
Welcome to the Workflow Builder Walkthrough! This guide is designed to help you understand and navigate the Workflow Builder. Whether you're new to workflows or looking to refresh your knowledge, this article will guide you through key features, best practices, and tips for success.
TABLE OF CONTENTS
- What Is This Workflow Builder Walkthrough?
- Infinite Canvas Layout
- Workflow Switcher
- Adding New Triggers
- Adding New Actions
- Stats View
- Testing the Workflow
- Saving the Workflow
- Version History
- Draft/Publish Toggle
- Best Practices for Workflows
- Frequently Asked Questions
- Further Reading
What Is This Workflow Builder Walkthrough?
This article provides a comprehensive overview of the Workflow Builder, including its layout, functionality, and best practices. If you're looking for more specific topics, such as advanced triggers or detailed action configurations, explore our related articles:
Infinite Canvas Layout
The Workflow Builder’s Infinite Canvas allows for an expansive view of your workflows. You can:
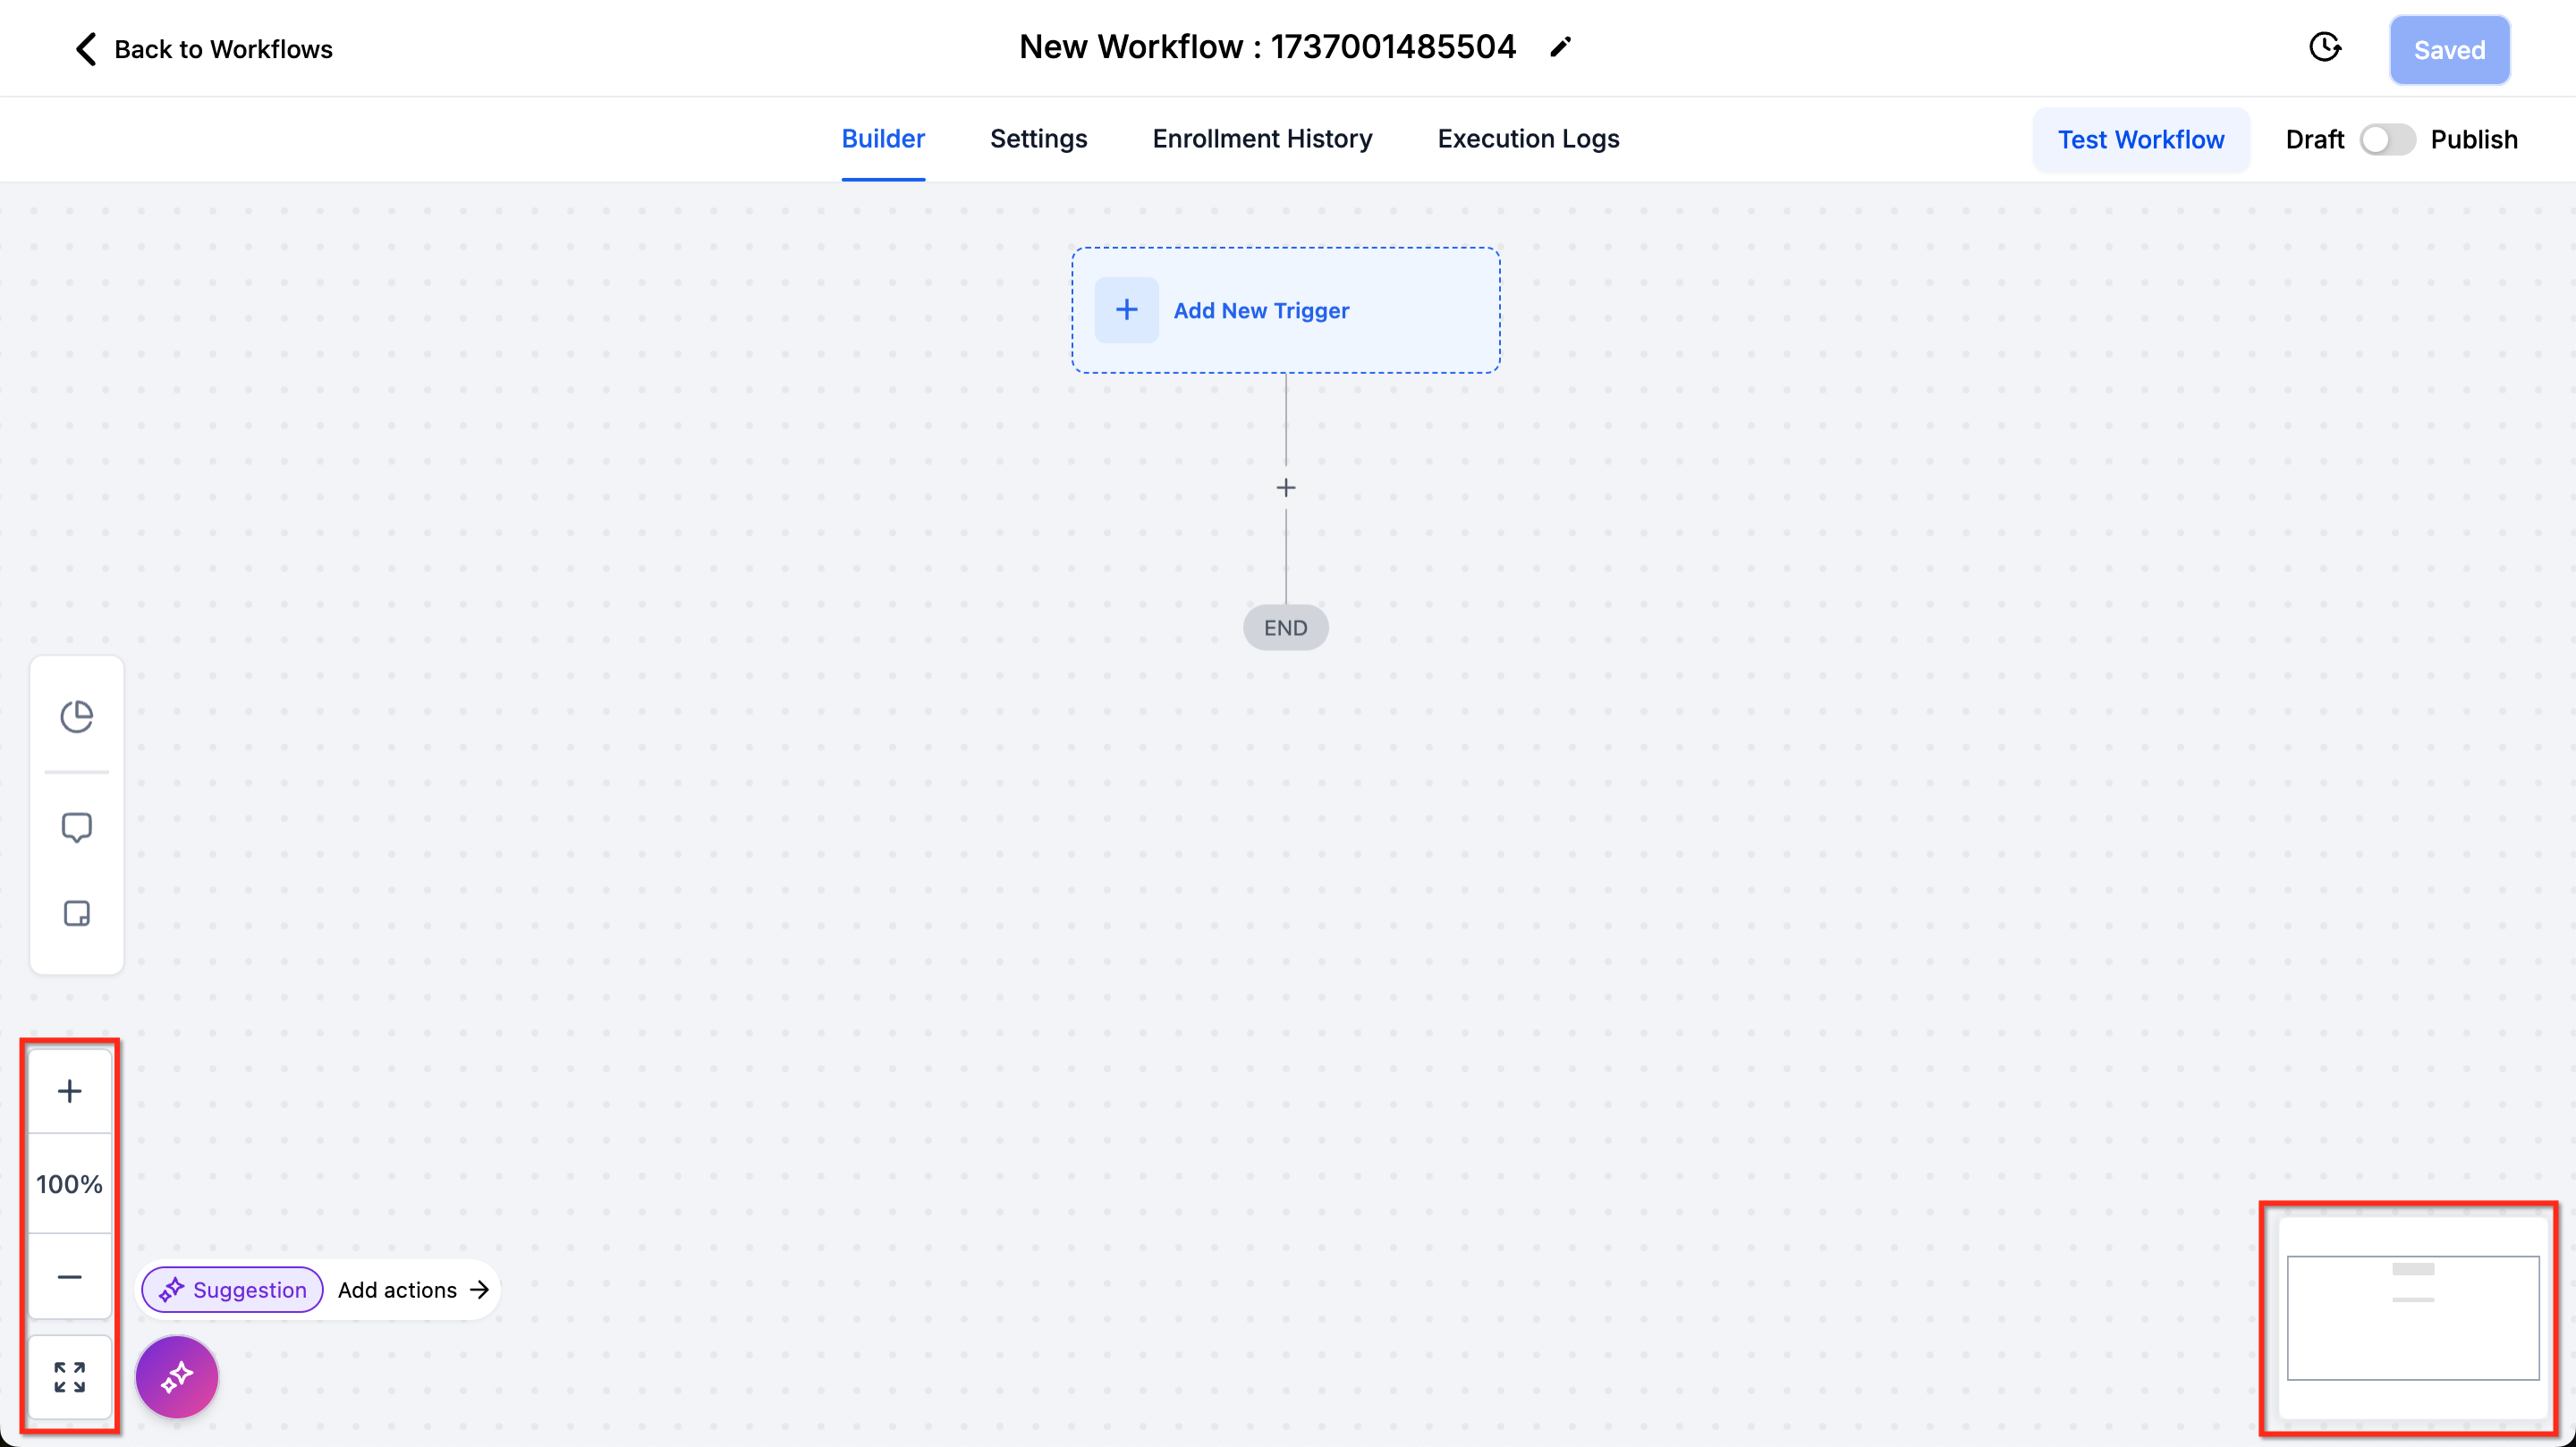
- Use the Fit to Screen and Zoom In/Zoom Out buttons in the bottom-left corner to adjust the view.
- Utilize the Minimap in the bottom-right corner to navigate your current position within the workflow.
Best Practices: Keep complex workflows organized by grouping related actions and using clear naming conventions. Try to keep workflows small enough to be seen in one screen. This aids understanding and troubleshooting.
Move workflow nodes directly on the canvas
In the Standard Workflow Builder, you can move nodes directly on the canvas.
- Hover over a node to reveal the 6-dot drag handle.
- Click and hold the drag handle to move the node.
- Drop the node where you see the Move here indicator.
This makes it easier to reorganize steps and branches without moving each node from the right-click menu.
Workflow Switcher
The Workflow Switcher allows you to quickly move between workflows without leaving the builder.
You can open it from the left panel or by pressing **Shift + W**, then search or scroll to select another workflow.
For more details, see: Using the Workflow Switcher in SourCherry
Adding New Triggers
Triggers define the events that start your workflows. Follow these steps:
- Click the Add New Trigger button.
- Select a trigger from the list (e.g., Contact Added, Appointment Booked).
- Configure the trigger with relevant settings.
Tip: Use the search bar and category filters to find triggers faster. Search results may include additional context (such as badges and app details) to help you pick the right trigger.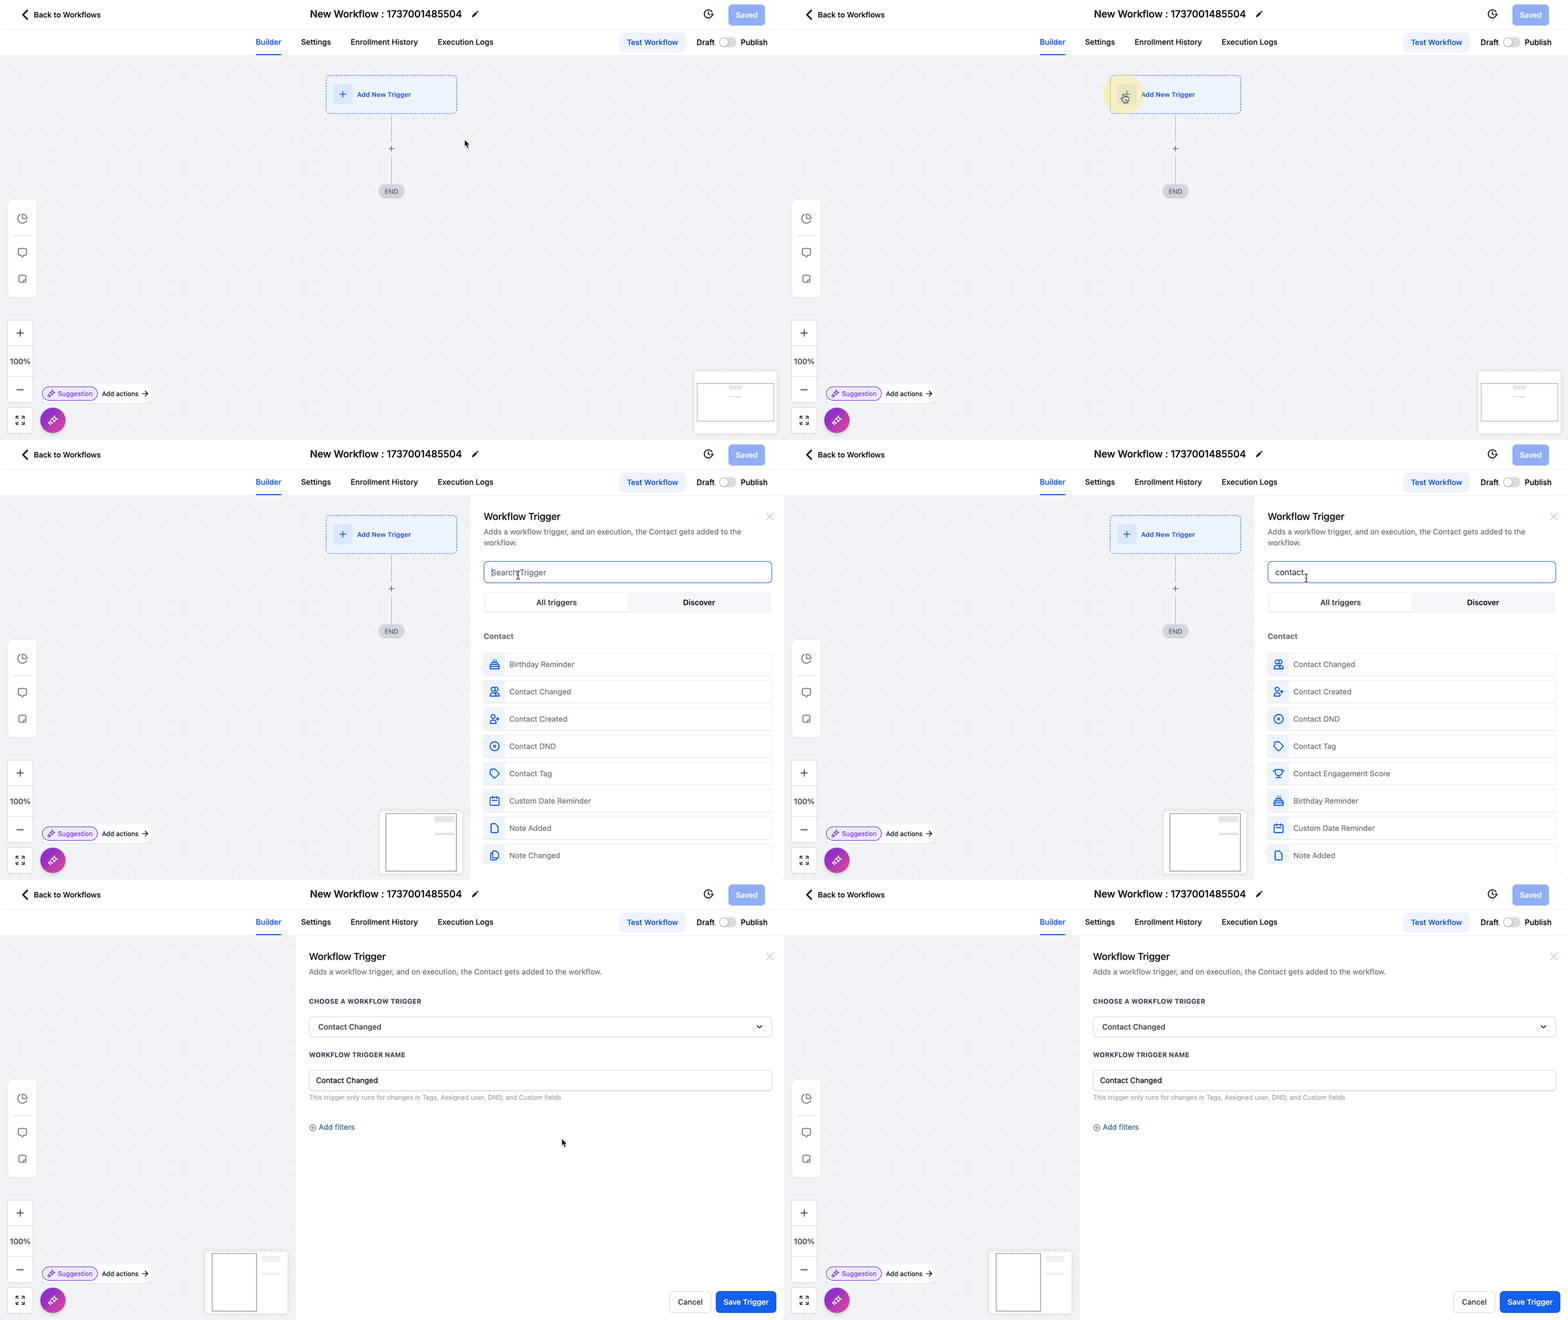
Important: All triggers in the workflow will activate when their specific conditions are met. Ensure that your trigger setup aligns with your desired workflow initiation.
For a comprehensive list of triggers, visit A List of Workflow Triggers.
Use Keyboard Shortcuts in Standard Builder
The Standard Builder supports keyboard shortcuts for selecting nodes, moving between nodes, copying and pasting actions, zooming the canvas, opening panels, deleting nodes, and saving changes.
For the full shortcut list and key combinations, refer to the keyboard shortcuts article.
Adding New Actions
Actions define what happens after a trigger is activated. To add an action:
- Click the + button in the workflow line(s).
- Select an action from the list (e.g., Send Email, Assign to User).
- Configure the action based on your workflow’s requirements.
Tip: Use the search bar and categories to quickly locate actions across SourCherry-built tools and Marketplace apps. Some results show extra details (such as pricing or install information) so you can compare options before adding a step.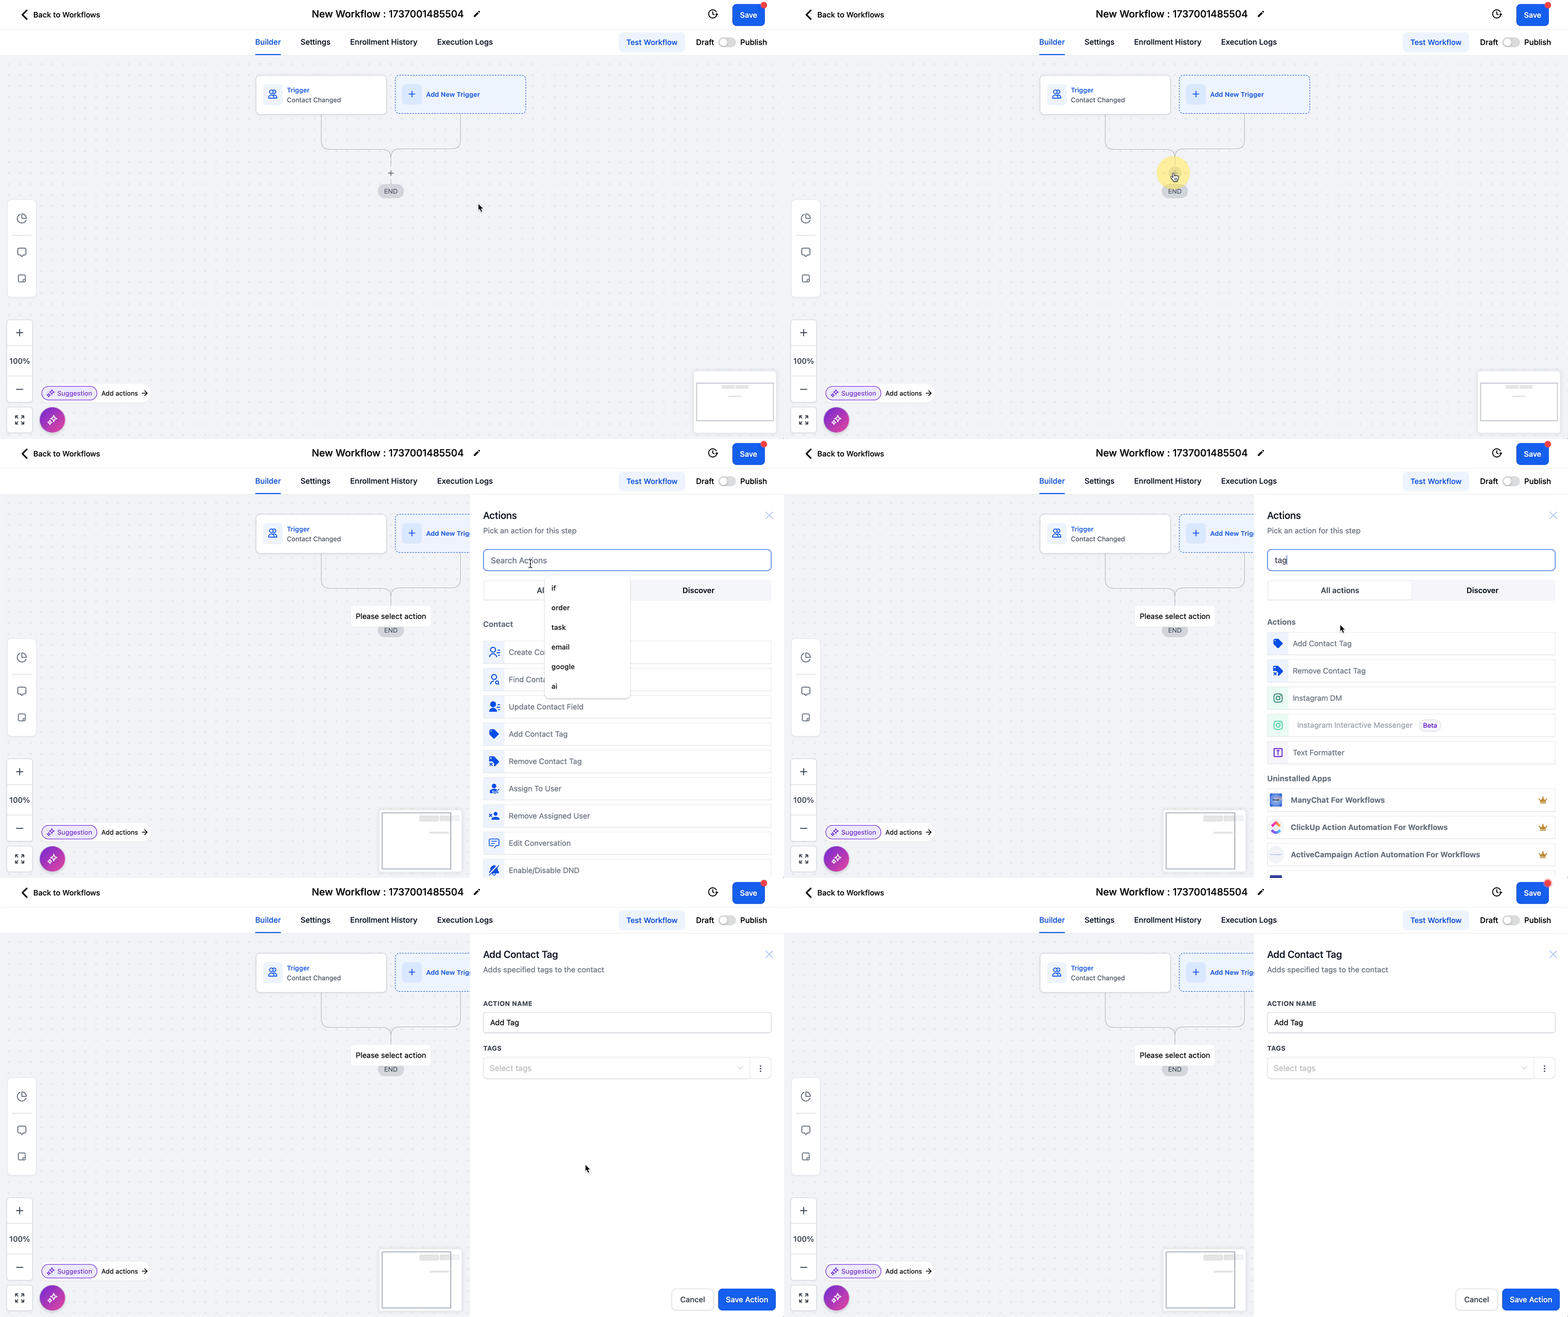
Aside from normal actions, there are some other types of actions that are more advanced:
- Drip Actions: Control the flow of contacts by slowing their progress through the workflow.
- Conditional Actions: Evaluate conditions and guide contacts based on specific criteria.
- Goal Actions: Allow contacts to skip ahead to a later point in the workflow bypassing the actions in between.
Tips: Always give actions meaningful names for clarity in Canvas view. This makes workflows easier to understand and manage.
Refer to A List of Workflow Actions for detailed information on all available actions.
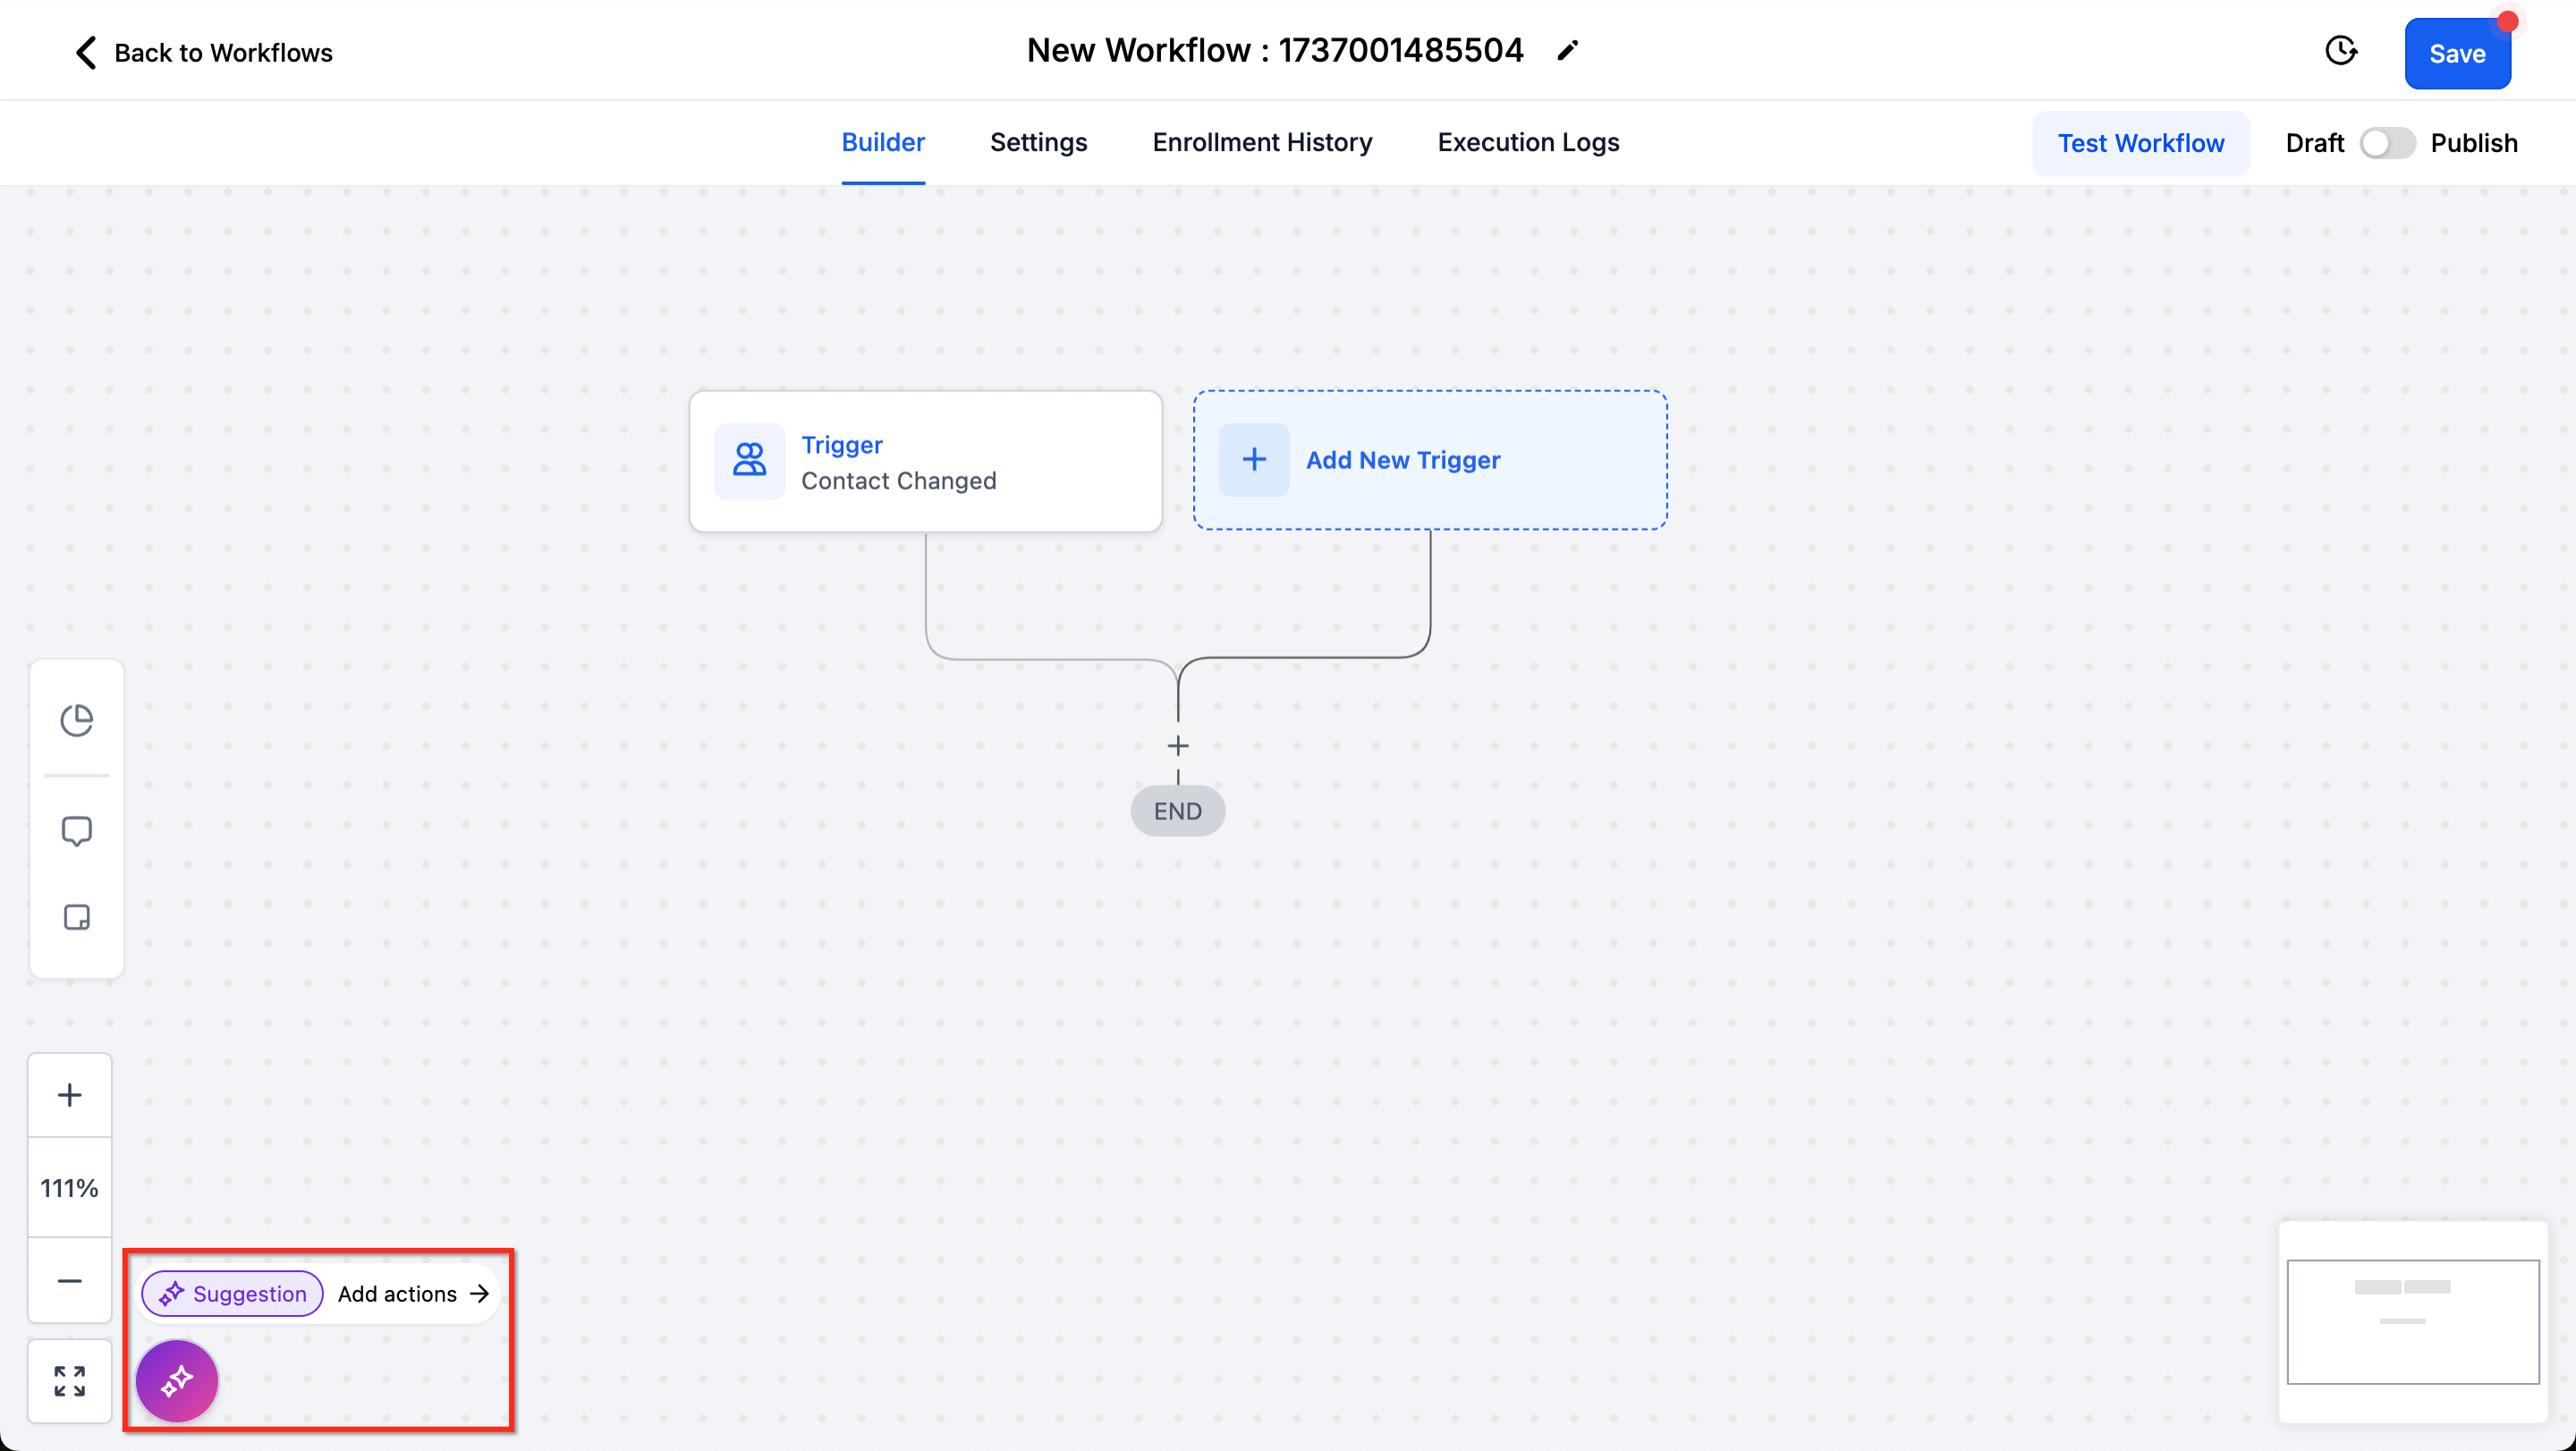
You can also use Workflow AI Assistant to help understand the workflow and add the right actions. Learn more in the Workflow AI Assistant article.
Stats View
Stats View helps you review trigger enrollment activity and communication-action performance without leaving the Workflow Builder.
To use Stats View:
1. Open a workflow.
2. Turn on Stats View from the top-left corner.
3. Select a trigger or action to review its available statistics.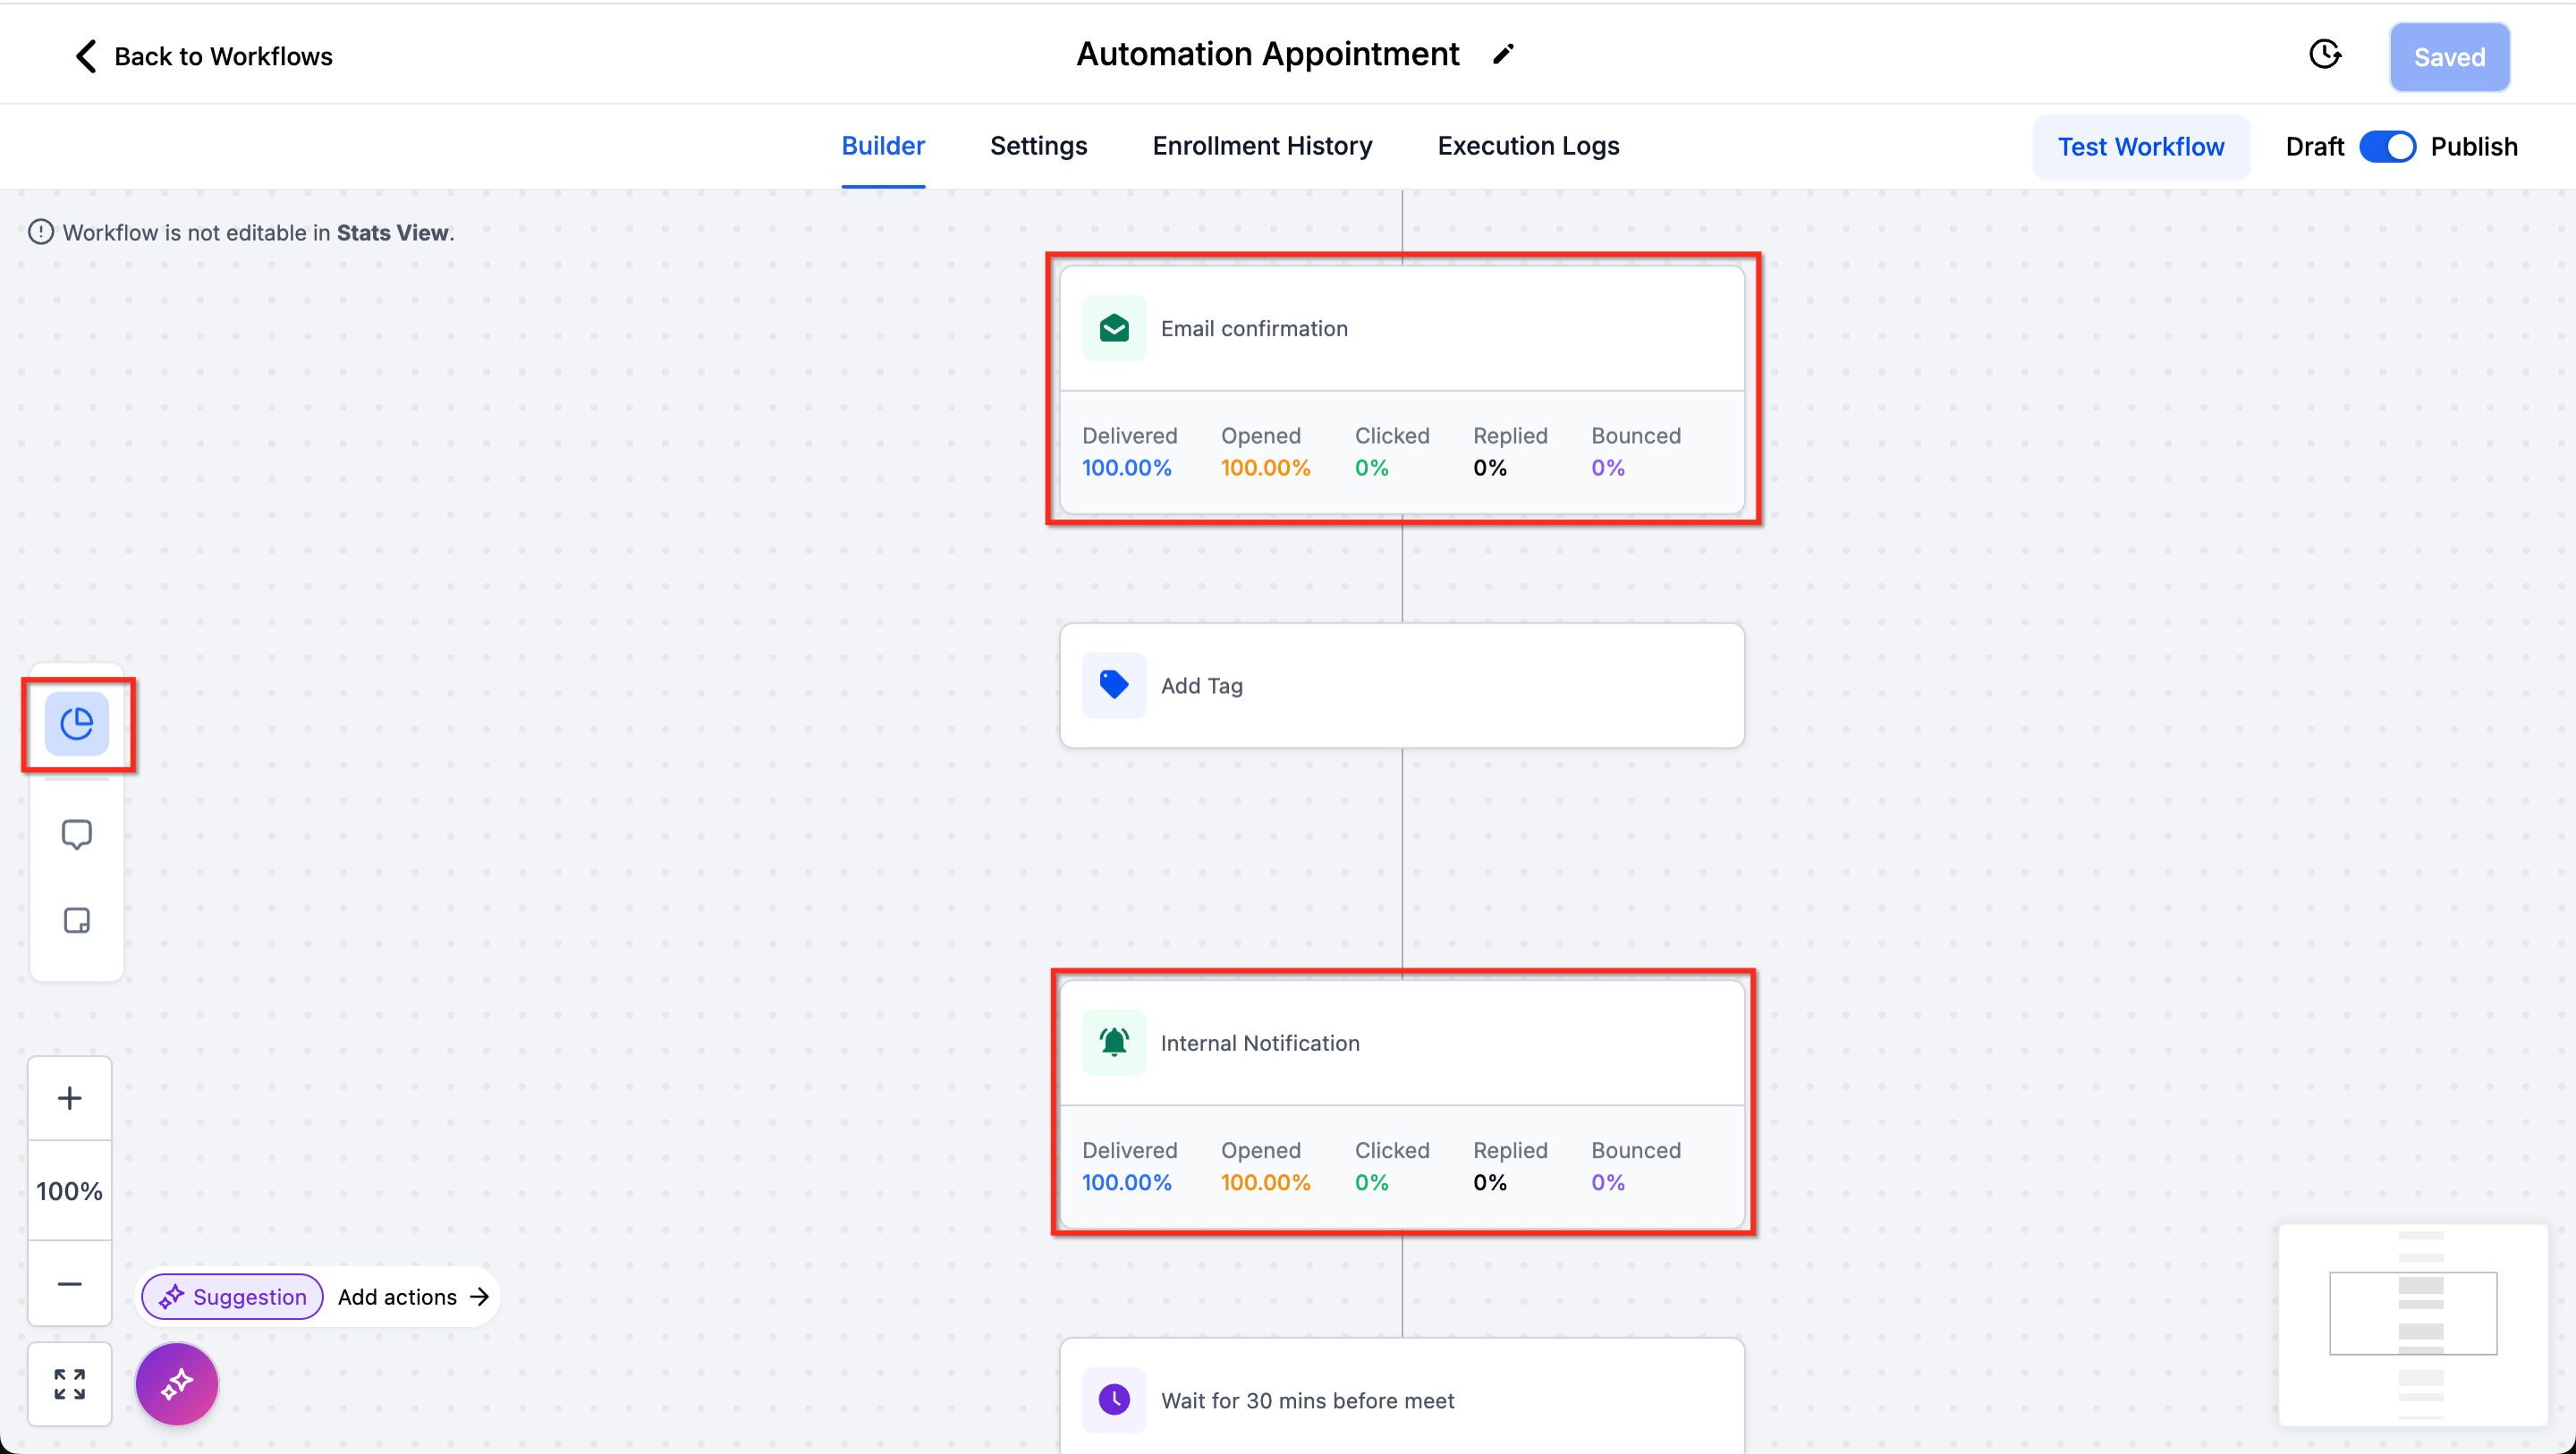
For workflow triggers, Stats View displays:
Attempted: Contacts evaluated by the trigger.
Matched: Contacts that met the trigger conditions.
Unmatched: Contacts that did not meet the trigger conditions.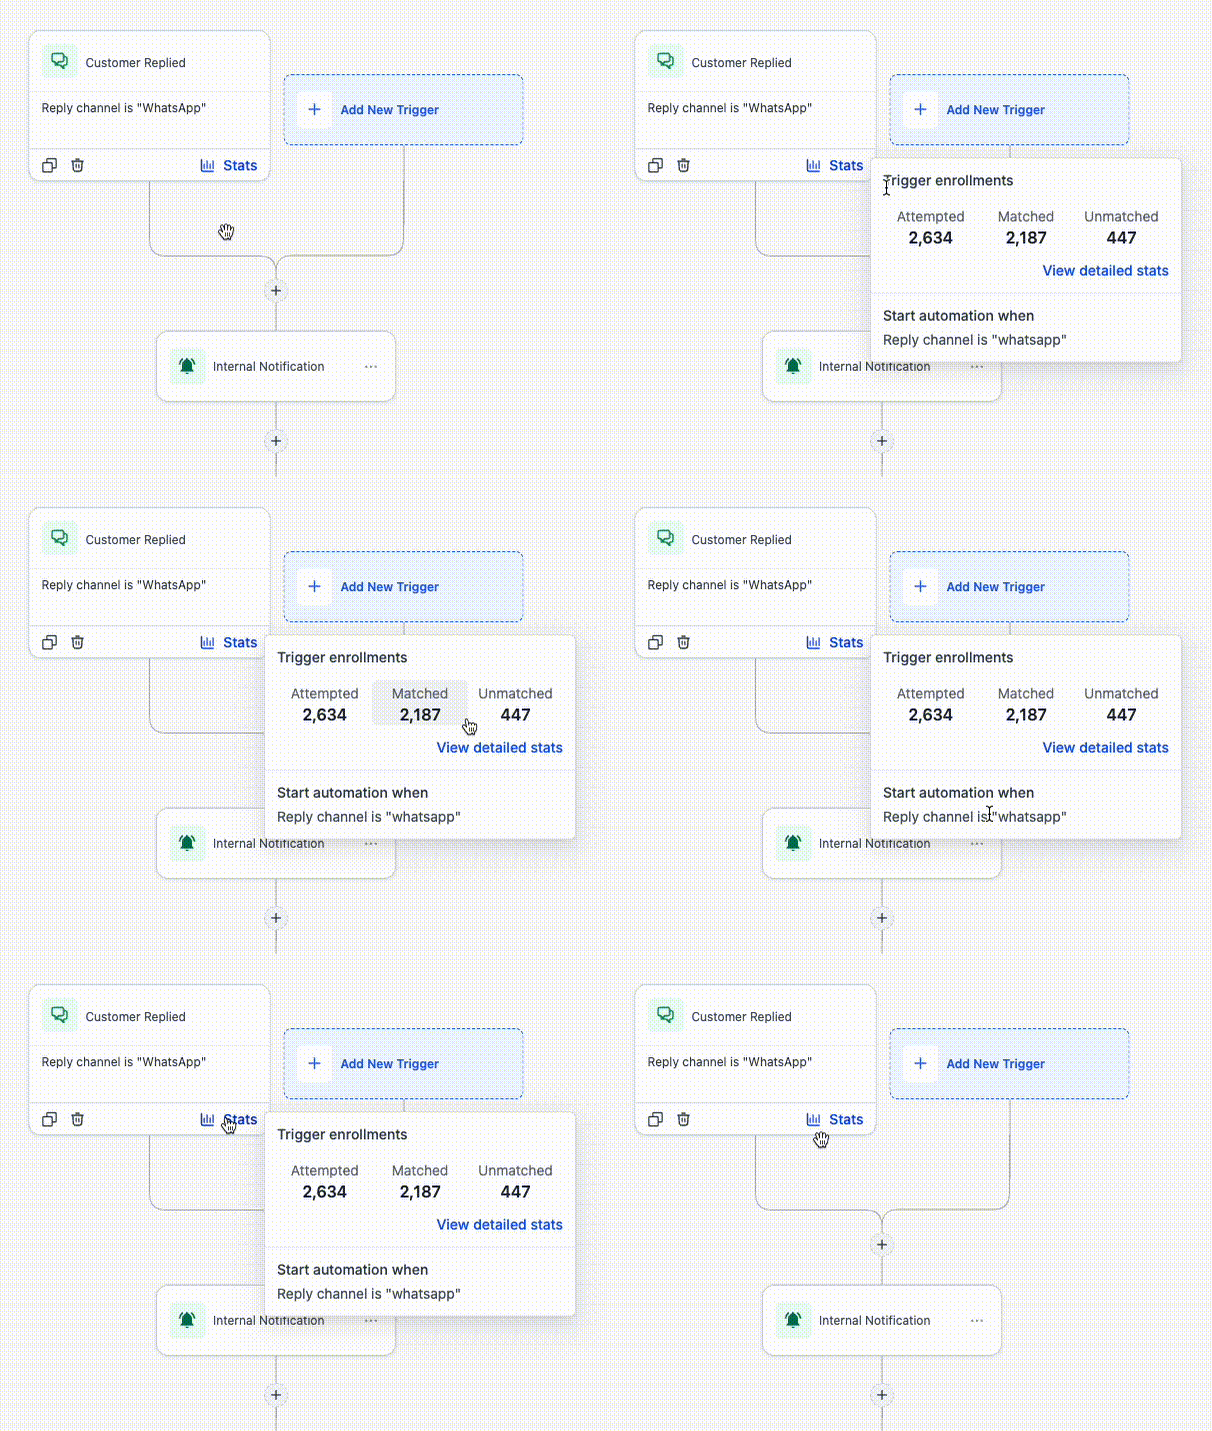
For communication actions, Stats View displays the available delivery and engagement statistics for that action. Click a statistic to open its detailed report.
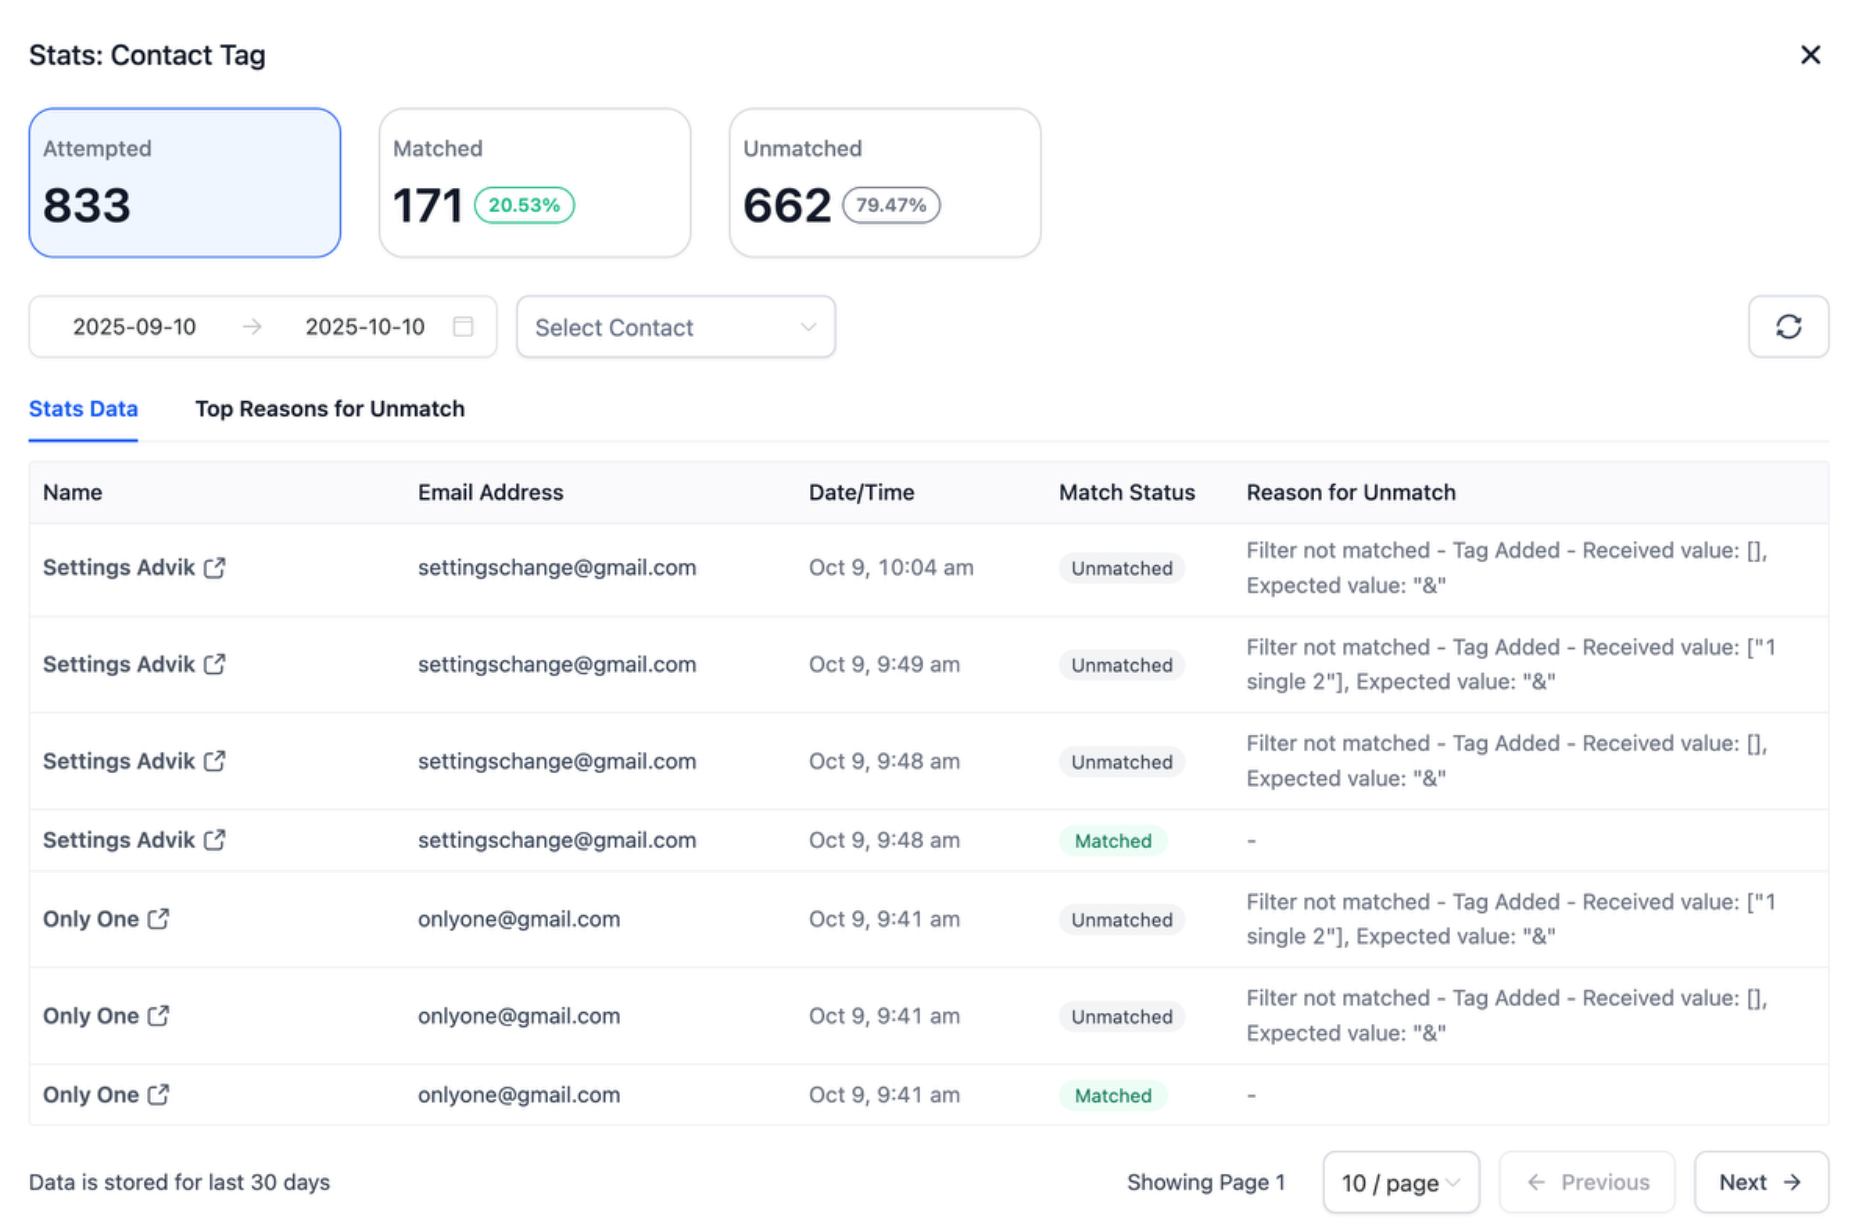
For tips on analyzing workflow performance, explore How to Analyze Workflow Campaigns. Stats are also available at the workflow level in the Workflow List Click the expand arrow under Stats.
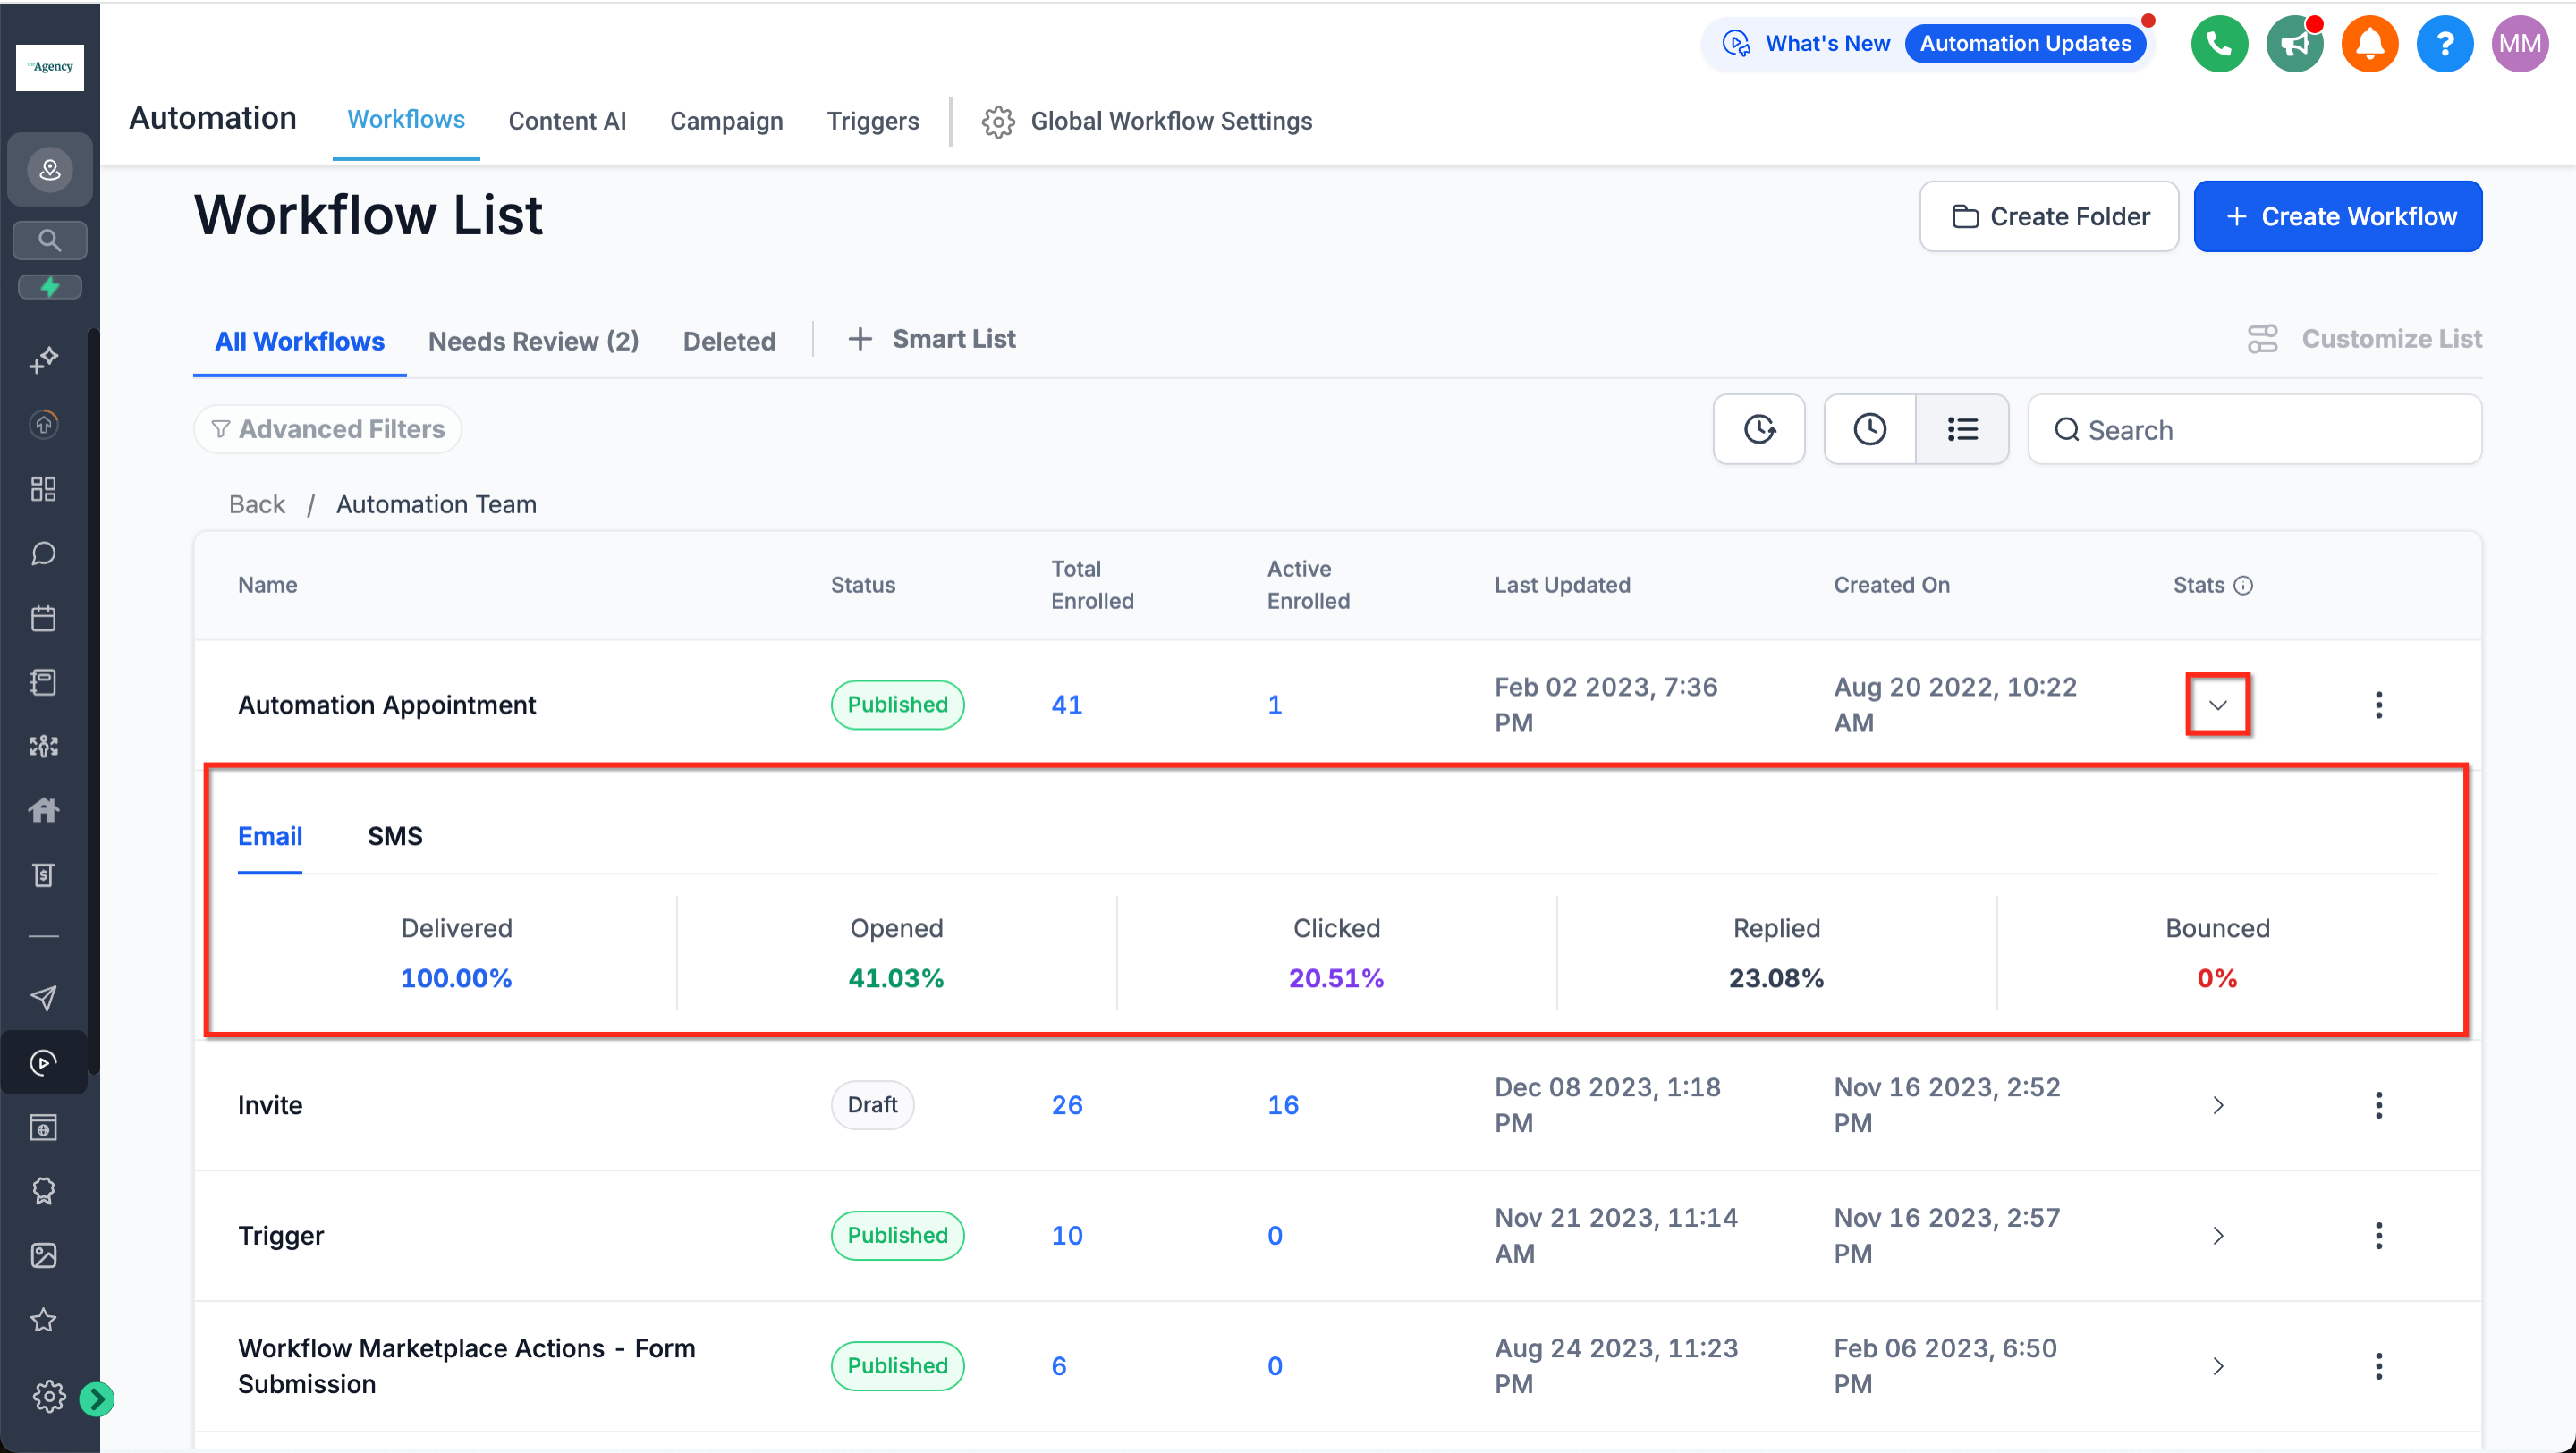
Note that if a communication action was in the workflow, and used, and then deleted, the stats will still be saved in the workflow.

You cannot edit a workflow while Stats View is active. Trigger Stats includes data from the last 30 days.

For complete Trigger Stats instructions, see Workflow Trigger Narration and Statistics.
Testing the Workflow
To ensure your workflow functions correctly:
- Click the Test Workflow button in the top-right corner.
- Select a contact for testing.
- Click Run Test to run the workflow.
Note that the Test Workflow using a contact isn't 100% perfect, especially if you reuse the same contact for multiple tests. Ideally you should test the workflow by publishing it and using it live.
Troubleshooting: If tests fail, check your triggers and actions for incomplete configurations.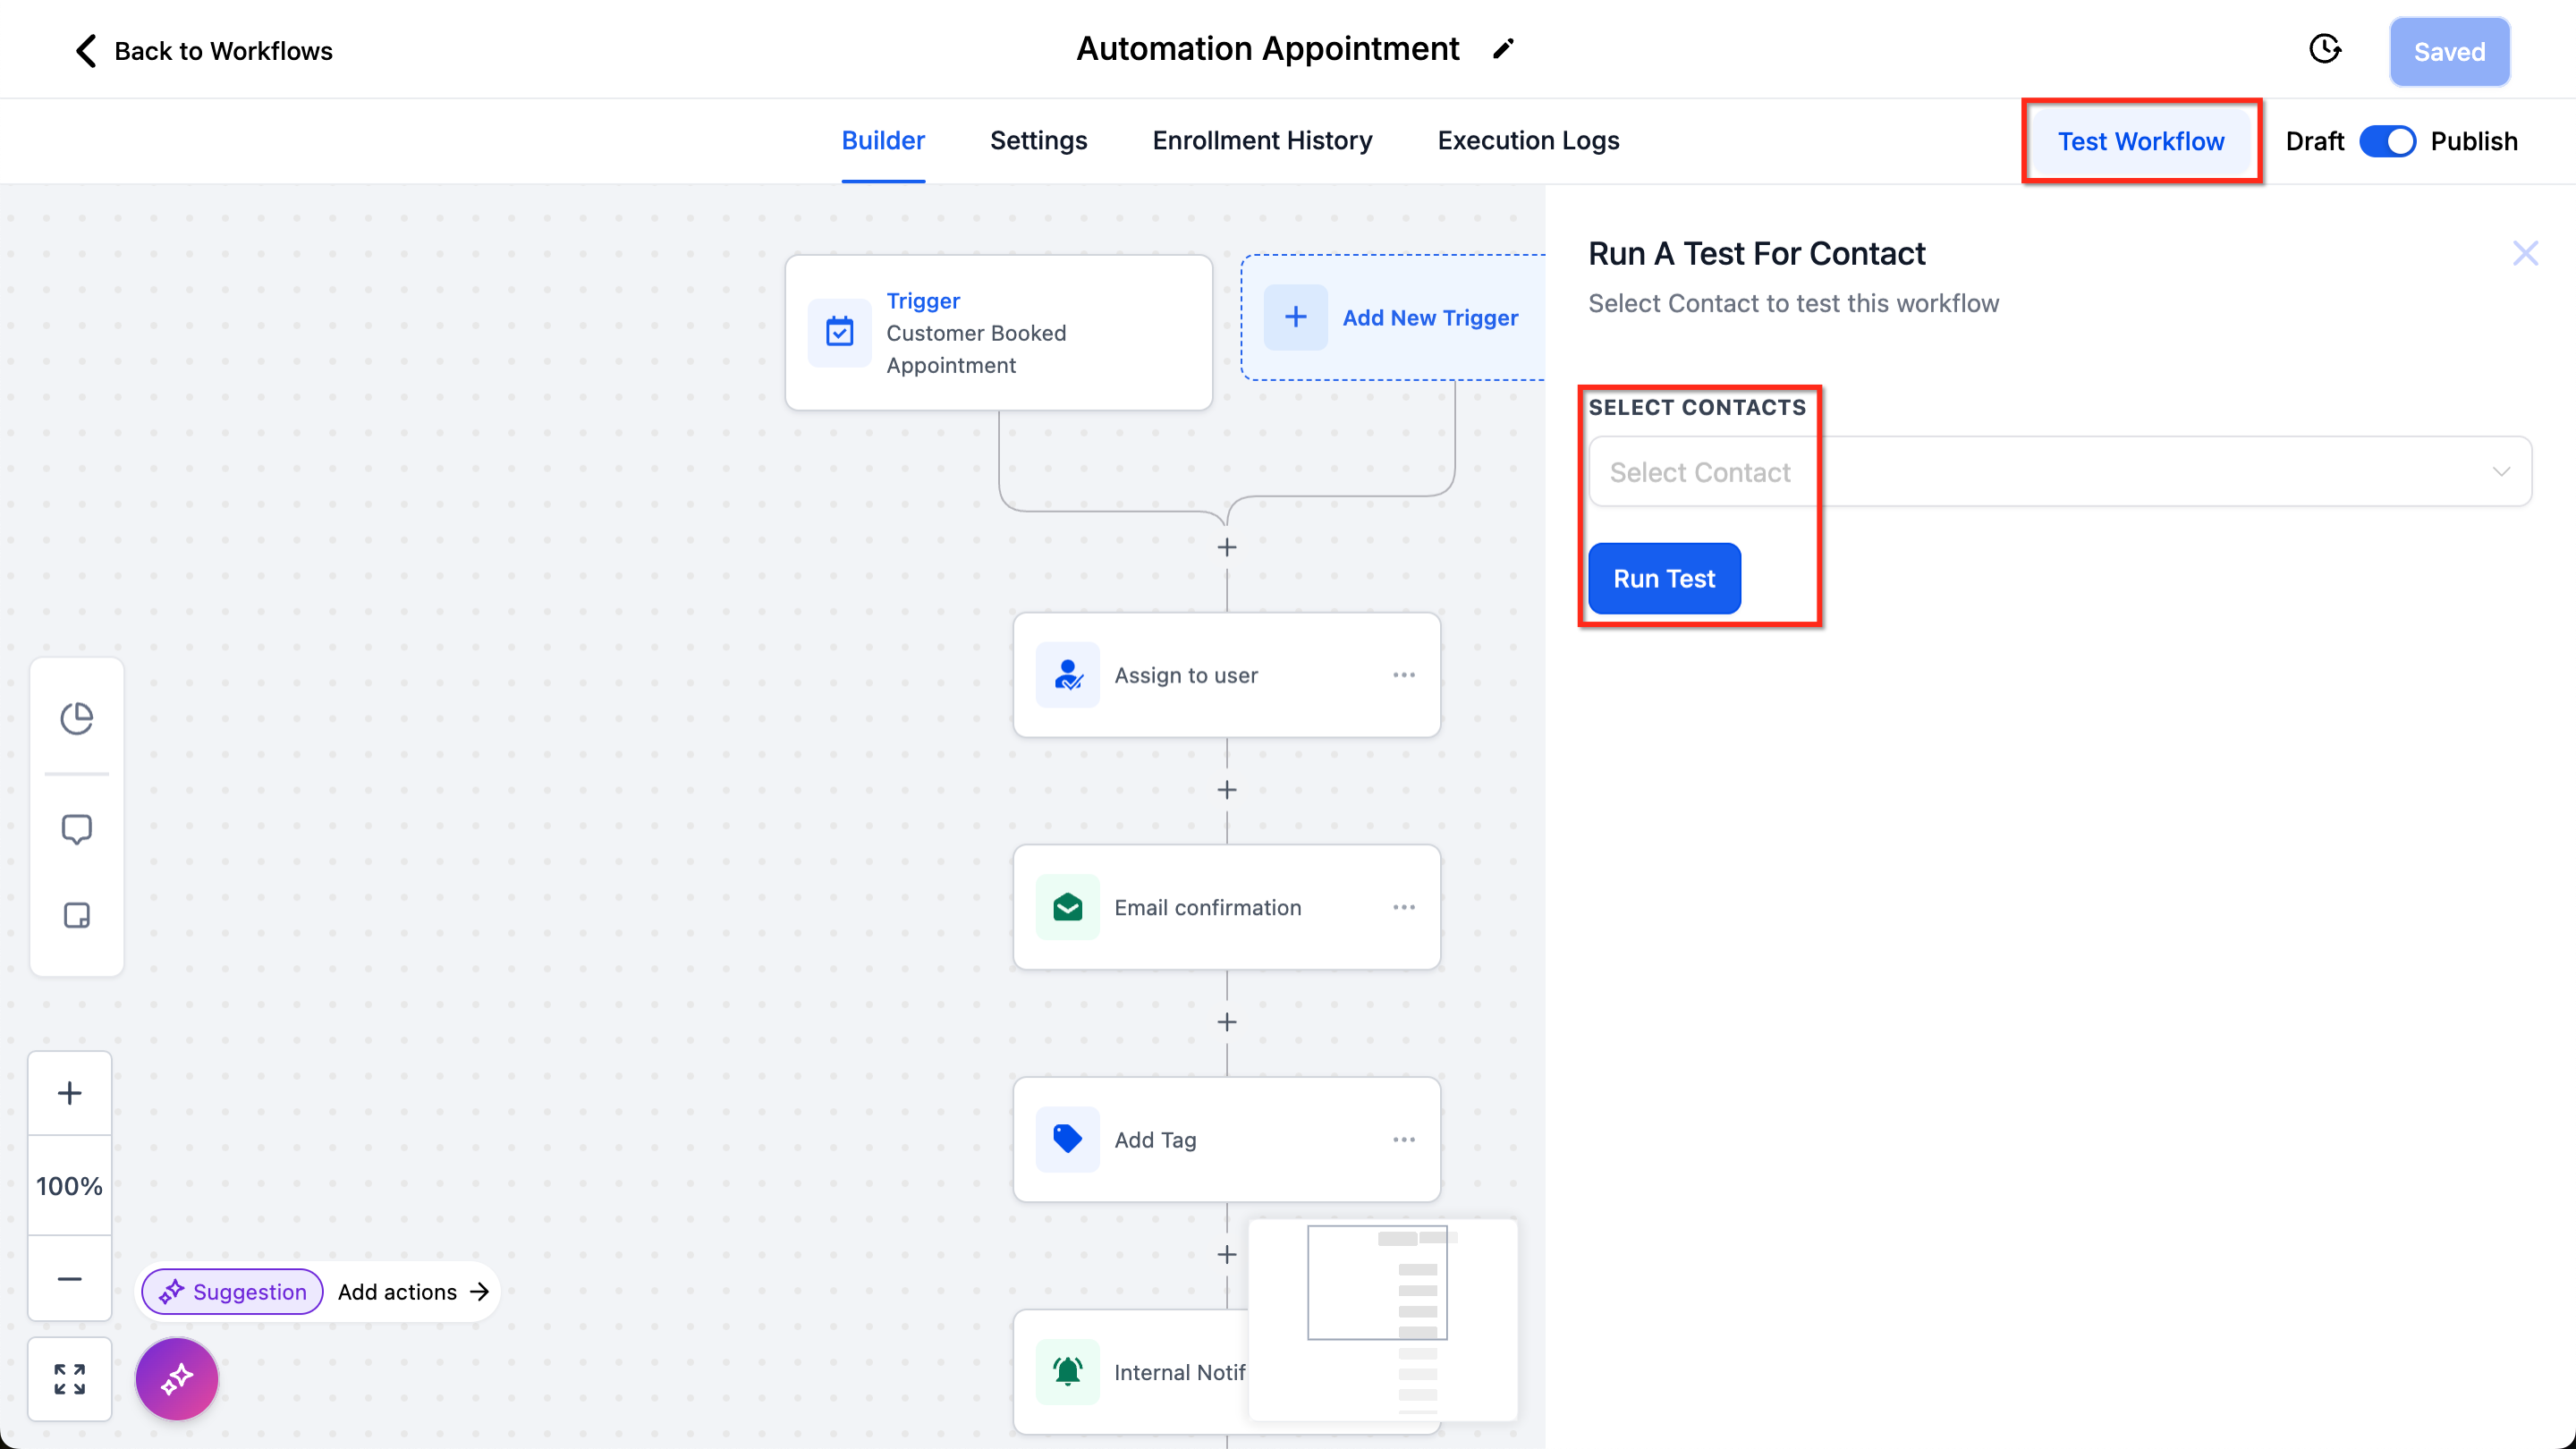
Saving the Workflow
Always save your changes:
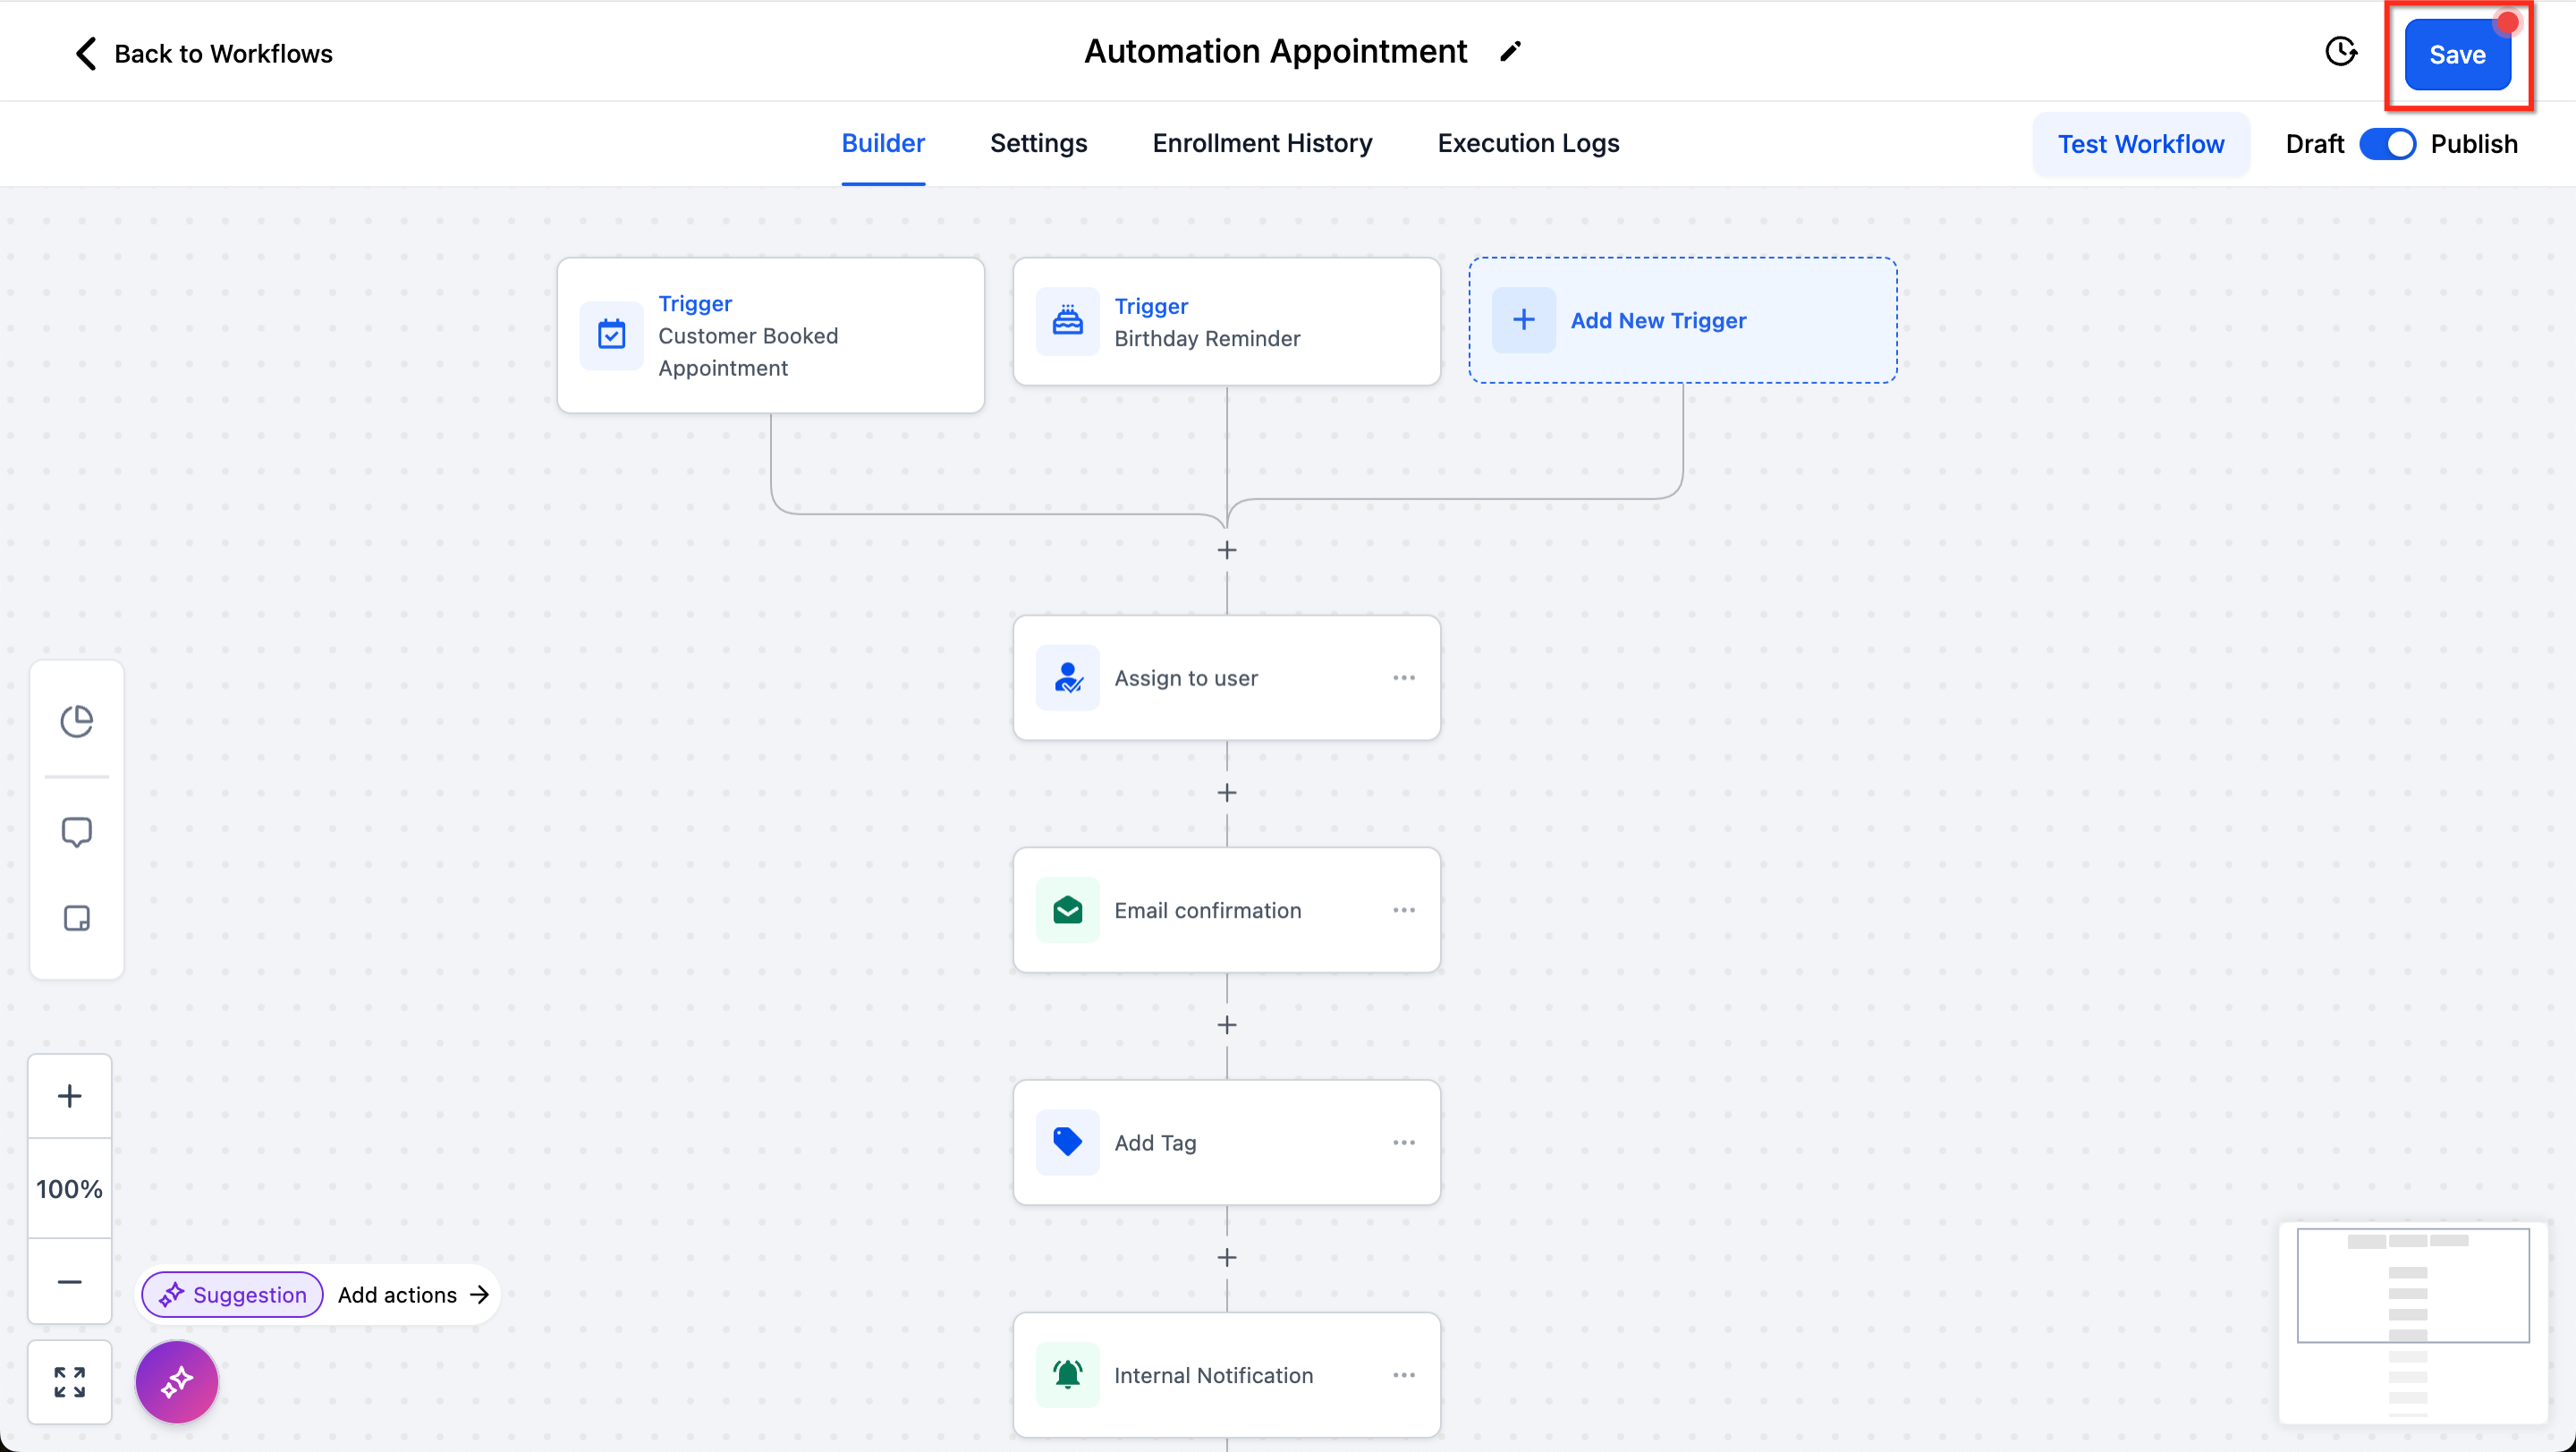
- Click the Save button in the top-right corner whenever there are unsaved changes (red dot).
- If you encounter errors while saving, ensure all required fields in triggers and actions are completed.
Note that Saved and Published are not the same thing. The workflow can be saved or have unsaved changes and can be draft or publish, independent of each other.
Version History
Track changes made to your workflow:
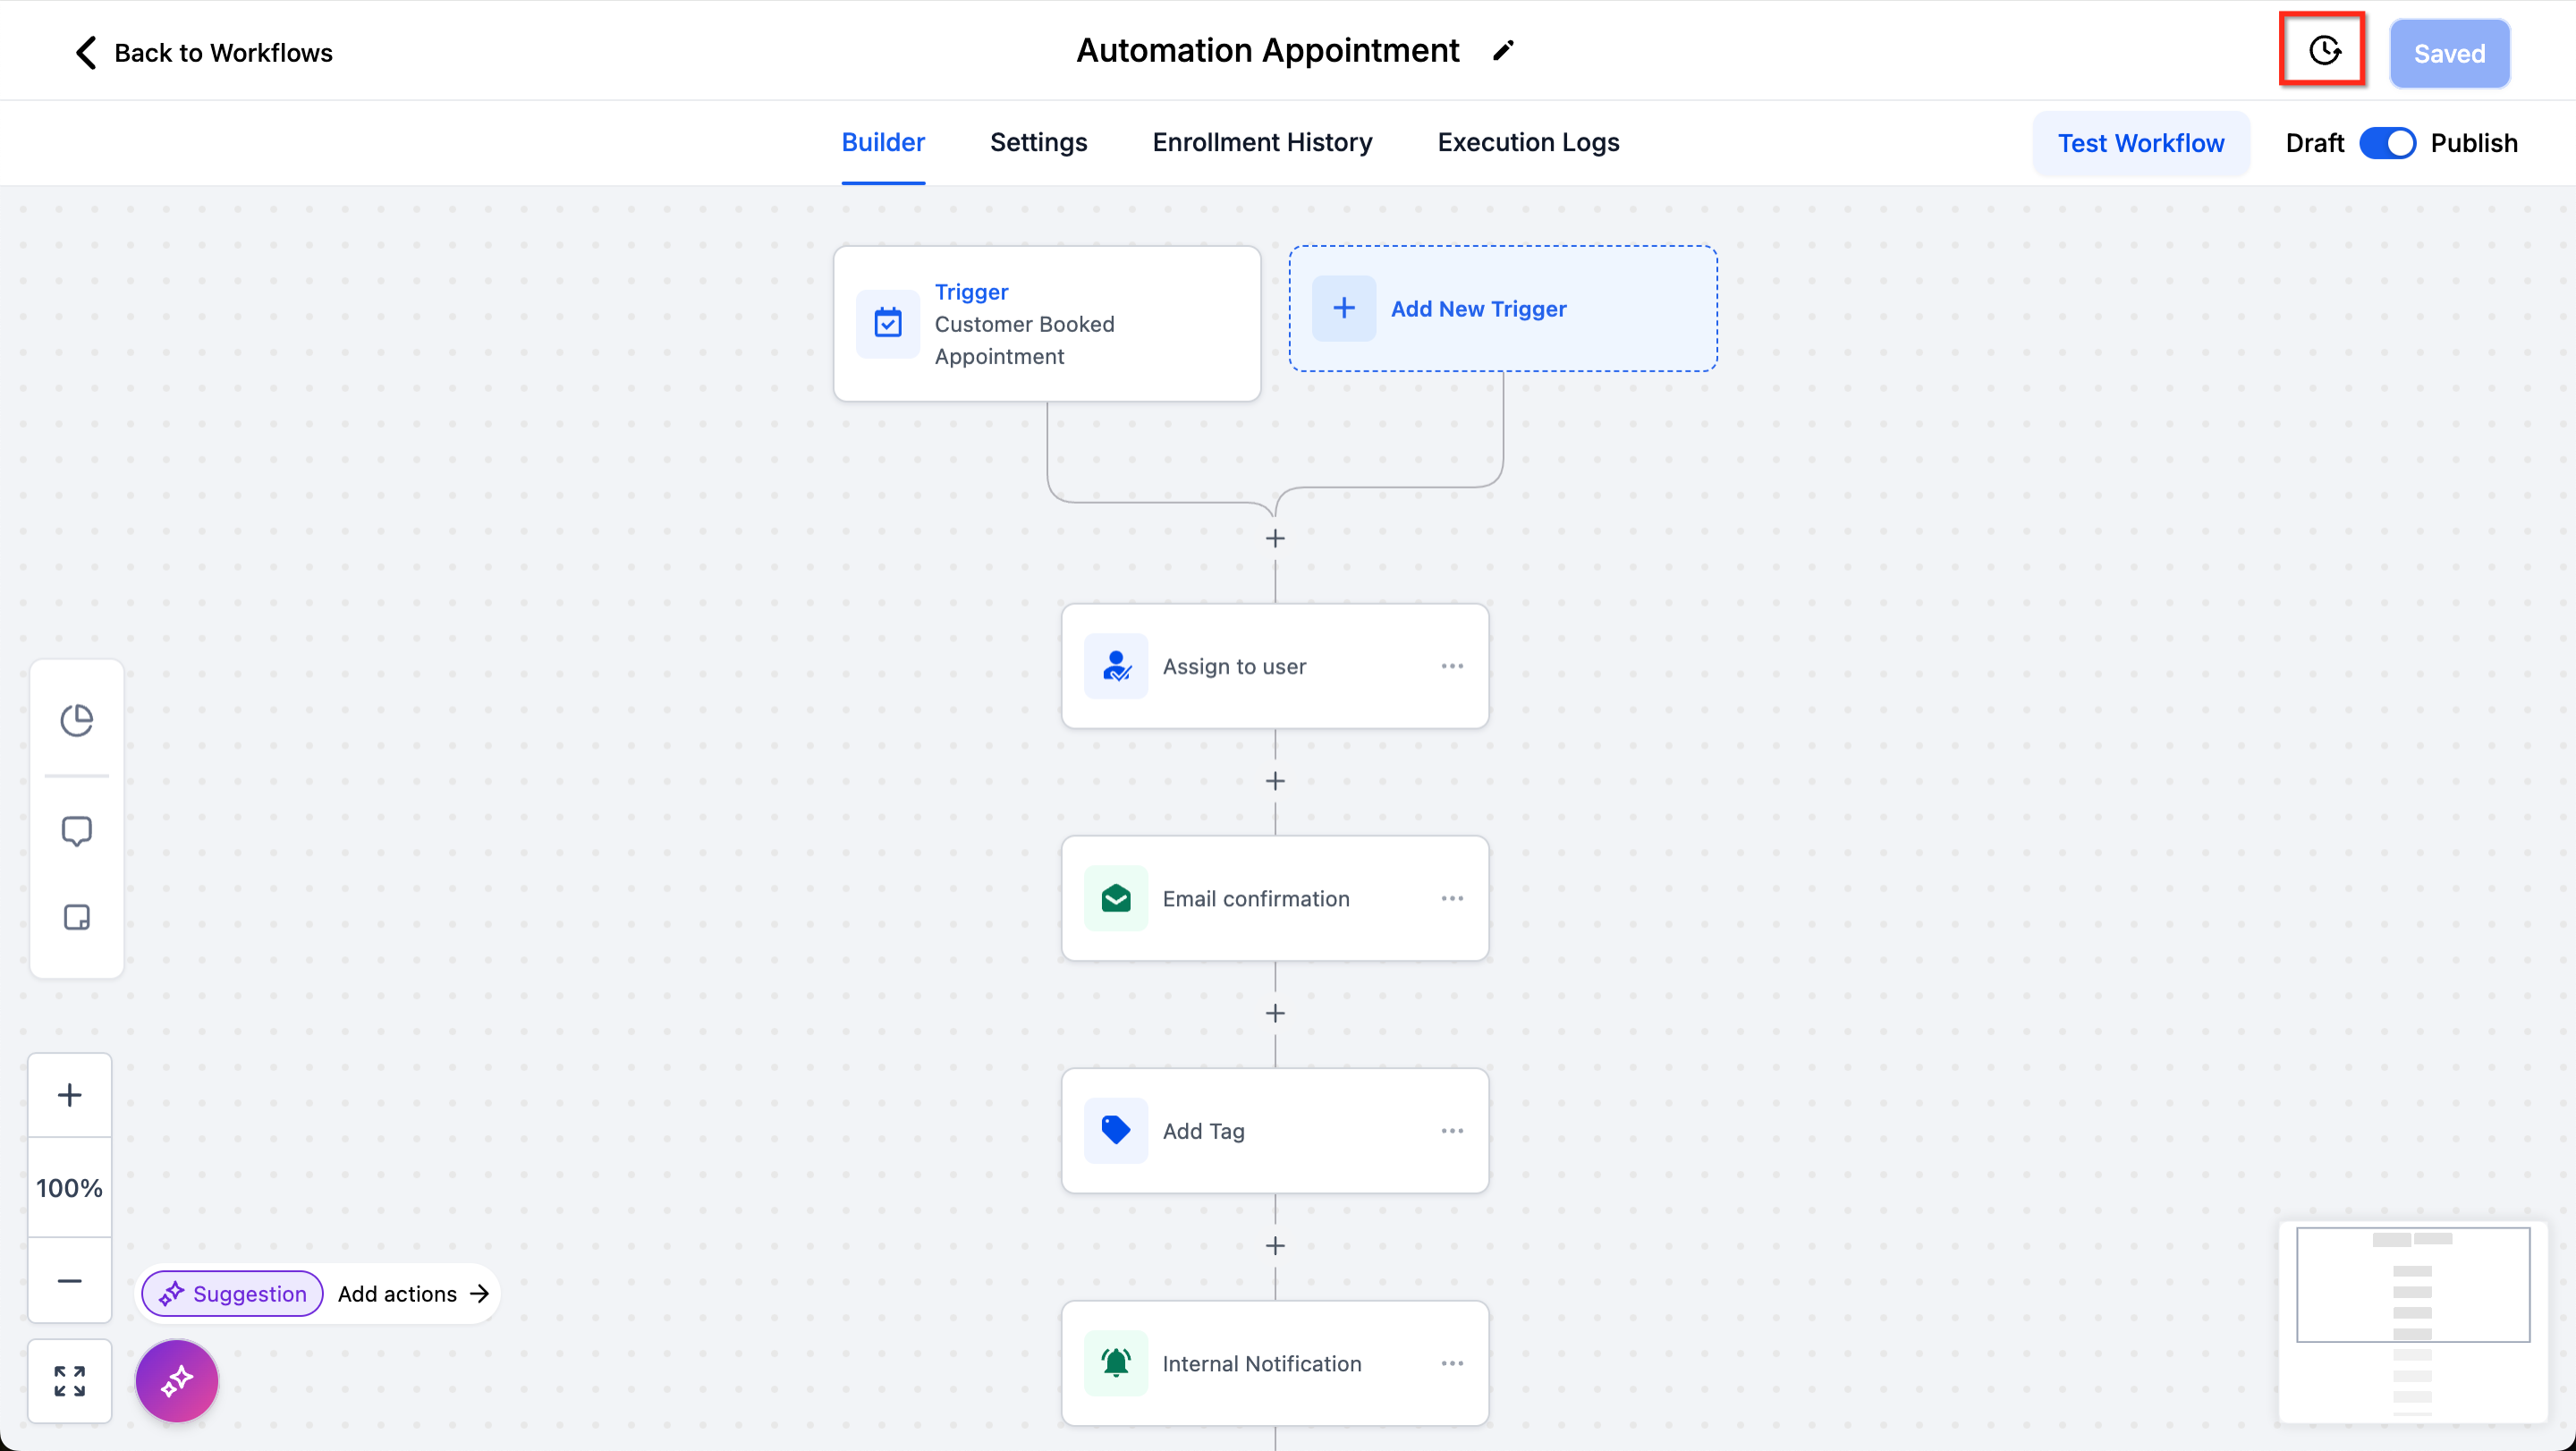
- Click the History icon in the top-right corner.
- View previous versions.
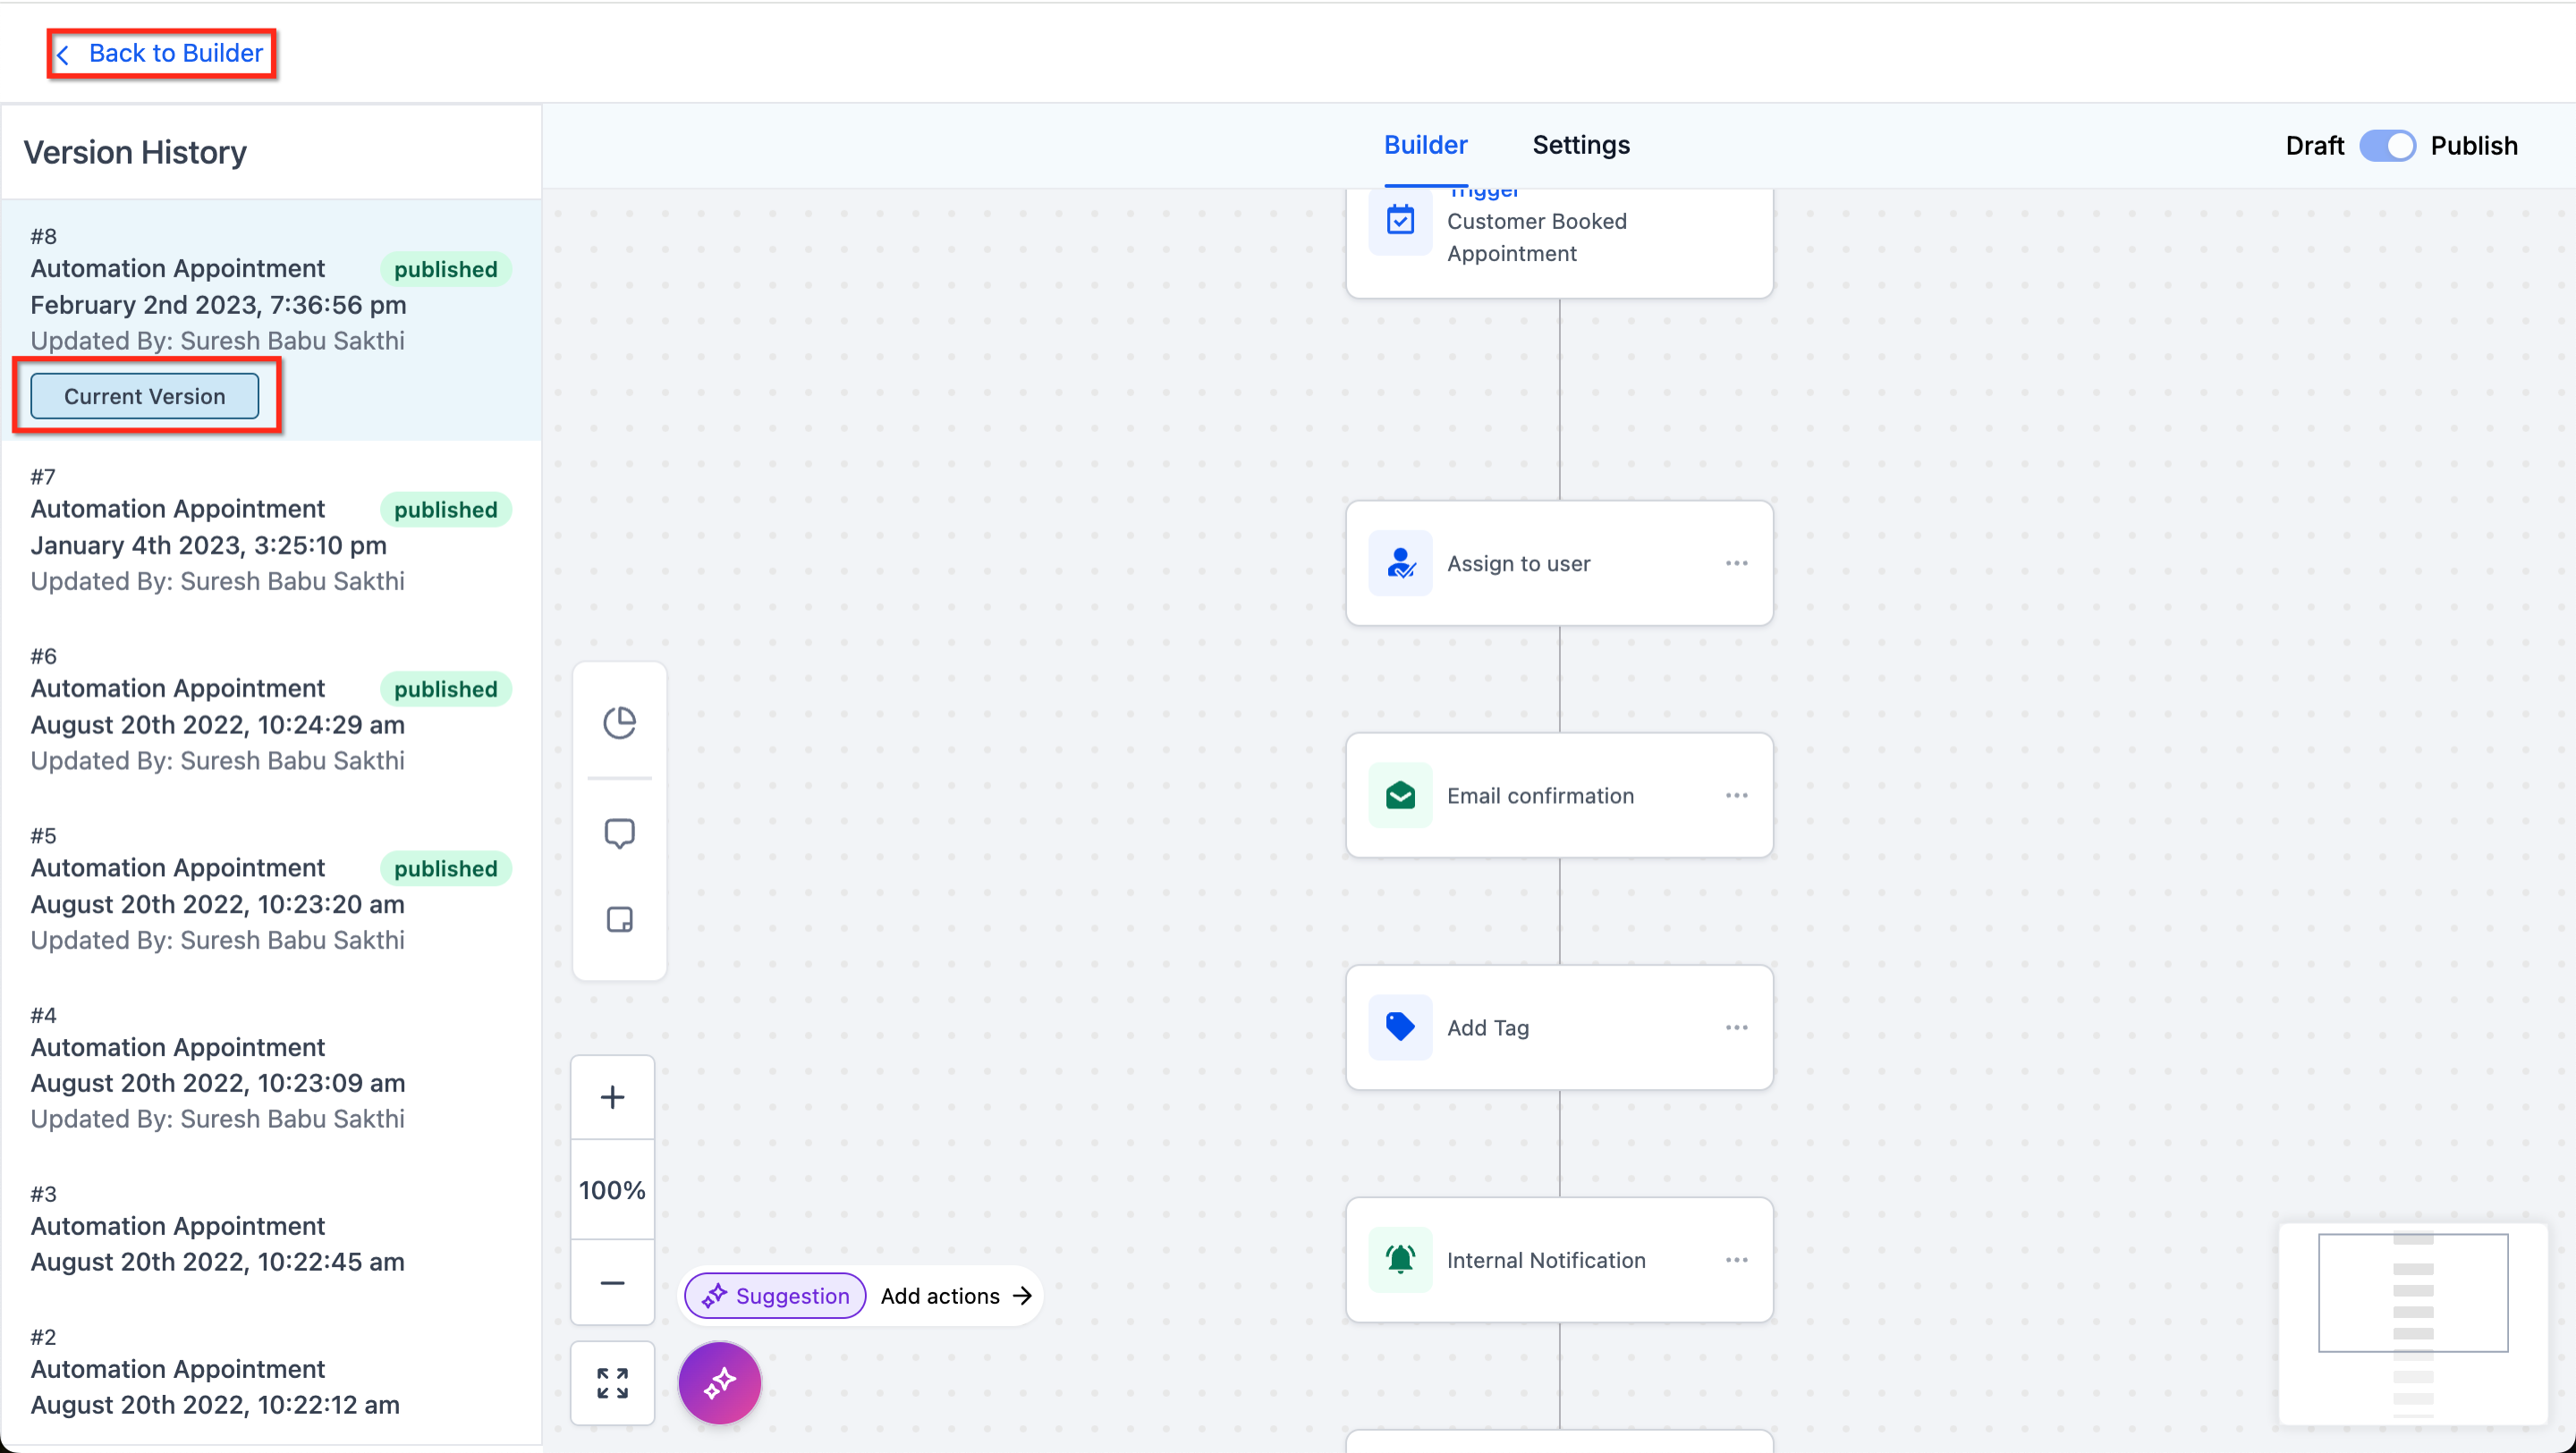
Use the Back to Builder button to return to editing the workflow.
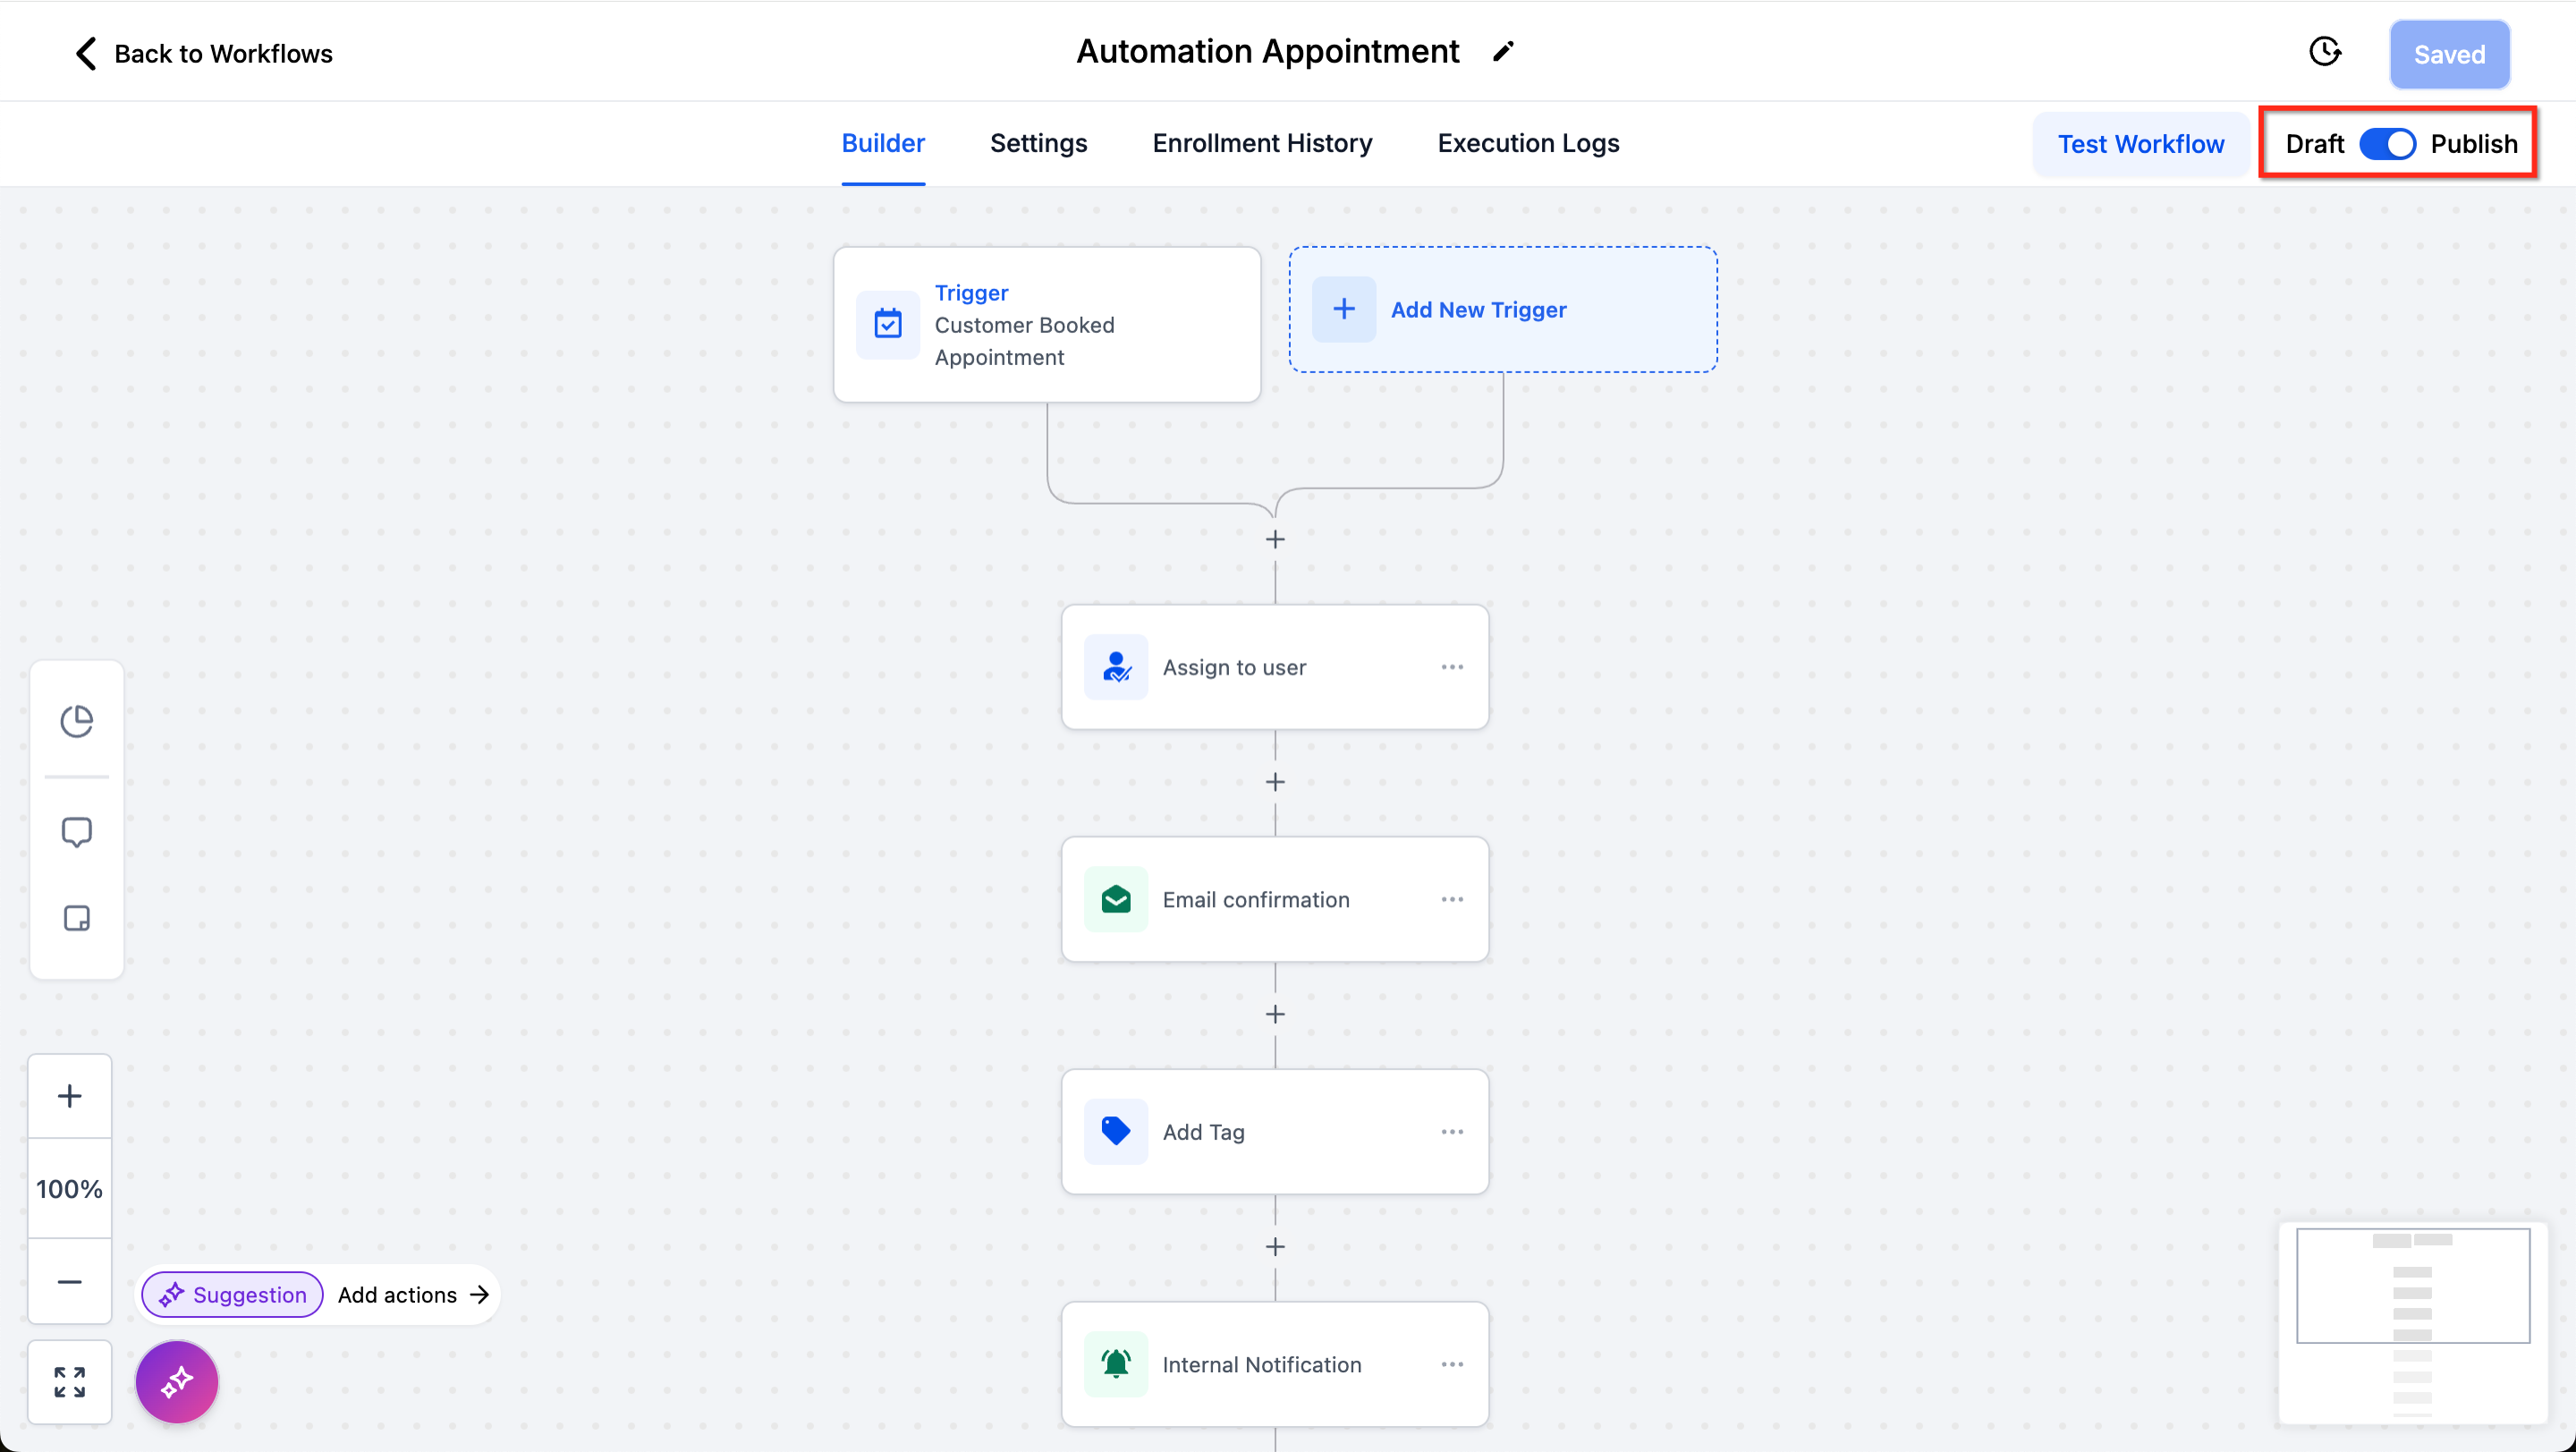
Draft/Publish Toggle
Control the status of your workflows:
- Toggle between Draft and Publish modes in the top-right corner.
- Draft mode means the workflow will not trigger and take actions for real; Publish mode means it will.
Important: Contacts in waiting steps (e.g., Wait, Manual Call) will remain at their current step when resuming a draft workflow.
Best Practices for Workflows
- Avoid Loops: The Workflow Builder prevents visual loops (arrows cannot return to a previous step), but it’s possible to create non-visible loops. Double-check your actions to avoid unintended looping behaviors.
- Keep Workflows Small: Aim to fit workflows into one screen whenever possible. Divide complex functions into separate workflows to simplify troubleshooting and management.
- Meaningful Naming: Use clear and descriptive names for triggers and actions to improve clarity, especially in collaborative environments.
Frequently Asked Questions
Q: What happens to contacts in my workflow if I set it to draft?
A: Contacts in waiting steps (e.g., Wait, Manual Call, Manual SMS) will remain in the same step when the workflow is resumed.
Q: How do goal events impact workflows?
A: Goal events can dynamically adjust contact progress based on interactions. For more, see Action - Goal Event.
Q: Can I add a contact to multiple workflows?
A: Yes, use the "Add to Workflow" action to include a contact in multiple workflows. Learn more Add To Workflow.
Q: How can I integrate external apps?
A: Use the "Webhook" action to send data to external platforms. Check out Actions - Webhook for details.
Further Reading
- Getting Started with Workflows
- A List of Workflow Triggers
- A List of Workflow Actions
- How to Analyze Workflow Campaigns
- Introduction to Workflows and Automations