
Quick Filters empower users to analyze dashboard widgets without requiring edit permissions. This feature ensures that users can apply filters individually, reducing the need for manual adjustments and protecting dashboard integrity. Quick Filters are saved at the user level, meaning each user can have their personalized filtering experience.
Important: Quick Filters currently only work with custom widgets (those you’ve created). They do not apply to the default General Widgets.TABLE OF CONTENTS
- Adding Quick Filters to a Dashboard
- Using Quick Filters
- How do Quick Filters work with existing widget level filters
Adding Quick Filters to a Dashboard
Step 1: Navigate to the Dashboard
- Open the dashboard where you want to add Quick Filters.
Step 2: Access the Quick Filters Menu
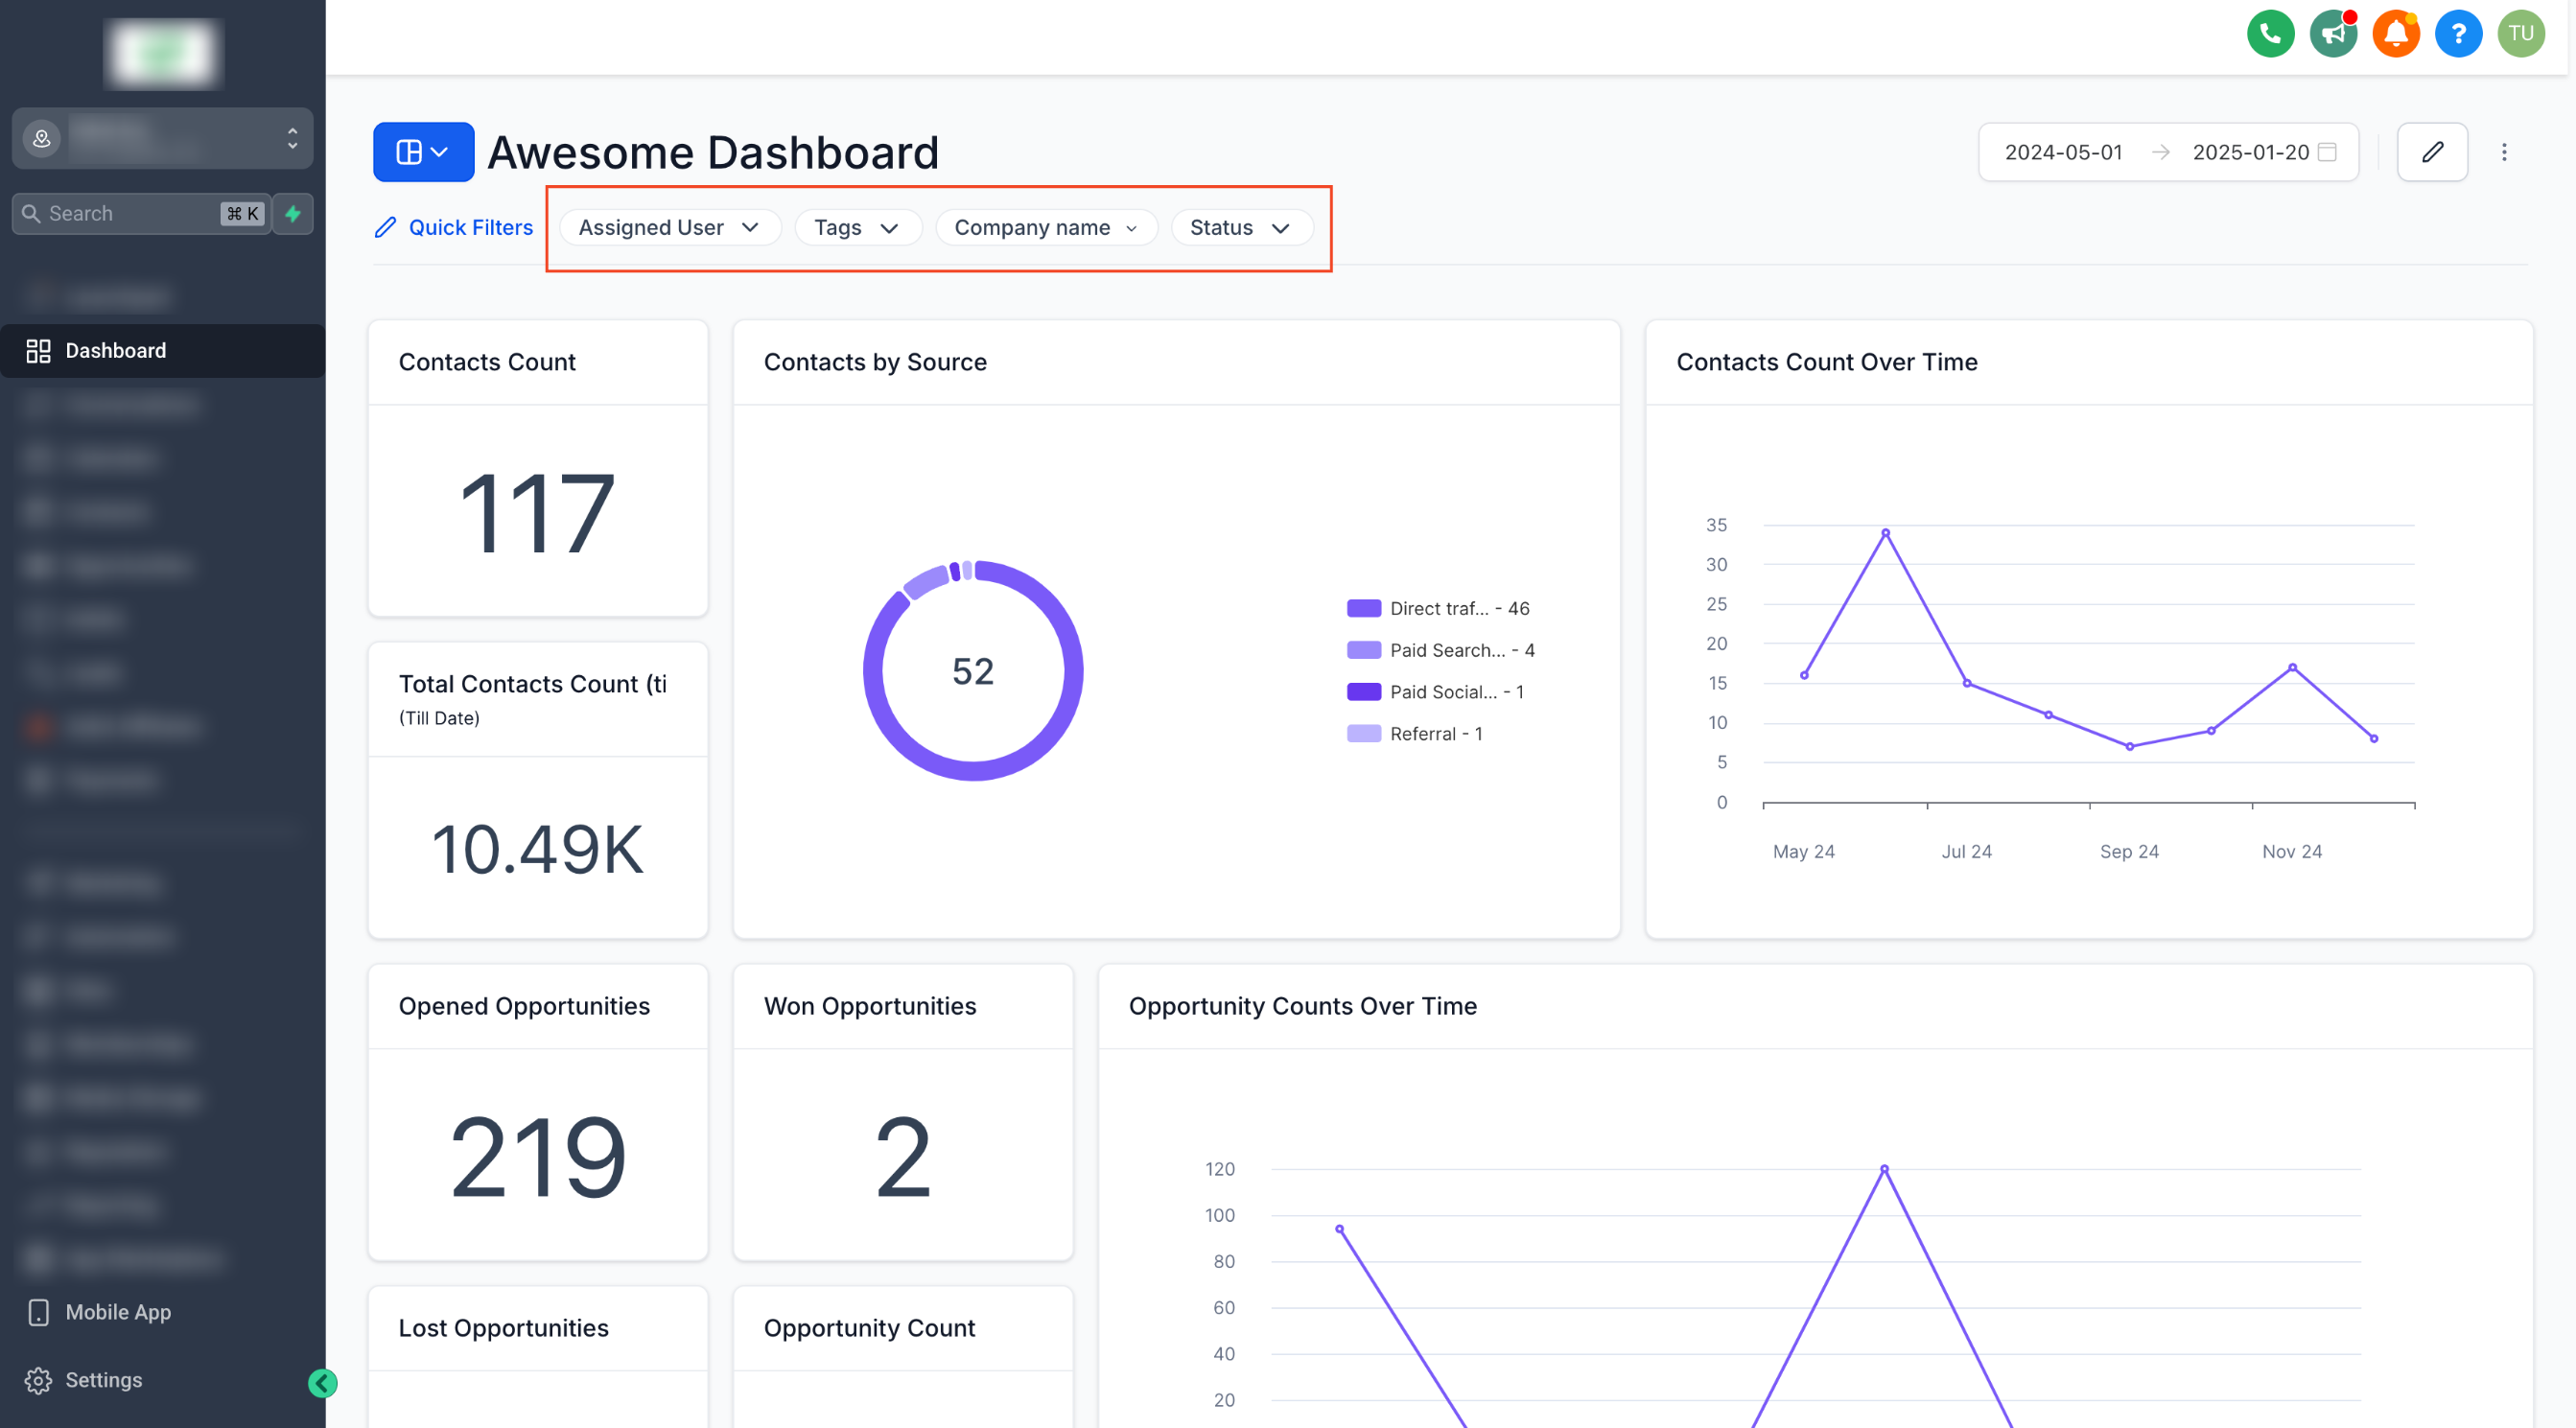
- Click on the "Quick Filters" button at the top of the dashboard.
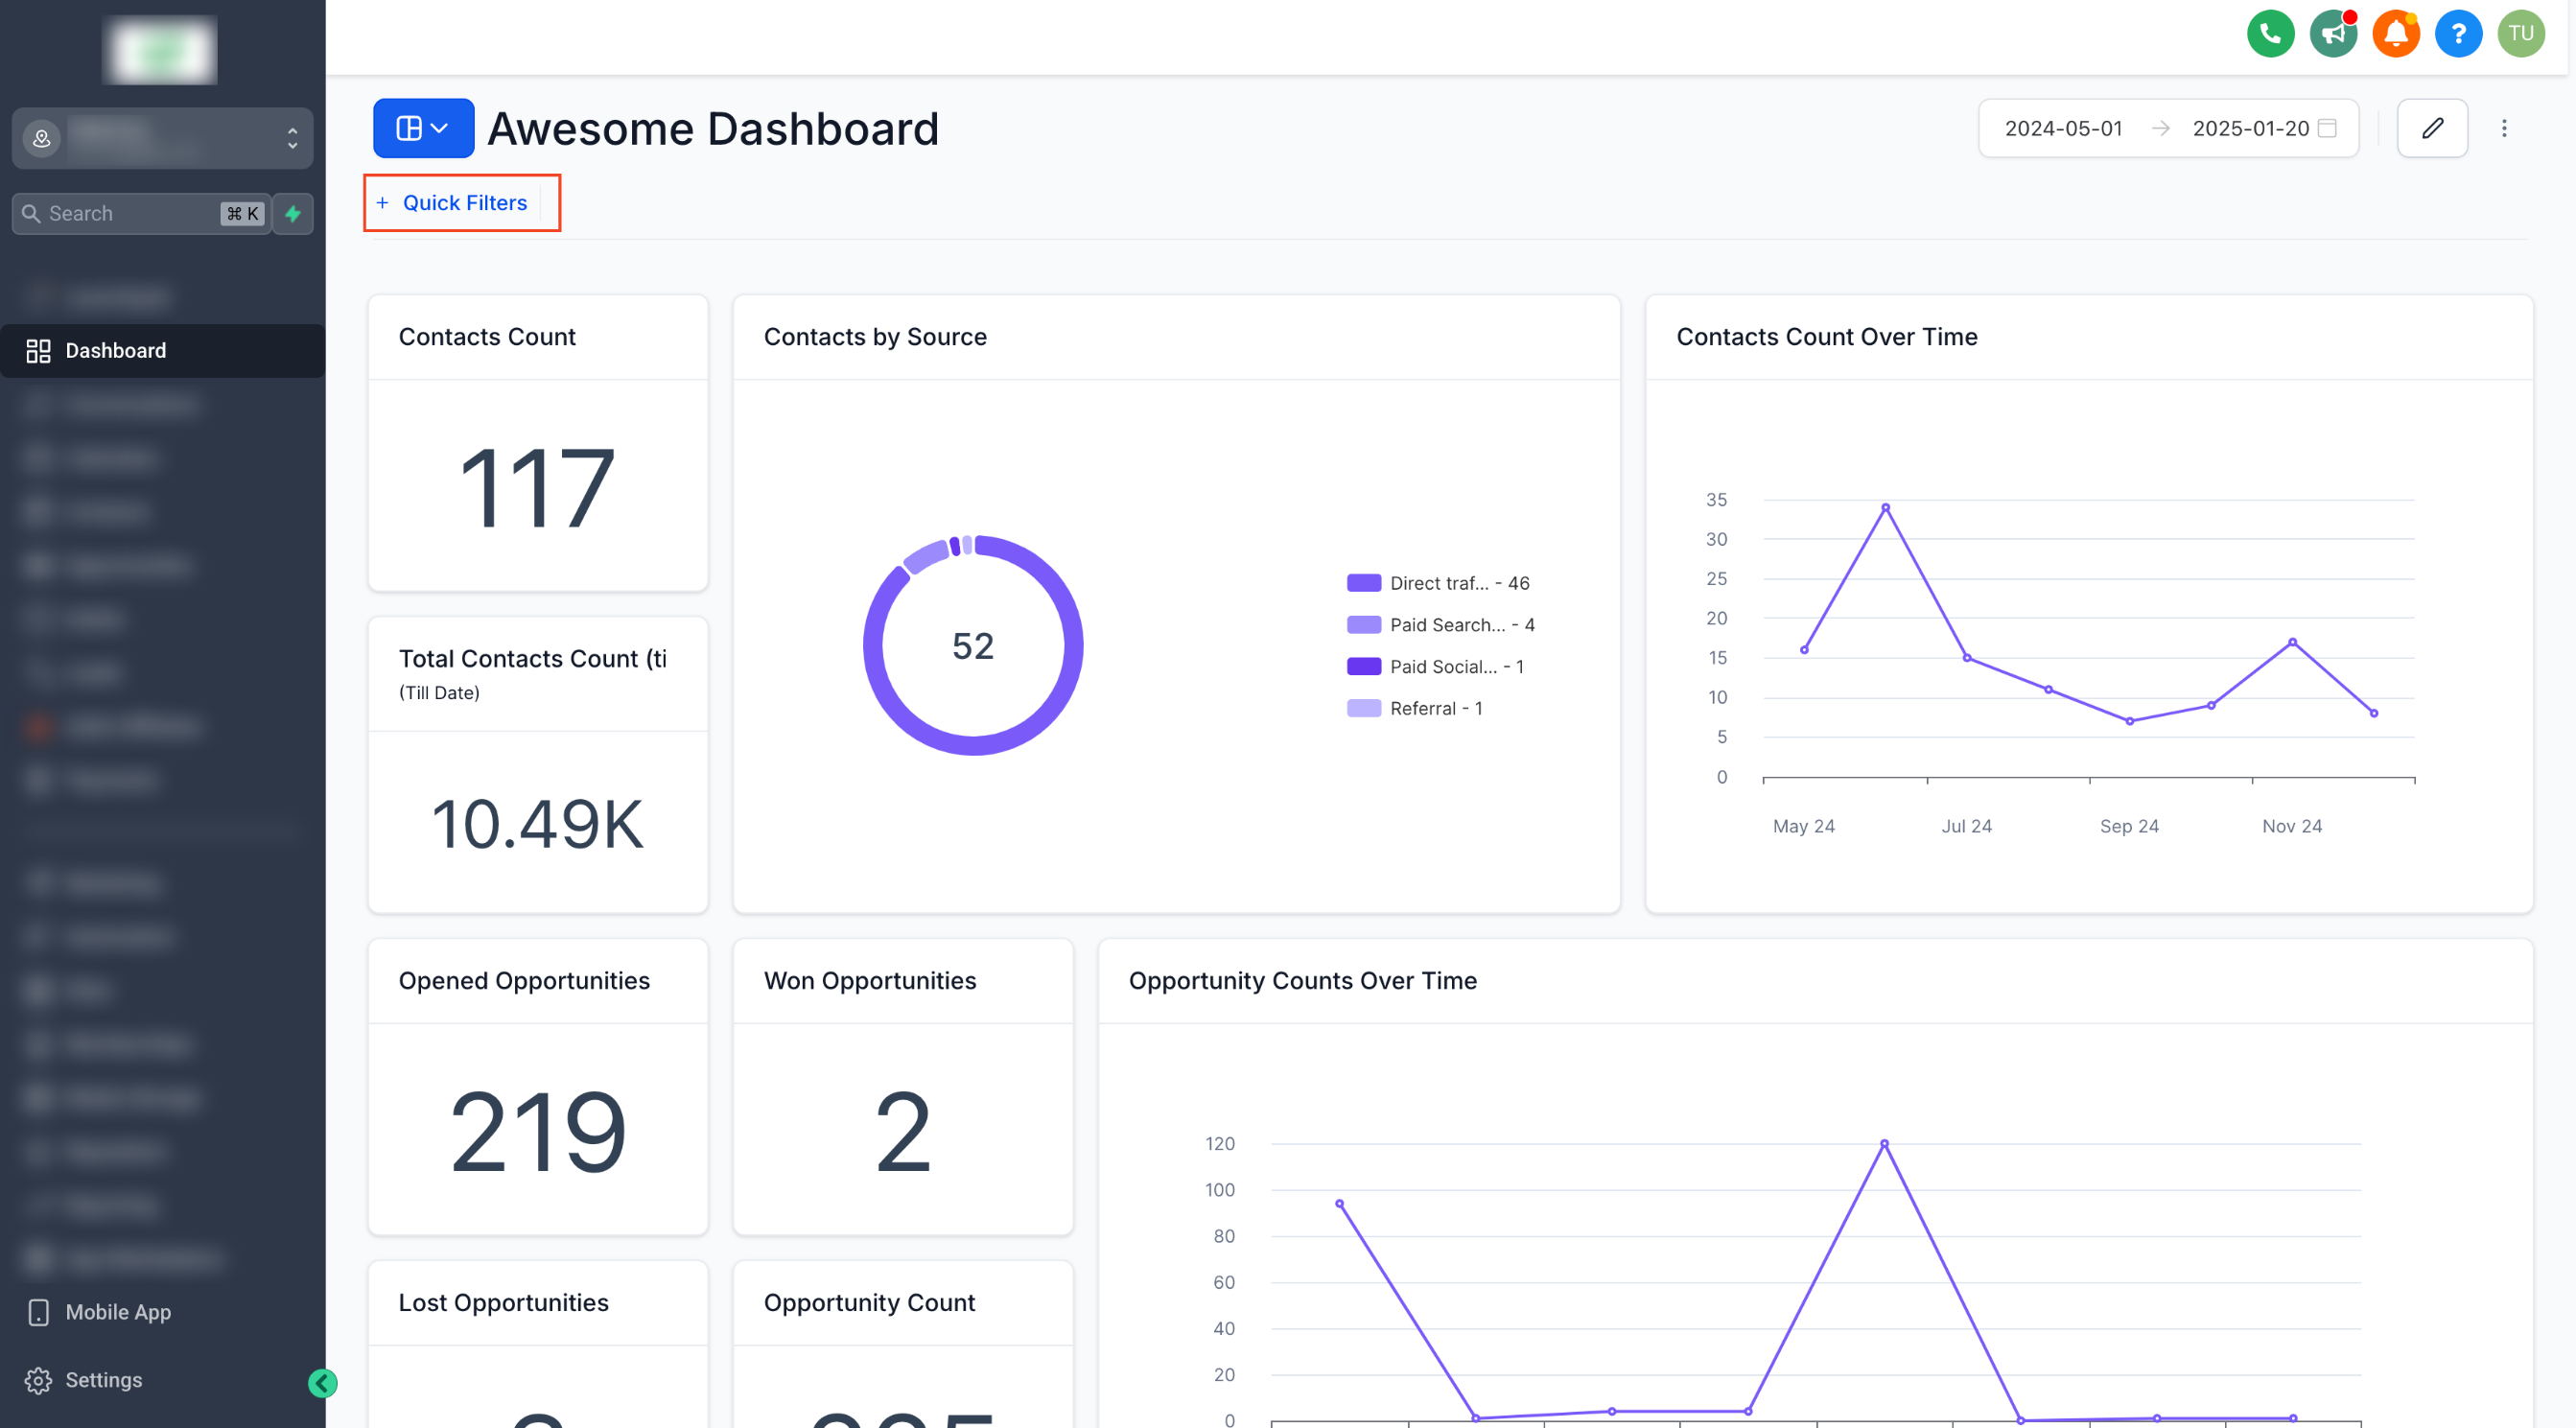
Step 3: Add Filters
- Click on the "+ Add Quick Filters" button.
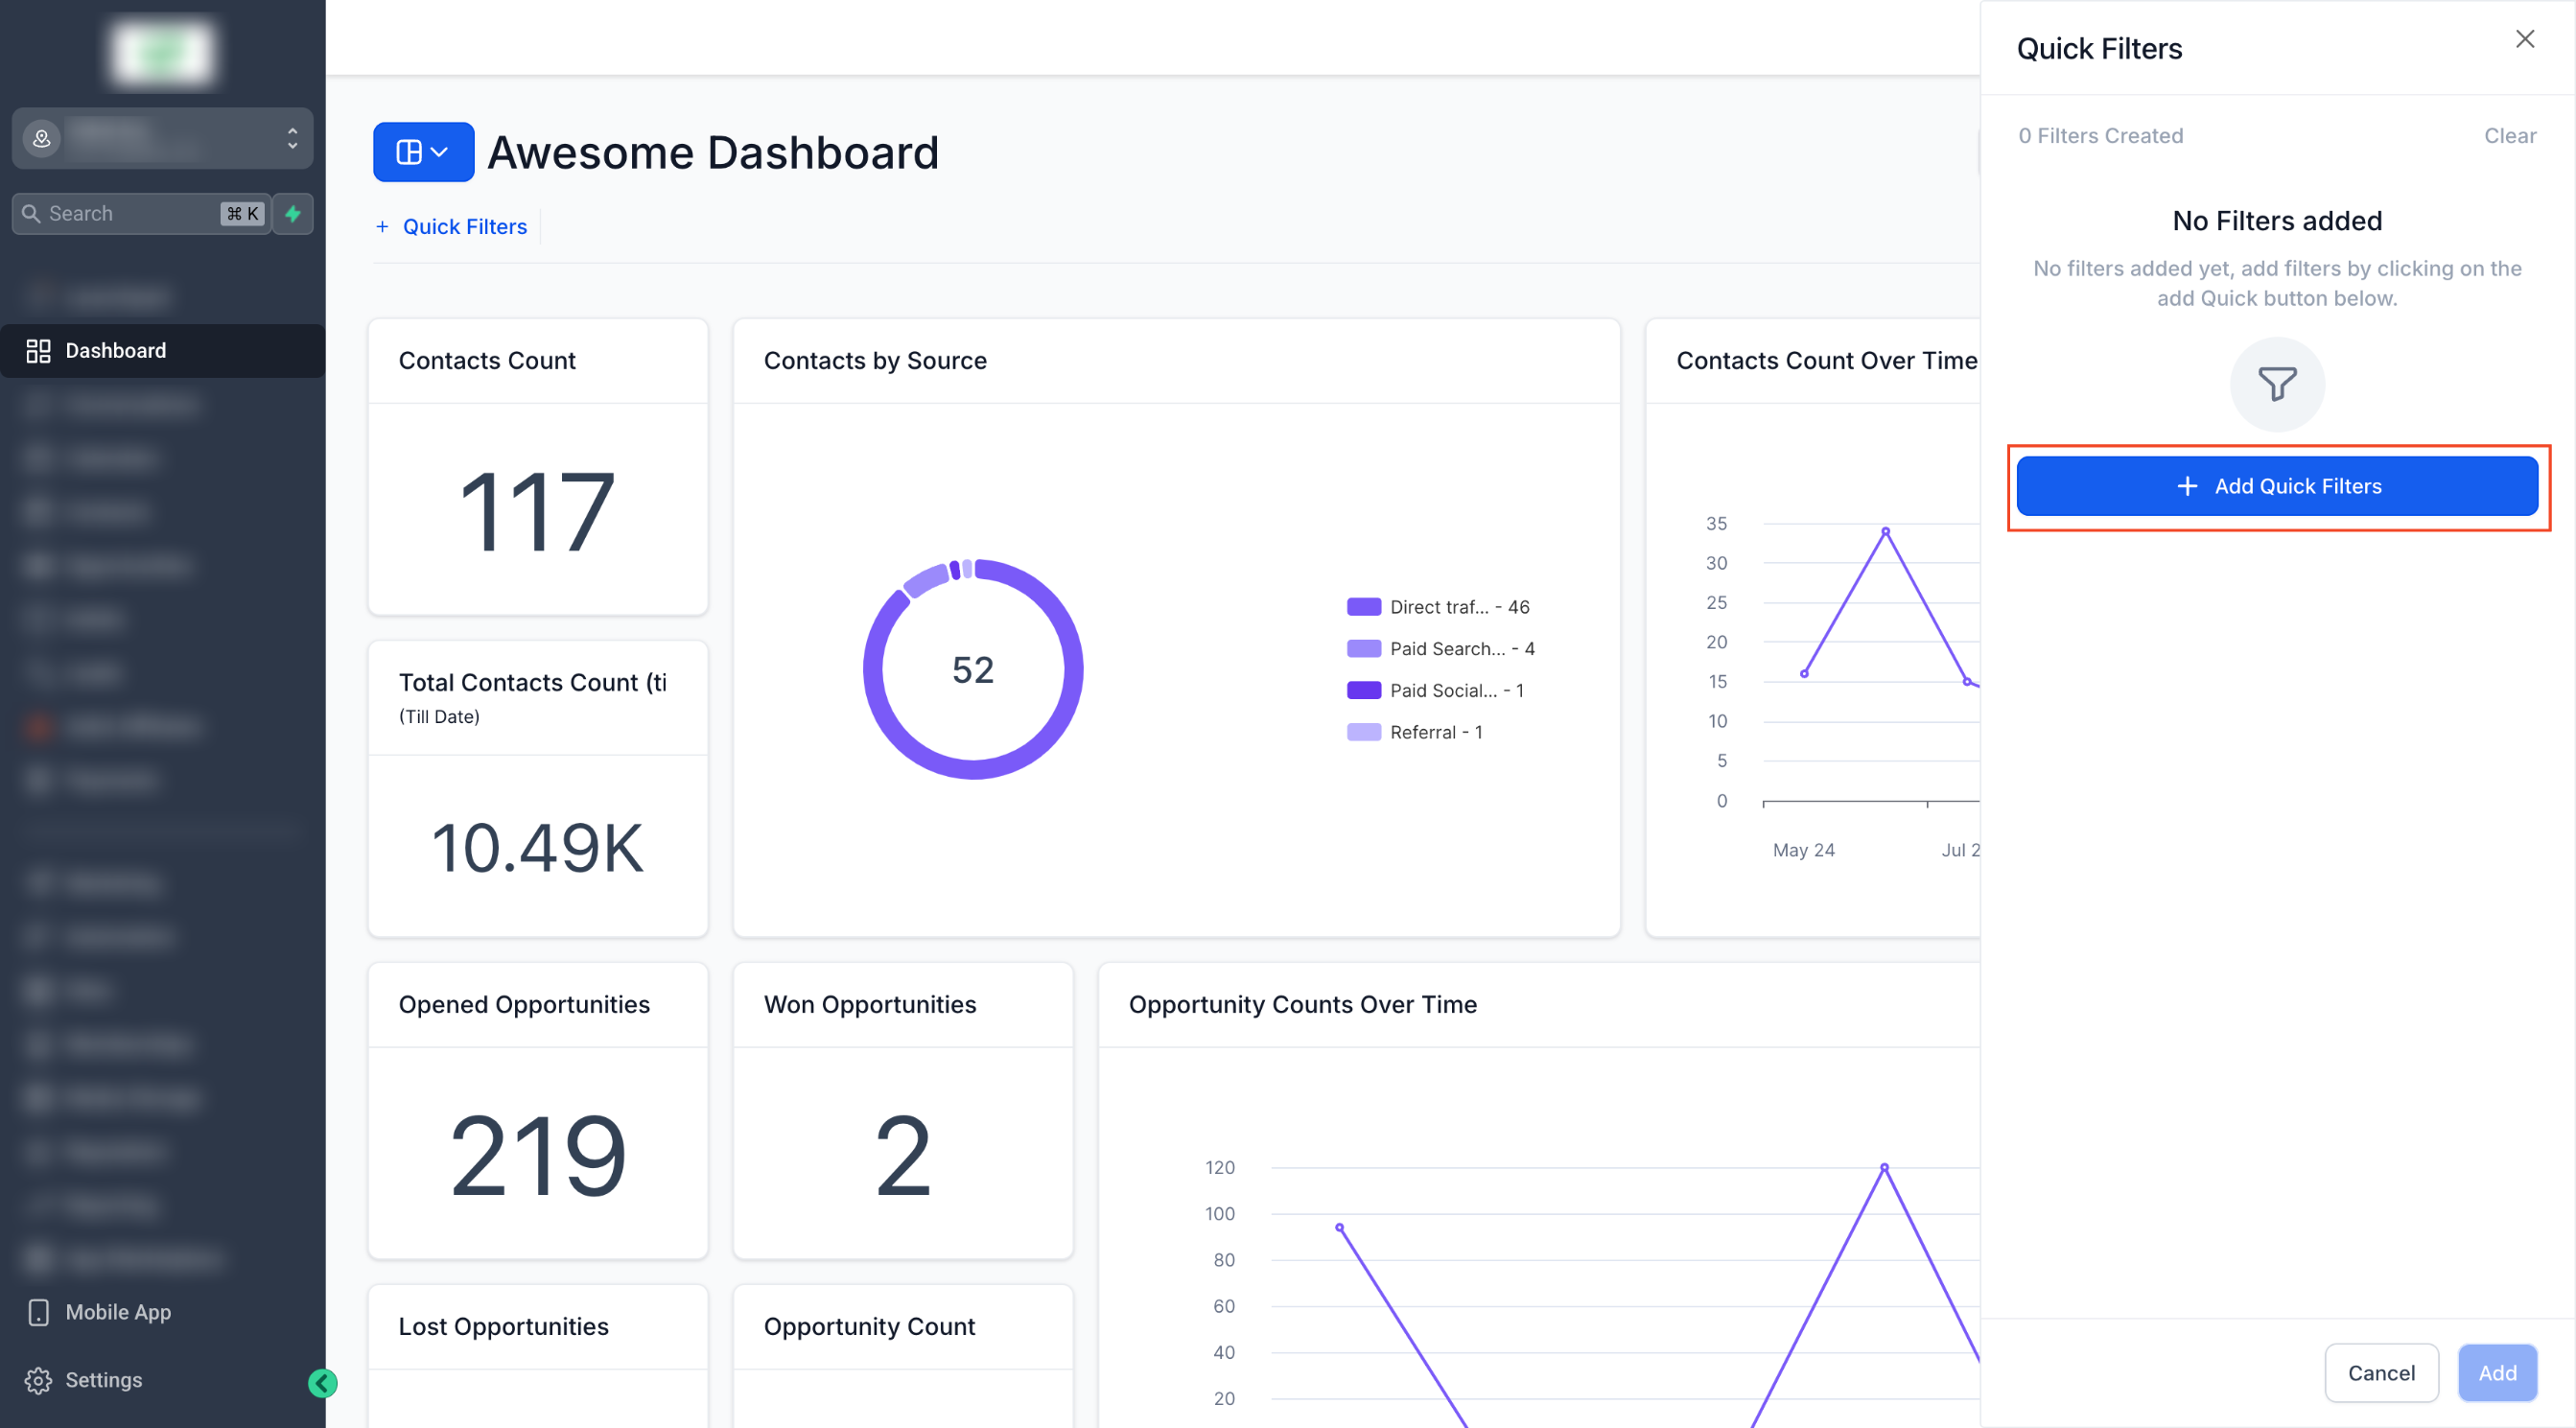
- A sidebar will appear with available filters categorized by data source.
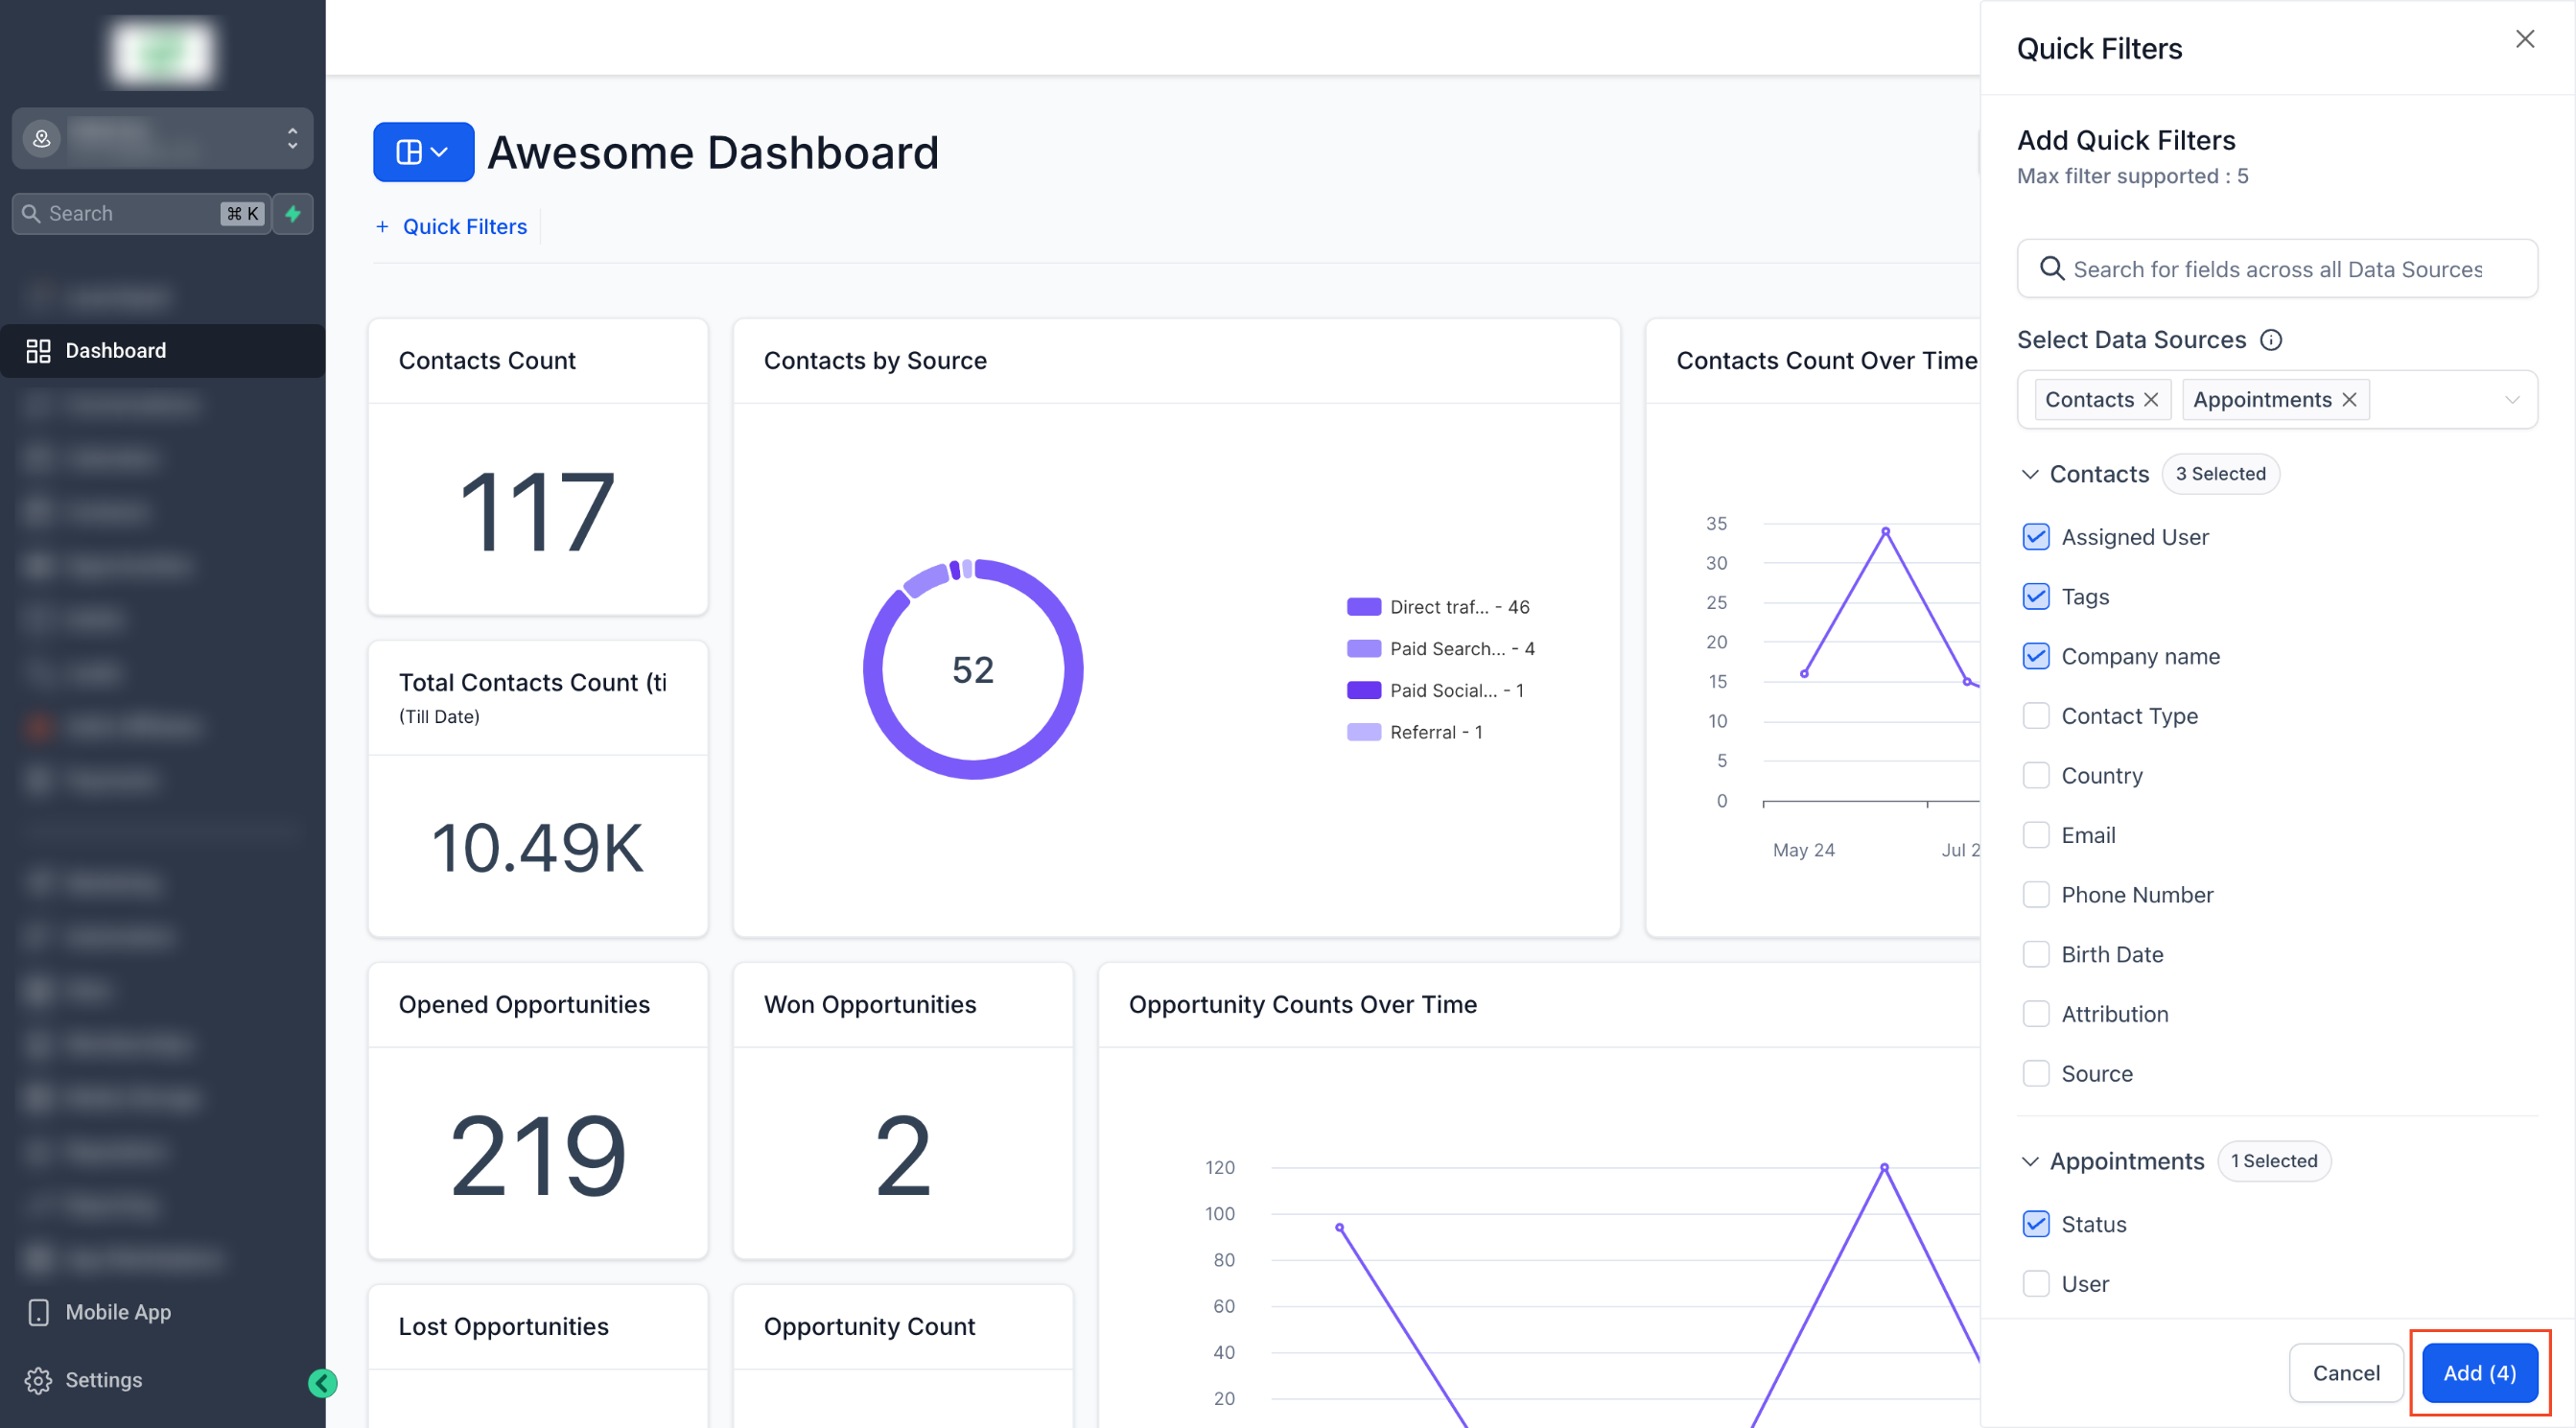
- Use the search bar to find specific filters or browse categories.
Step 4: Select Filters
Check the boxes next to the filters you want to add.
Click "Add" to proceed.
Step 5: Review and Apply
Review the selected filters and add descriptions if needed.
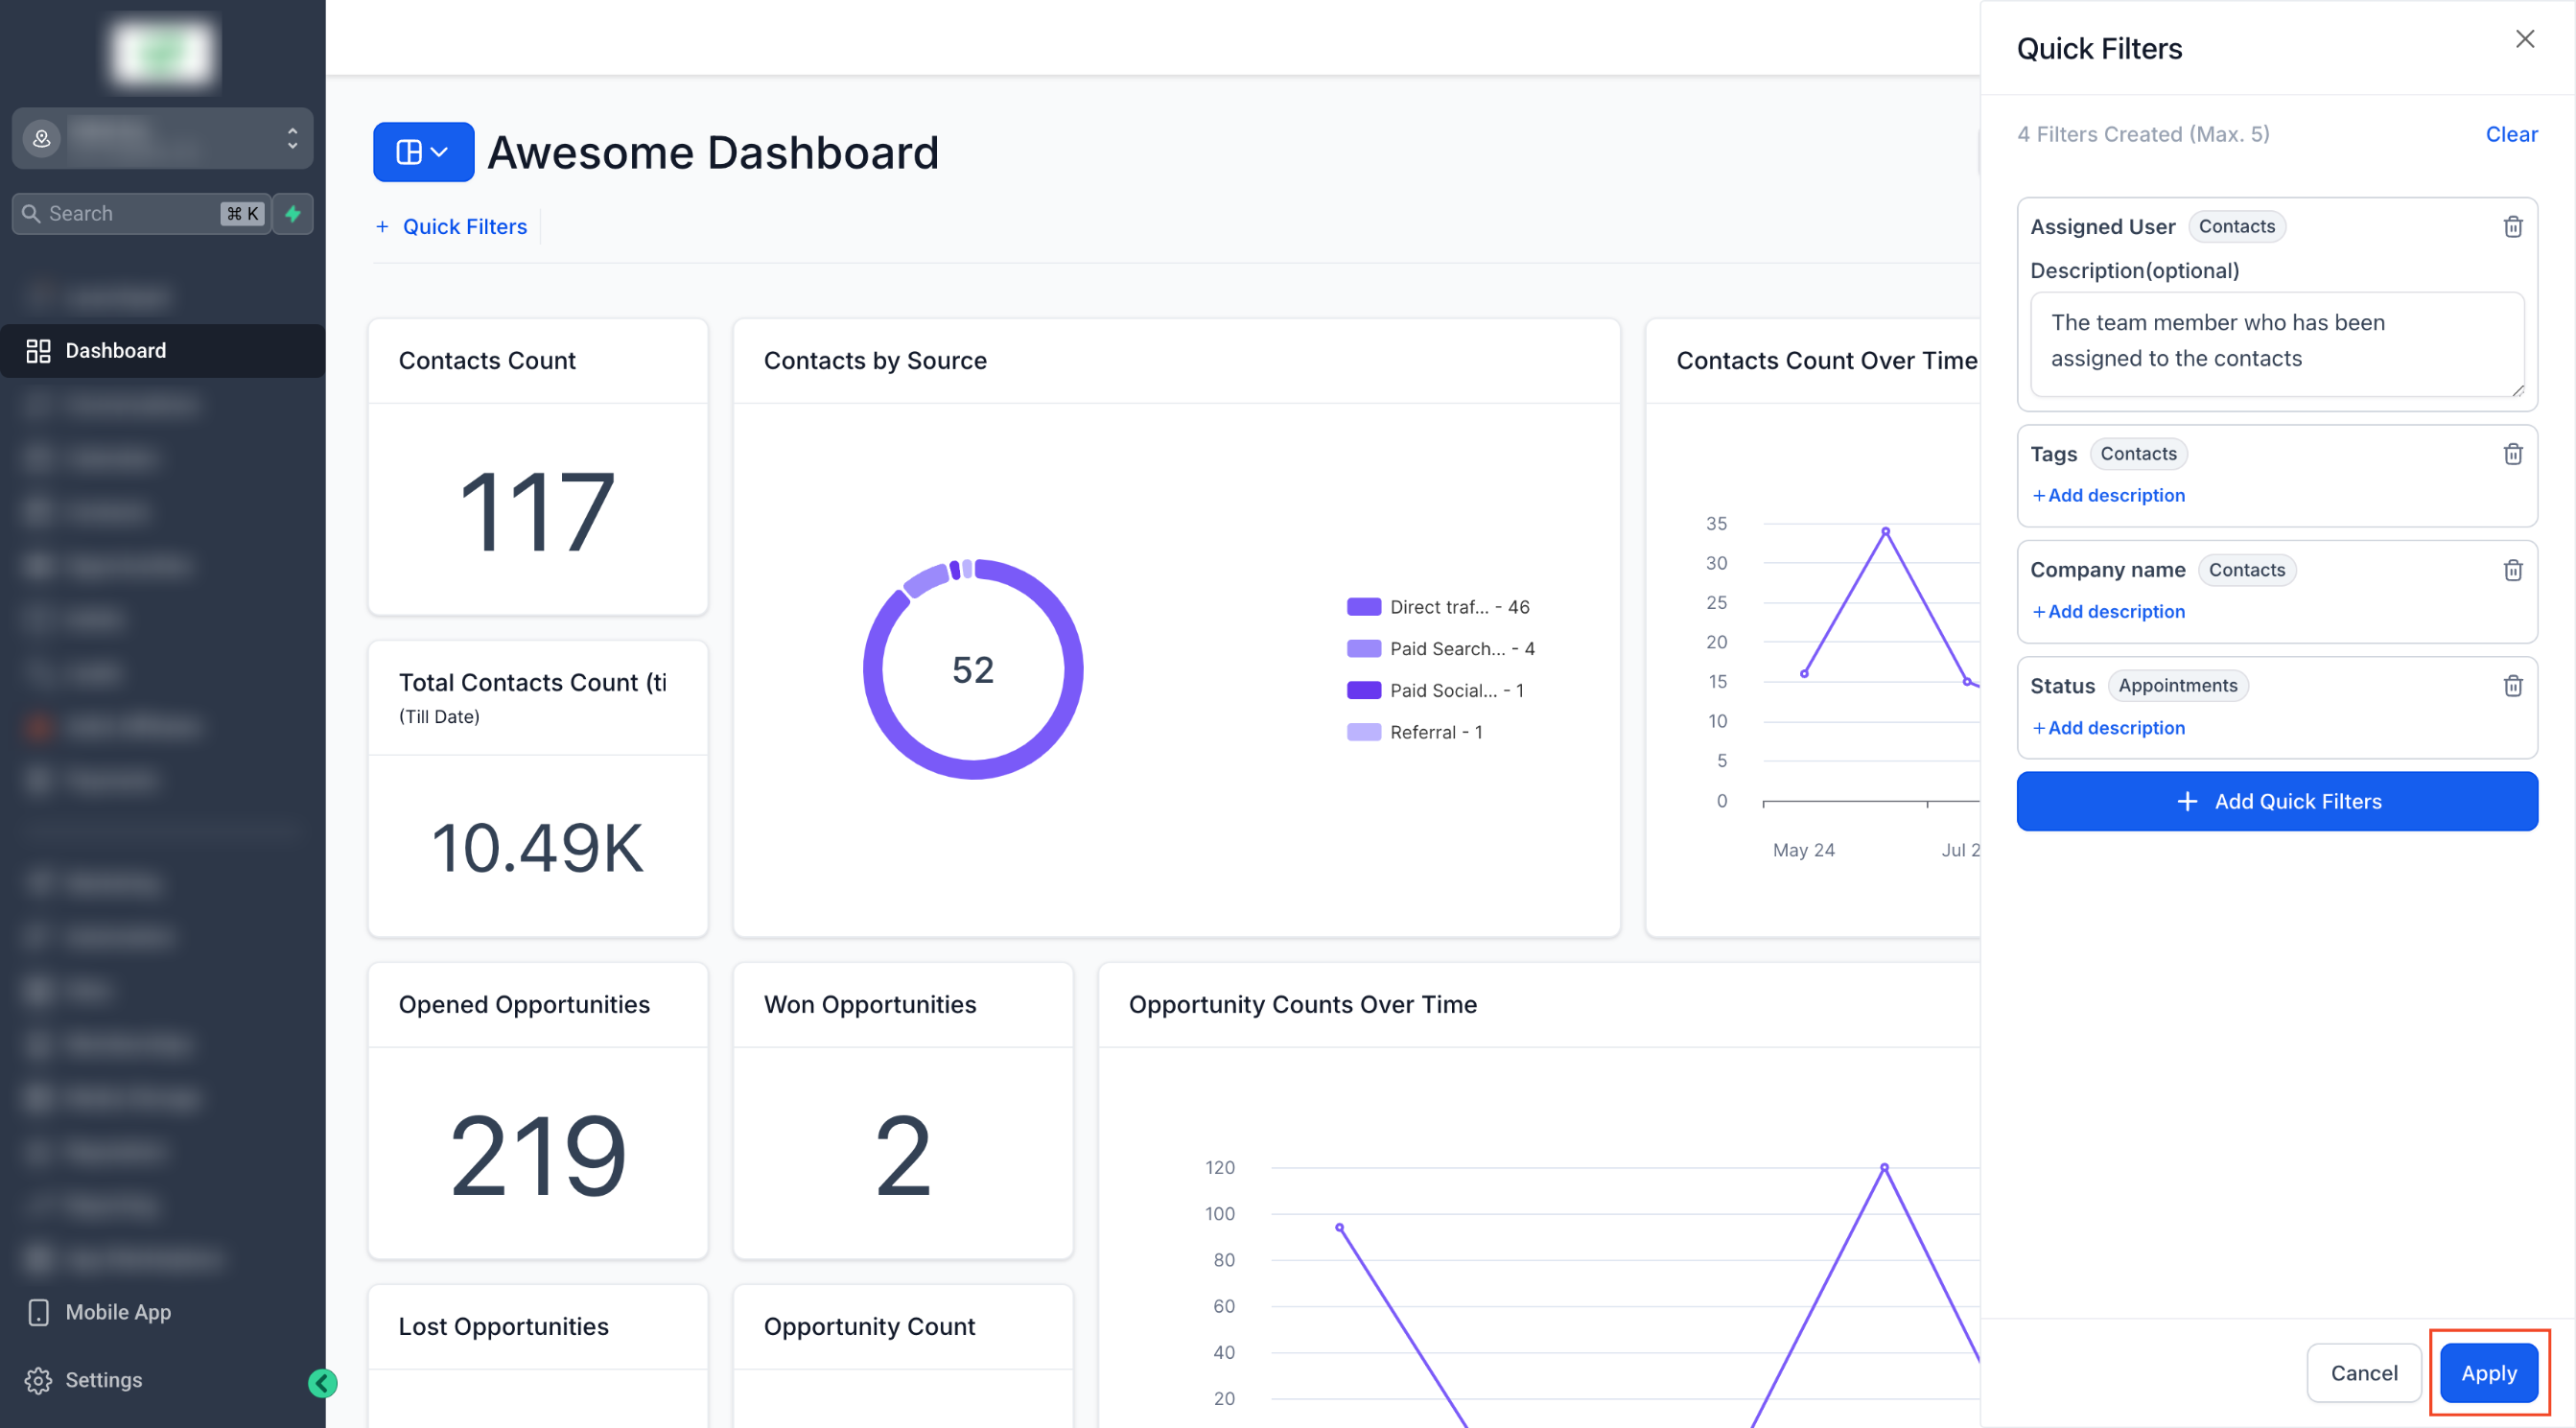
Descriptions are visible to all users and help them understand the purpose of each filter.
Click "Apply" to finalize the setup.
Important Note:

1. Quick Filters are specific to each dashboard. You’ll need to configure them separately for every dashboard.
2. Only users with full or edit access to the dashboard can add Quick Filters.
3. Users with view access can use the filters but cannot modify them.
Using Quick Filters
Step 1: Navigate to the Dashboard
- Open the dashboard where Quick Filters are configured.
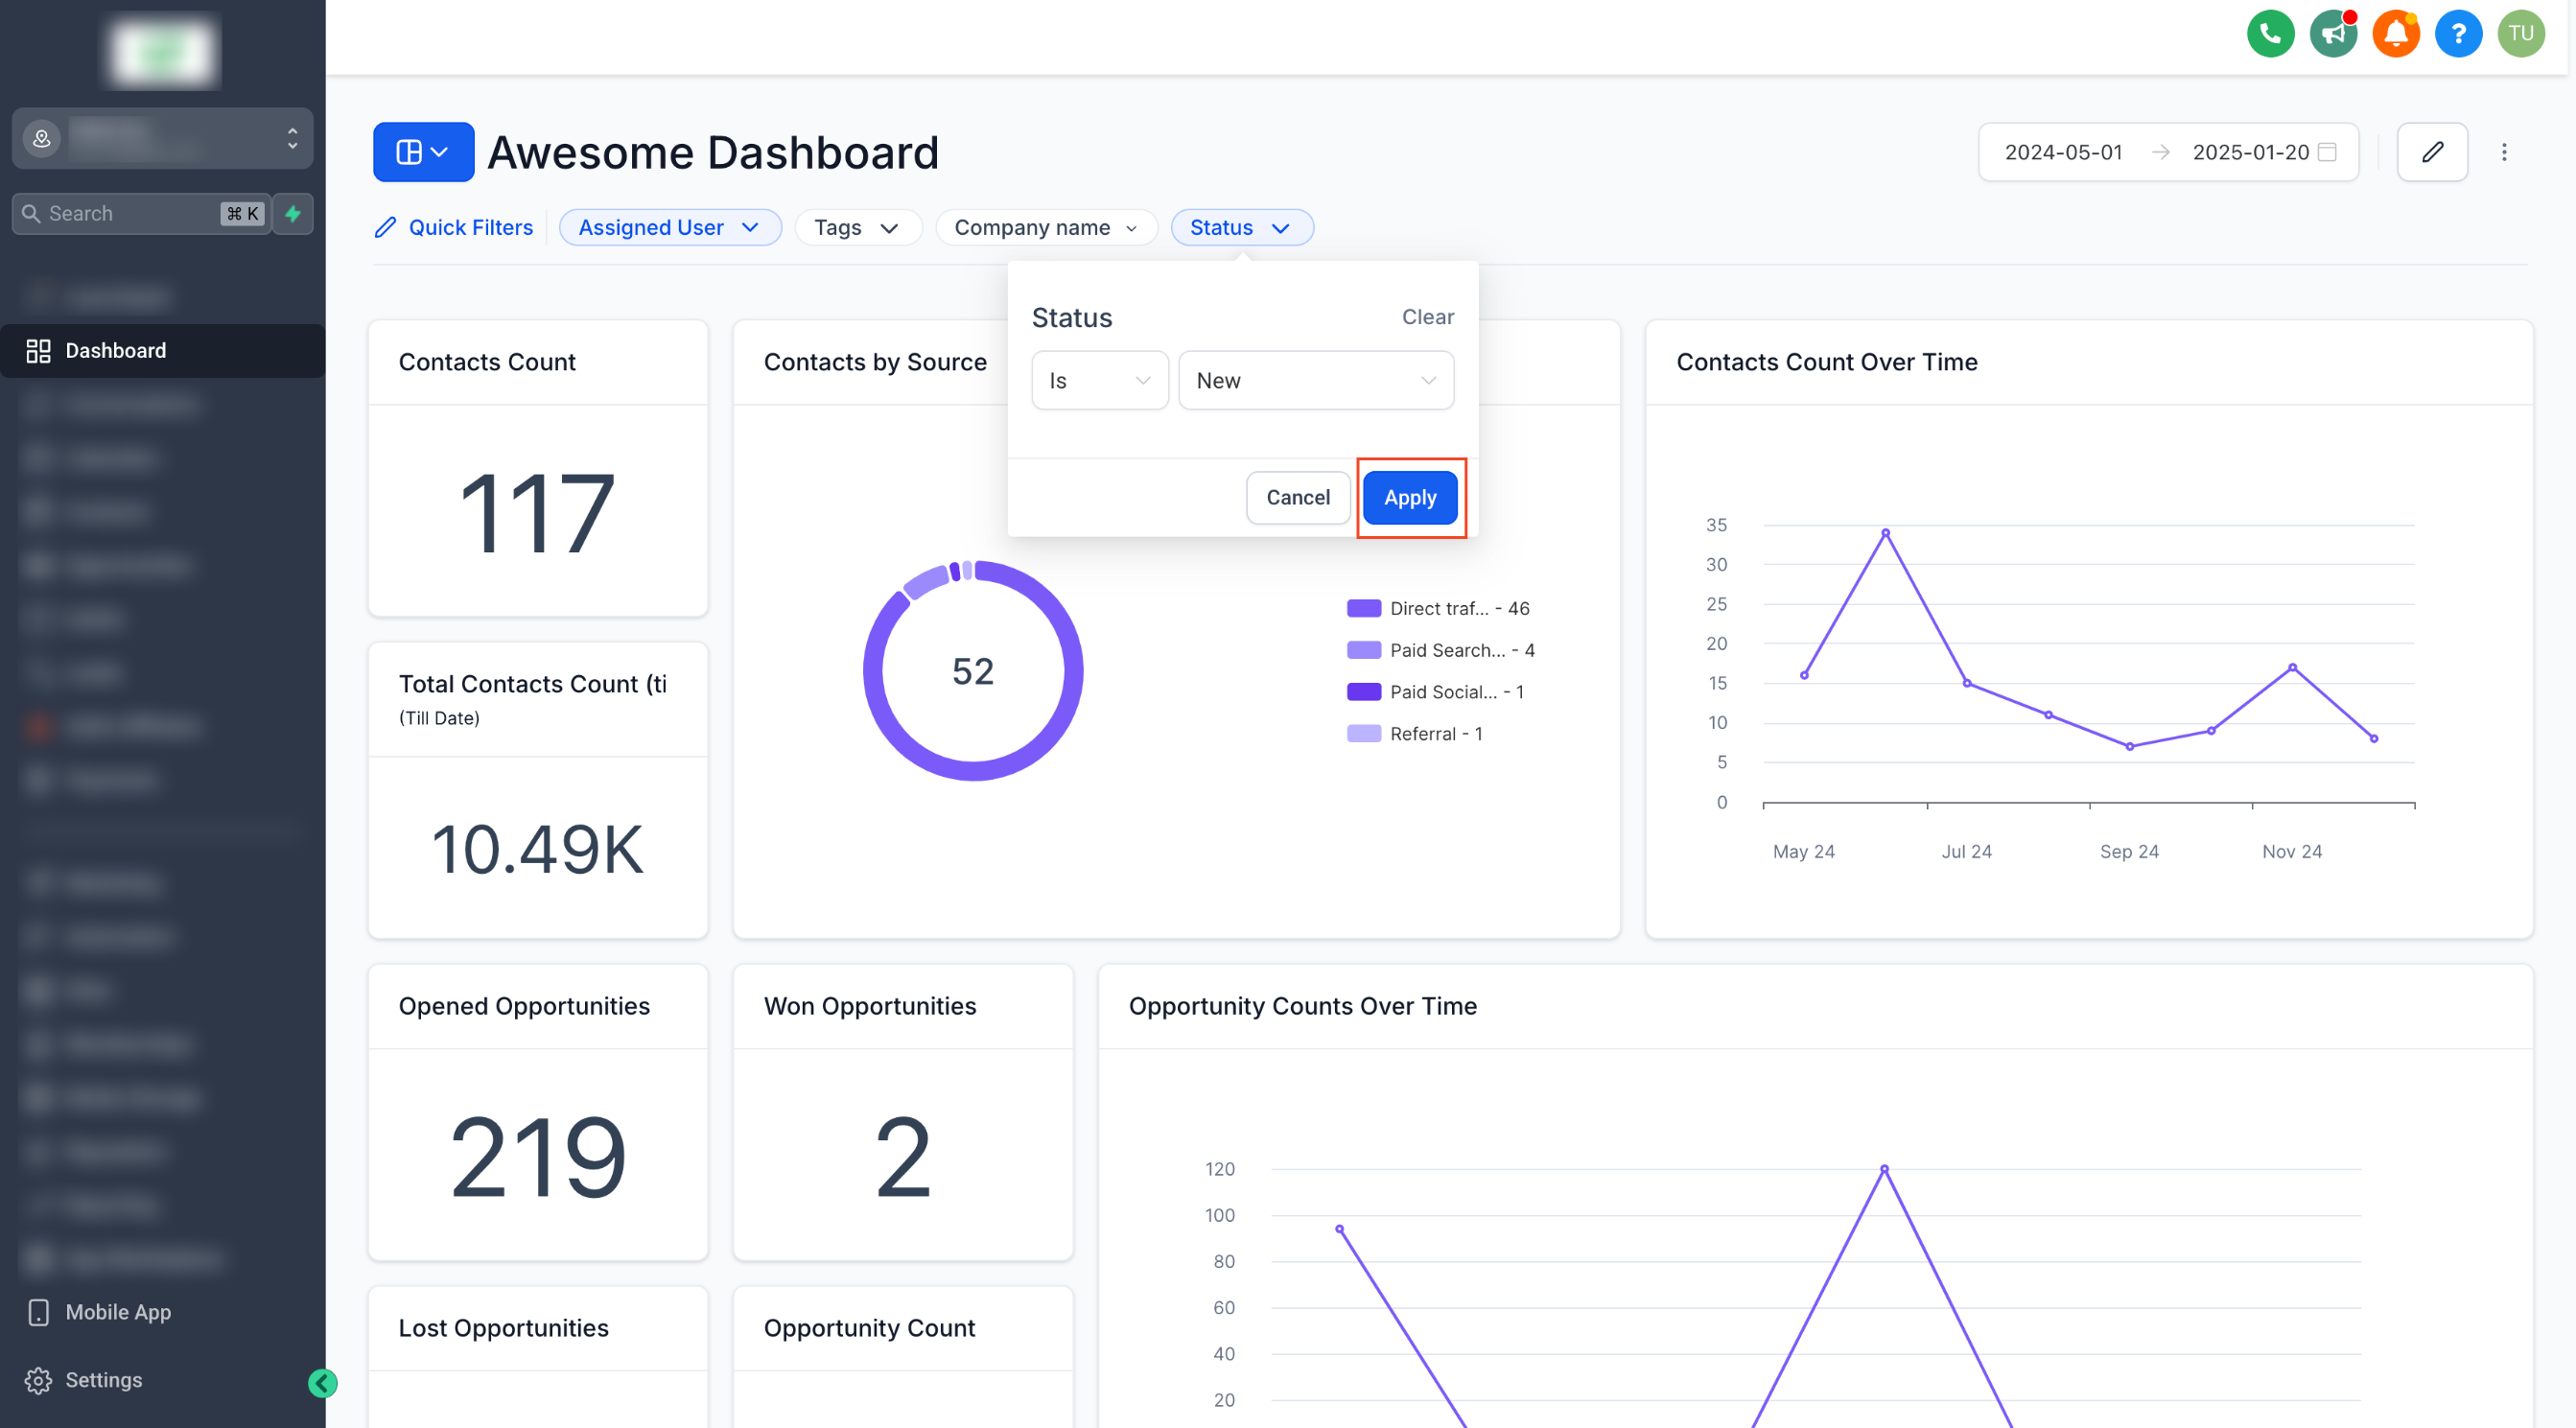
Step 2: Apply a Filter
Use the Quick Filter bar to select and apply a filter.
Adjust filter properties to refine your view.
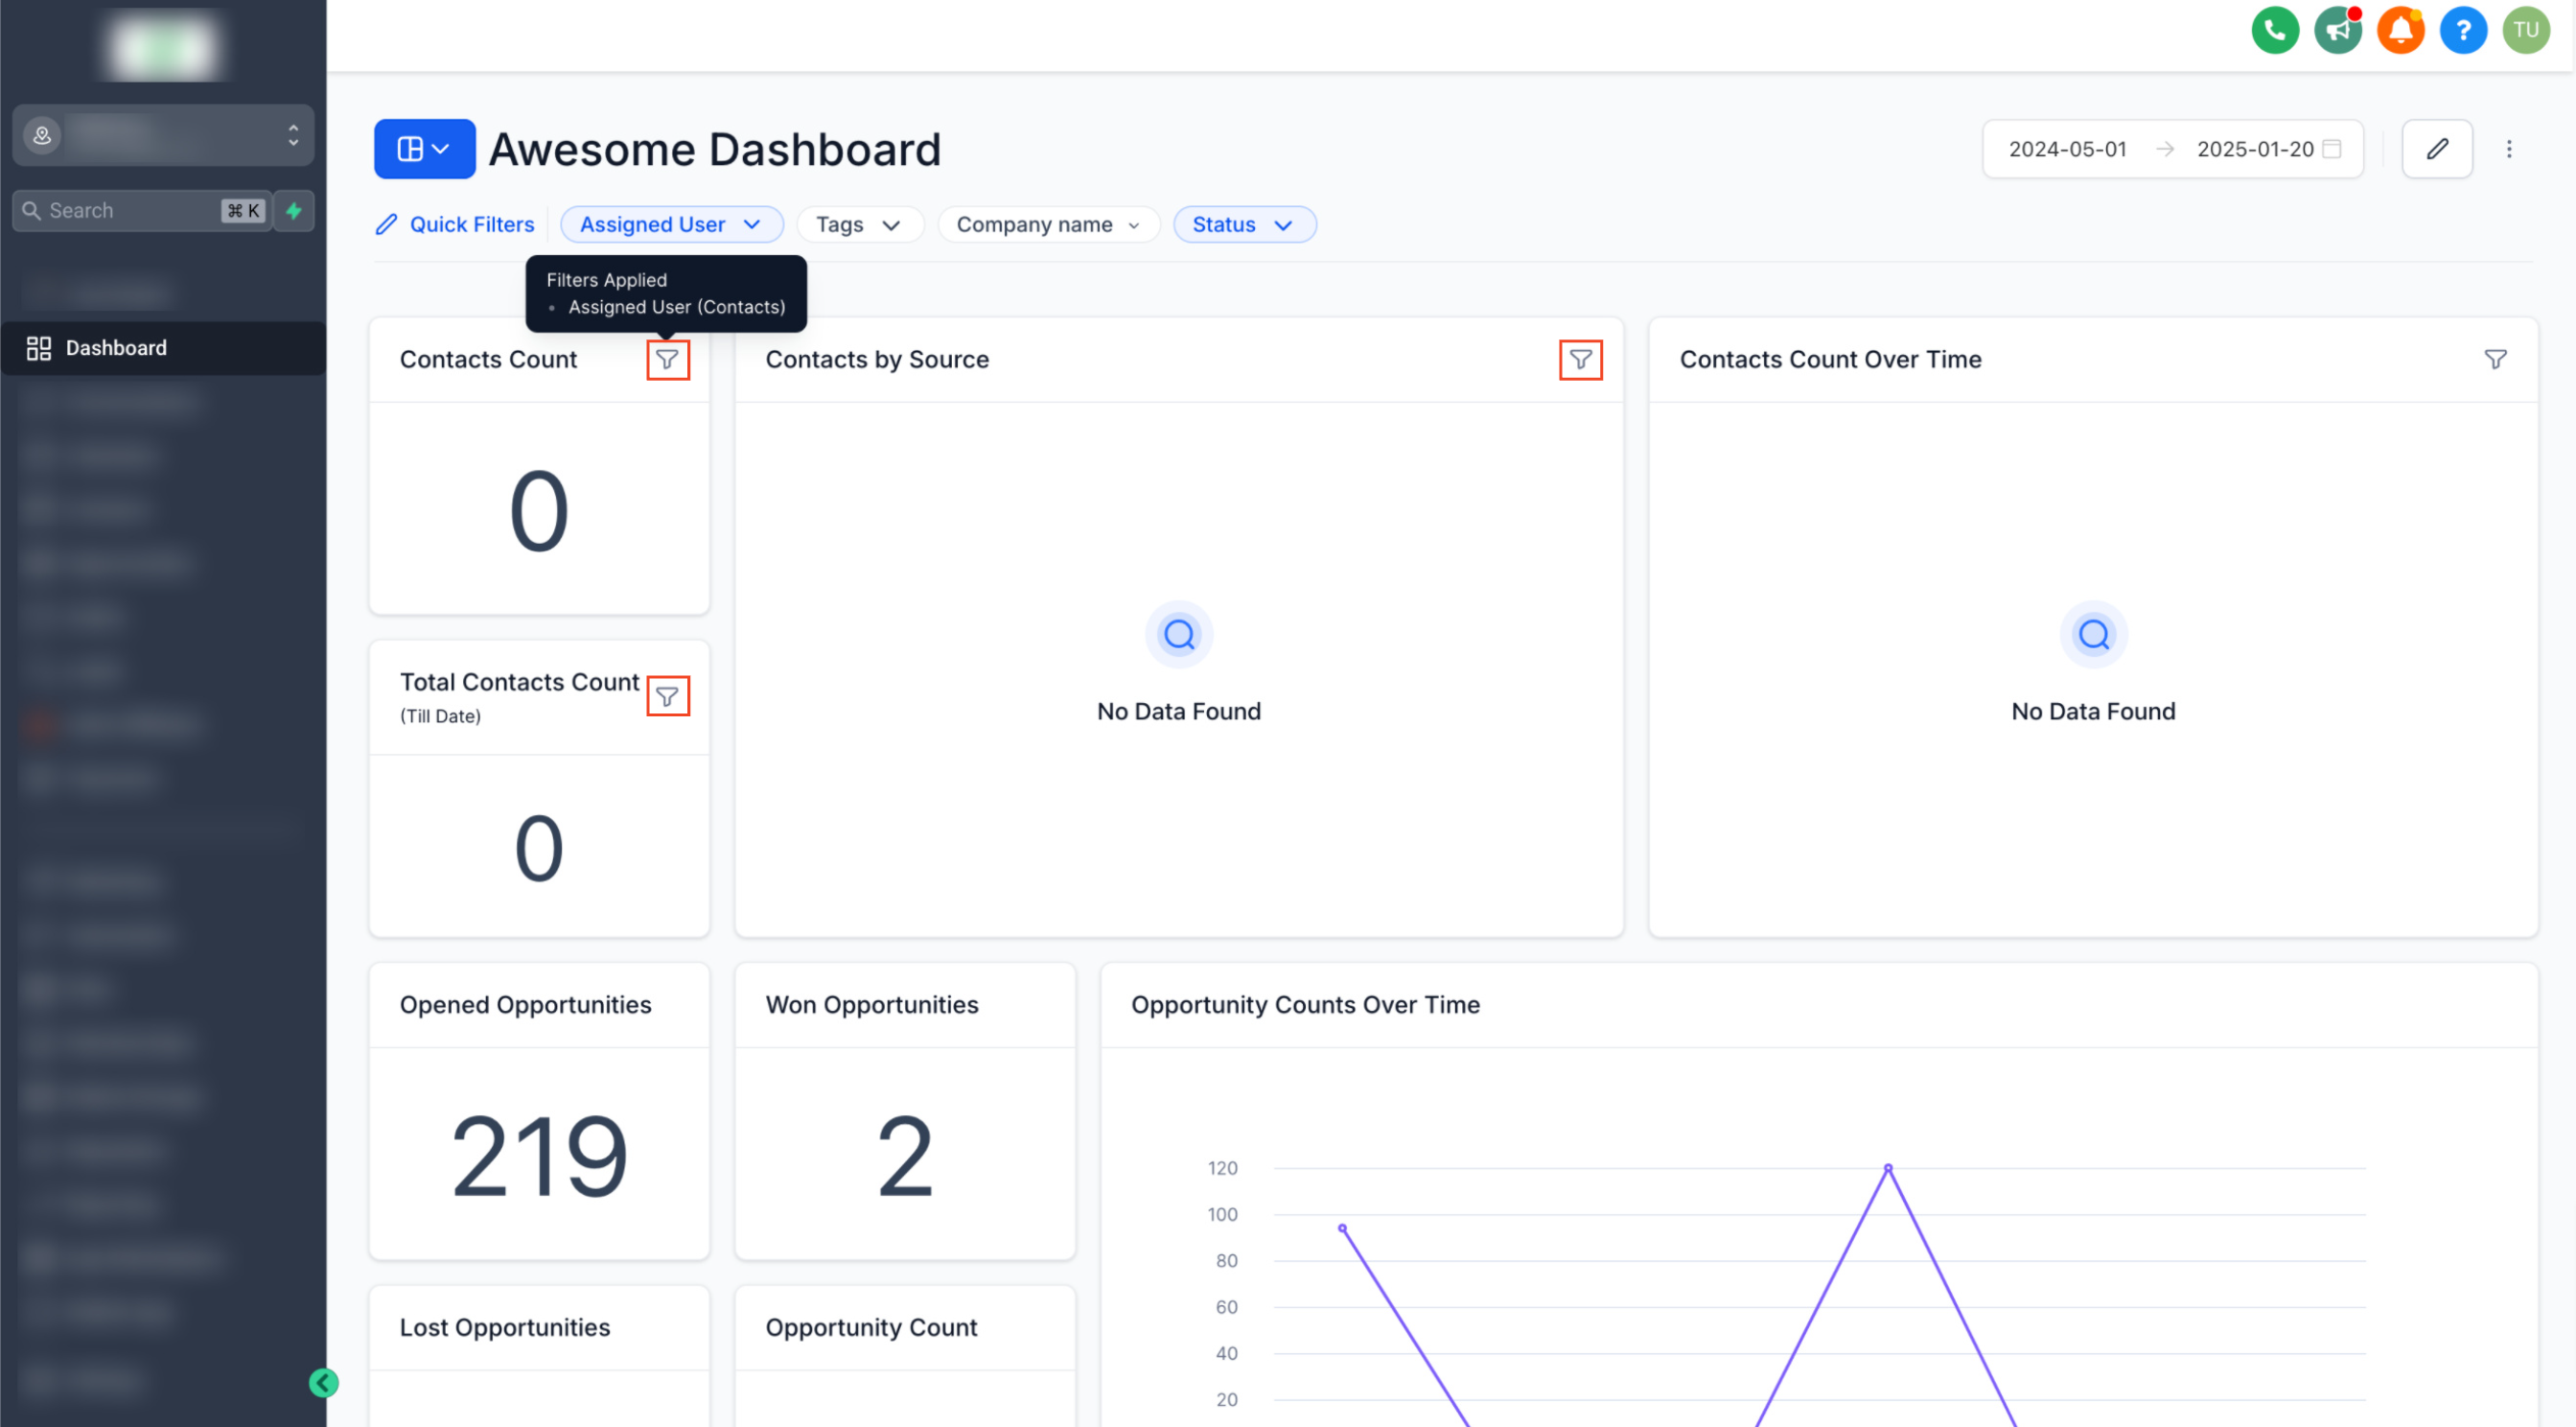
Step 3: View Filtered Results
- The widgets will update based on the applied filters.
Important Note:

Filters apply only to widgets that use the same data source as the filter property.

Example: A filter for the Tags property under the Contact data source will affect only widgets using the Contact data source.
Important Note:

Filters only apply to the user who set them — they don’t affect other users.

Filters are saved within your current browser session. If you revisit the dashboard in the same session, your last-selected filters will remain applied.
How do Quick Filters work with existing widget level filters
- Quick filters and widget filters work together using AND logic. This means a quick filter does not override a widget-level filter—it adds to it.
- To avoid incorrect or missing data, use widget filters for widget-specific needs and quick filters for broader, team-wide filtering.
Example:
If you set:- Widget filter: Appointment status = Confirmed
- Quick filter: Appointment status = Cancelled
The system will try to show appointments where the status is both Confirmed AND Cancelled—which is not possible, resulting in no data.
✅ Best Practice: Use quick filters for flexible filtering across the team and avoid duplicating similar filters at the widget level