
TABLE OF CONTENTS
Introduction
The Embedding Options for Forms provide users with enhanced control over how and when forms appear on their websites or funnels. This feature offers flexibility to manage form behavior dynamically, including advanced options for triggering and deactivating forms based on specific conditions. While embed codes are static once placed on a website, any changes made to the form—such as layout, triggers, or deactivation settings—require generating and replacing the embed code to reflect the updates. These options allow users to align forms with their goals, such as improving user experience, running time-sensitive campaigns, or managing lead collection effectively.
Use Cases
Time-Limited Campaigns - Deactivate forms after a specific number of displays to enforce urgency or exclusivity, such as for limited-time offers or seasonal promotions
Lead Management - Deactivate forms after a specific number of displays to enforce urgency or exclusivity, such as for limited-time offers or seasonal promotions
Step By Step Guide
Step 1: Access the Integration Settings
Navigate to the Form Integration Settings - After creating a form and clicks on the "integrate" button
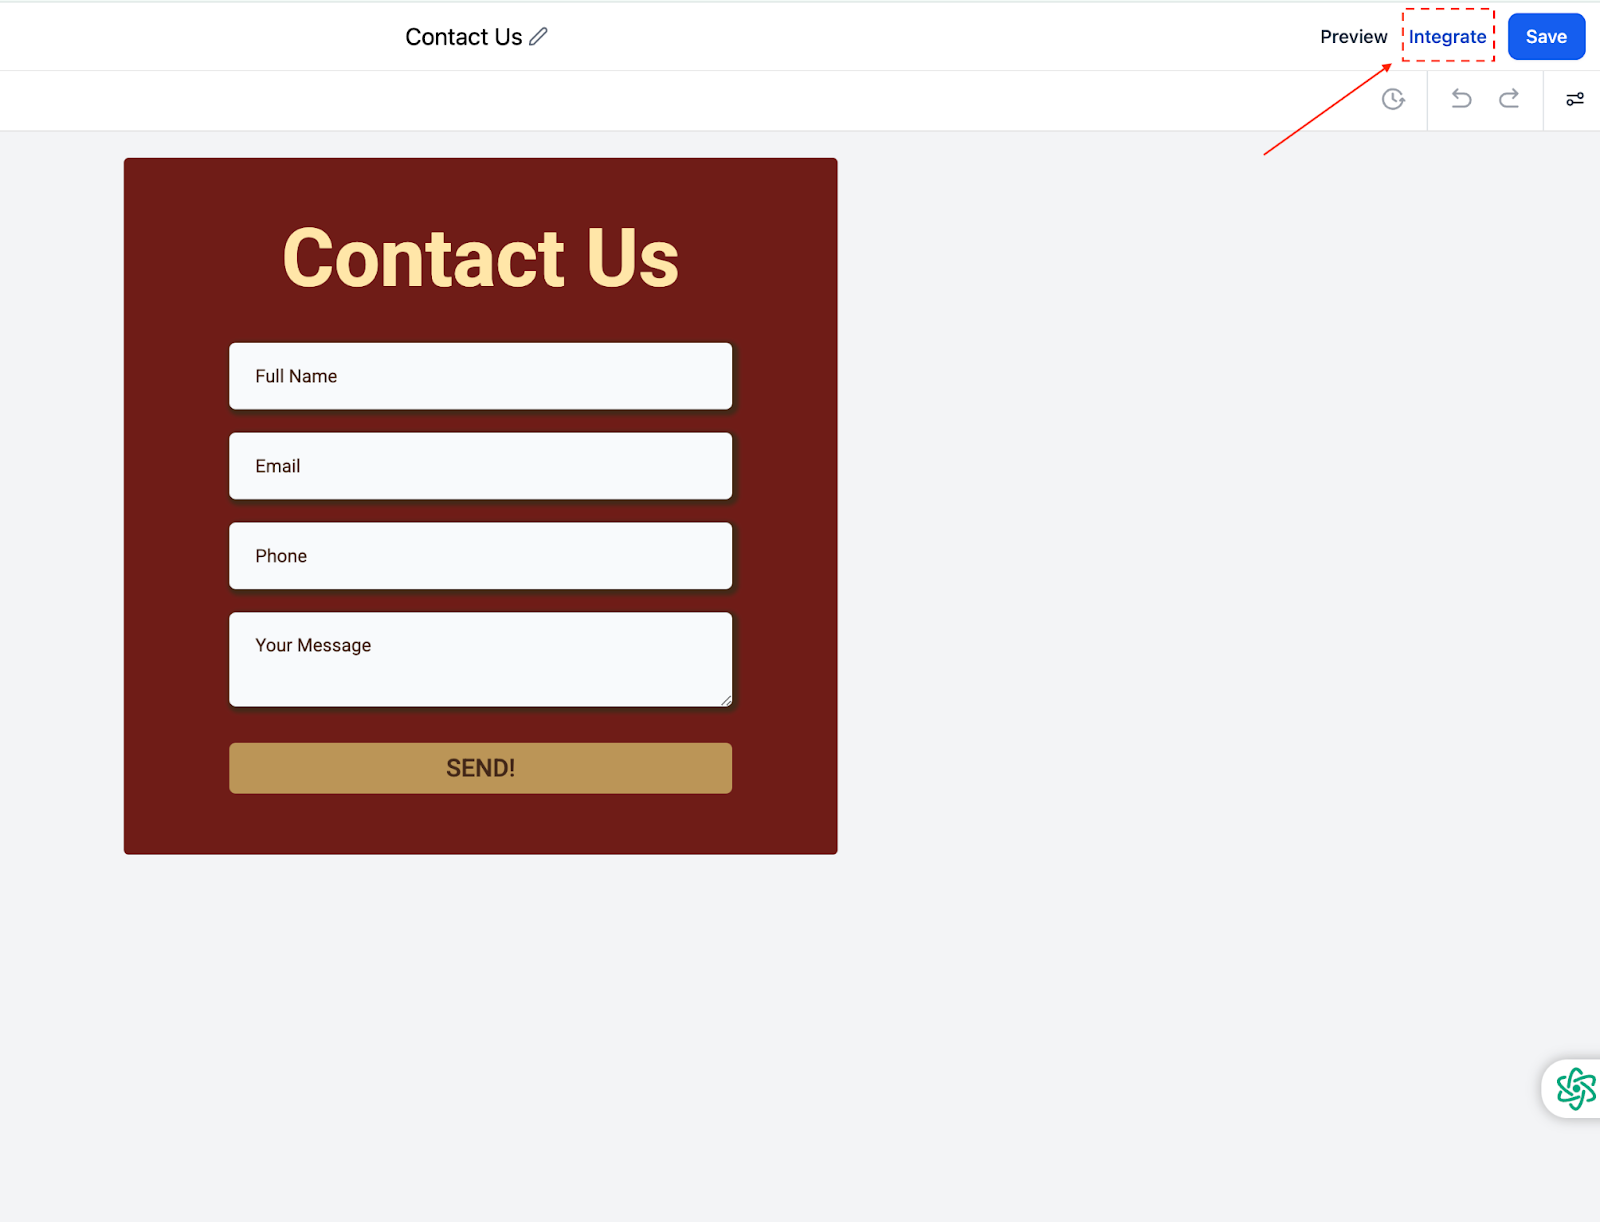
The following screen shows up -
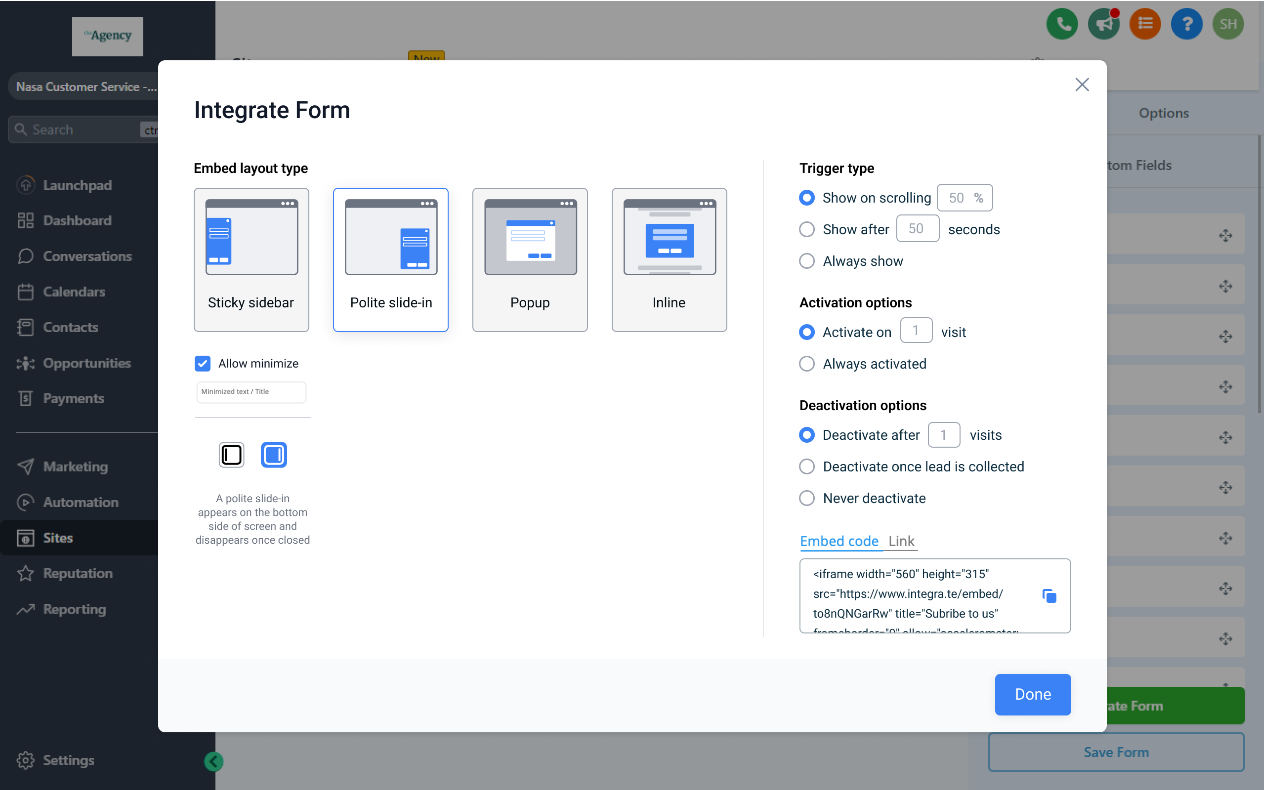
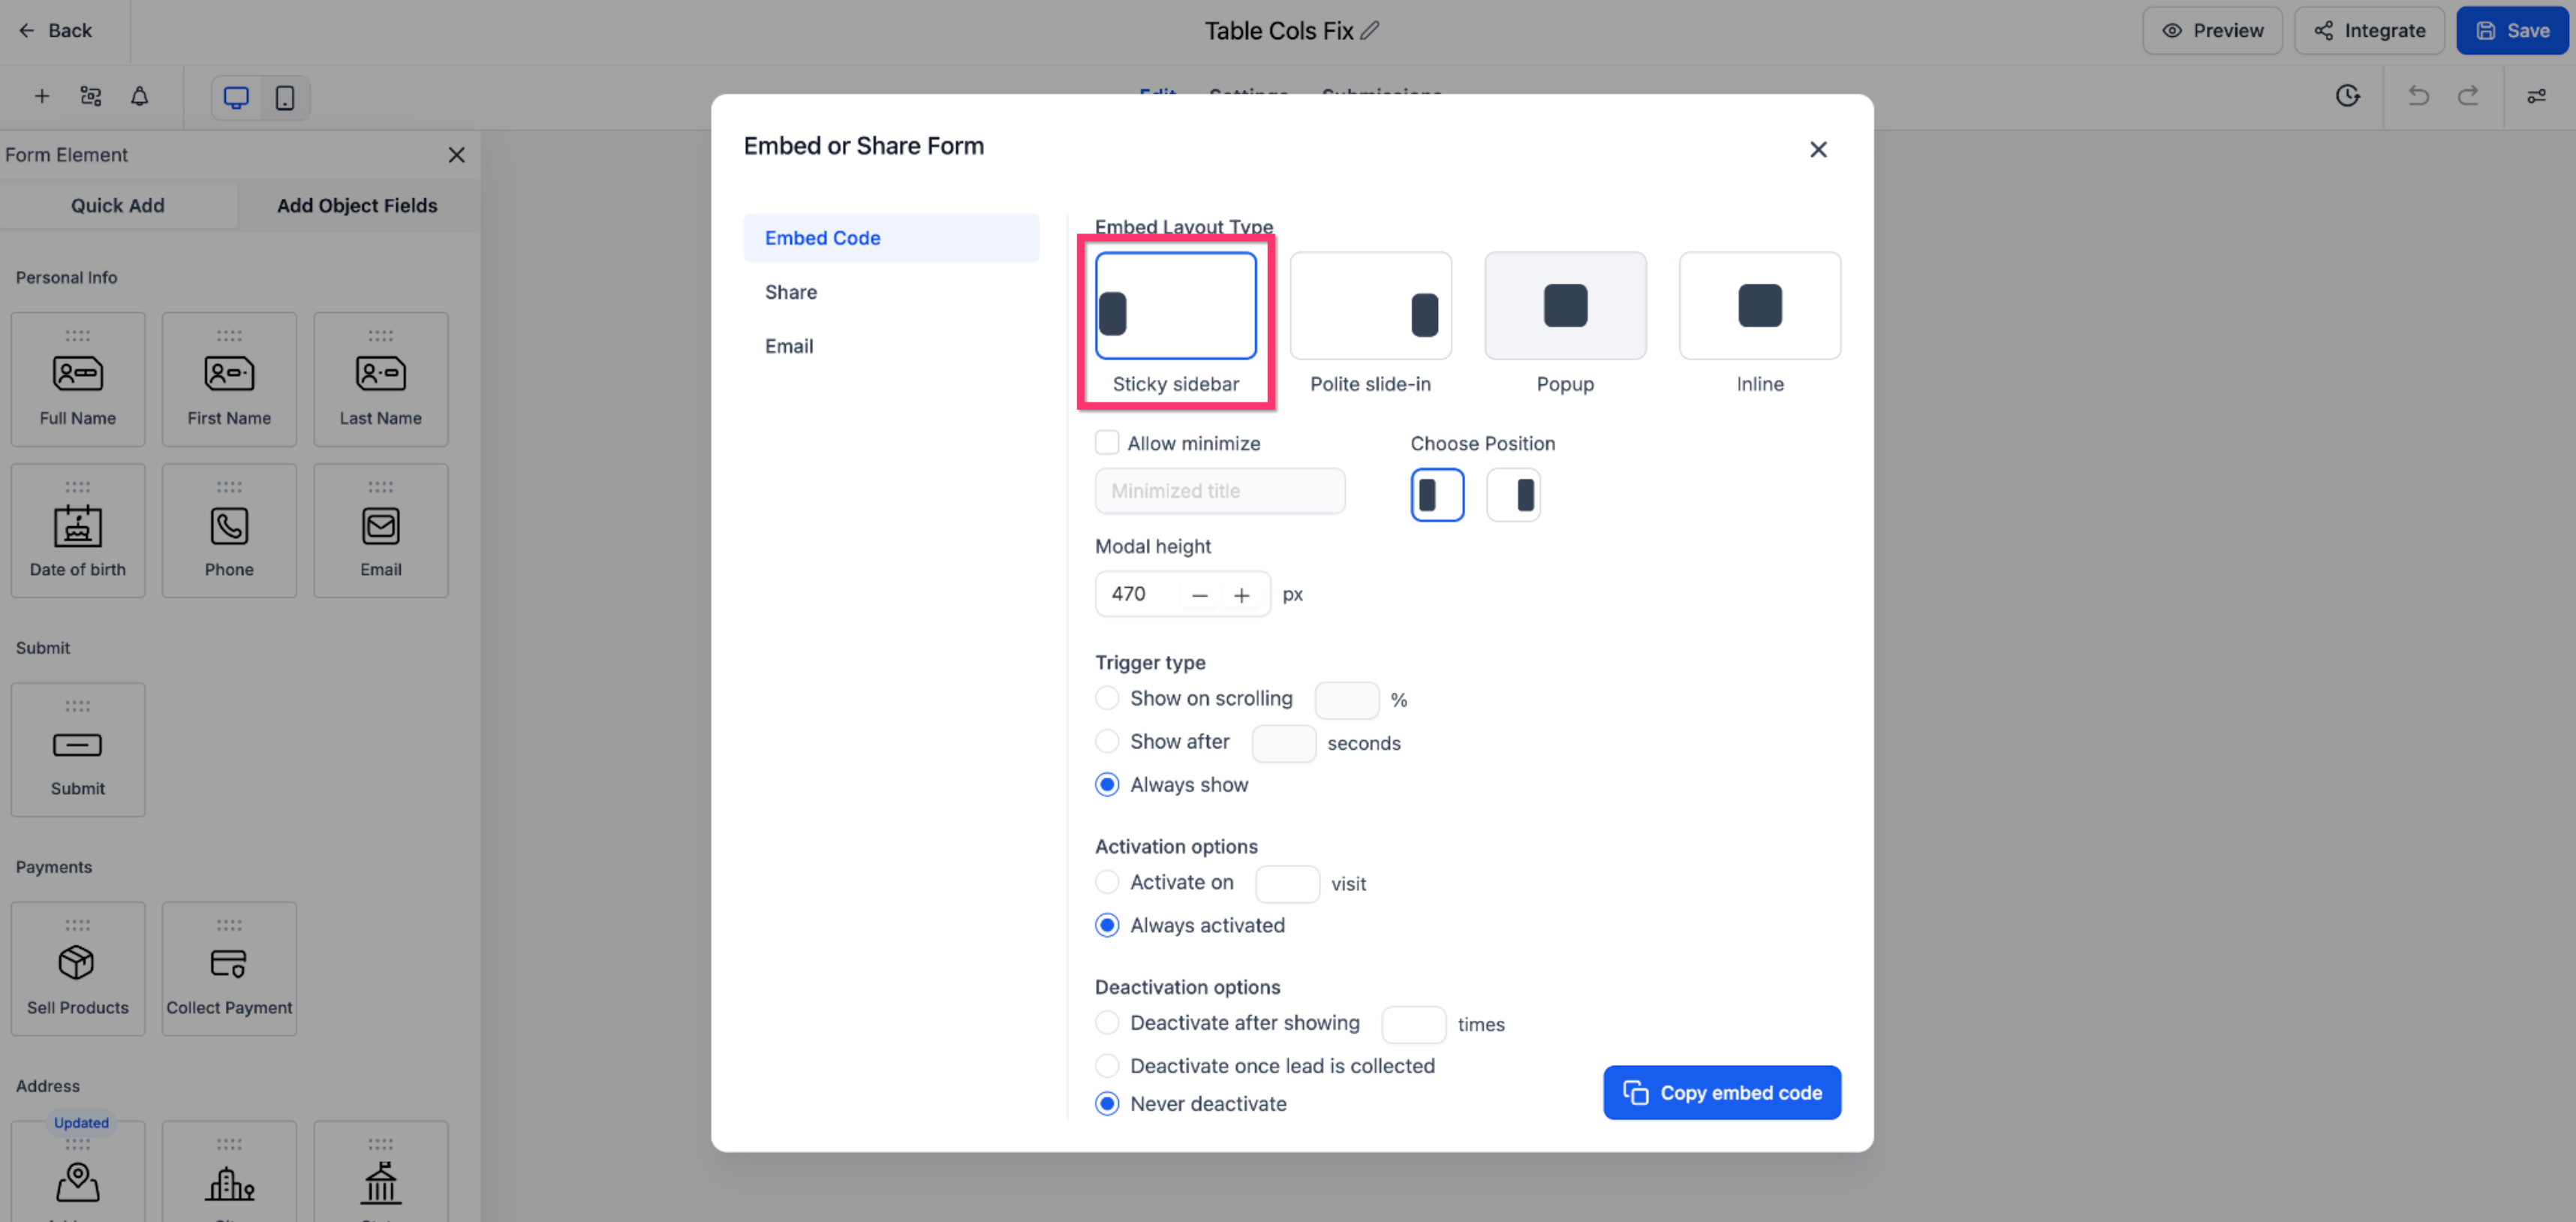
Here’s a step-by-step guide on how to use the entire feature shown in the screenshot, including all embed layout types, activation options, and deactivation options:
Step 2: Choose an Embed Layout Type
You can select how the form will appear on your website or funnel. The options include:
Sticky Sidebar - The form appears as a sticky element on the left or right of the screen, remaining visible as the user scrolls. This can be minimized or maximized as needed.
Maximized
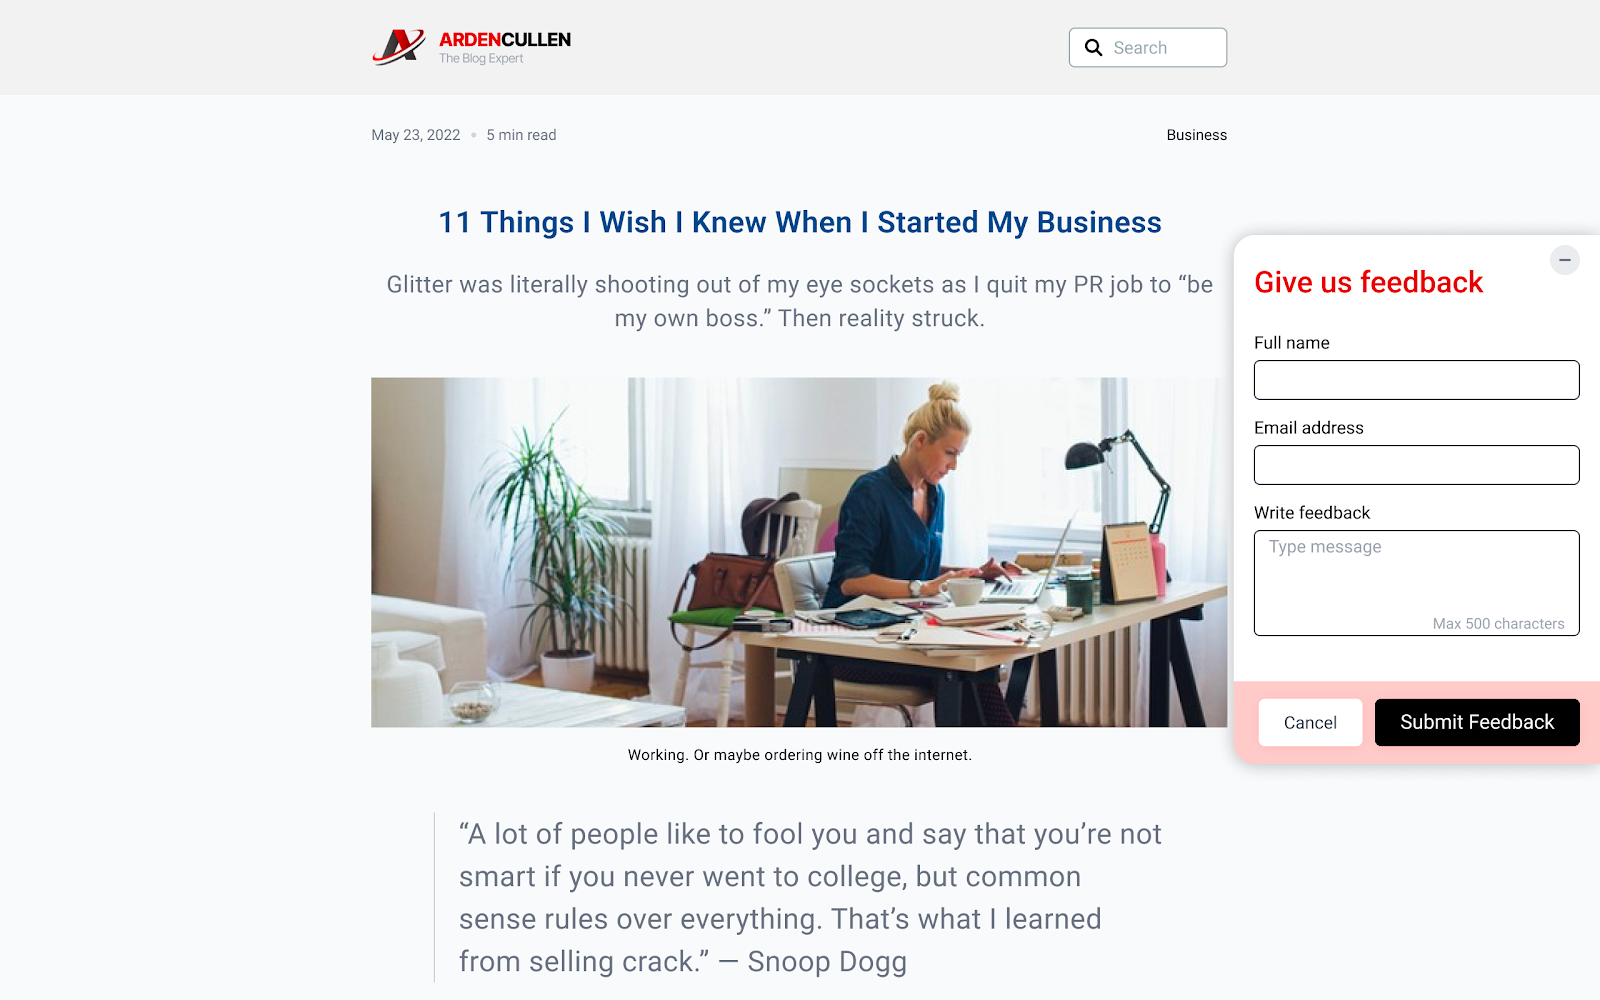
Minimized

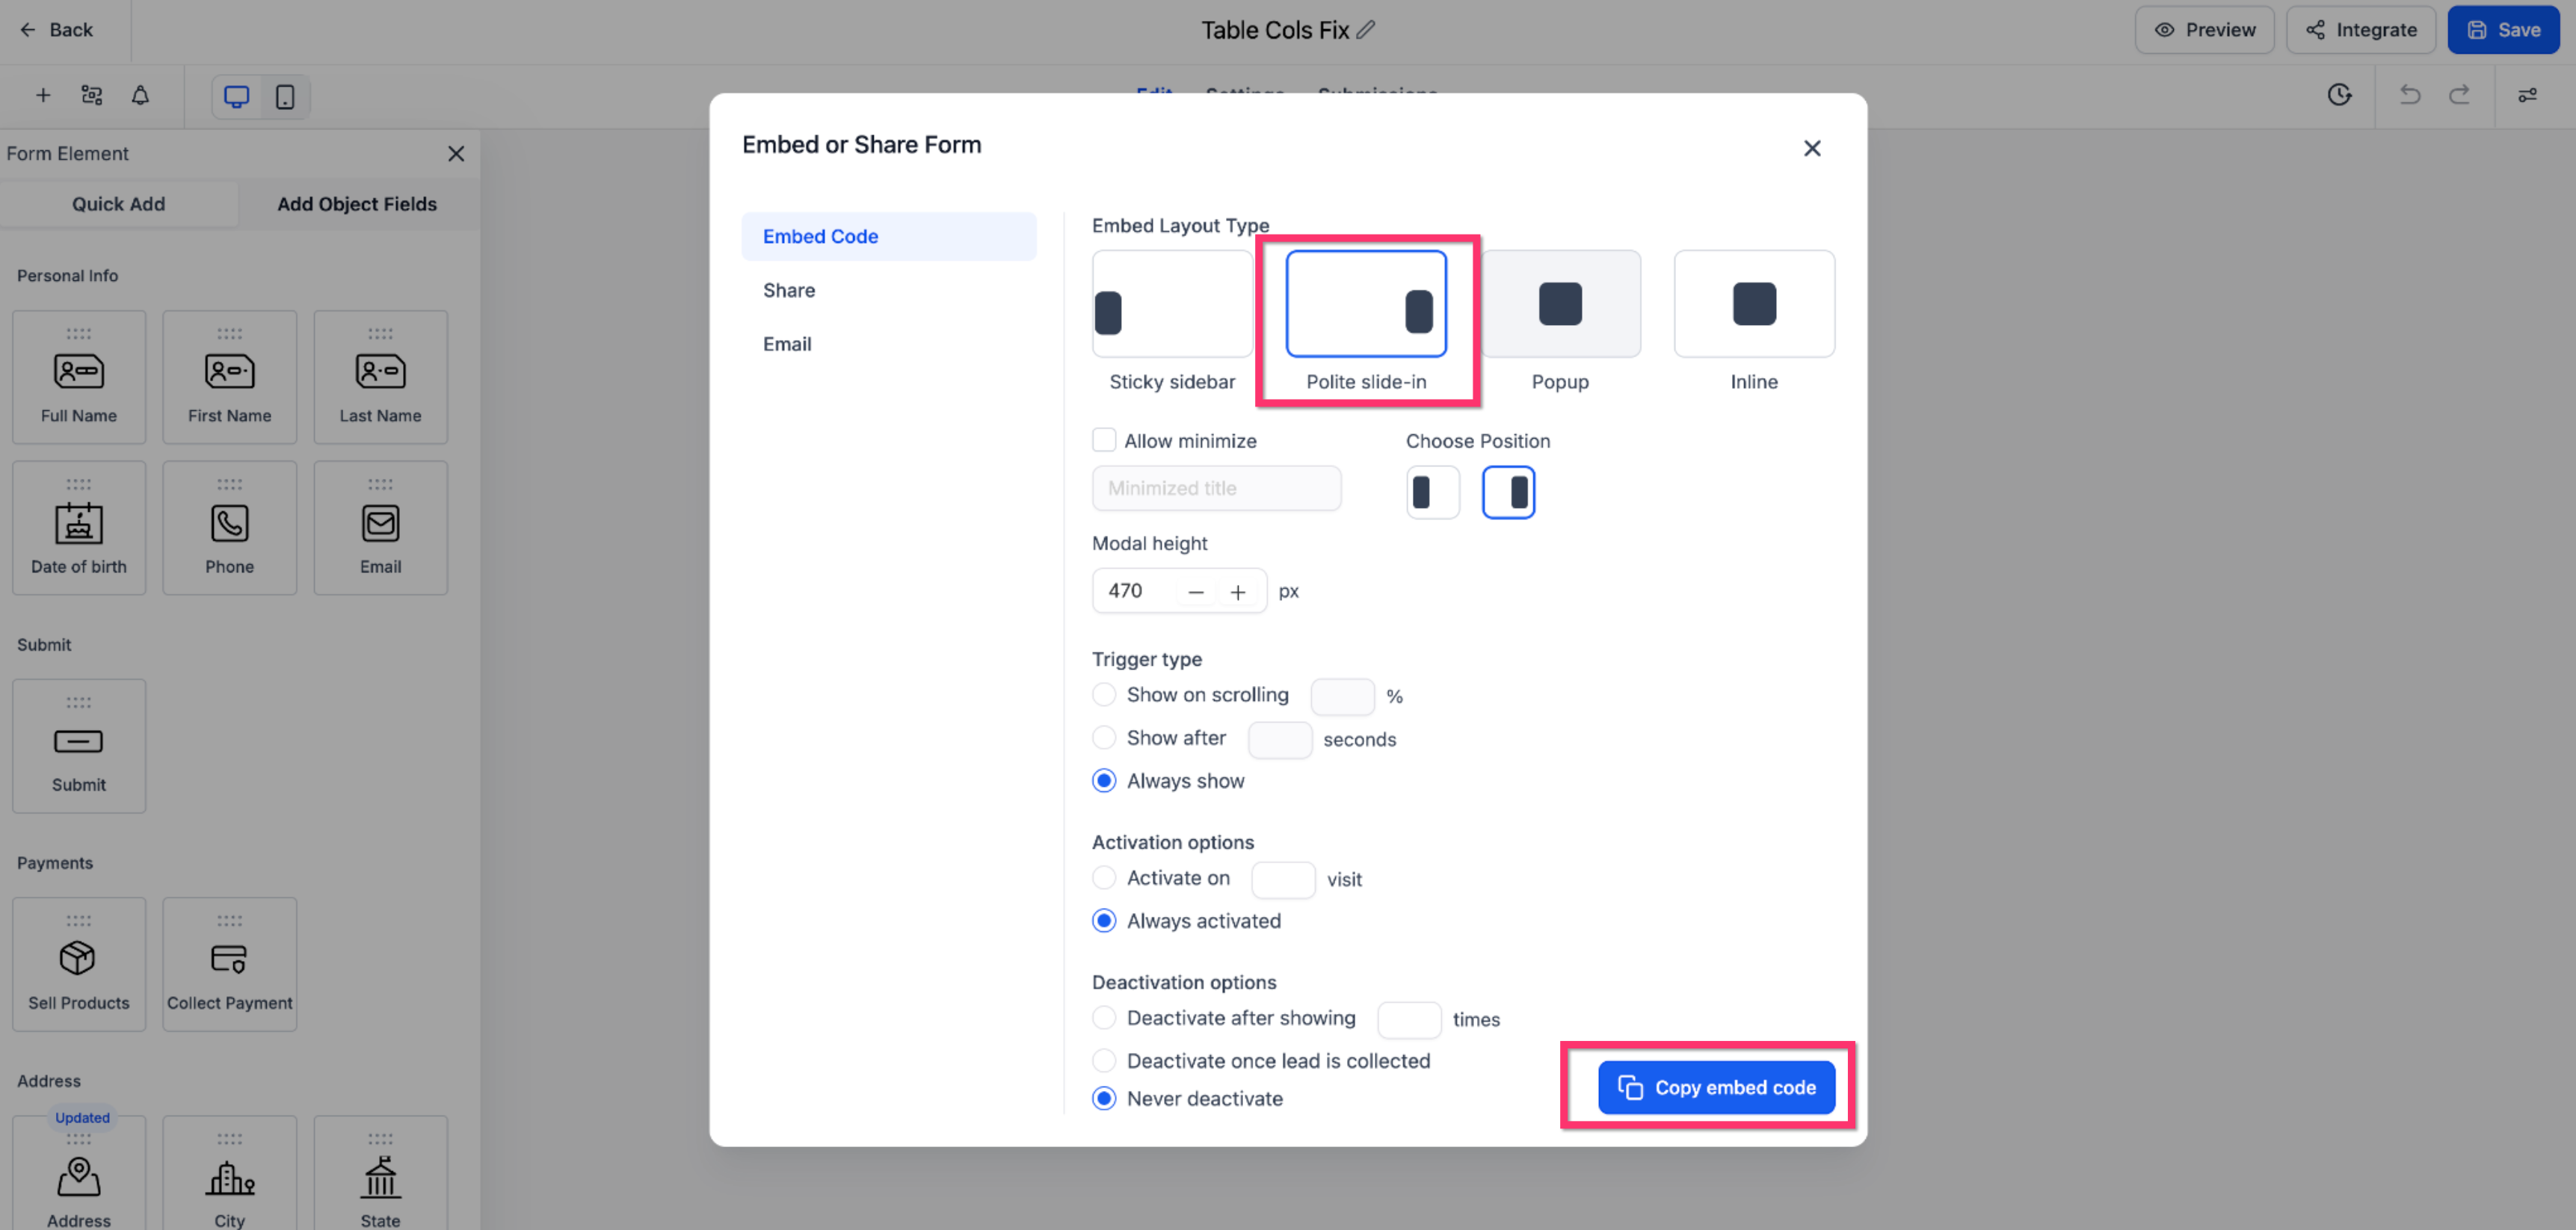
Polite Slide-In: The form slides in from the left or right side of the screen, subtly catching the user's attention. It can also be minimized to avoid disruption.
Maximized:
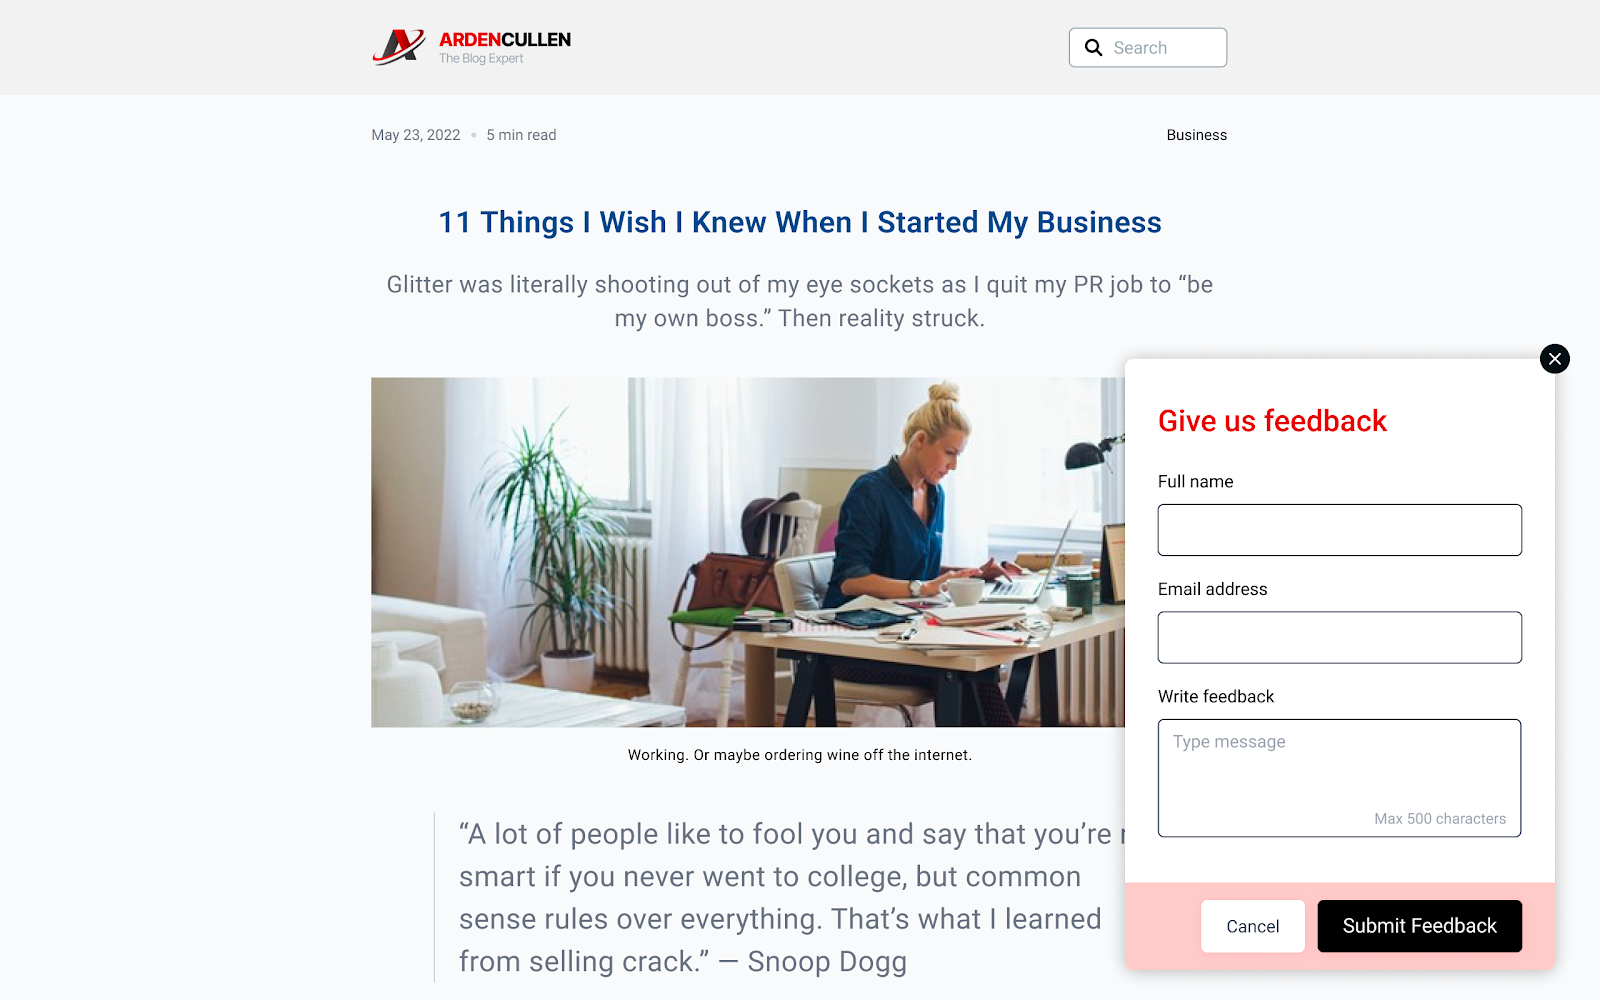
Minimized:

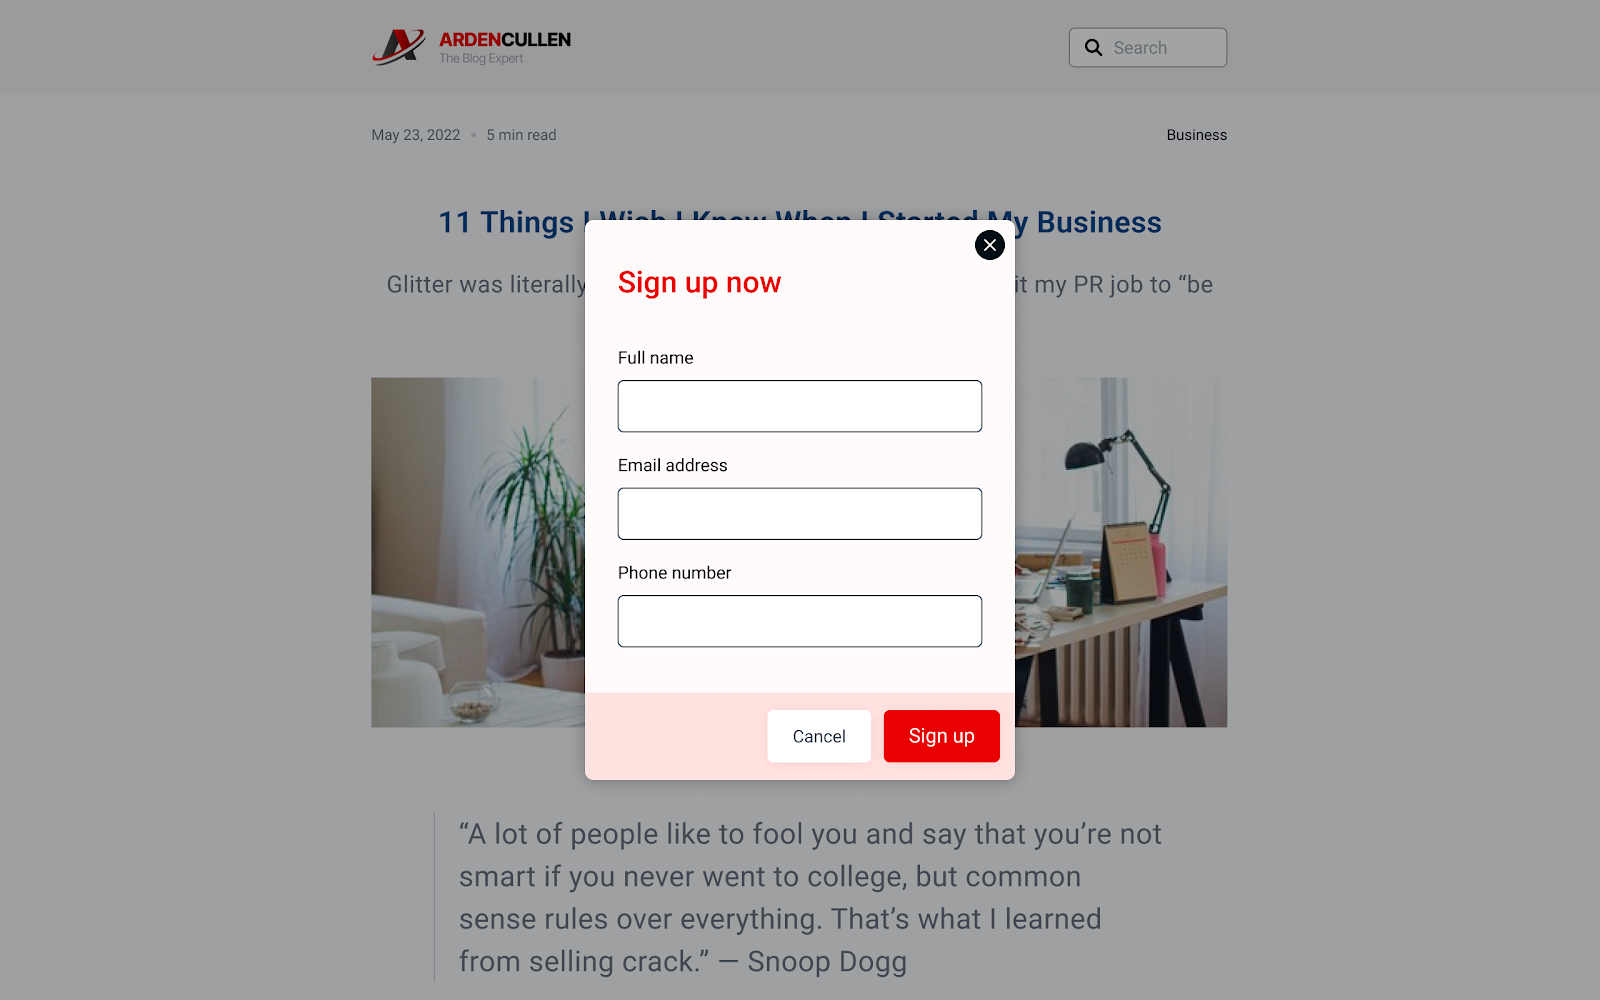
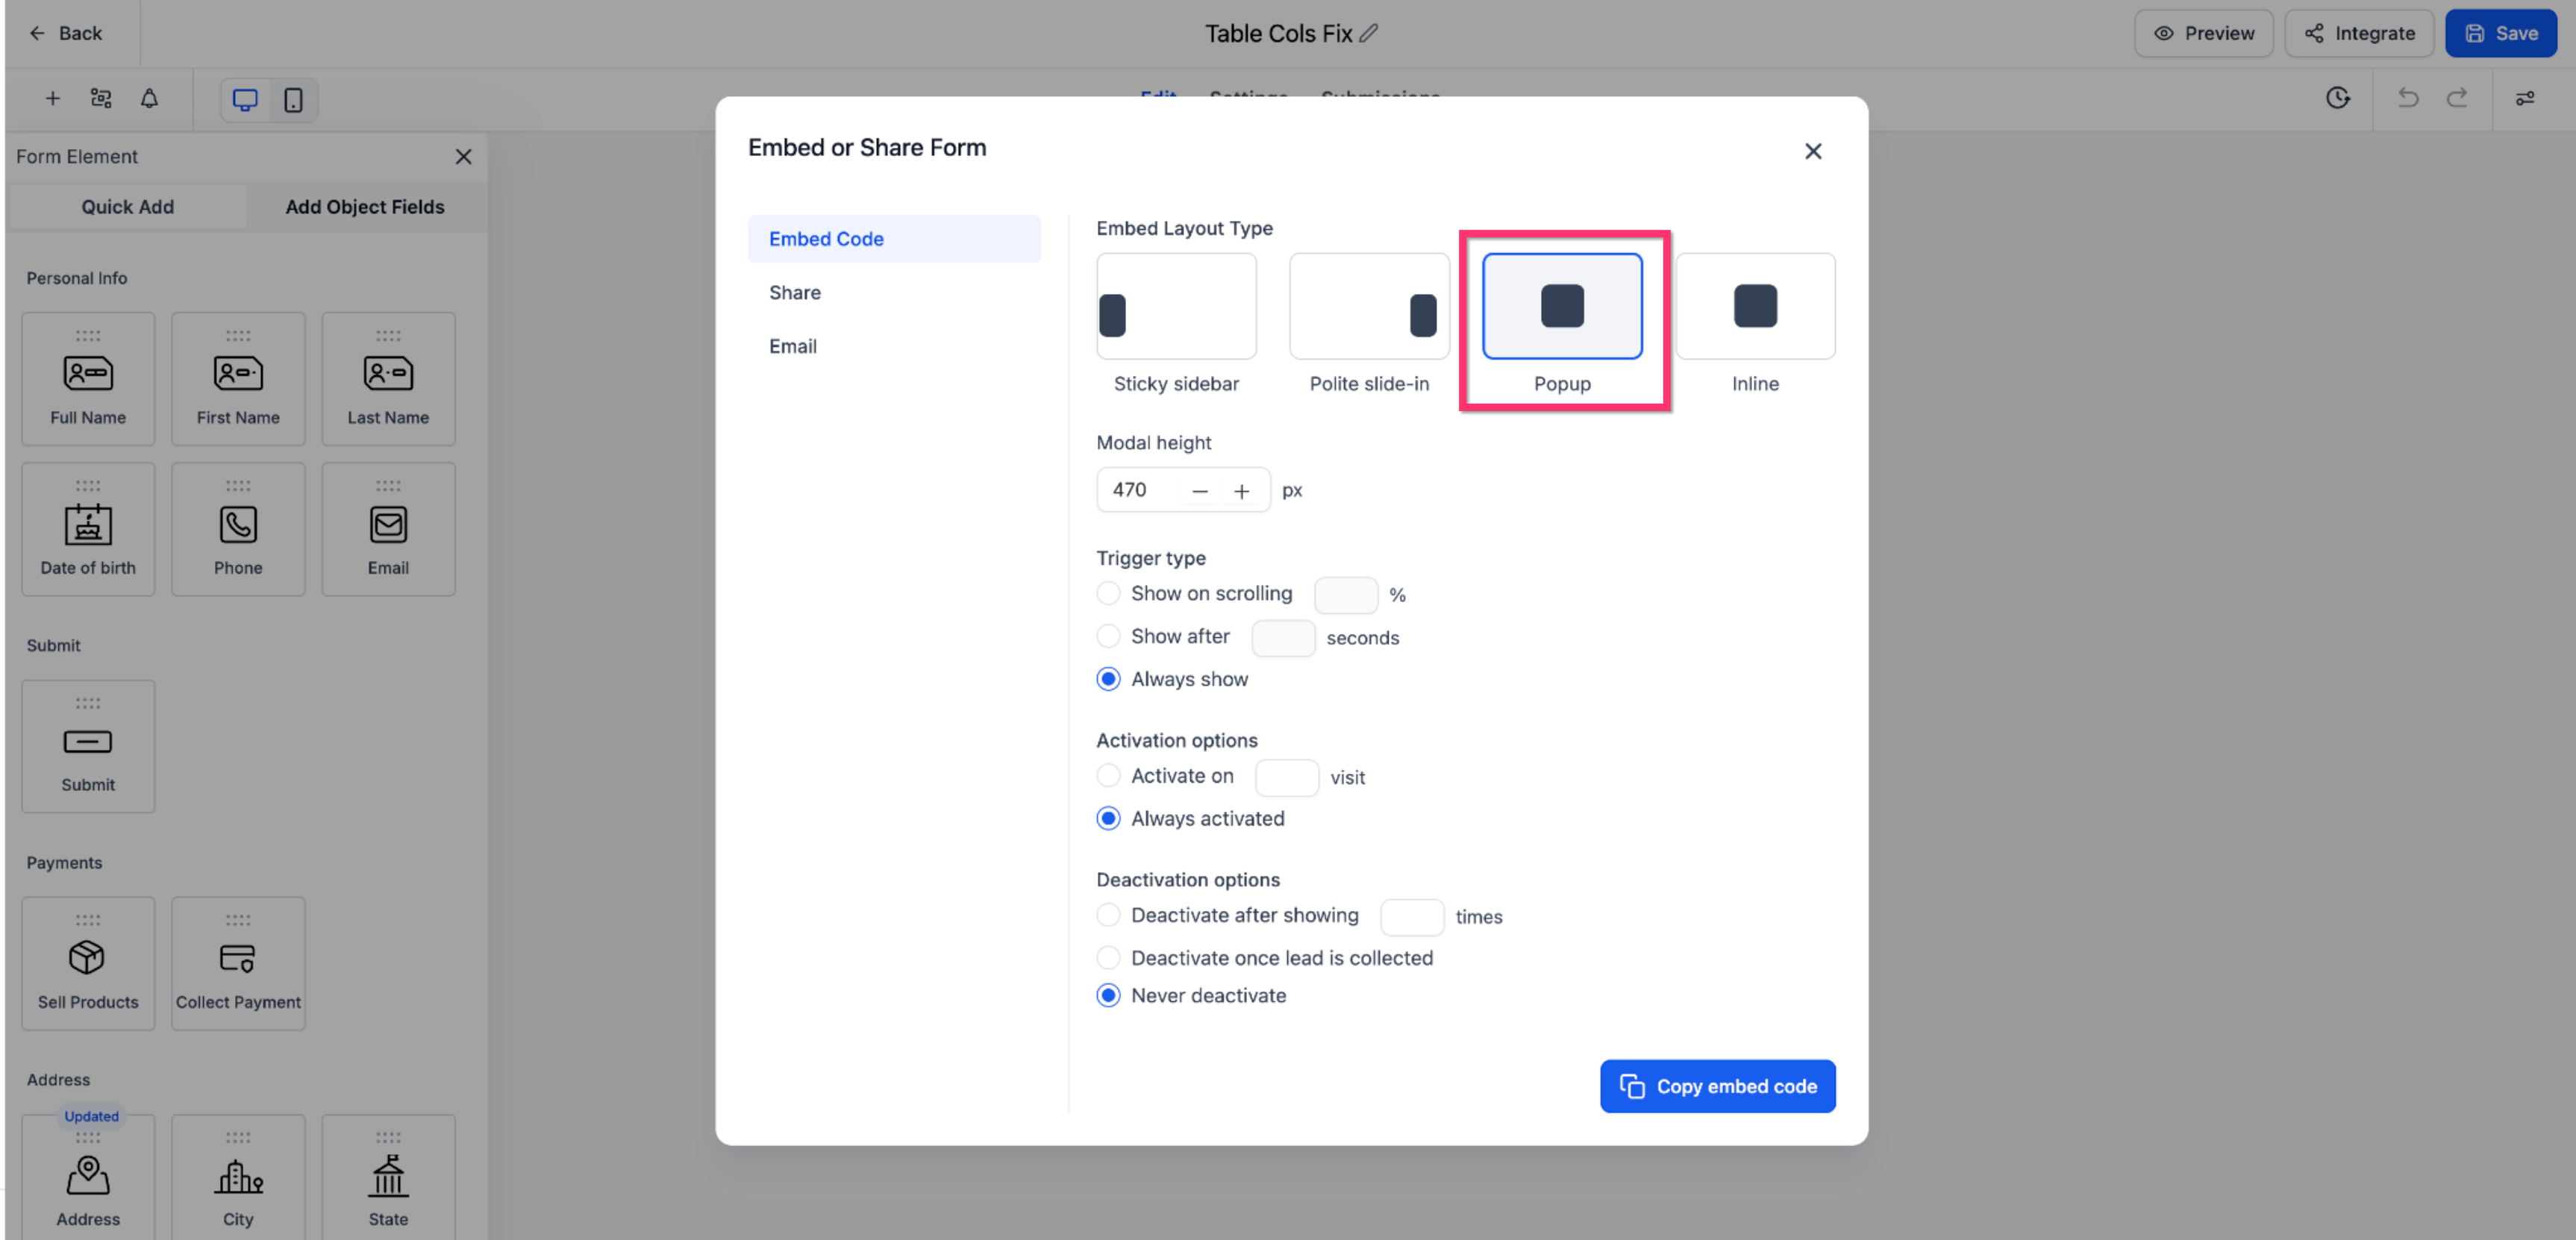
Popup - The form appears in a modal window that overlays the page content. It grabs immediate attention but requires dismissal to view the underlying content.
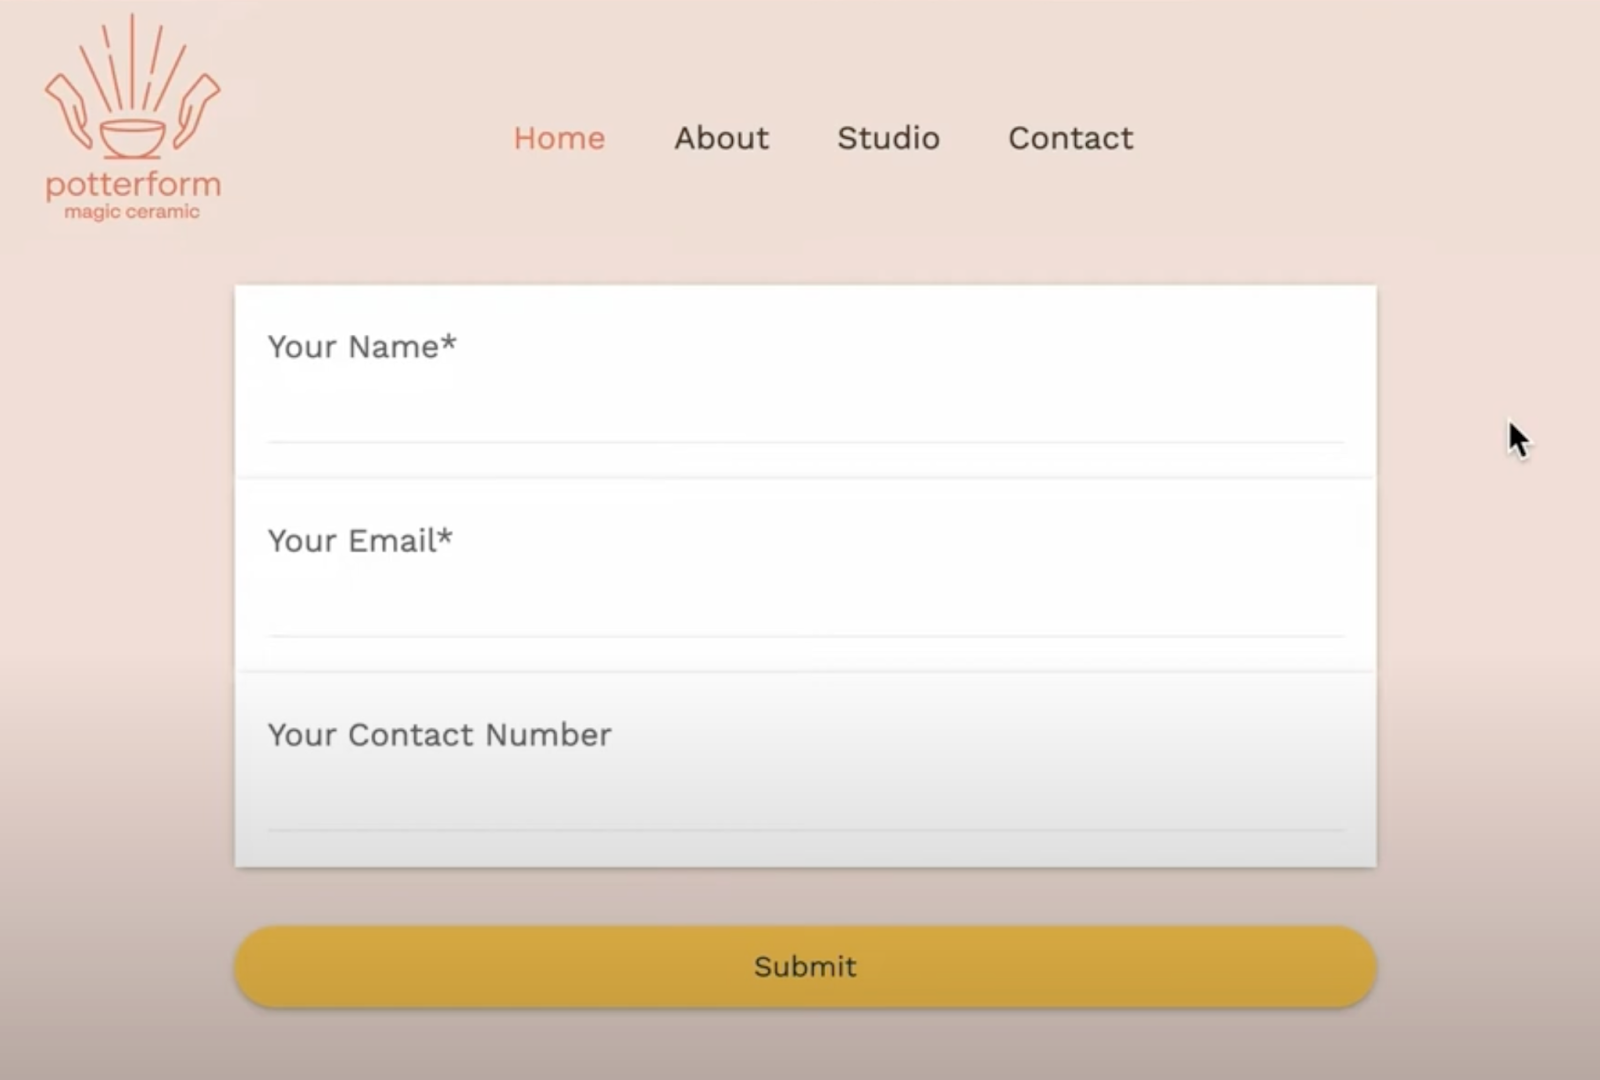
Inline: The form is embedded directly into the page content as a native element. It doesn’t interrupt the user experience.
Set a Custom Modal Height
Custom modal height gives you more control over how embedded forms appear on external pages. This helps prevent non-inline embeds from feeling oversized or overflowing on the host page while keeping existing embed behavior unchanged.
You can set a Modal height for these embed layout types:
- Popup
- Polite Slide-in
- Sticky Sidebar
The Inline layout does not show this option.
How to configure modal height
1. Open your form and click Integrate after the form finishes loading.
2. Select Embed Code.
3. Choose one of these layouts:
- Popup
- Polite Slide-in
- Sticky Sidebar
4. Enter your preferred height in the Modal height field.
5. Click Copy embed code and paste it on your website.
Important details
- The default modal height is 500 px
- The field accepts any whole number 1 or greater
- Existing embeds without this setting continue to work as before
- The field is hidden for Inline layouts
Step 3: Configure Trigger Options
Trigger options control when the form appears. Select one of the following:
Show on Scrolling [X]% → The form appears after the user scrolls a certain percentage of the page (e.g., 50%).
Show After [X] Seconds → The form appears after a delay (e.g., 5 seconds).
Always Show → The form is always visible and does not rely on user interaction.
Step 4: Set Activation Options
Define when the form should become active:
Activate on [X] Visit → The form is displayed only after the user has visited the page a set number of times (e.g., on their third visit).
Always Activated → The form remains active at all times.
Step 5: Set Deactivation Options
Decide when the form should stop being displayed:
Deactivate After Showing [X] Times → Stops displaying the form after it has been shown a specific number of times (e.g., 3 times).
Deactivate Once Lead Is Collected → The form deactivates automatically once the user submits their information.
Never Deactivate → The form remains active and visible indefinitely.
Step 6: Copy and Embed the Form
Click "Copy Embed Code" to get the HTML code for embedding the form into your website.
Paste this code into your website’s HTML wherever you want the form to appear.
Alternatively, click "Copy Form Link" to get a direct URL for the form.
Use this link in emails, social media, or other platforms where you want users to access the form.
FAQs
1. How do triggers and deactivation options work together?
Triggers determine when the form appears (e.g., after a delay or scrolling). Deactivation Options control when the form stops appearing (e.g., after a specific number of displays or after a lead is collected). Both can work simultaneously to create a dynamic user experience.
2. Do I need to update existing embed codes for the new features to work?
Yes, to use the new embed options (e.g., triggers, deactivation), you need to update the integration by generating a new embed code from the "Integrate Form" section and replacing the old code on your site.
3. Can embedded forms work dynamically if I change my options?
Embed codes are static once they are placed on a website. This means that any changes made to the form require generating and replacing the embed code with the updated version for the changes to take effect.