This article provides a step-by-step guide to setting up Conversation AI V3 using the Guided Form approach in SourCherry. With the Guided Form method, you can create bots without writing prompts—just fill out a simple form, define your objectives, and let the system handle the logic. It’s perfect for quickly building effective, on-brand AI conversations.
TABLE OF CONTENTS
What is the Guided Form Bot?
The Guided Form Bot is a user-friendly setup option within Conversation AI that removes the need for manual prompt engineering. Instead, it walks you through creating a bot using a structured form. You define key goals—like collecting contact details or answering FAQs—and the system builds a logic-driven, objective-based conversation flow behind the scenes.
Key Benefits of the Guided Form Bot
Simpler setup: Build a Conversation AI bot by completing guided fields instead of writing detailed prompts from scratch.
Structured conversations: Define objectives and questions so the bot knows what information to collect and what goal to complete.
Better consistency: Keep bot behavior aligned across conversations by using clear setup fields, fallback messages, and additional instructions.
Improved lead qualification: Ask targeted questions that help identify contact needs, urgency, budget, service interest, or appointment readiness.
Action-based automation: Configure actions such as collecting contact details, triggering workflows, or helping contacts move toward booking.
Easier bot updates: Edit objectives, instructions, questions, or actions as your business process changes.
Reduced prompt complexity: Give the bot clear direction without needing to understand advanced AI prompting techniques.
How to Set Up the Guided Form Bot
Proper setup ensures the bot collects the right information, follows the intended conversation path, and takes the correct action after each objective is completed.
Step 1: Open Conversation AI
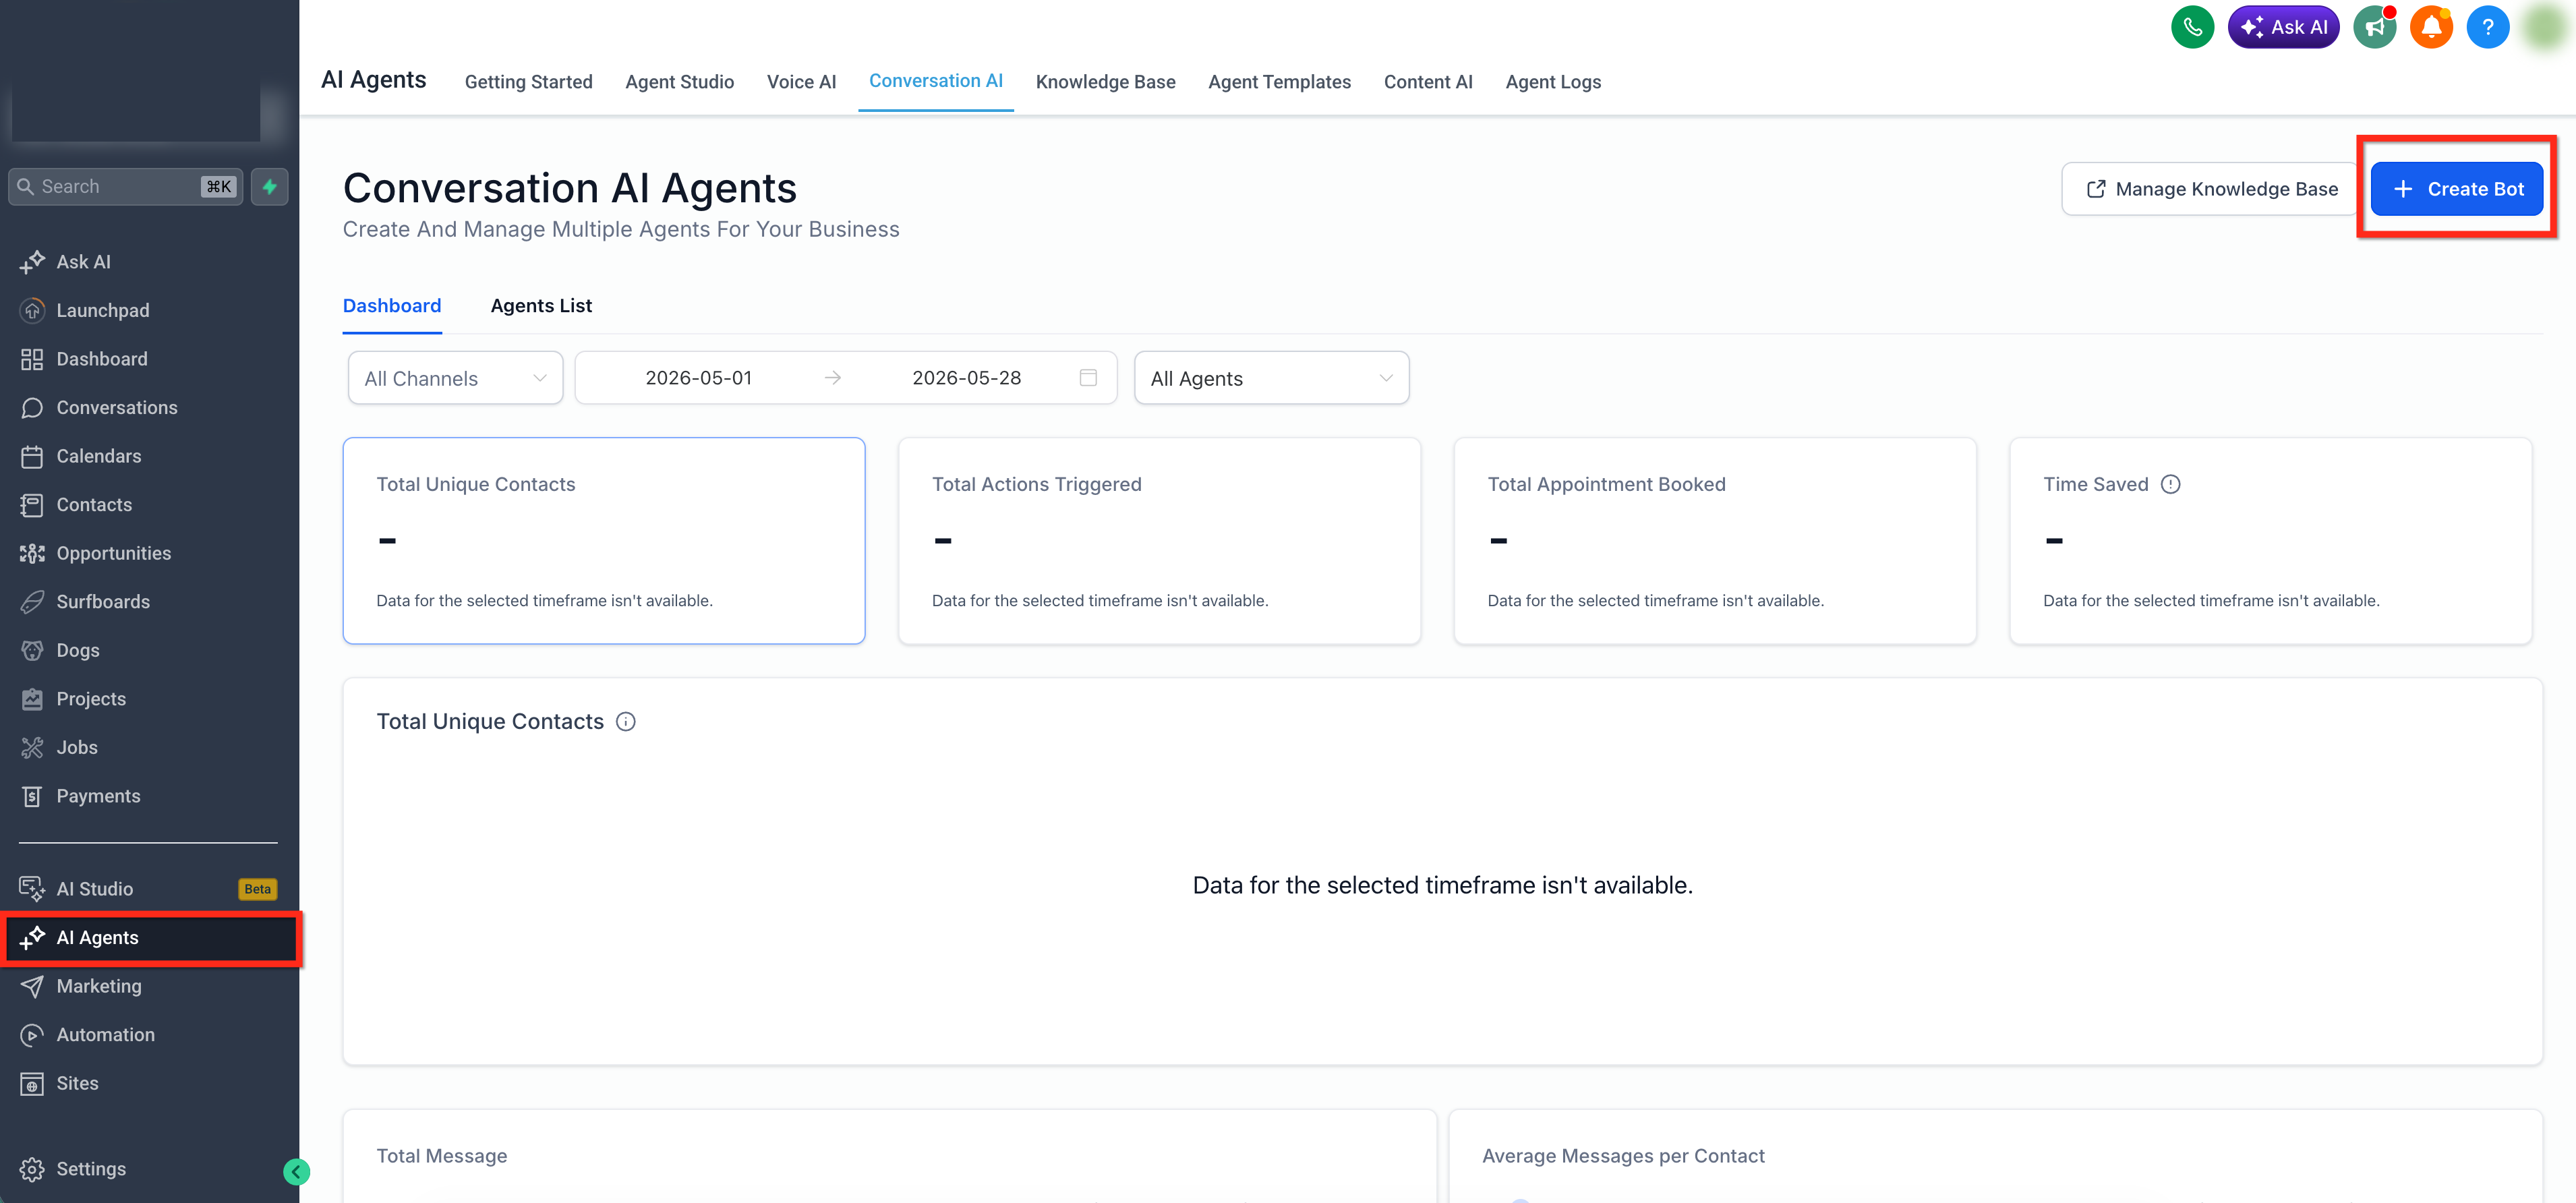
Navigate to AI Agents in the left menu, then select the Conversation AI tab. Click + Create Bot in the upper-right corner to start creating a new Conversation AI agent.
Step 2: Select Guided Form Based Setup
Choose Guided Form Based Setup as the setup method.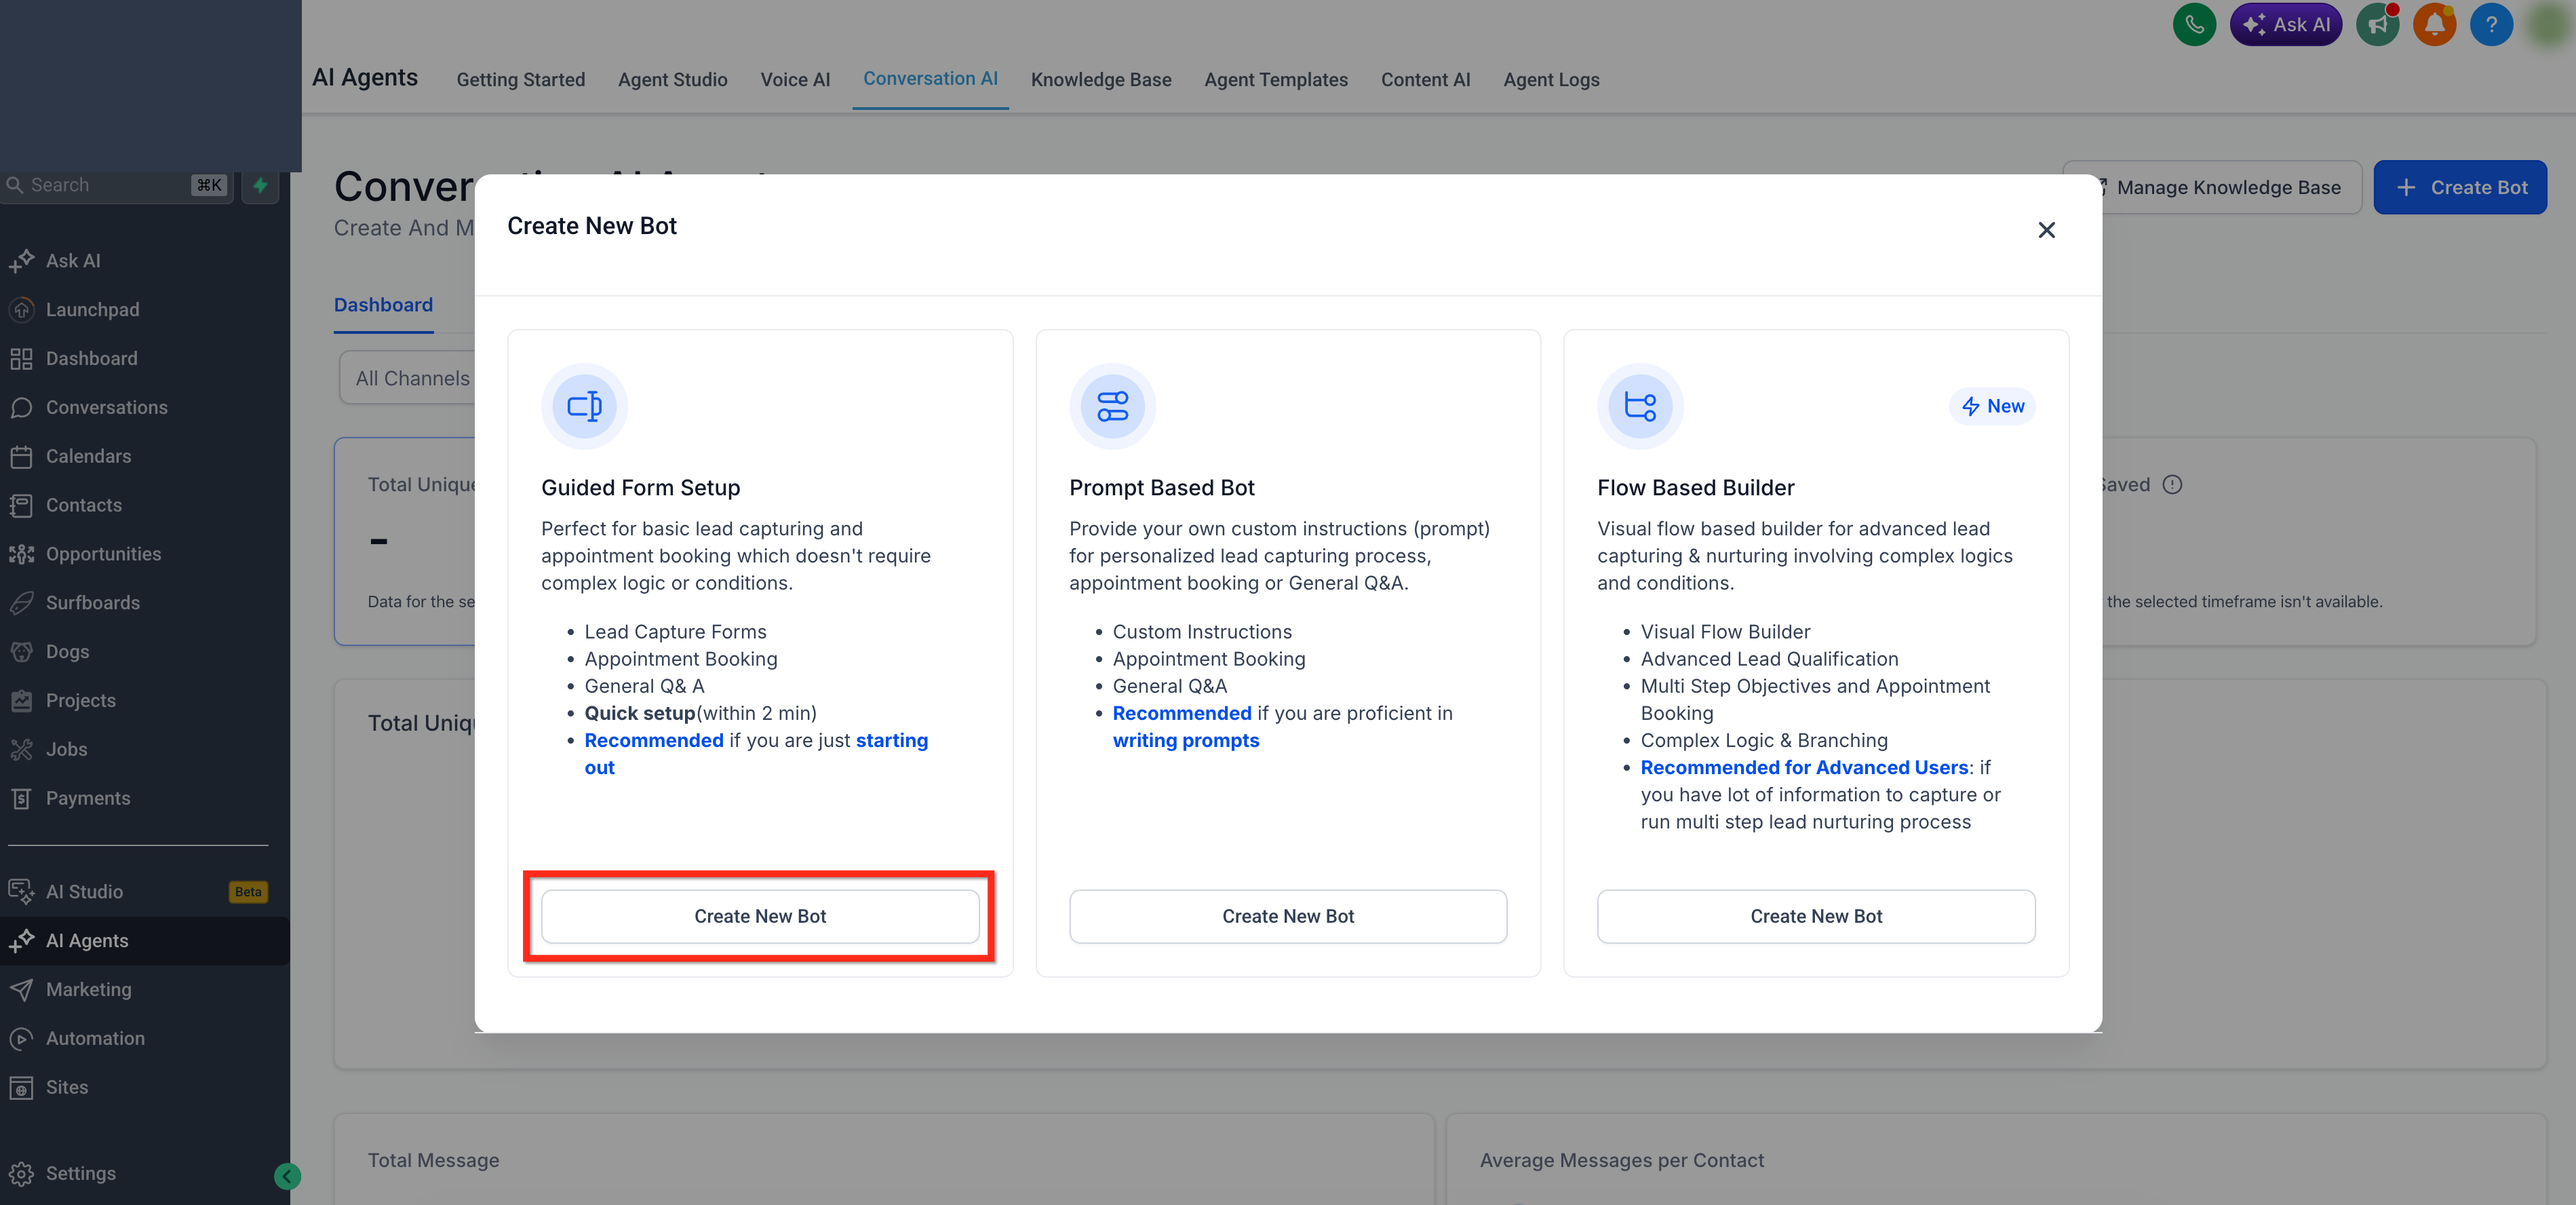
Step 3: Select Type of Bot
Select the type of bot you would like to create (General Q&A or Appointment Booking) then click Continue.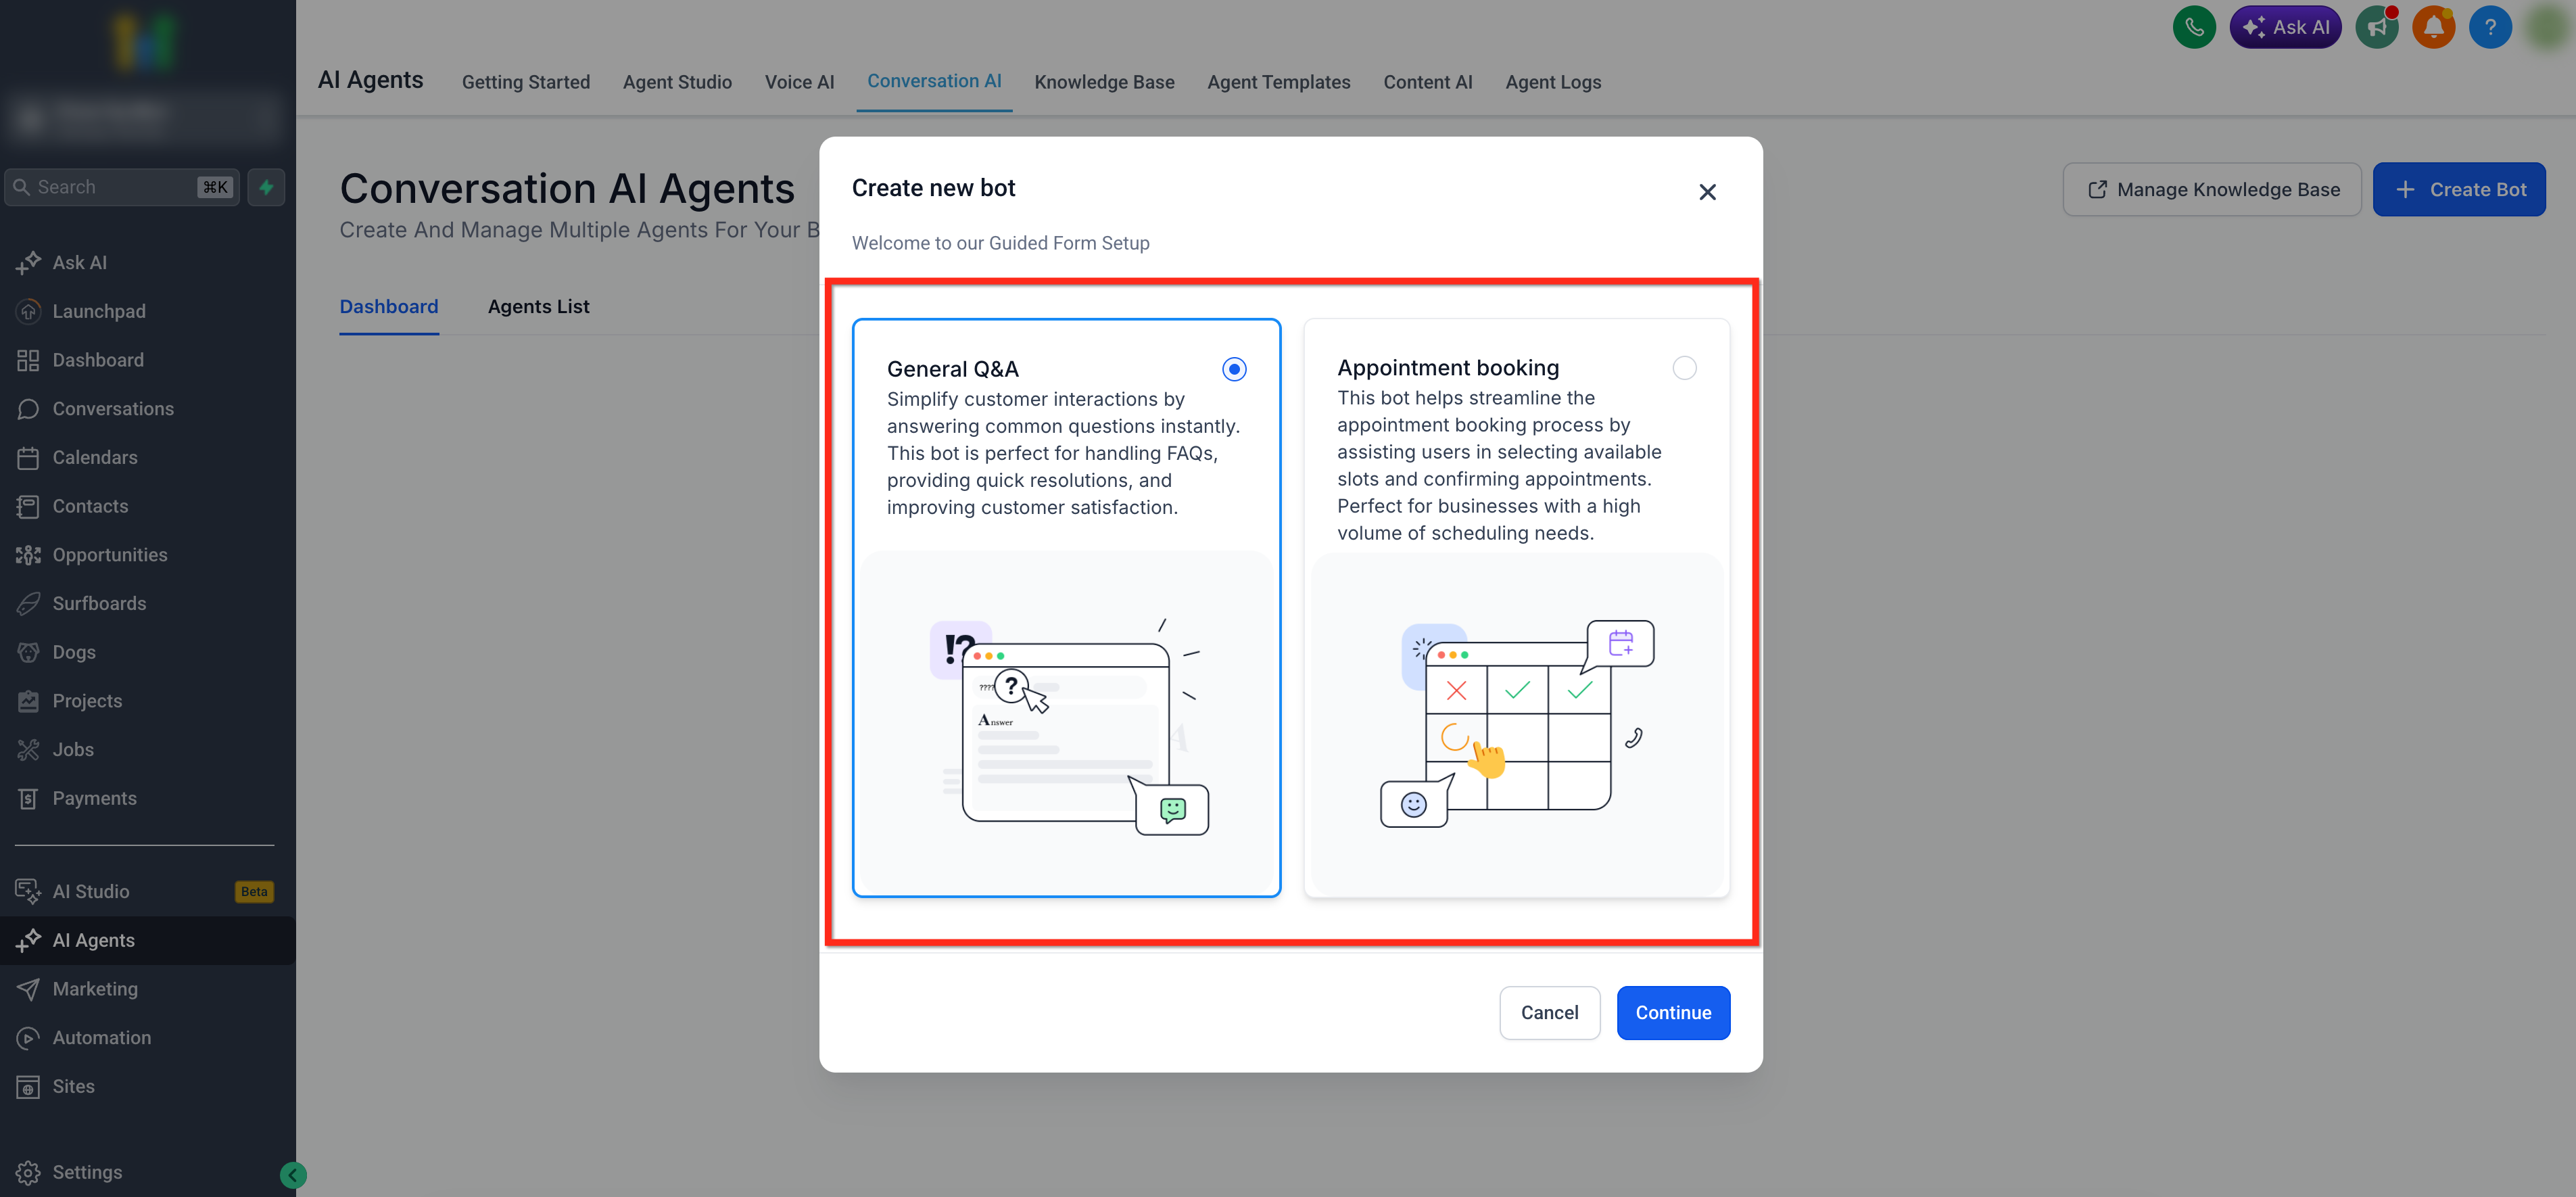
Step 4: Select Brand Voice
Choose a Brand Voice from the dropdown or create a new Brand Voice before continuing. After selecting a Brand Voice, you can optionally click Edit to adjust the voice settings.
For more info on creating a brand voice, see: Create Your Brand Voice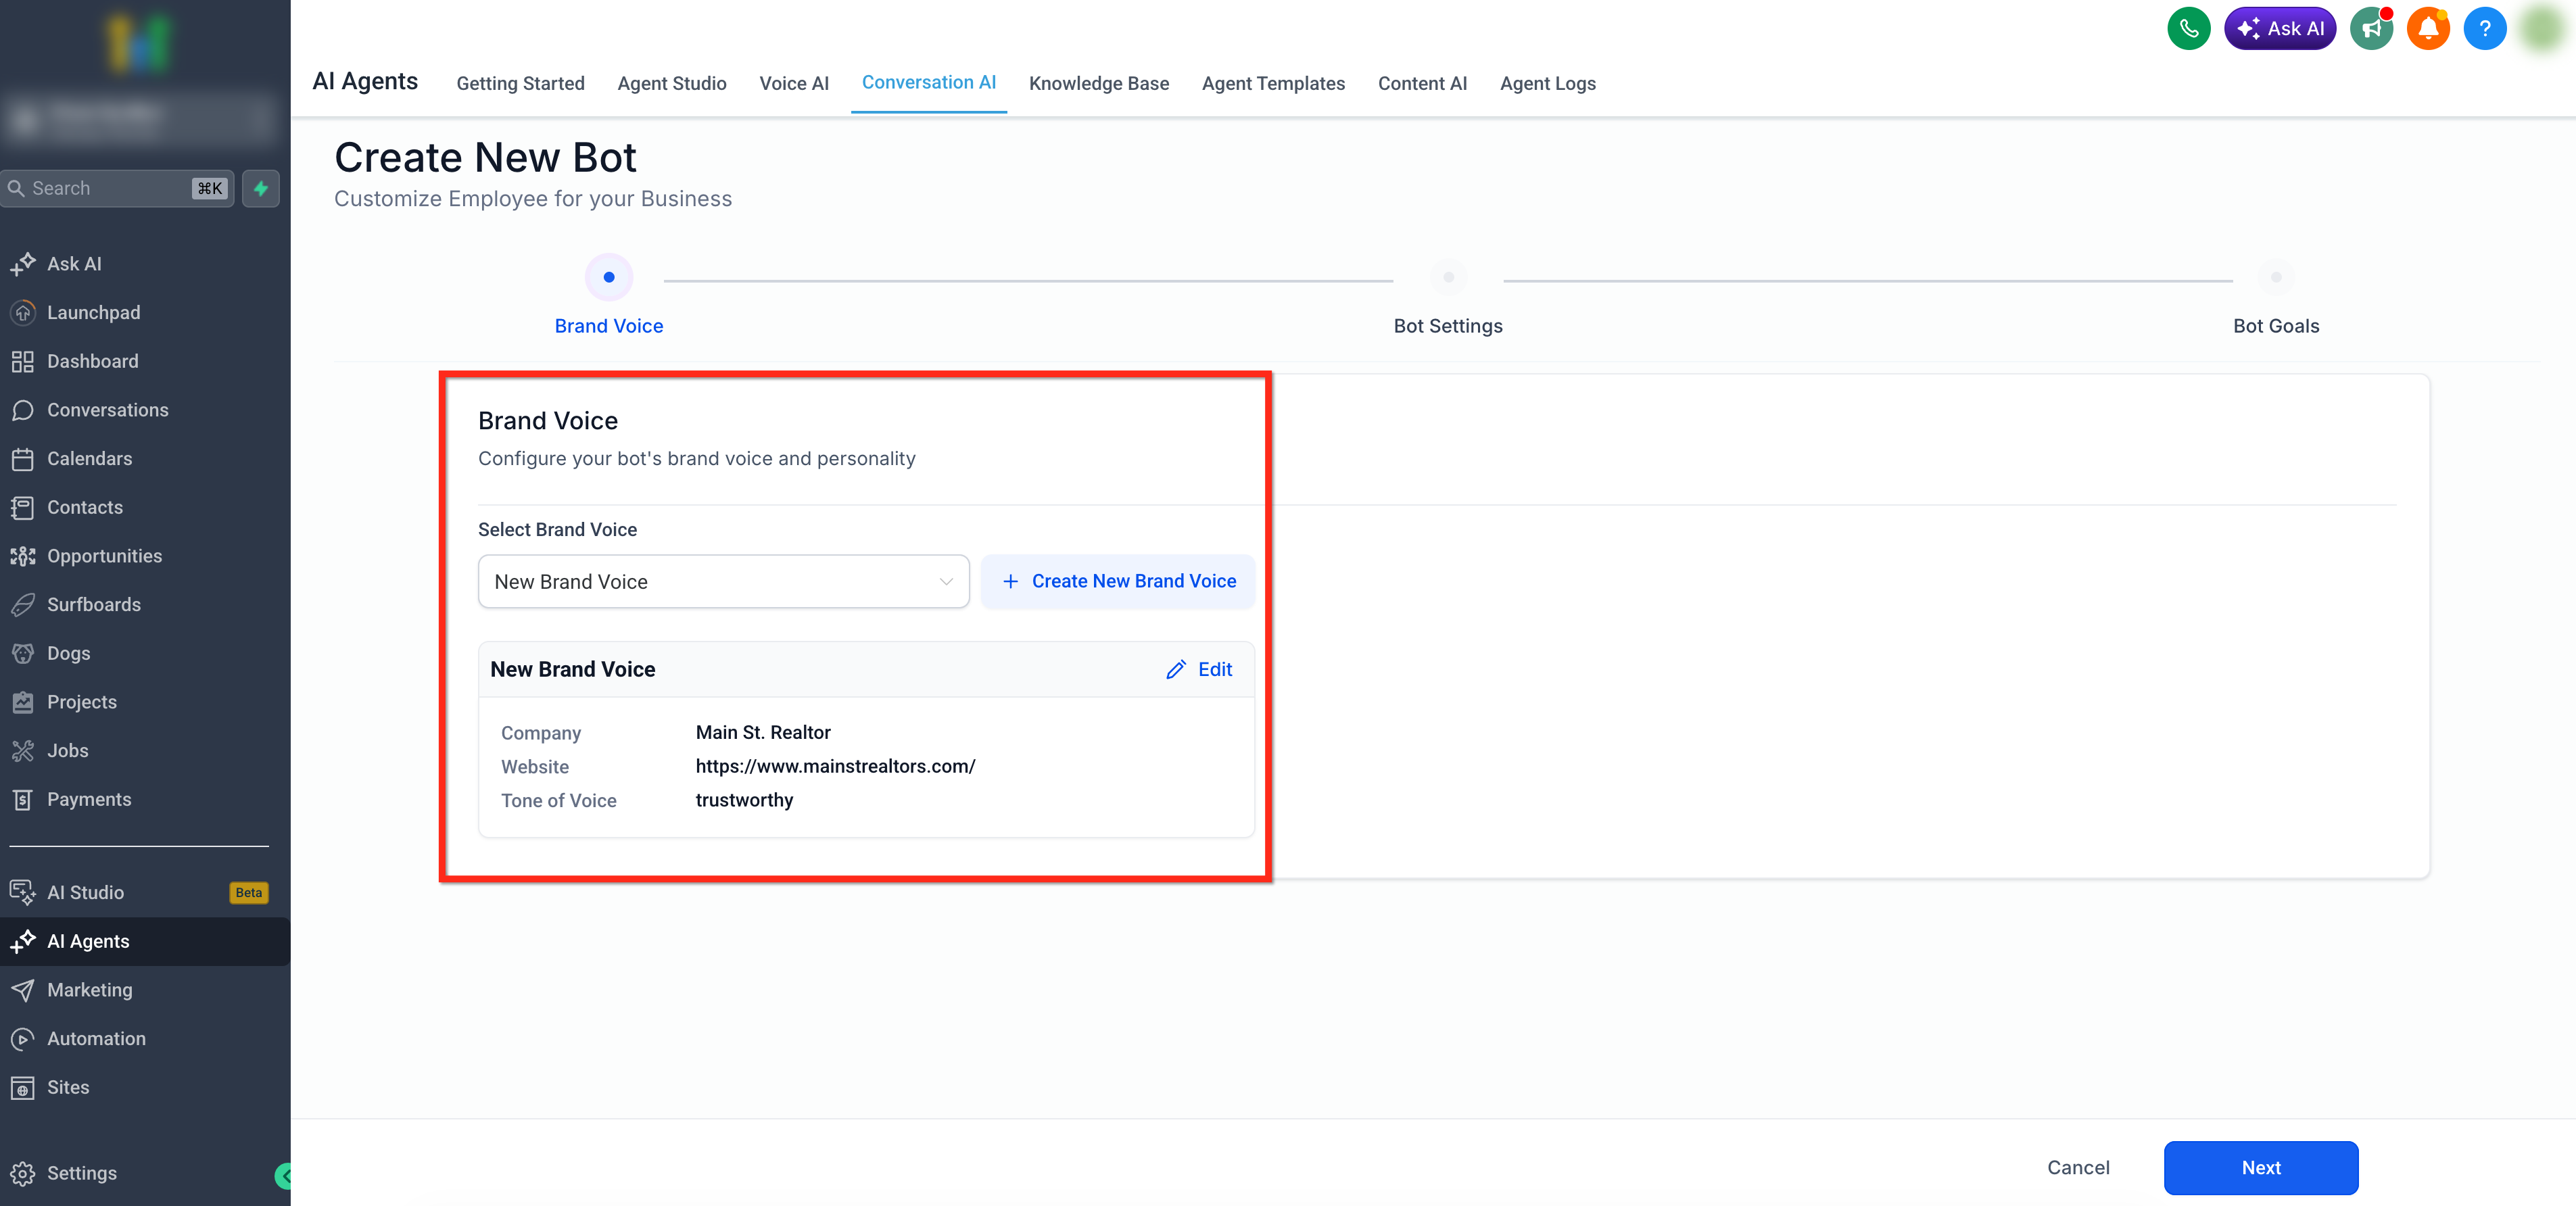
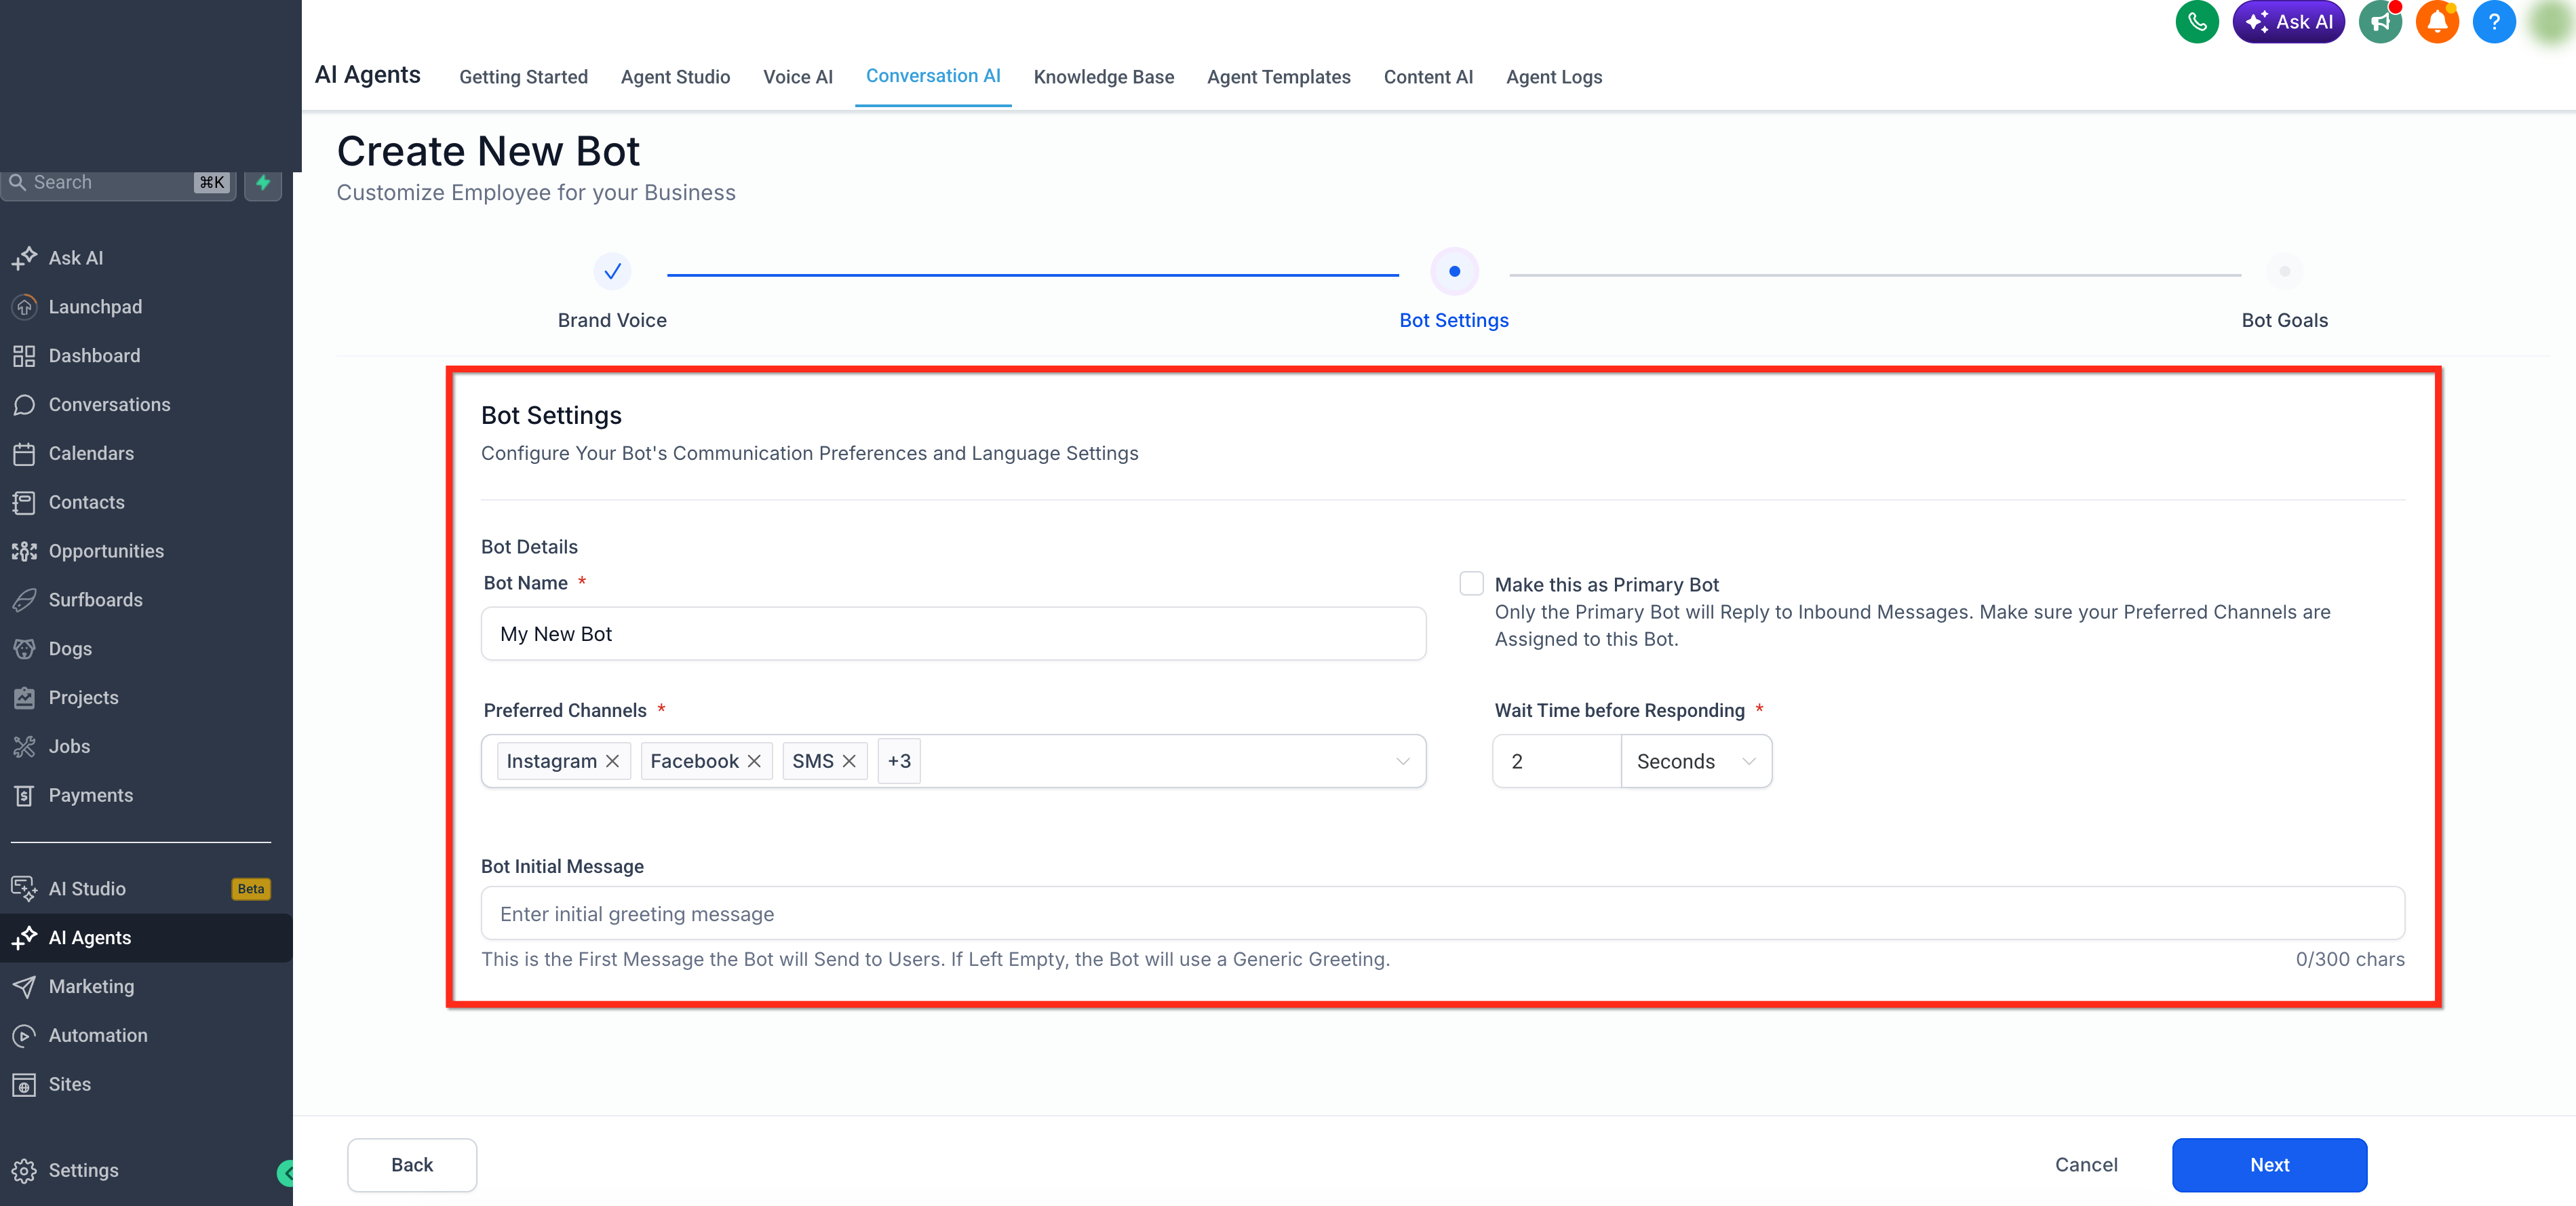
Step 5: Bot Settings
Configure Your Bot's Communication Preferences and Language Settings.
- Bot Name: Give your bot a friendly identifier.
- Preferred Channels: Select the channels where the bot should respond, such as Instagram, Facebook, SMS, and any other available connected channels.
- Bot Initial Message: This is the first message the bot will send to users. If left empty, the bot will use a generic greeting.
- Make this as Primary Bot: Enable this option if this bot should reply to inbound messages as the Primary Bot. Make sure the preferred channels are assigned to this bot.
- Wait Time Before Responding: Set how long the bot should wait before replying, such as 2 seconds.
Click Next after the Bot Settings are complete.
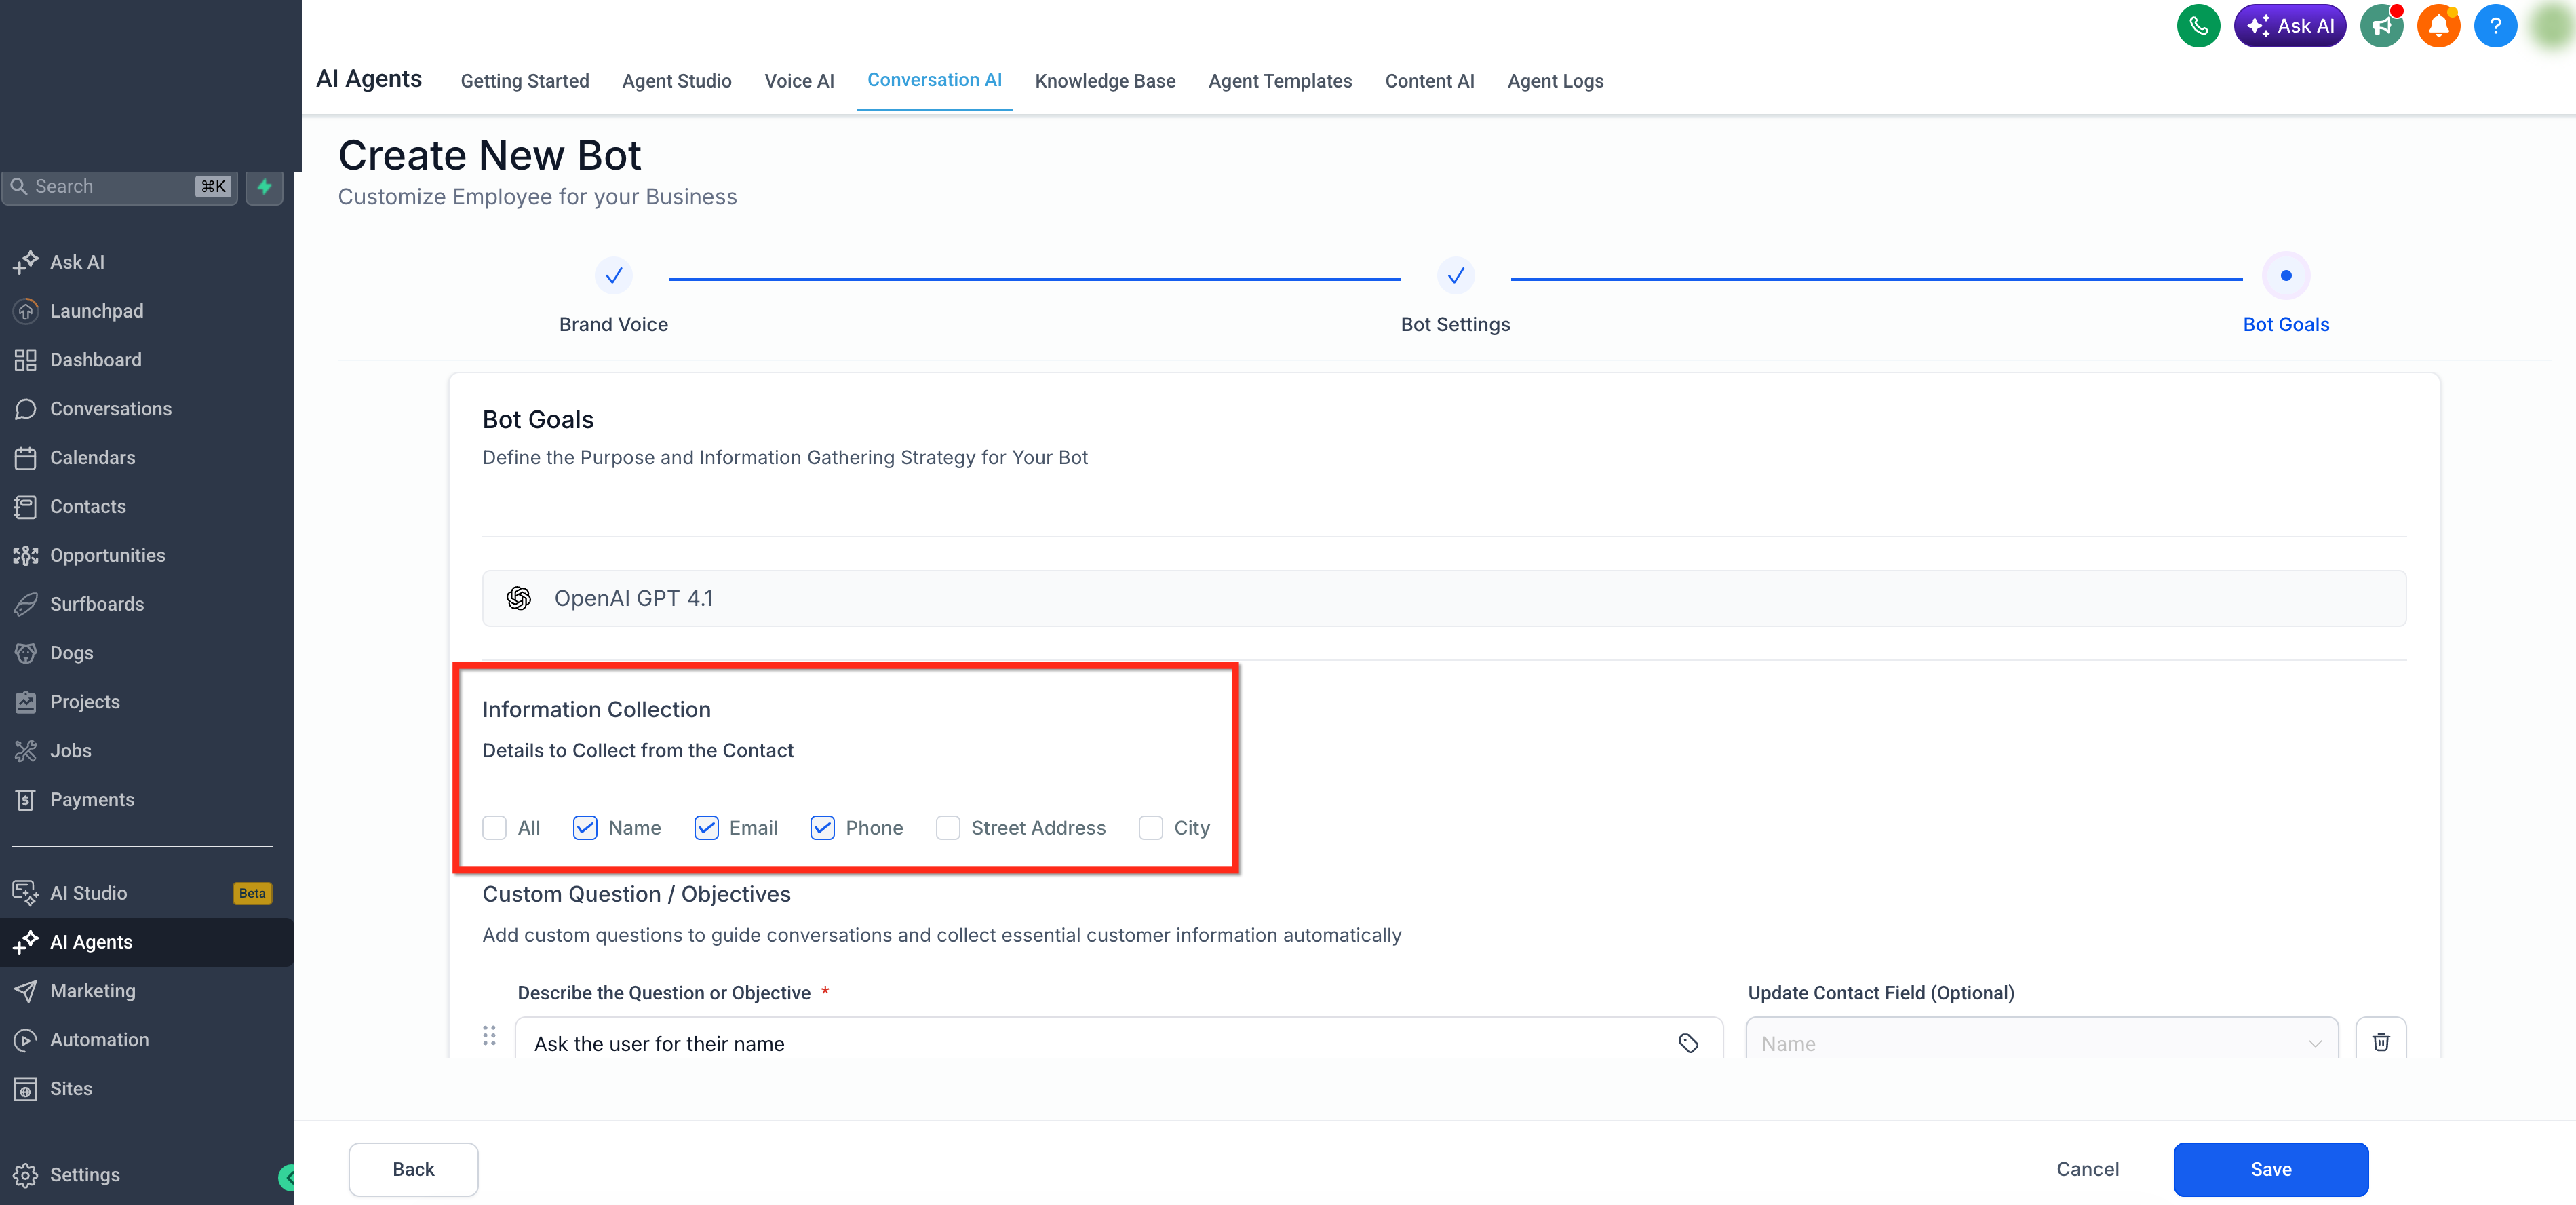
Step 6: Information Collection
Choose the contact details the bot should collect. Available options shown in the setup include Name, Email, Phone, Street Address, and City.
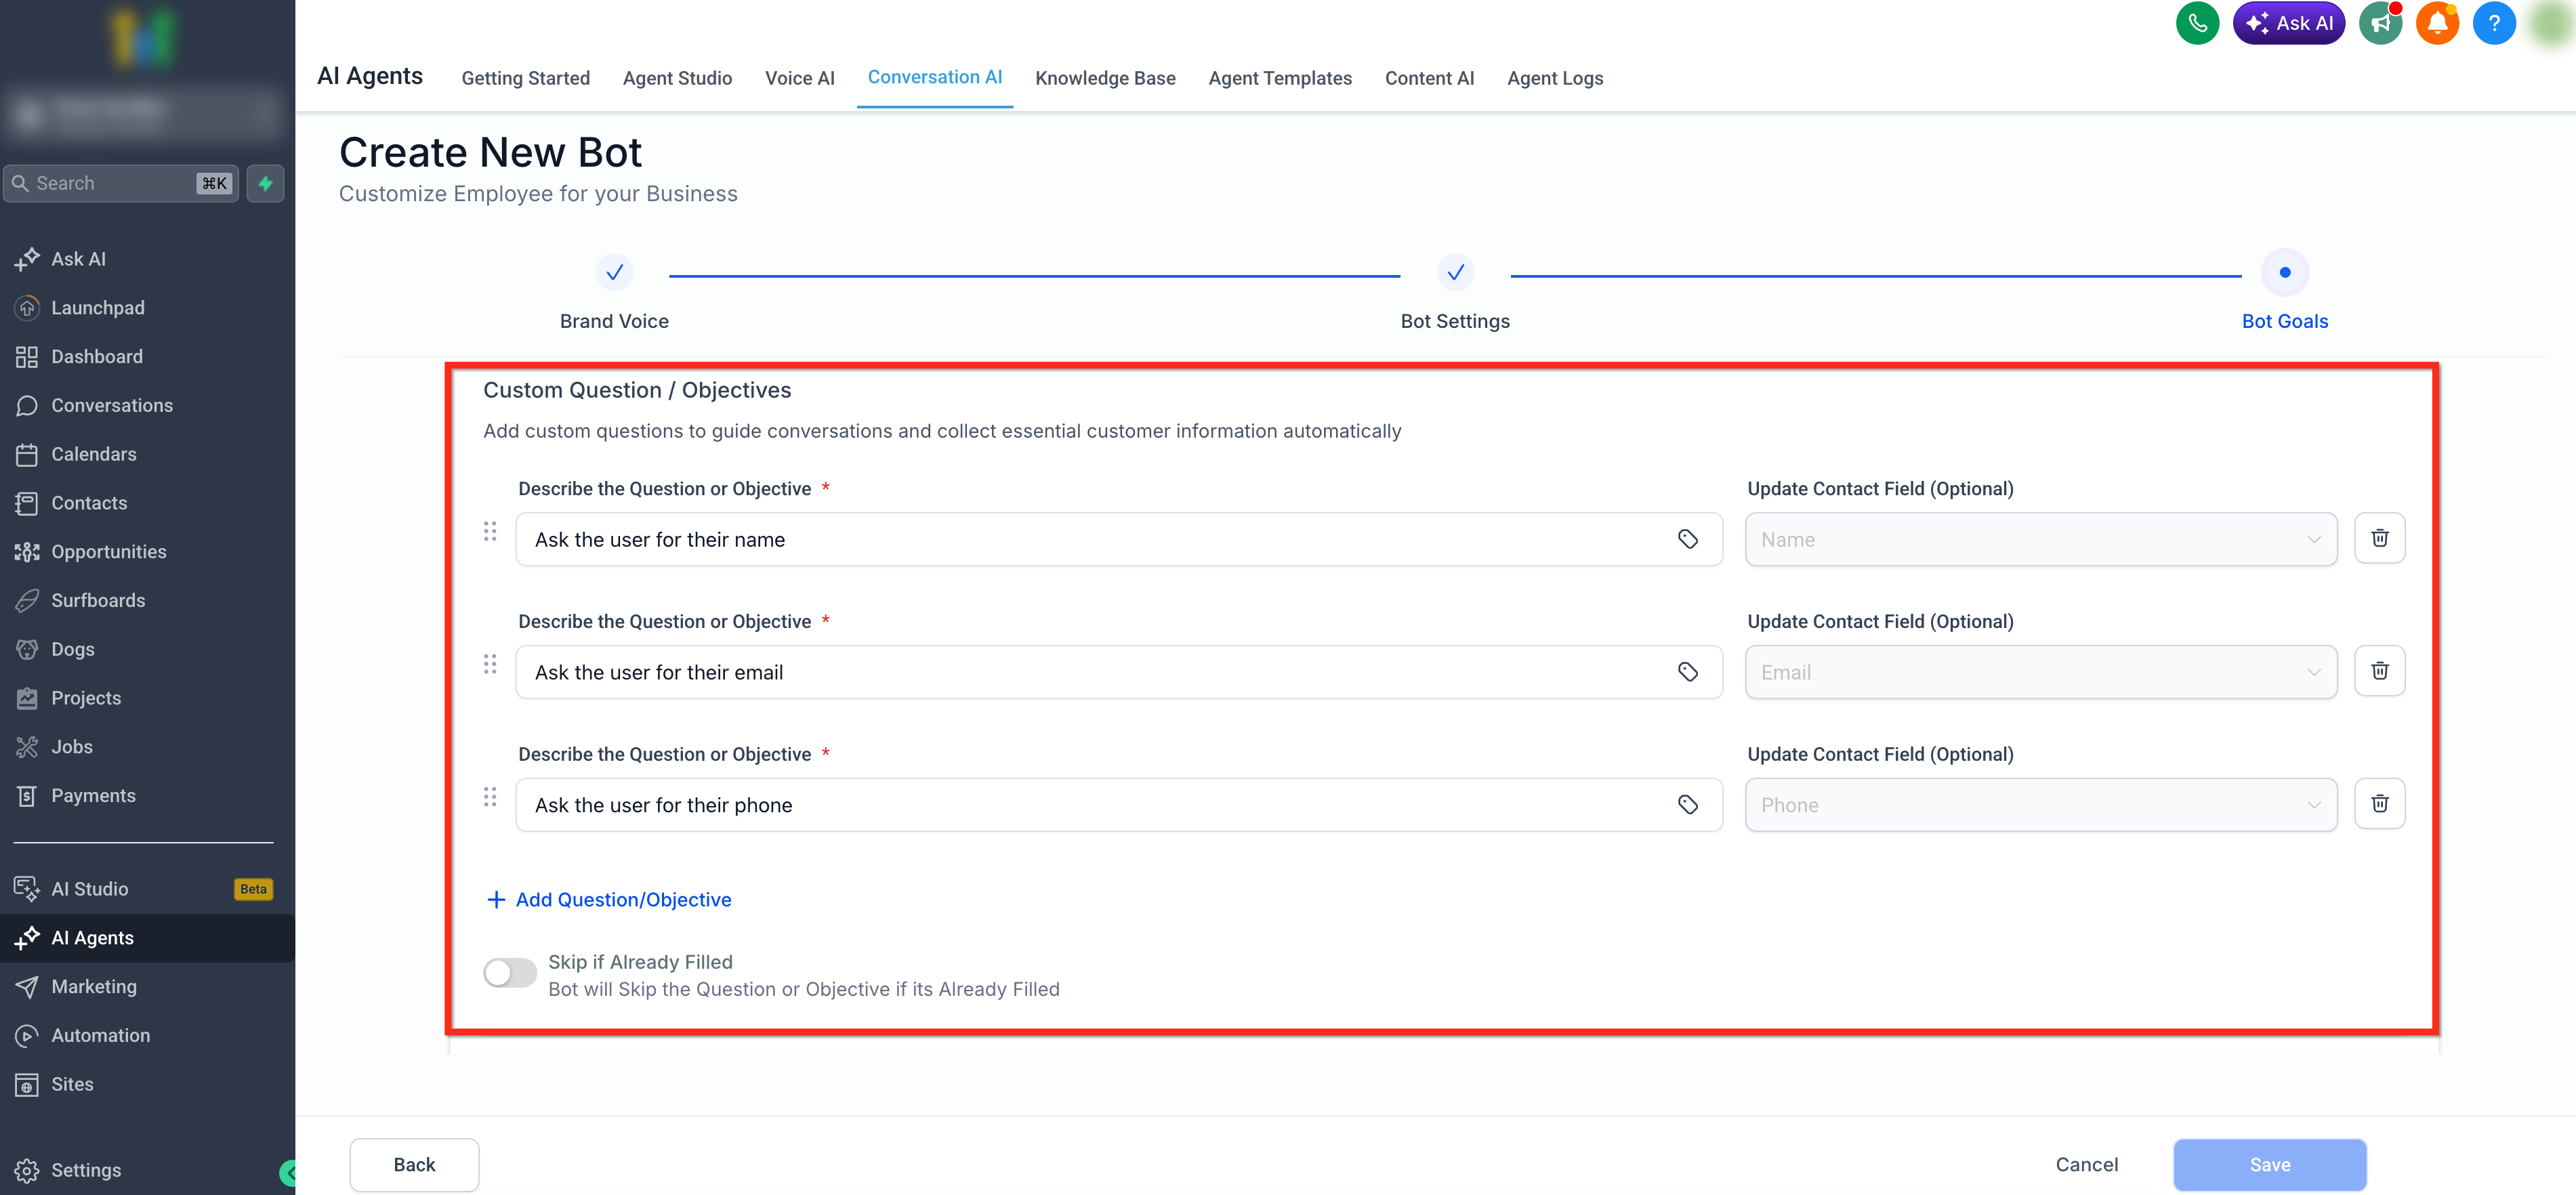
Step 7: Custom Question / Objectives
Add all the objectives you’d like the bot to complete. Enable Skip if Already Filled to prevent asking for existing contact data.
Common use cases include:
- Ask for name, email, phone
- Qualify lead with Yes/No questions
- Offer scheduling link
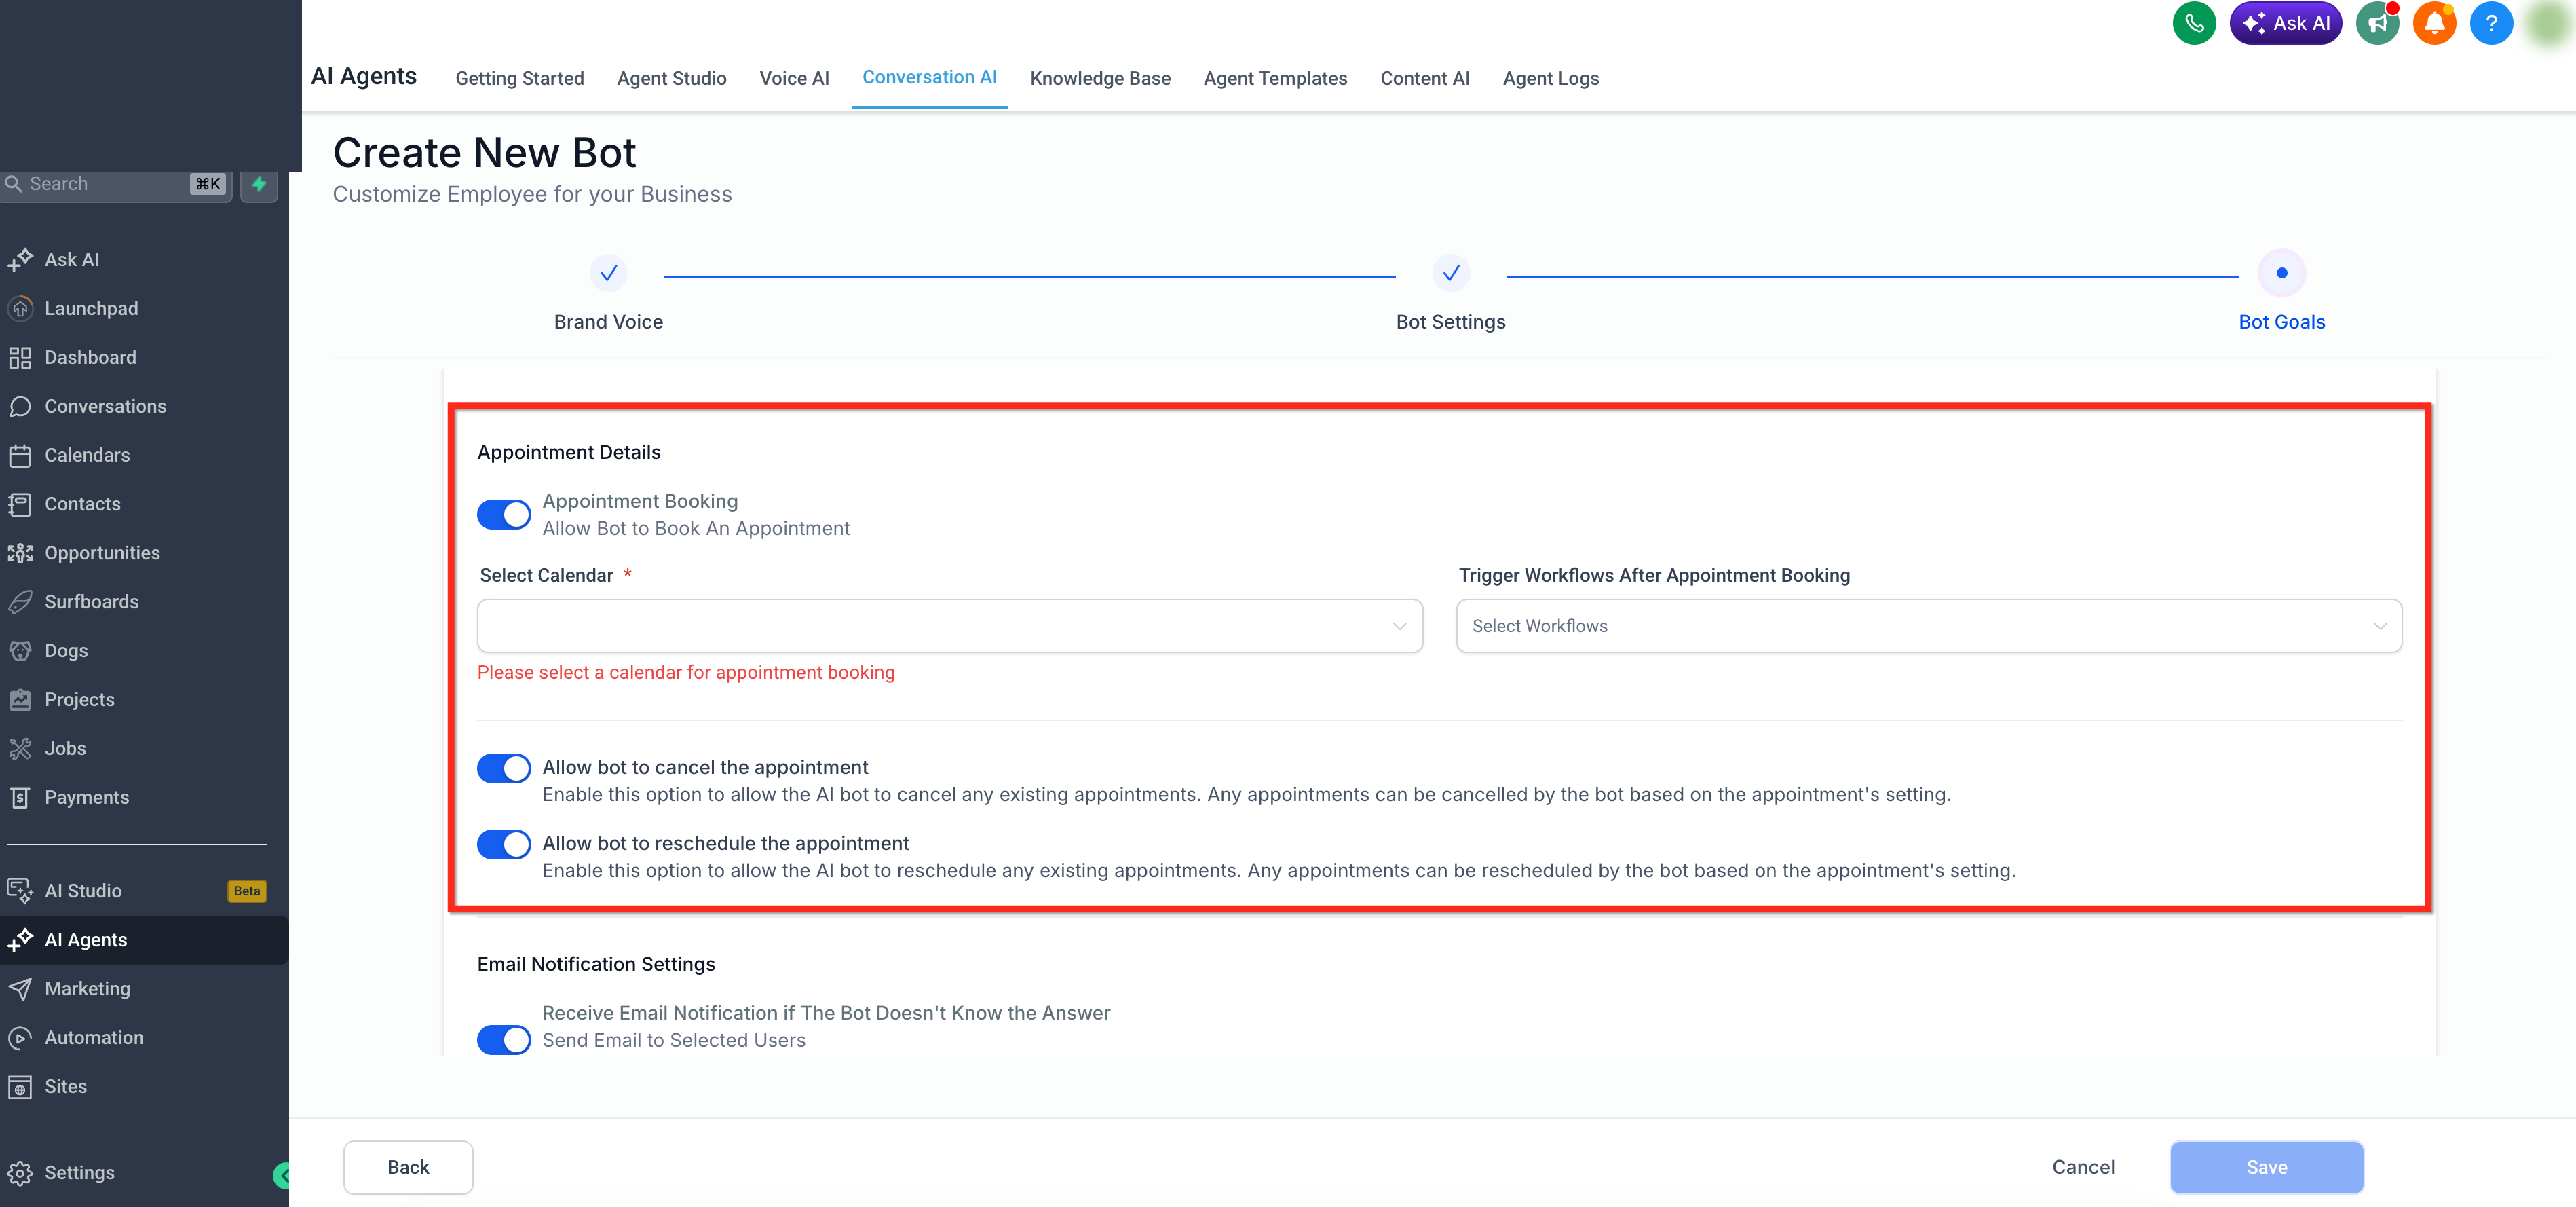
Step 8: Appointment Details
Enable Appointment Booking to allow the bot to book an appointment, then select the calendar the bot should use.
You can also select workflows under Trigger Workflows After Appointment Booking if an automation should run after the appointment is booked.
Use the secondary appointment toggles to decide whether the bot can manage existing appointments.
- Enable Allow bot to cancel the appointment if the bot should be able to cancel appointments.
- Enable Allow bot to reschedule the appointment if the bot should be able to reschedule appointments.
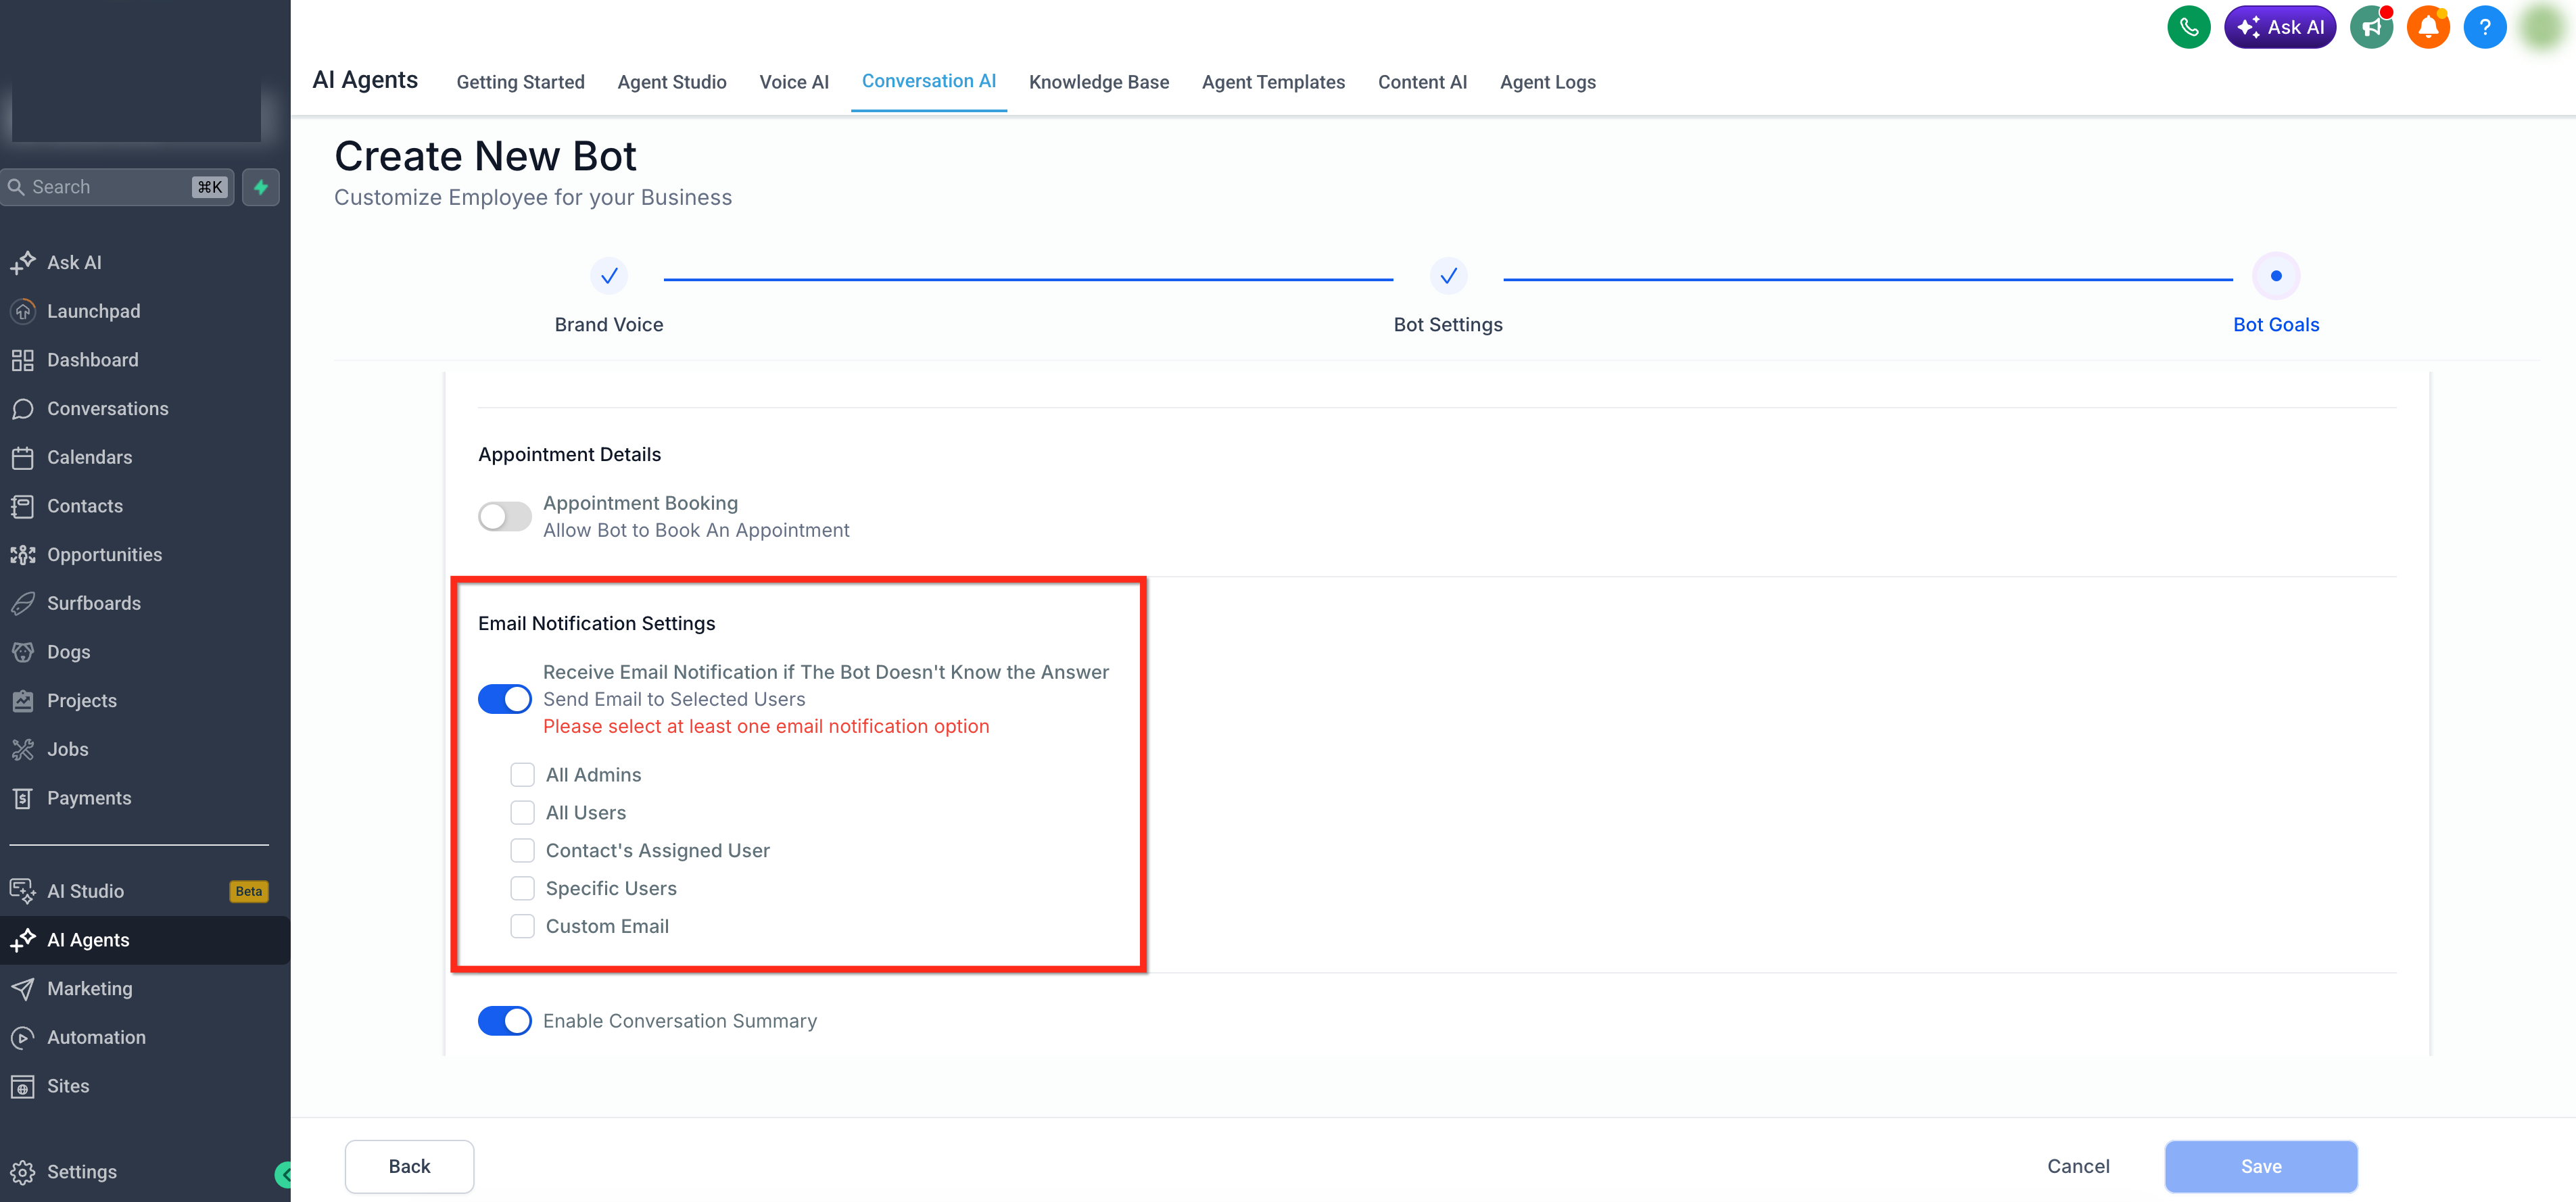
Step 9: Email Notification Settings
Use Email Notification Settings to receive an email when the bot does not know the answer. Enable Receive Email Notification if The Bot Doesn’t Know the Answer, then choose who should receive the notification.
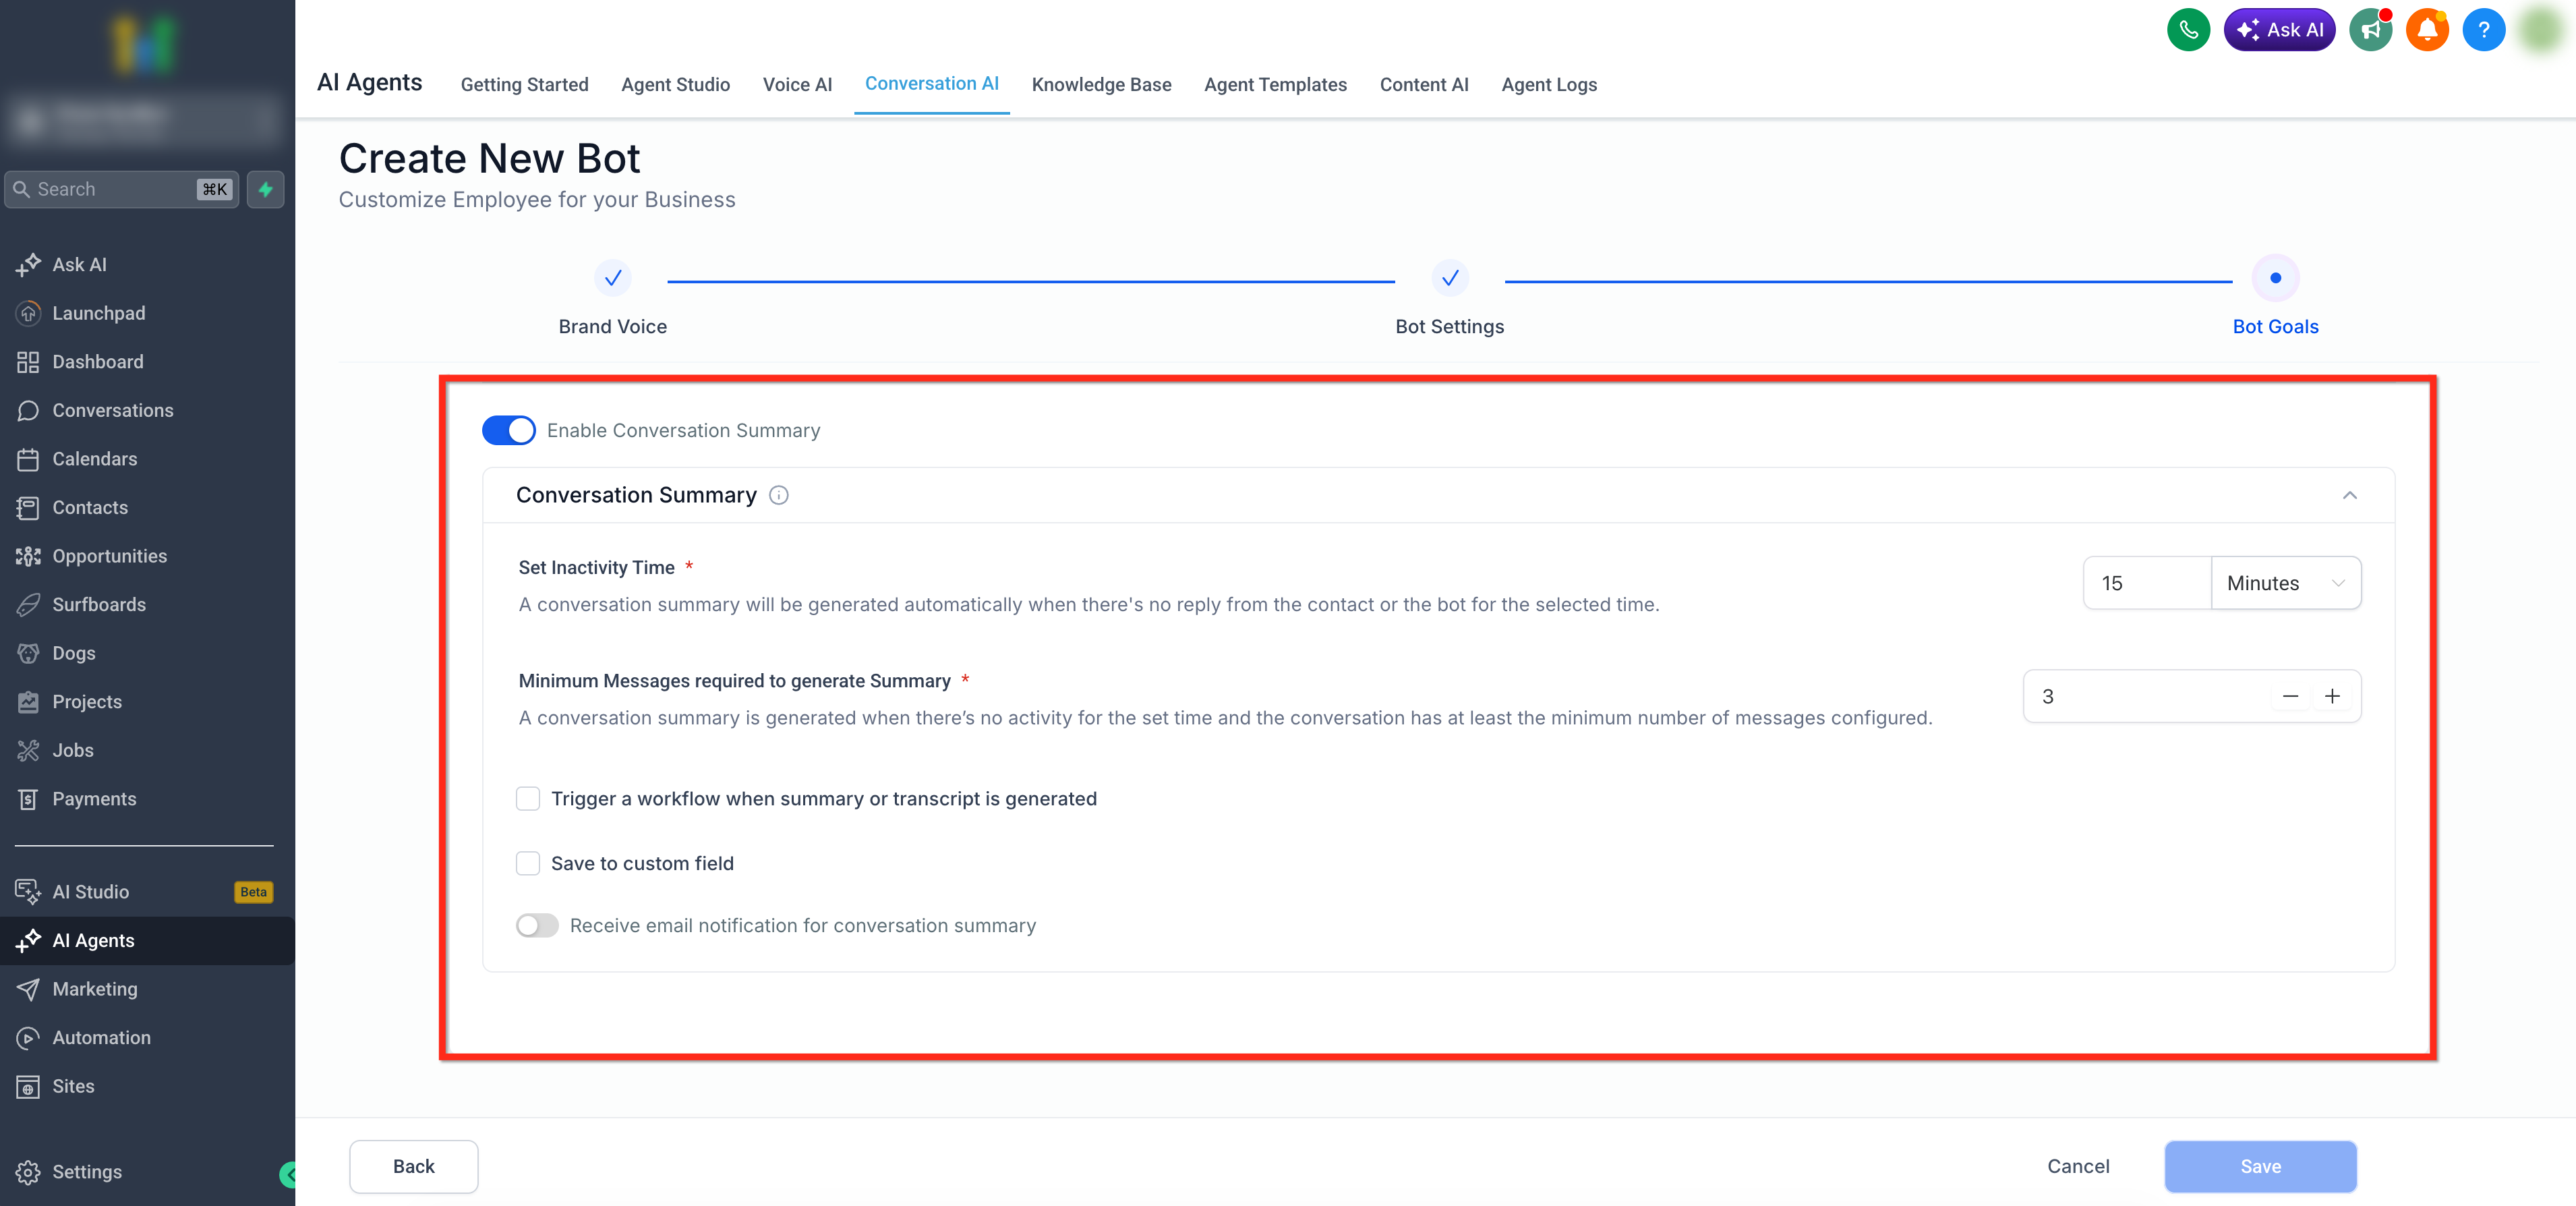
Step 10: Enable Conversation Summary
Enable Conversation Summary when the system should generate a summary after a conversation becomes inactive. Configure the Set Inactivity Time value and the Minimum Messages required to generate Summary value.
You can also choose whether to trigger a workflow when the summary or transcript is generated, save the summary to a custom field, or receive an email notification for the conversation summary.
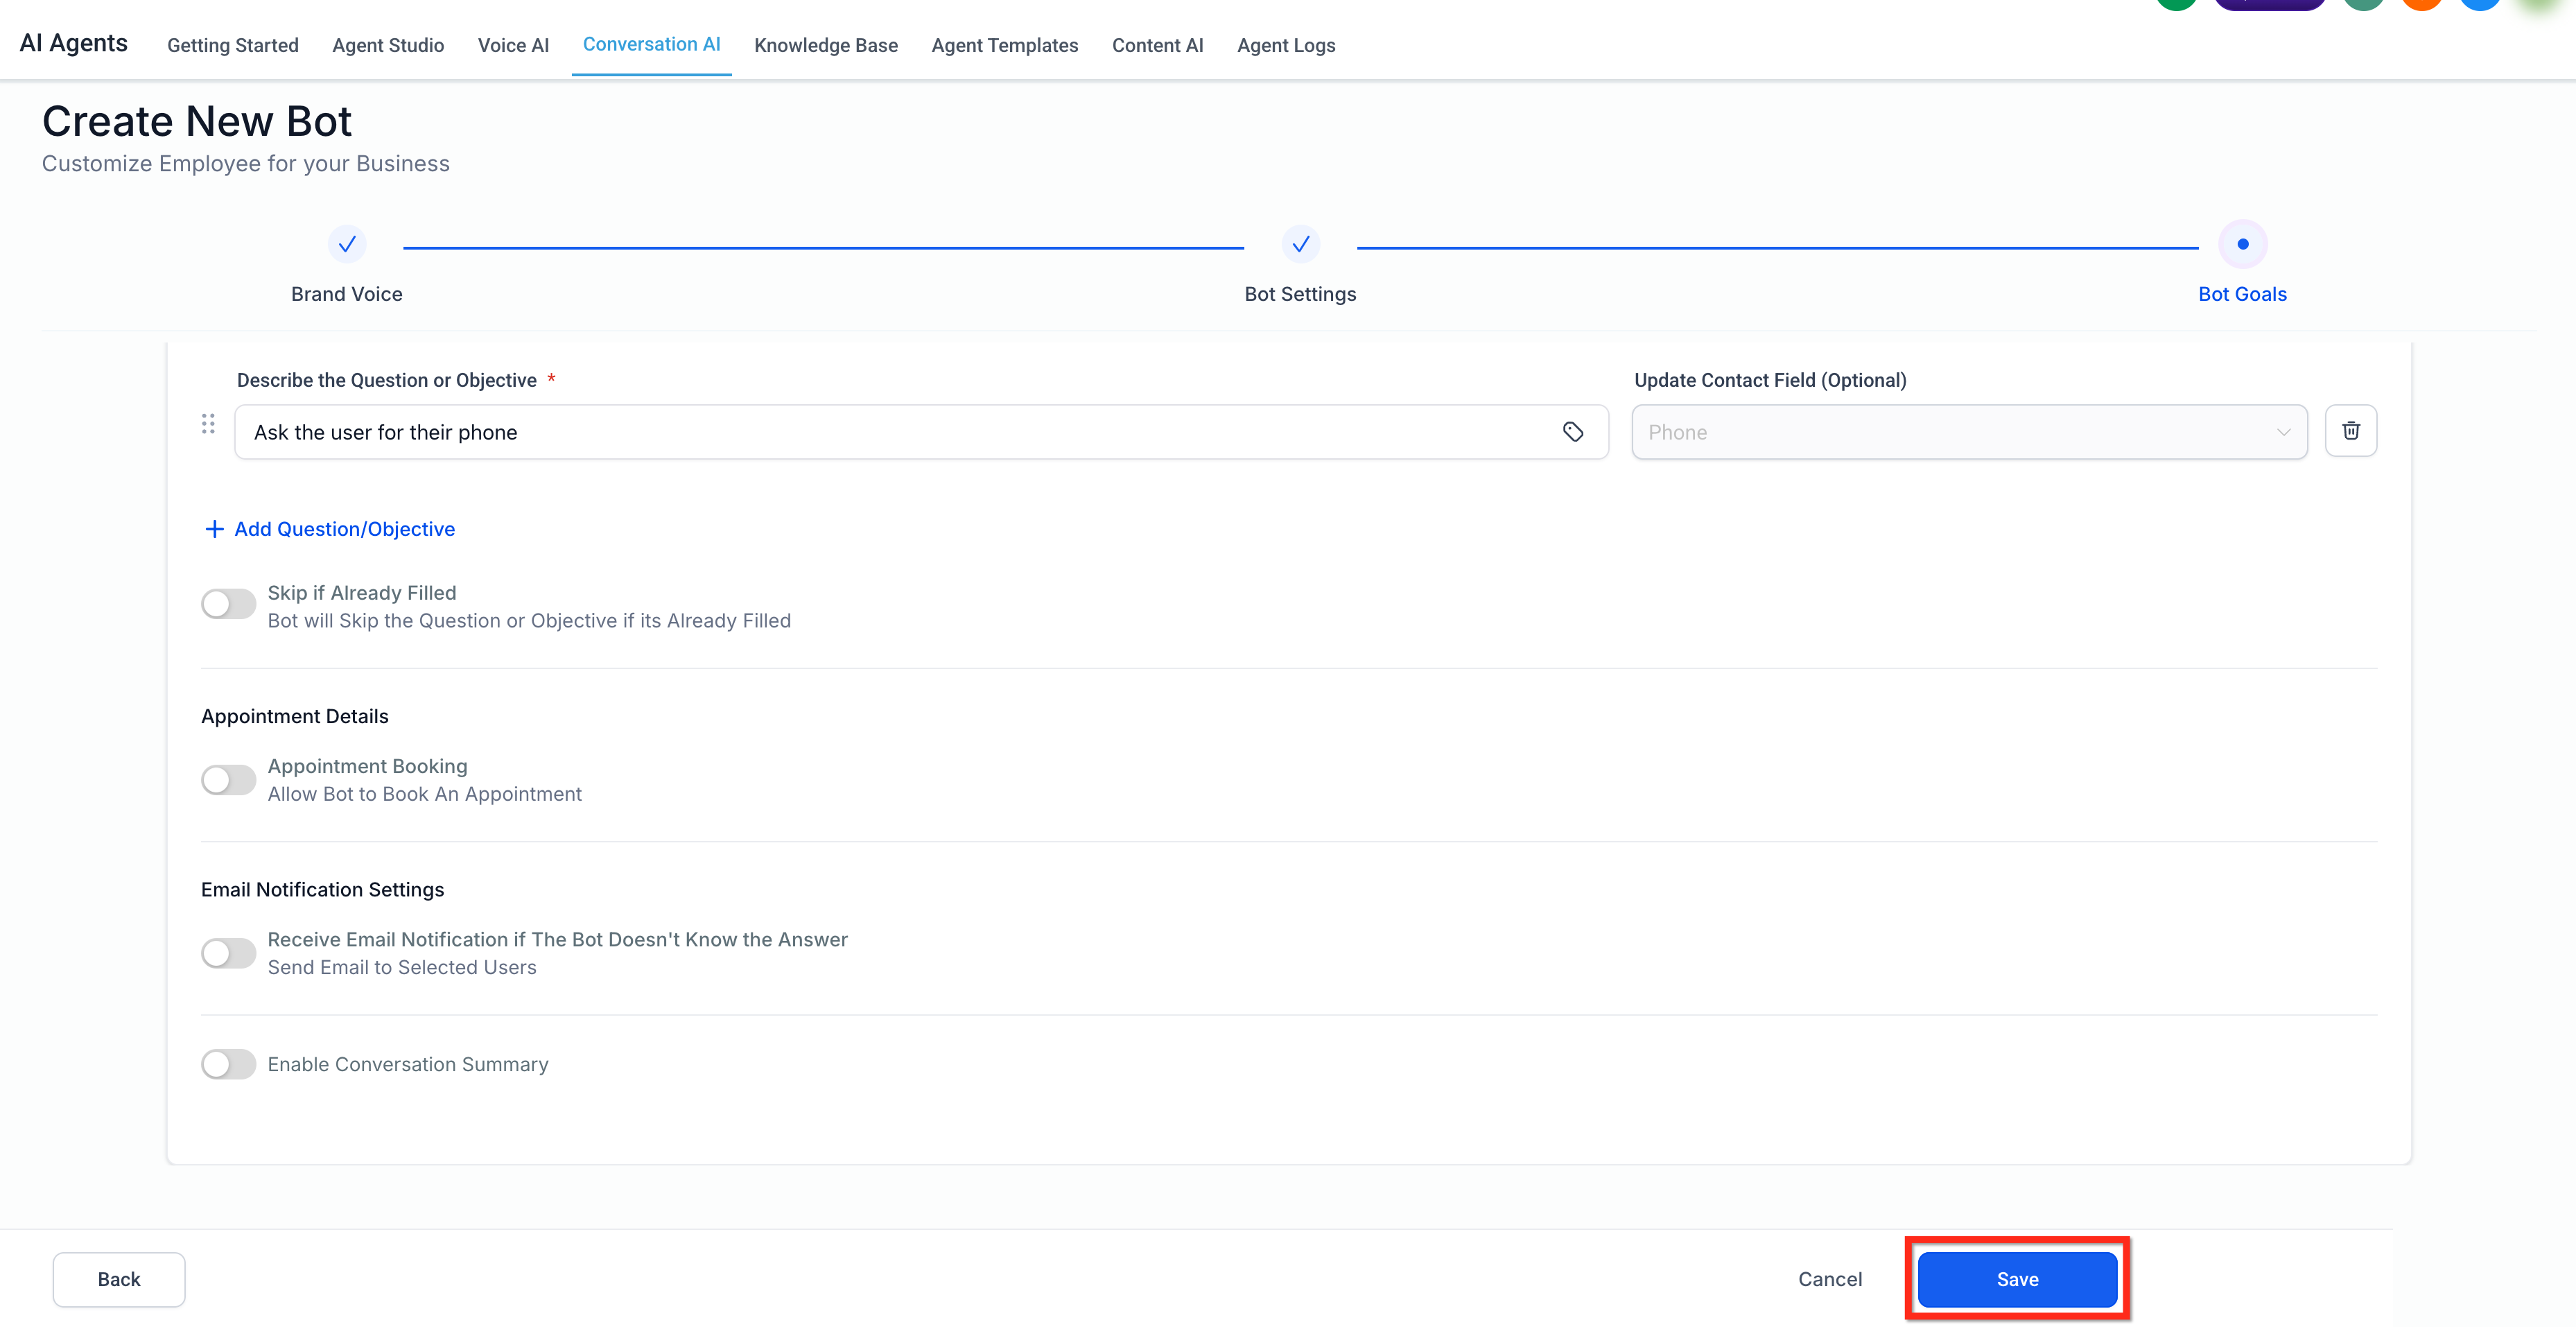
Step 11: Save the Bot
After Bot Goals are configured, click Save.
Step 12: Set the Status
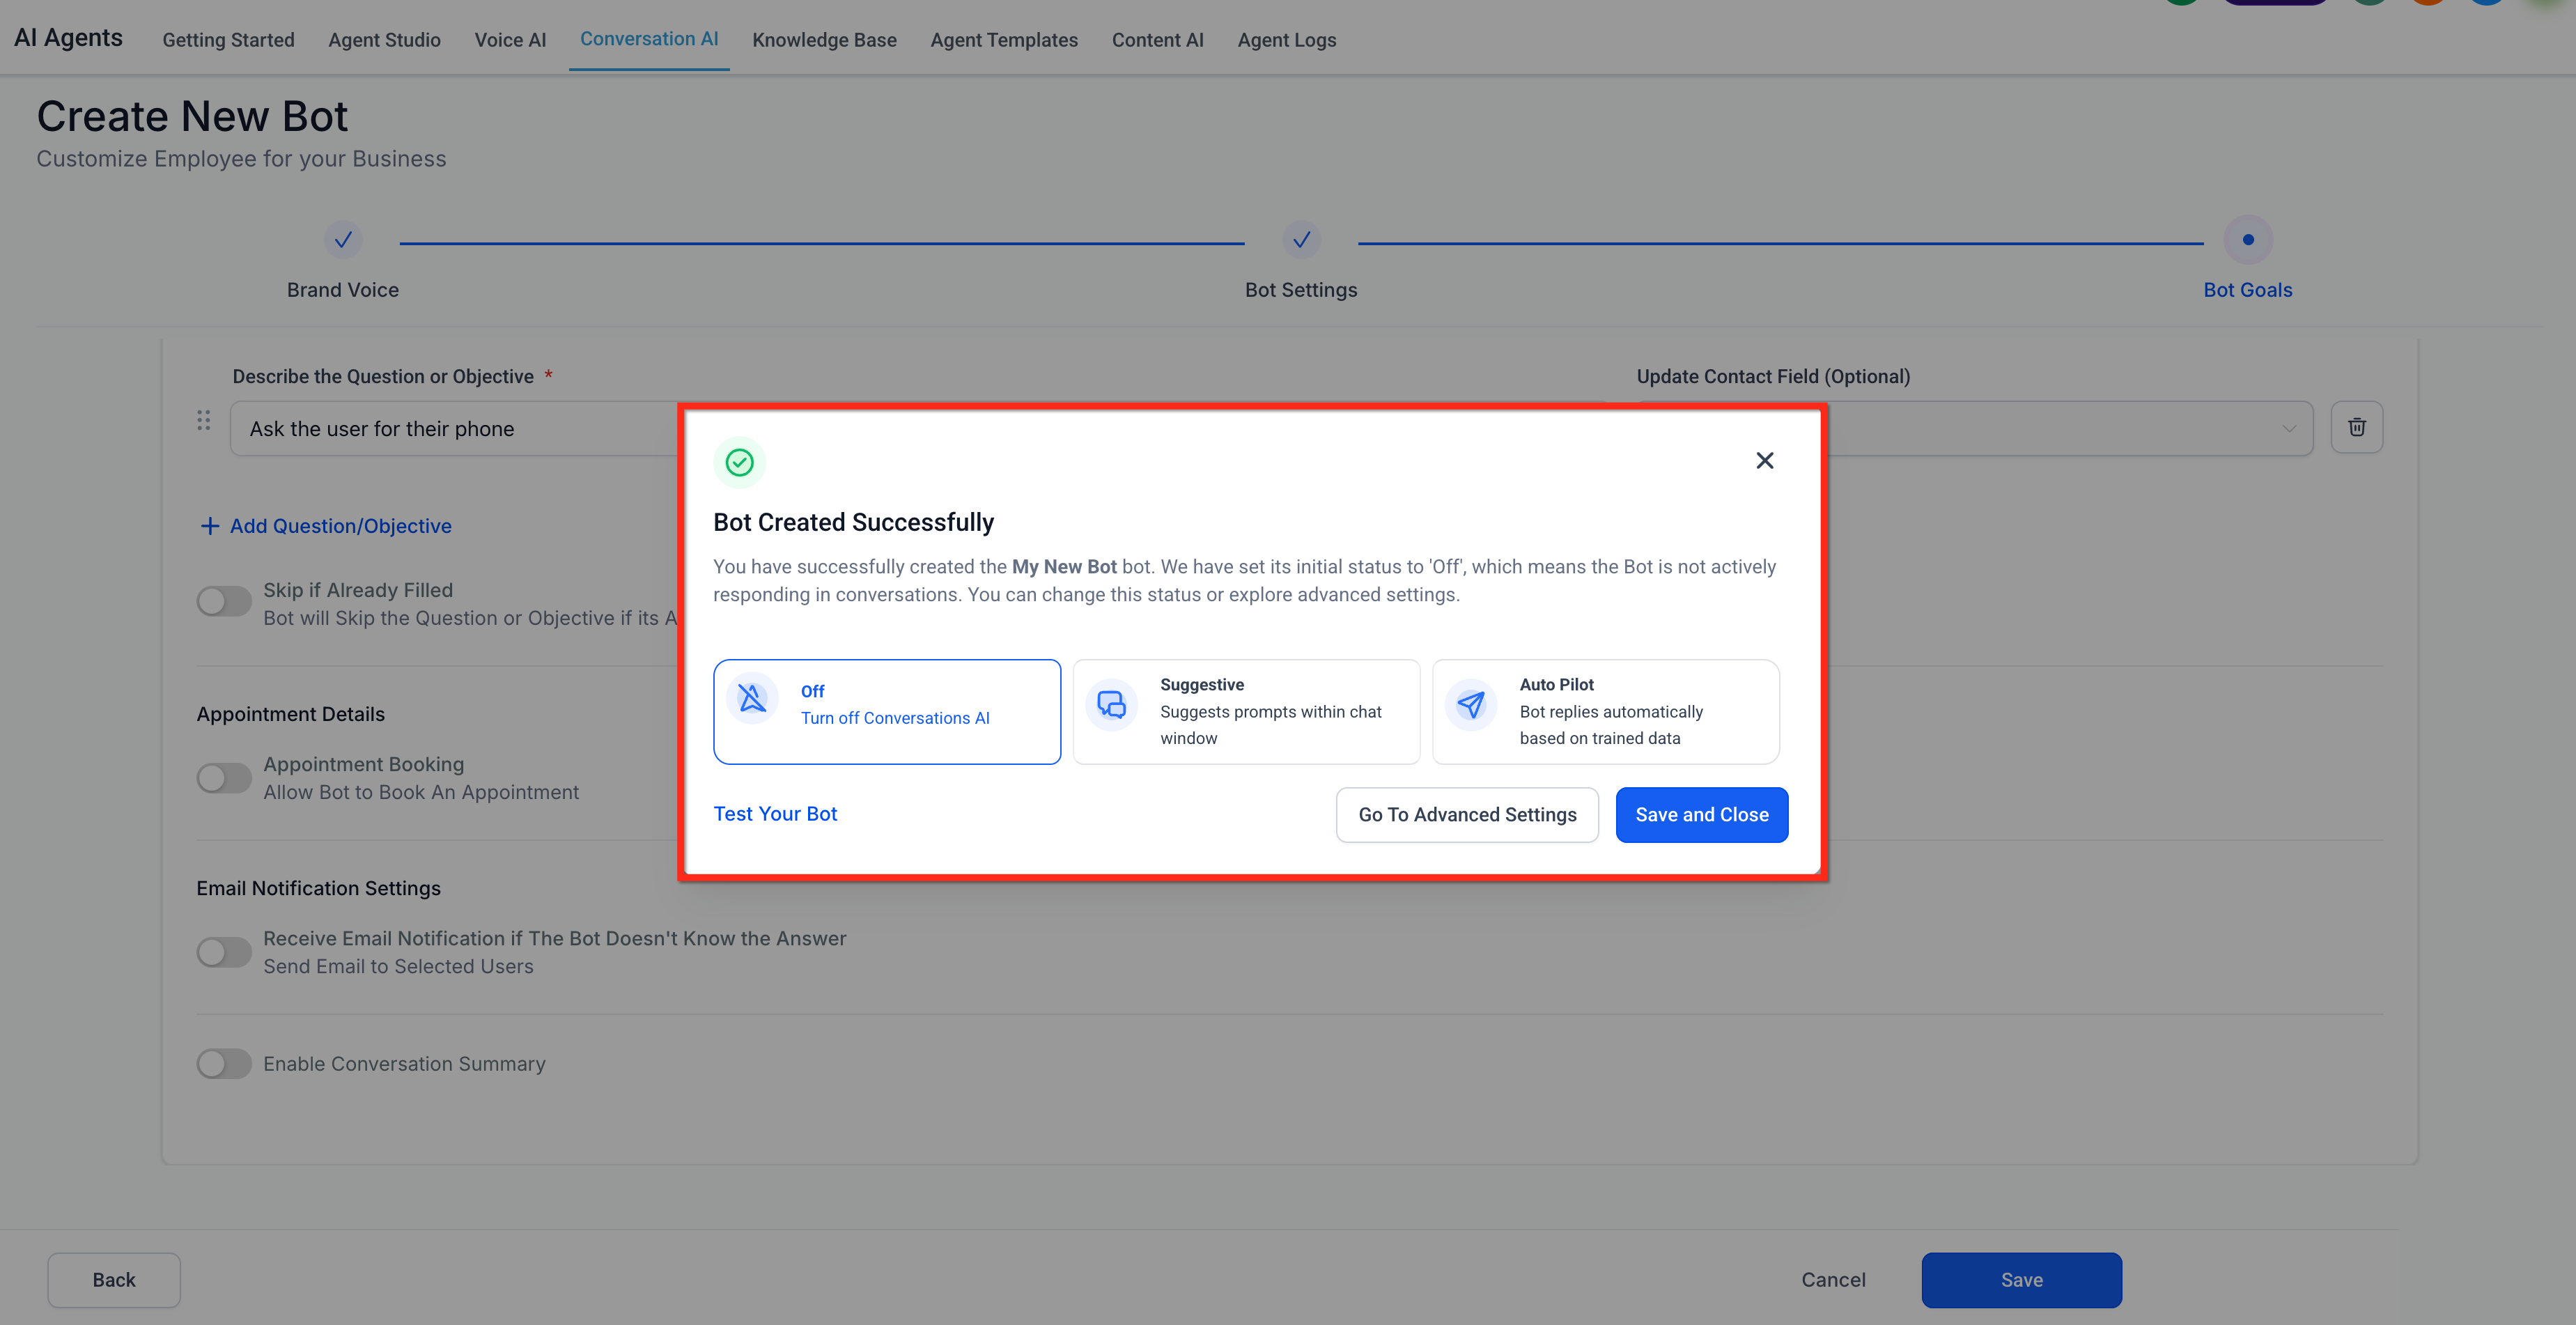
After the bot is created, the Bot Created Successfully modal appears. The bot’s initial status is set to Off, which means it is not actively responding in conversations yet.
Choose one of the available status options:
Off: Turns off Conversation AI so the bot does not actively respond.
Suggestive: Suggests prompts within the chat window for a team member to review and send.
Auto Pilot: Allows the bot to reply automatically based on trained data.
From this modal, you can also click Test Your Bot, open Go To Advanced Settings, or click Save and Close to finish setup.
Additional Instructions
Use Additional Instructions to give your bot extra context and guardrails so it follows your processes consistently and handles edge cases confidently. Character limit: Up to 2,000 characters (previously 1,200).
Best practices
- Define the bot’s role and boundaries.
- Use clear do/don’t rules for tricky scenarios.
- Keep bullets concise; put critical steps first.
Where to find it
- Go to Conversation AI and select Edit on the bot you would like to add instructions to.
- Locate Additional Instructions.
- Enter your guidance and Save.
Frequently Asked Questions
Q: Can I switch between Guided Form and prompt-based bots?
Yes! From the bot creation screen, click the dropdown arrow next to “Create Bot” to choose your setup method.
Q: Can I edit the bot after it’s created?
Absolutely. Just open the bot from the Bot Manager and click “Edit.”
Q: What happens if the user doesn’t answer a question?
The bot will either retry, move on, or end the conversation—based on how you’ve configured each objective.
Q: Can I duplicate a bot?
Yes. Use the Duplicate option in the bot menu to reuse a configuration.
Q: Can I use Guided Form bots across channels like Instagram or WhatsApp?
Yes, as long as those channels are integrated into your SourCherry setup.
Q: When does the Guided Form flow start if I set an Initial Message?
If you configure an Initial Message, the bot sends that welcome message first and waits for the contact’s next reply before starting the objectives/questions flow. If you leave Initial Message blank, the flow starts immediately on the first message.