
Mobile Auto-Payment for recurring invoices in SourCherry automates card charging on a set schedule, so you collect on time without manual follow-ups. Turn it on from the mobile send flow, choose a saved card or a customer card you’ve captured, and let billing run itself. This guide explains what it is, how it works with POS, and how to set it up.
TABLE OF CONTENTS
- What is Auto-Payment for Recurring Invoices (Mobile)?
- Prerequisites
- Key Benefits of Auto-Payment for Recurring Invoices
- Payment Method Options
- How To Set Up Auto-Payment for Recurring Invoices
- Frequently Asked Questions
- Related Articles
What is Auto-Payment for Recurring Invoices (Mobile)?
Auto-Payment automatically charges a customer’s card for each occurrence of a recurring invoice you send from the SourCherry mobile app. You decide the charge source—either a Saved Card already on file or a Customer Card captured during checkout—then the system processes future payments on the schedule you define.
Prerequisites
- Recurring invoice created via the Invoices or POS module.
- Customer payment method on file (Card on File, or online card capture).
- Payments must be via card — Auto-Payment is not available for cash or manual entry.
Key Benefits of Auto-Payment for Recurring Invoices
Understanding the benefits helps you decide when to enable Auto-Payment and which payment source to use for the smoothest customer experience and most reliable collections.
- Hands-free collections: payments run on each billing date automatically.
- Multiple payment sources: choose a Saved Card on file or a Customer Card you captured via checkout.
- Frictionless experience: no extra steps for the customer after the initial payment.
- Predictable cash flow: scheduled, on-time charges reduce revenue gaps.
- Less admin work: set it once during scheduling; no chasing or manual charges.
Payment Method Options
Picking the right payment source ensures successful charges and fewer declines. Below are the available options and when to use them.
- Saved Card: Charge any card already stored on the contact. Ideal when you’ve previously added a card on file and want the most reliable, “set-and-forget” billing.
- Customer Card: Use the card captured during Tap to Pay, Card on File, or online checkout. Helpful if you just took a payment in person or online and want to continue charging that same card for future cycles.
Please Note: Auto-Payment on mobile supports card payments. Cash and manual entry aren’t supported for Auto-Payment.
How To Set Up Auto-Payment for Recurring Invoices
A Correct setup ensures charges fire on schedule and use the correct card. Follow these steps each time you create a recurring invoice from mobile.
IMPORTANT: To get started, Create a Go to Invoices or POS and start a recurring invoice, add details, select a customer, items, and billing frequency. For this step refer to How to create recurring Invoices. Step 1: Enable Auto-Payment
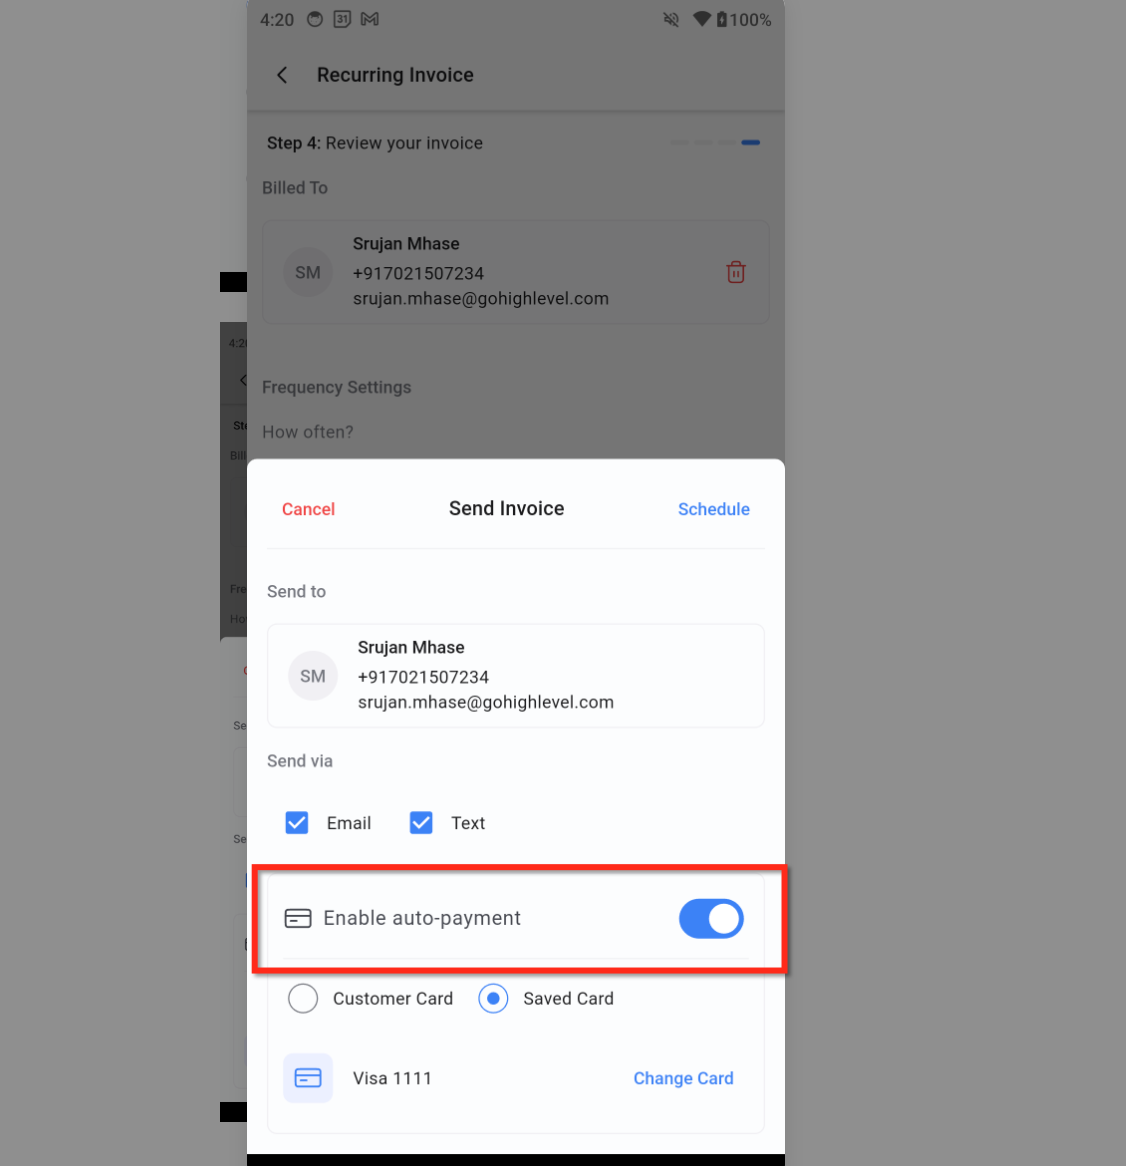
On the scheduling sheet, toggle Enable Auto-Payment.
Step 2: Select payment method
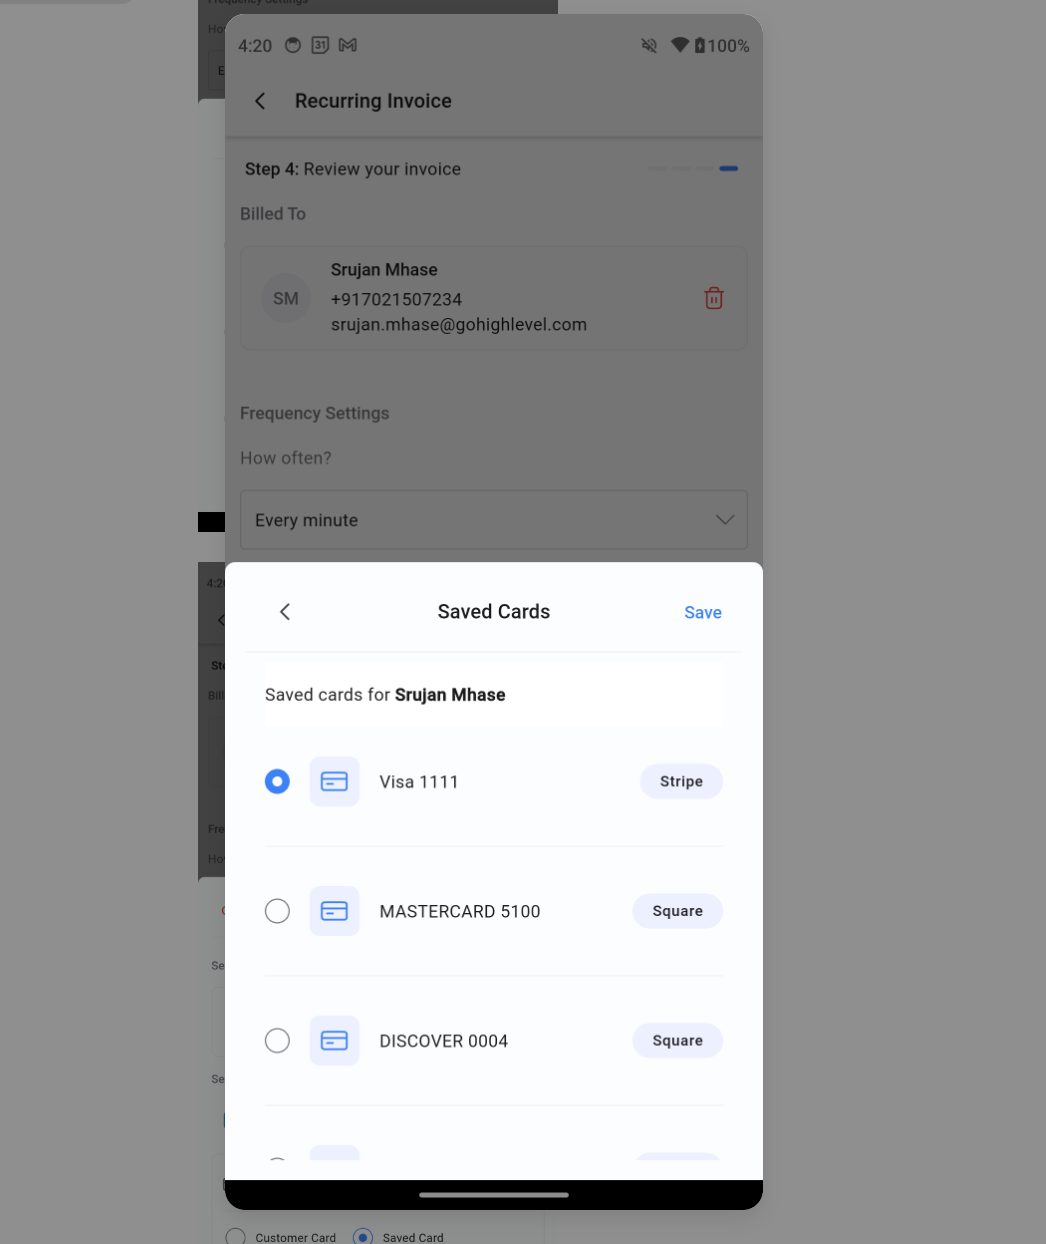
Saved Card – Pick from saved payment methods.
Customer Card – Use the payment card captured via Tap to Pay or online checkout.
Step 3: Confirm the selected card and Send/Schedule
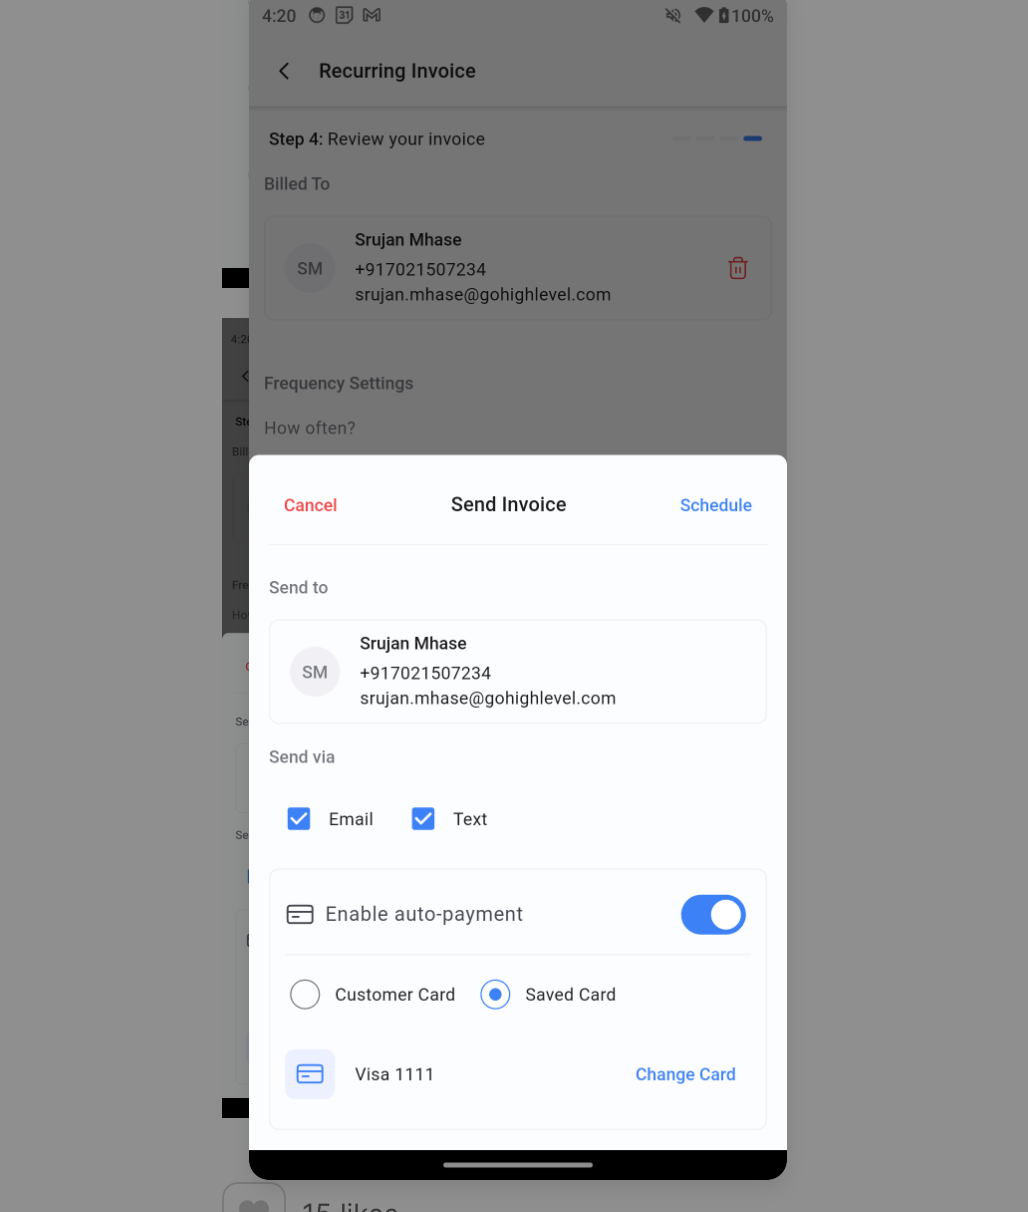
When a card is selected, you’ll see it summarized with the last 4 digits; use Change Card if needed. You can now Send/Schedule: Tap Send (or Schedule) to start the recurring invoice with Auto-Payment enabled. The system will process payments automatically on each billing date you defined.
Frequently Asked Questions
Q: Does Auto-Payment support cash, manual entry, or bank payments?
No. On mobile, Auto-Payment is for card payments only.
Q: Where do I turn on Auto-Payment in mobile?
In the Send/Schedule sheet for a recurring invoice. Toggle Enable auto-payment ON and choose the card source.
Q: Can I use Auto-Payment with POS?
Yes, when POS carts with recurring products are converted to an invoice. Then enable Auto-Payment during scheduling.
Q: What’s the difference between a Saved Card and a Customer Card?
Saved Card is any card already stored on the contact. Customer Card is a card captured during Tap to Pay, Card on File, or an online checkout.
Q: How do I change the card used for Auto-Payment?
Before sending, select Change Card and choose a different Saved Card or select Customer Card (after capturing a new card).
Q: What should I do if a scheduled charge fails?
Update the card on file with the customer, select the new card, and continue the schedule. Keeping cards current reduces future declines.
Q: Where do I find the "Manage Auto Payment" option when setting up or editing a recurring invoice?
The option to enable, disable, or manage the client's saved card for auto-debit is located within the invoice editor itself, accessible via a hidden menu:
Open the existing or new Recurring Invoice (or convert a one-time invoice to recurring).
Look for the three dots (⋮) menu on the upper right side of the invoice editor screen.
Click the three dots (⋮) and select Manage Auto Payment.
From this screen, you can choose the client's saved card (or add a new one) and enable the auto-debit for all future recurring charges.