
Run automations on a precise clock with the Workflow Scheduler Trigger in SourCherry. This contactless, time‑based trigger is ideal for operations, data hygiene, reporting, and integrations that don’t require a contact. This article shows how to use the scheduler trigger.
TABLE OF CONTENTS
- What is the Workflow Scheduler Trigger?
- Key Benefits of the Workflow Scheduler Trigger
- Advanced (Cron) Scheduling
- Skip Weekends & Stop On
- Contactless Actions & Skip Behavior
- How to Use the Workflow Scheduler Trigger
- Example Use Cases
- Frequently Asked Questions
- Related Articles
What is the Workflow Scheduler Trigger?
The Workflow Scheduler Trigger is a native, contactless trigger that starts a workflow on a schedule you define—no contact enrollment required. It’s purpose‑built for recurring jobs like daily summaries, weekly performance posts, spreadsheet syncs, and web-hook pings. All run times follow your account timezone, with clear status indicators so you always know it’s working.
Key Benefits of the Workflow Scheduler Trigger
This section explains how Scheduler improves reliability and design simplicity for time‑driven automations while reducing maintenance costs compared to workarounds.
Clock‑based automation: Start workflows exactly when you need—hourly, daily, weekly, monthly, on a specific date/time, or via cron.
Contactless by design: Run ops tasks without enrolling contacts. Contact‑only actions are automatically skipped to avoid failures.
Timezone aware: Schedules run according to your account timezone to keep reporting and operations consistent.
Built‑in safeguards: Skip Weekends and Stop On (end date) help ensure compliance with business rules.
Safe to publish: Use Check Trigger Schedule to preview the next five executions before you go live.
Integrations ready: Pair with actions like Webhook (Outbound), Google Sheets, Airtable, Slack, internal email/SMS to teammates, Custom Values, and task creation for powerful ops automations.
Advanced (Cron) Scheduling
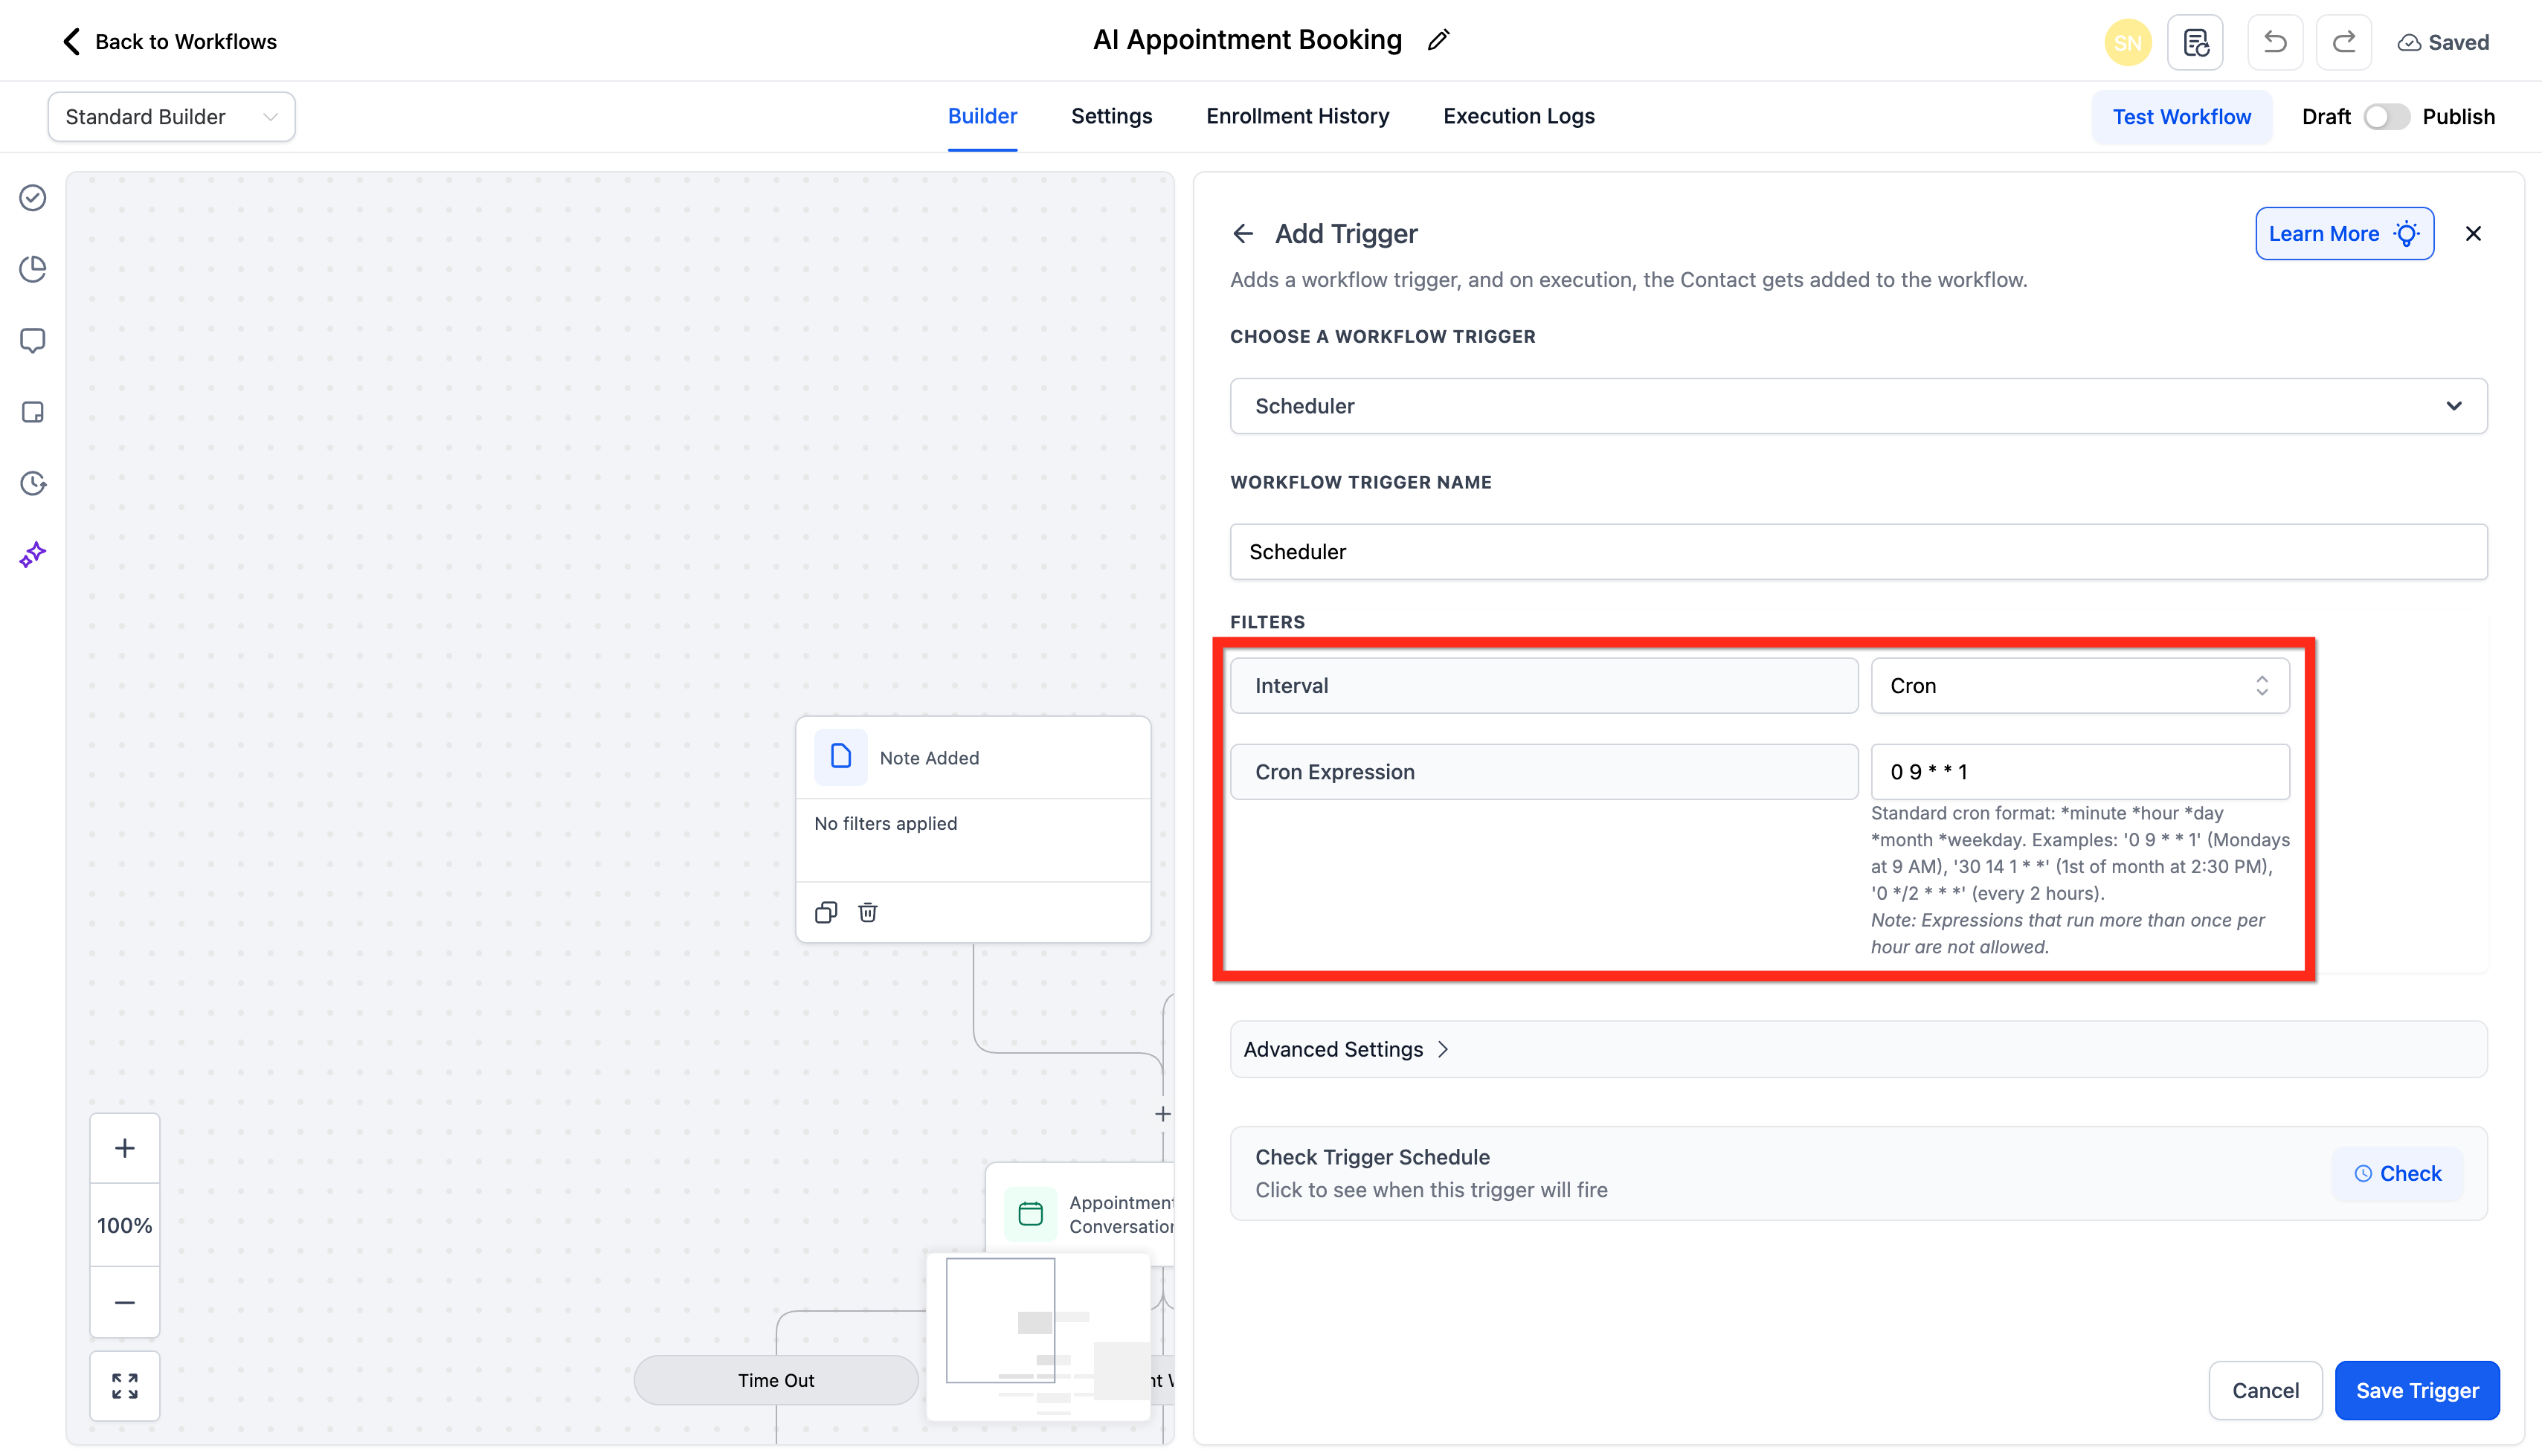
When presets aren’t enough, use cron to describe complex cadences (lists, ranges, and step values).
Syntax: Standard cron format: *minute *hour *day *month *weekday.
Examples:
'0 9 * * 1' (Mondays at 9 AM),
'30 14 1 * *' (1st of month at 2:30 PM),
'0 */2 * * *' (every 2 hours).
Note: Expressions that run more than once per hour are not allowed.
Skip Weekends & Stop On
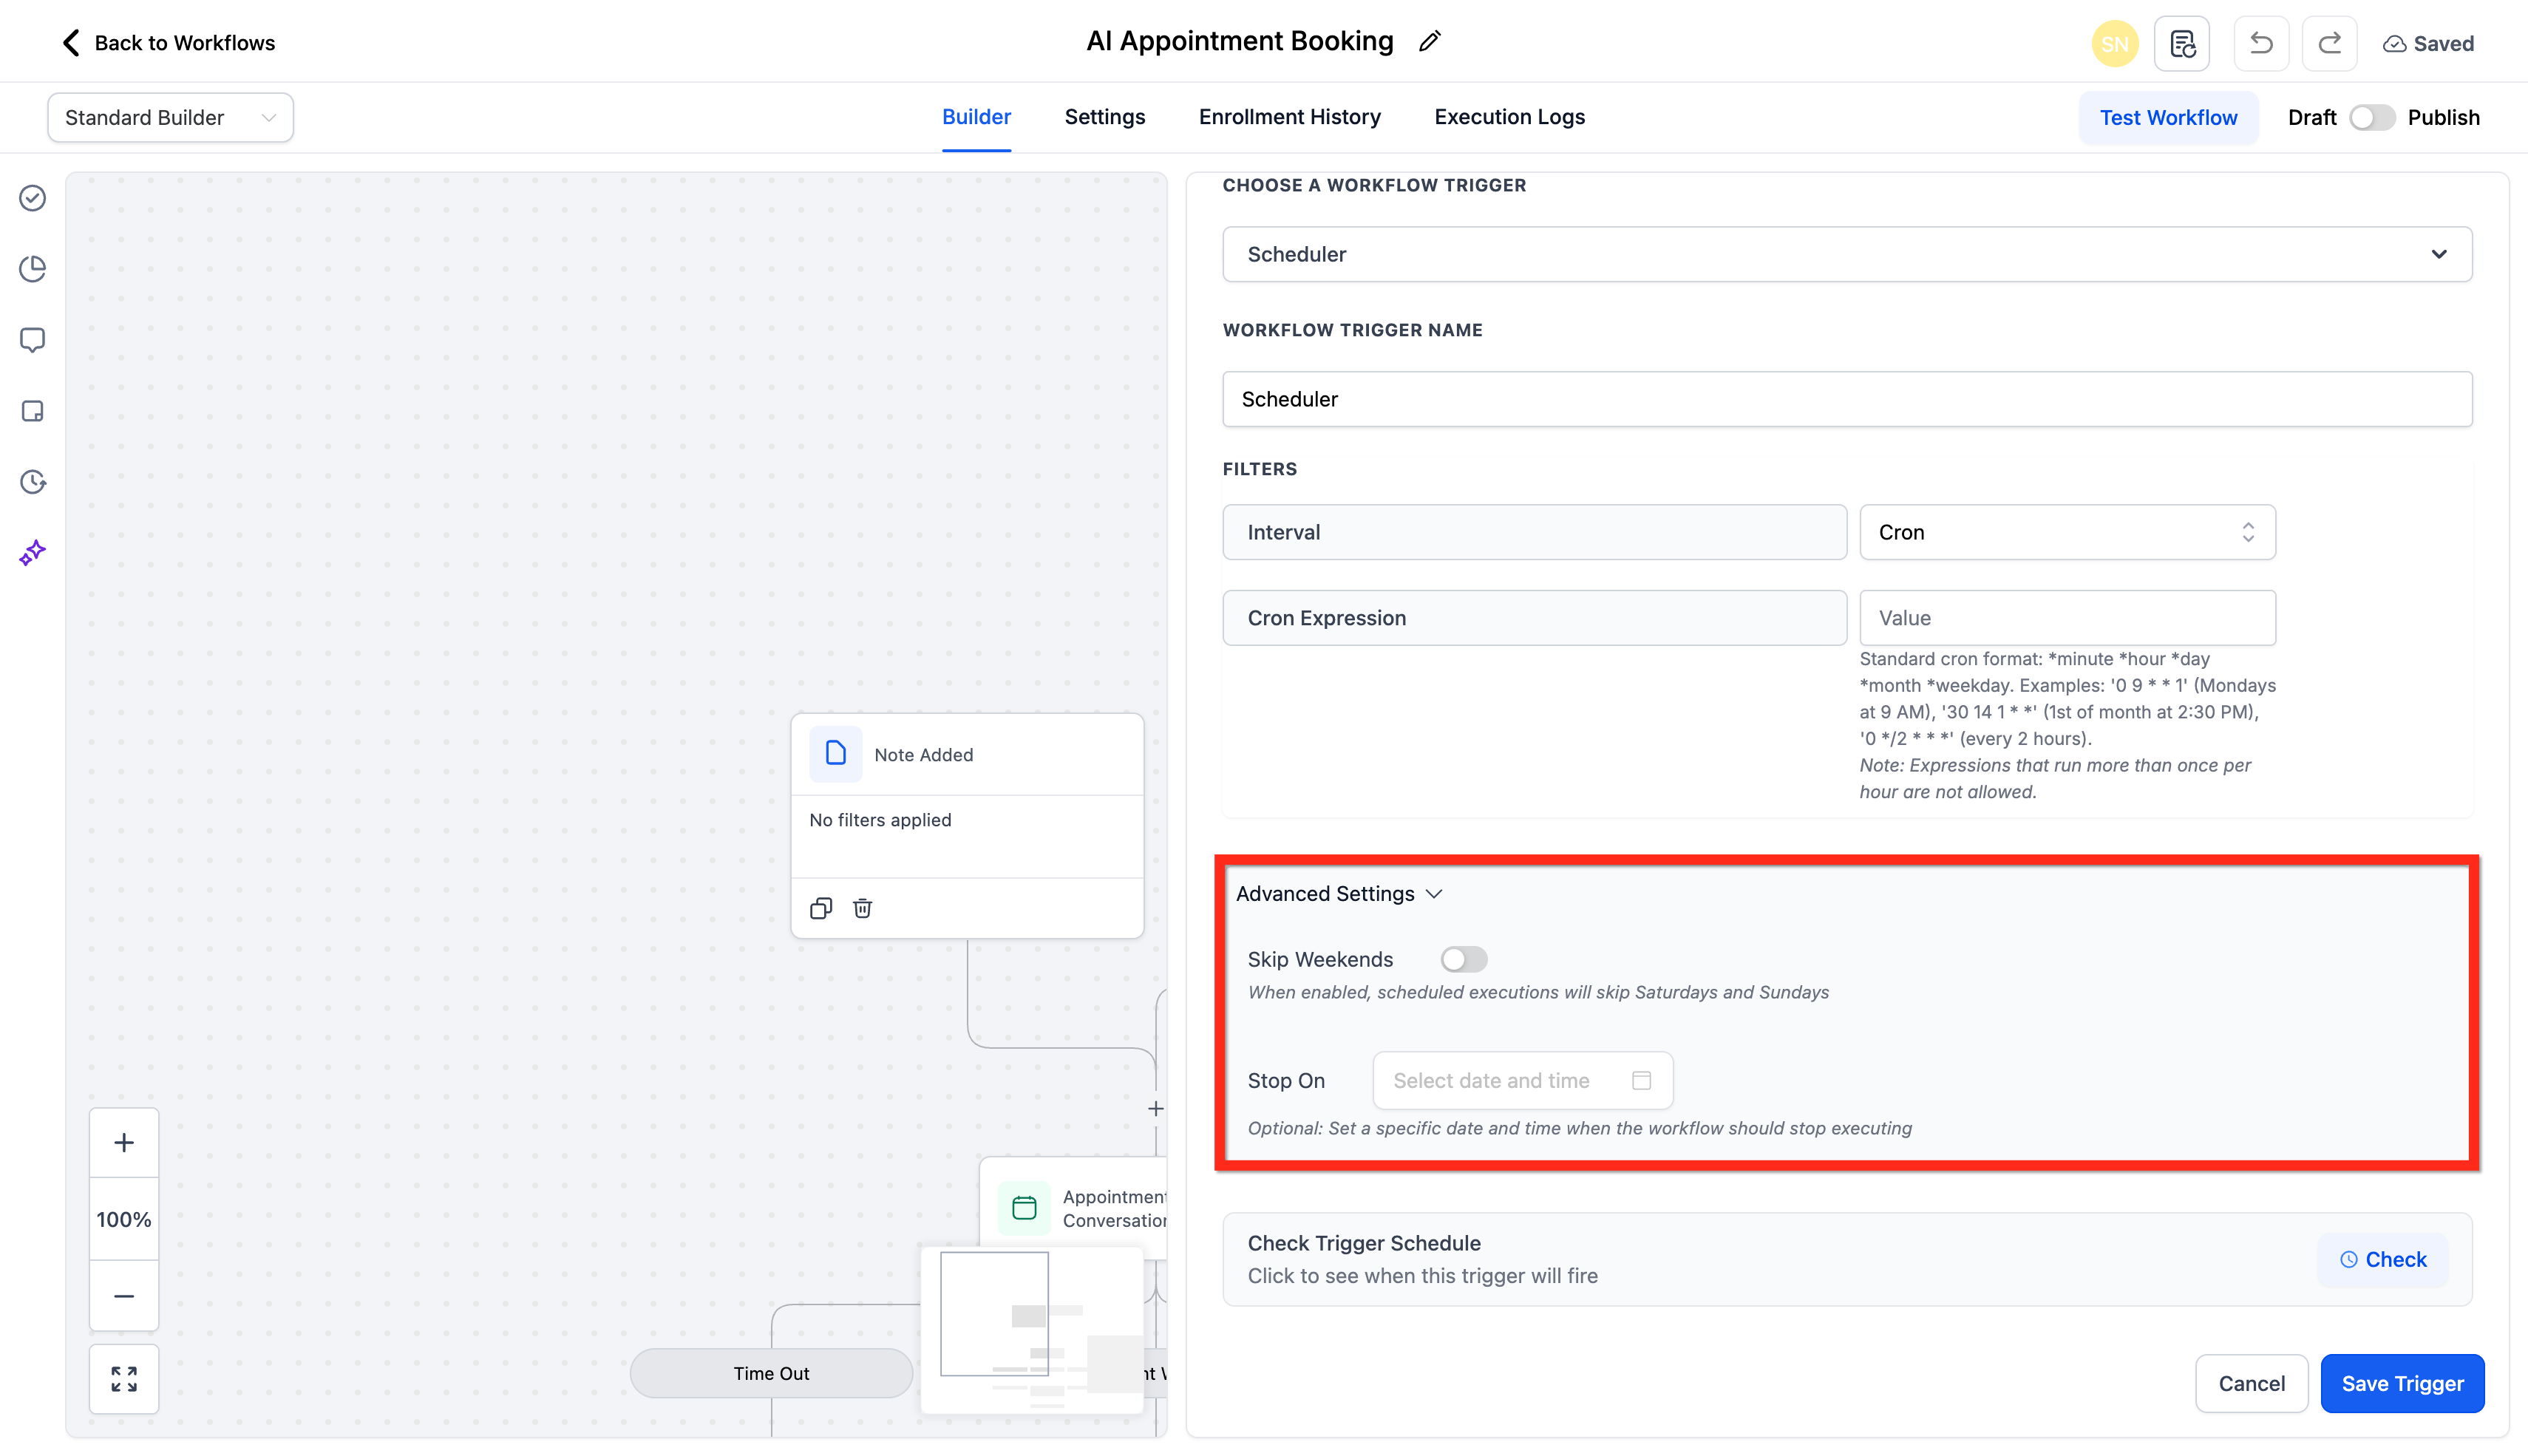
Guardrails help you respect business calendars and project timelines. Use Skip Weekends to automatically avoid Saturday/Sunday, and Stop On to end the schedule on a specific date/time.
Skip Weekends: Removes Saturday/Sunday occurrences from applicable schedules (Daily, Weekly, Every N days, Cron patterns that include weekends).
Stop On: Sets a final date/time after which future executions stop.
Works with Preview: both options are reflected in the next five executions list.
Contactless Actions & Skip Behavior
Scheduler is meant for contactless operations. Steps that require a contact context won’t run; the workflow continues to the next supported step.
Good fits: Web-hook (Outbound), Custom Web-hook, Google Sheets, Airtable, Slack, Internal Email/SMS to teammates, Update/Set Custom Values, Create Task.
Skipped in contactless runs: Any step that explicitly needs a contact (for example, “Send SMS to Contact”).
Result: Skipped steps are noted in Execution Logs; downstream steps continue if they don’t require contact data.
How to Use the Workflow Scheduler Trigger
Follow this guided setup to create a schedule, validate run times, and publish confidently.
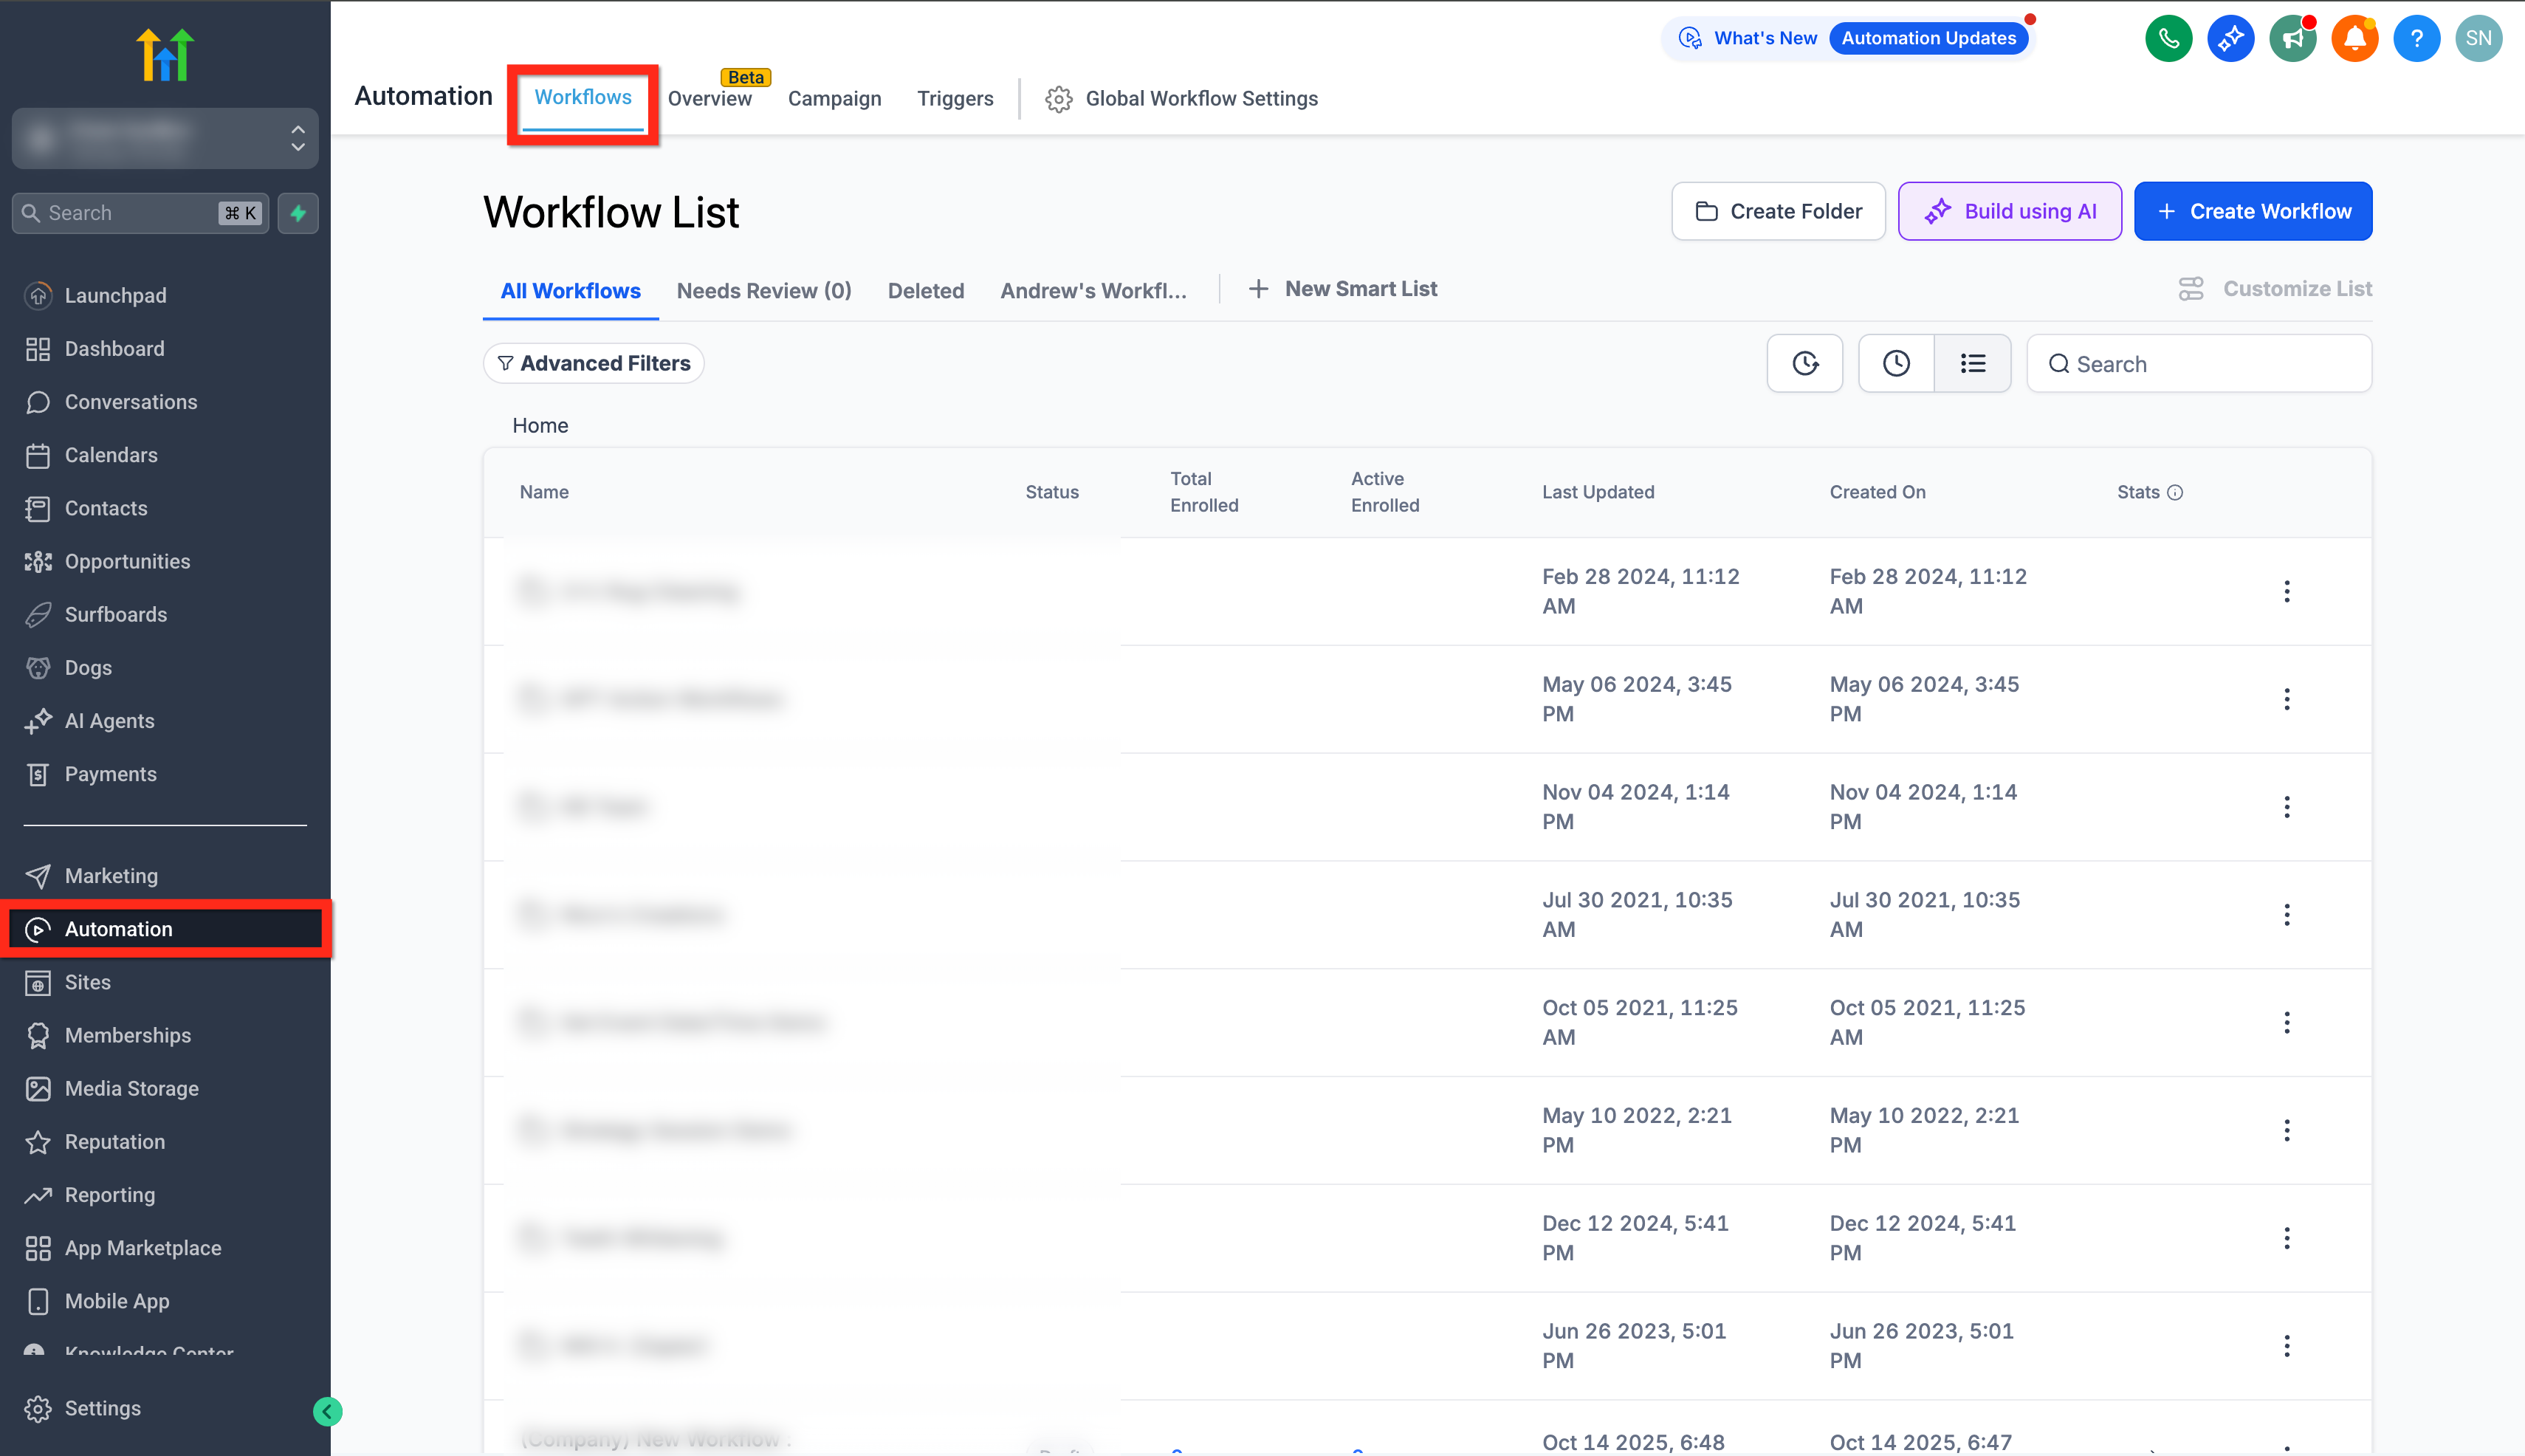
Go to Automations → Workflows.
Create a new workflow or open an existing one.
Add Trigger → choose Scheduler.
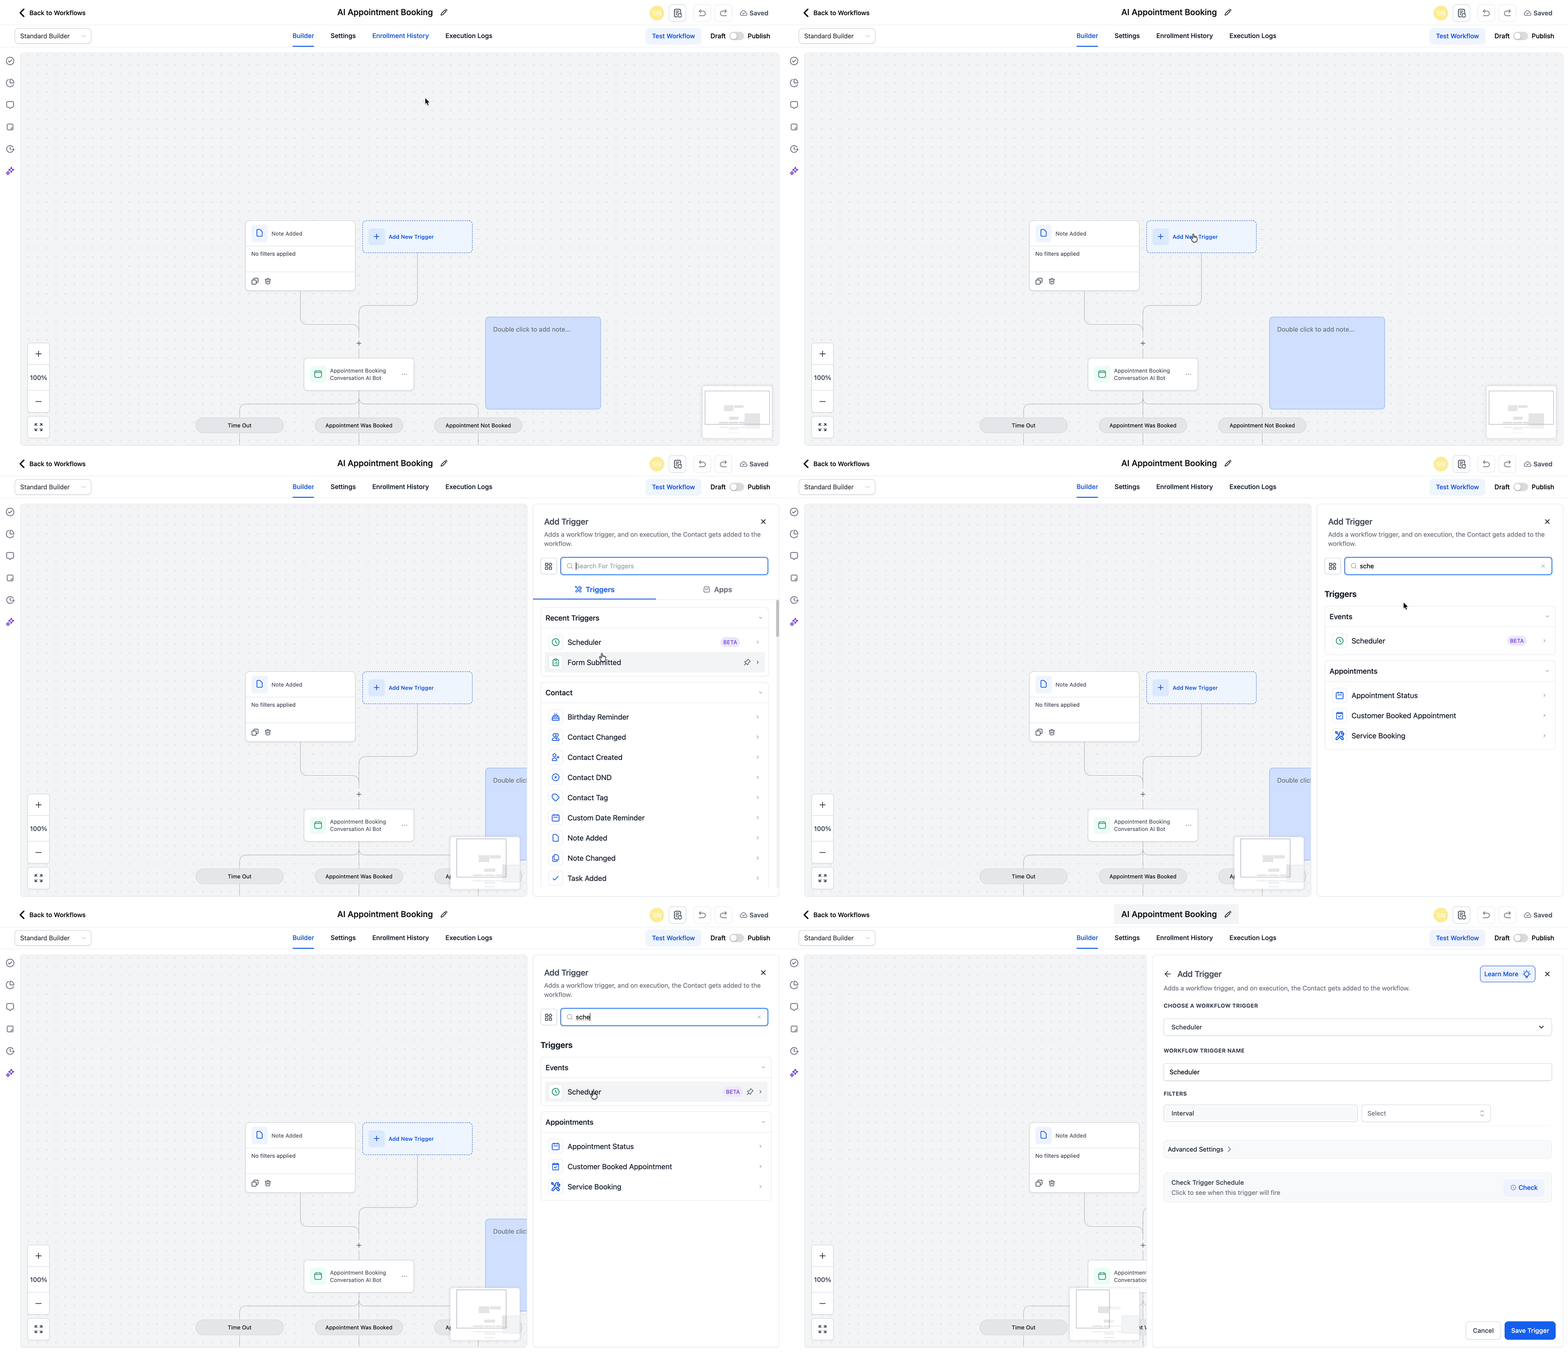
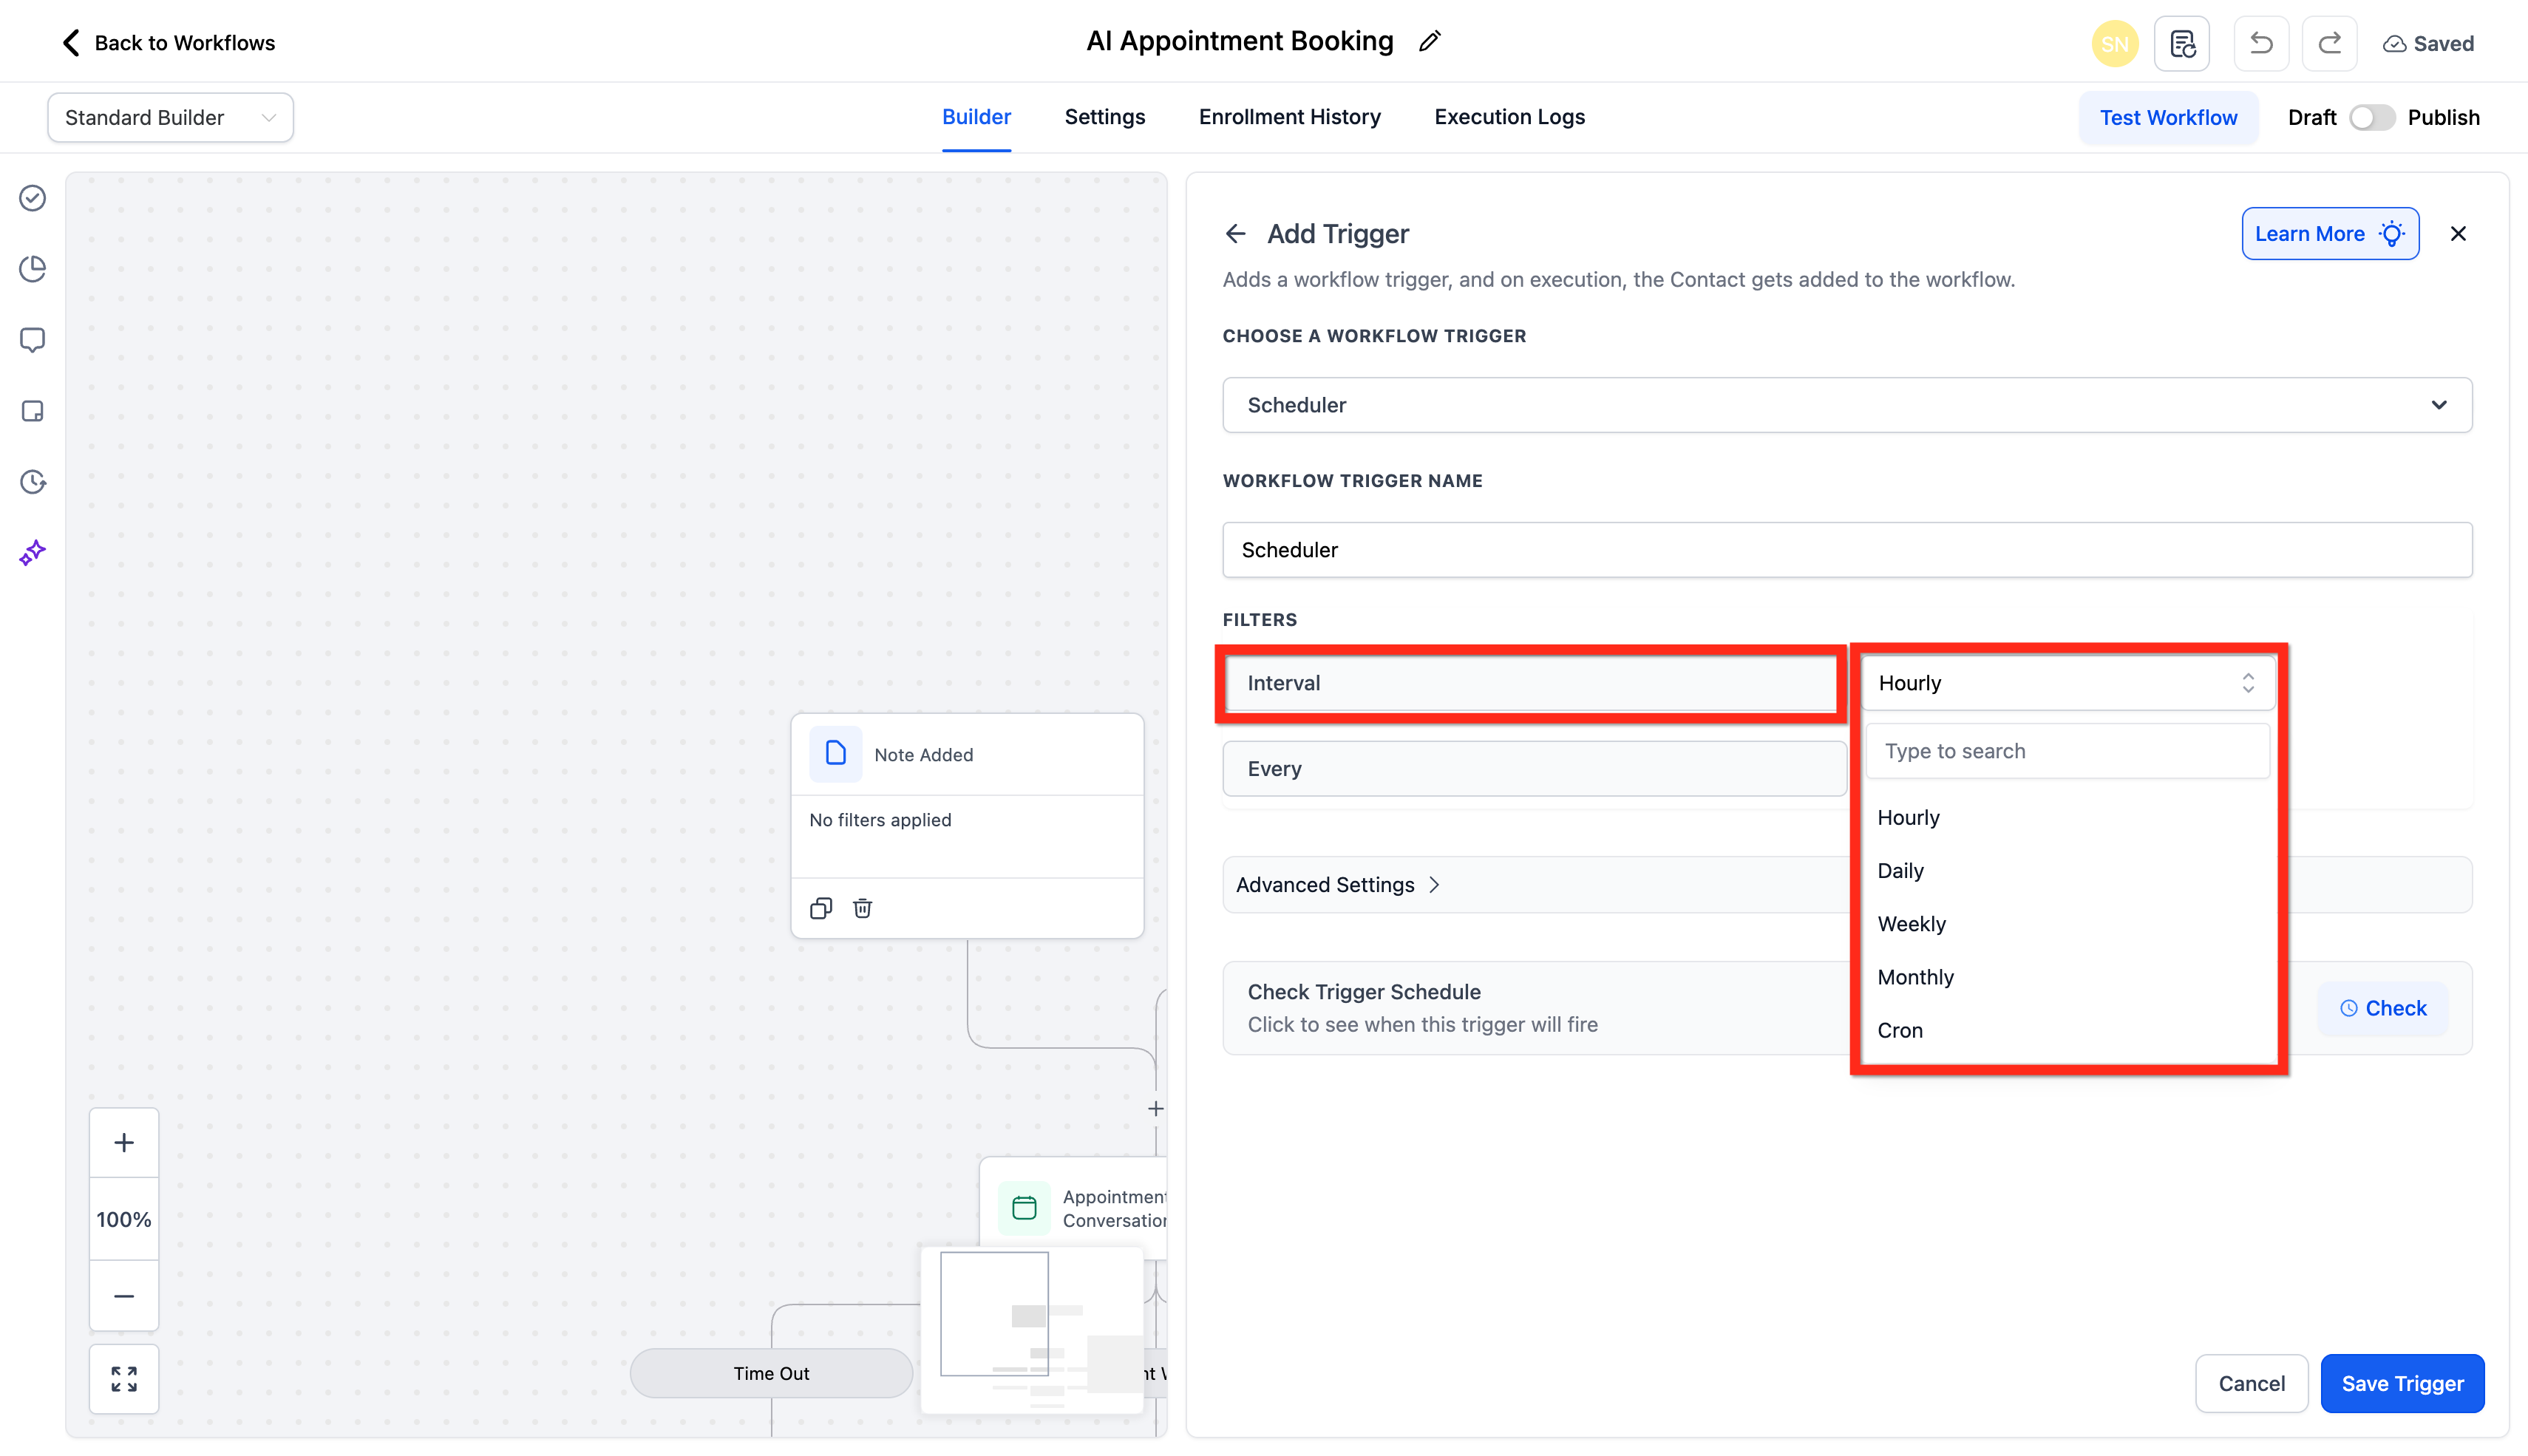
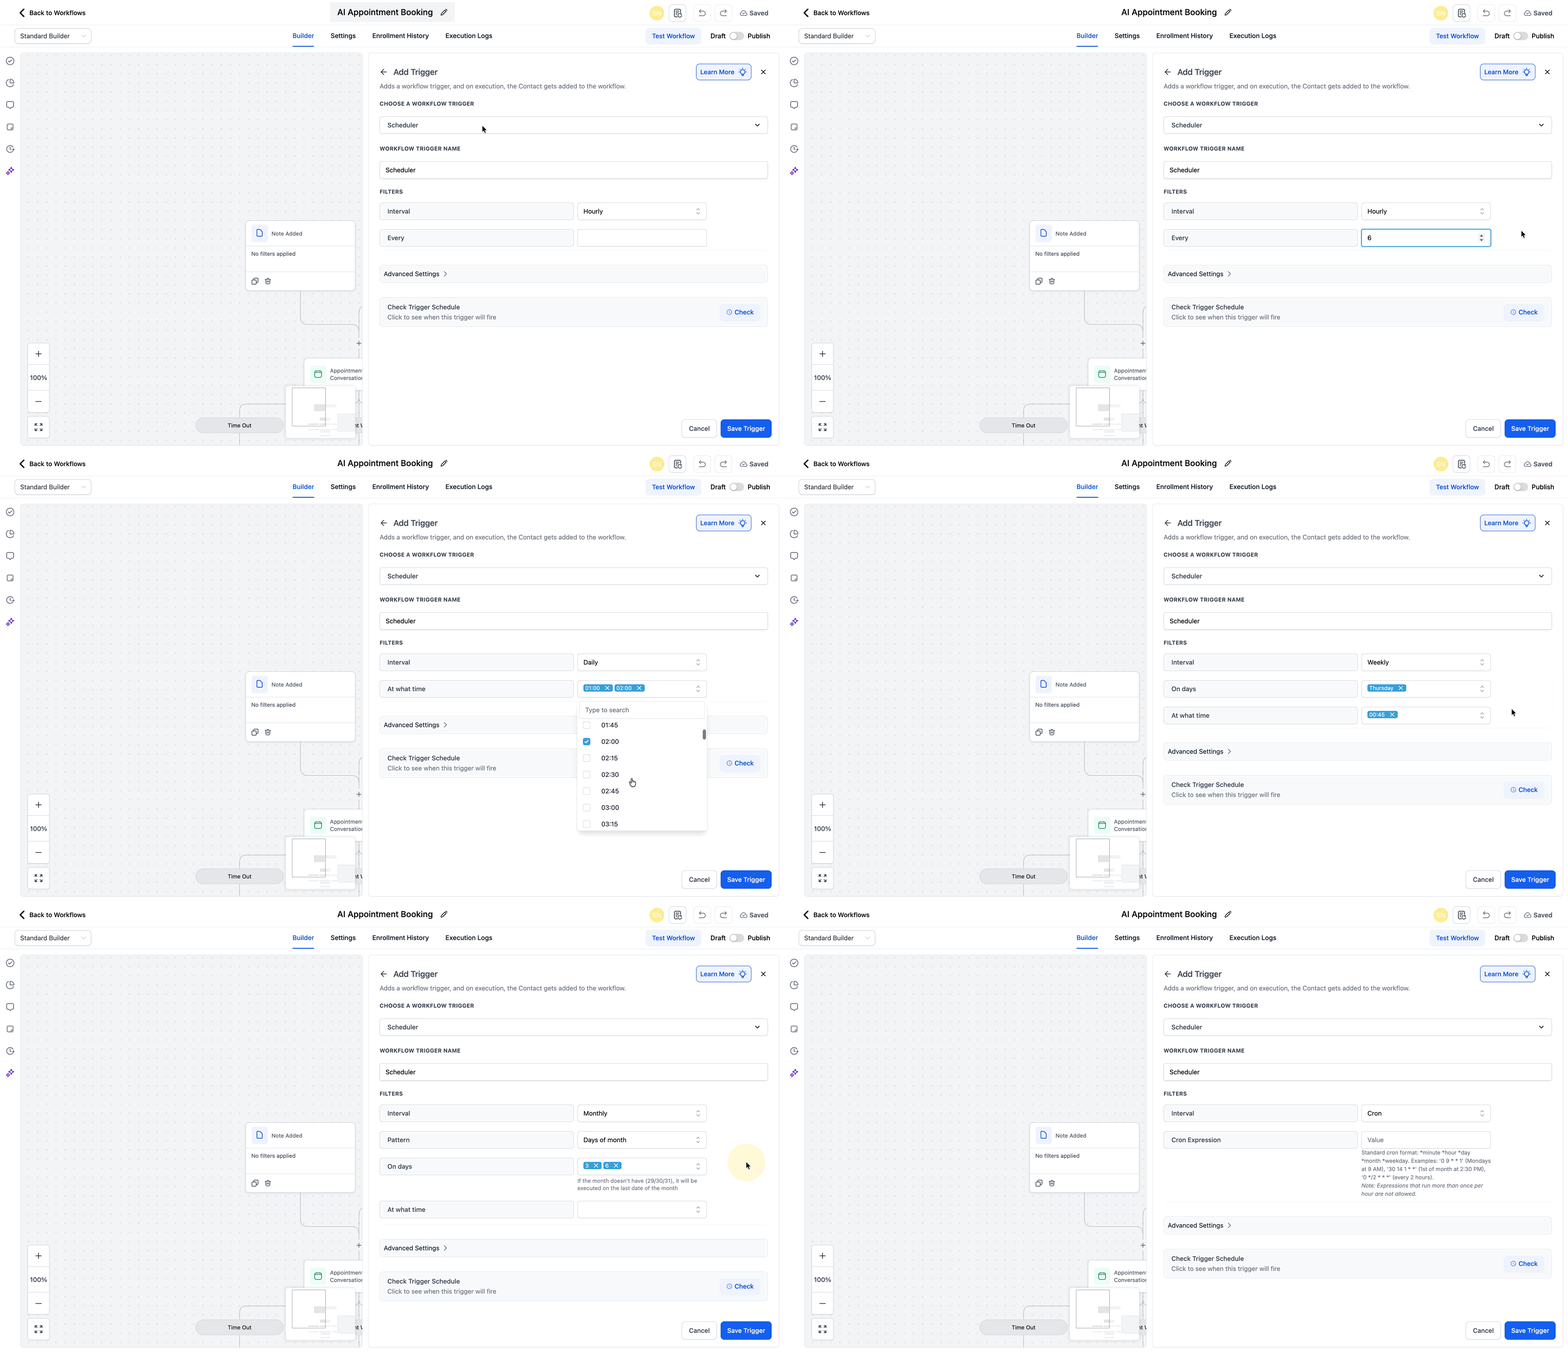
Choose an interval type:
Custom (Nth weekday like 2nd Friday / 4th Monday; supports multiple times)
Daily (one or more times in a day)
Weekly (select days of week + time)
Monthly (choose day 1–31 or Last + time)
Every N days (e.g., every 2 days at 9:00 AM)
One‑off date/time (run once)
Advanced (cron‑style) for complex schedules
Set the time(s) for the selected interval.
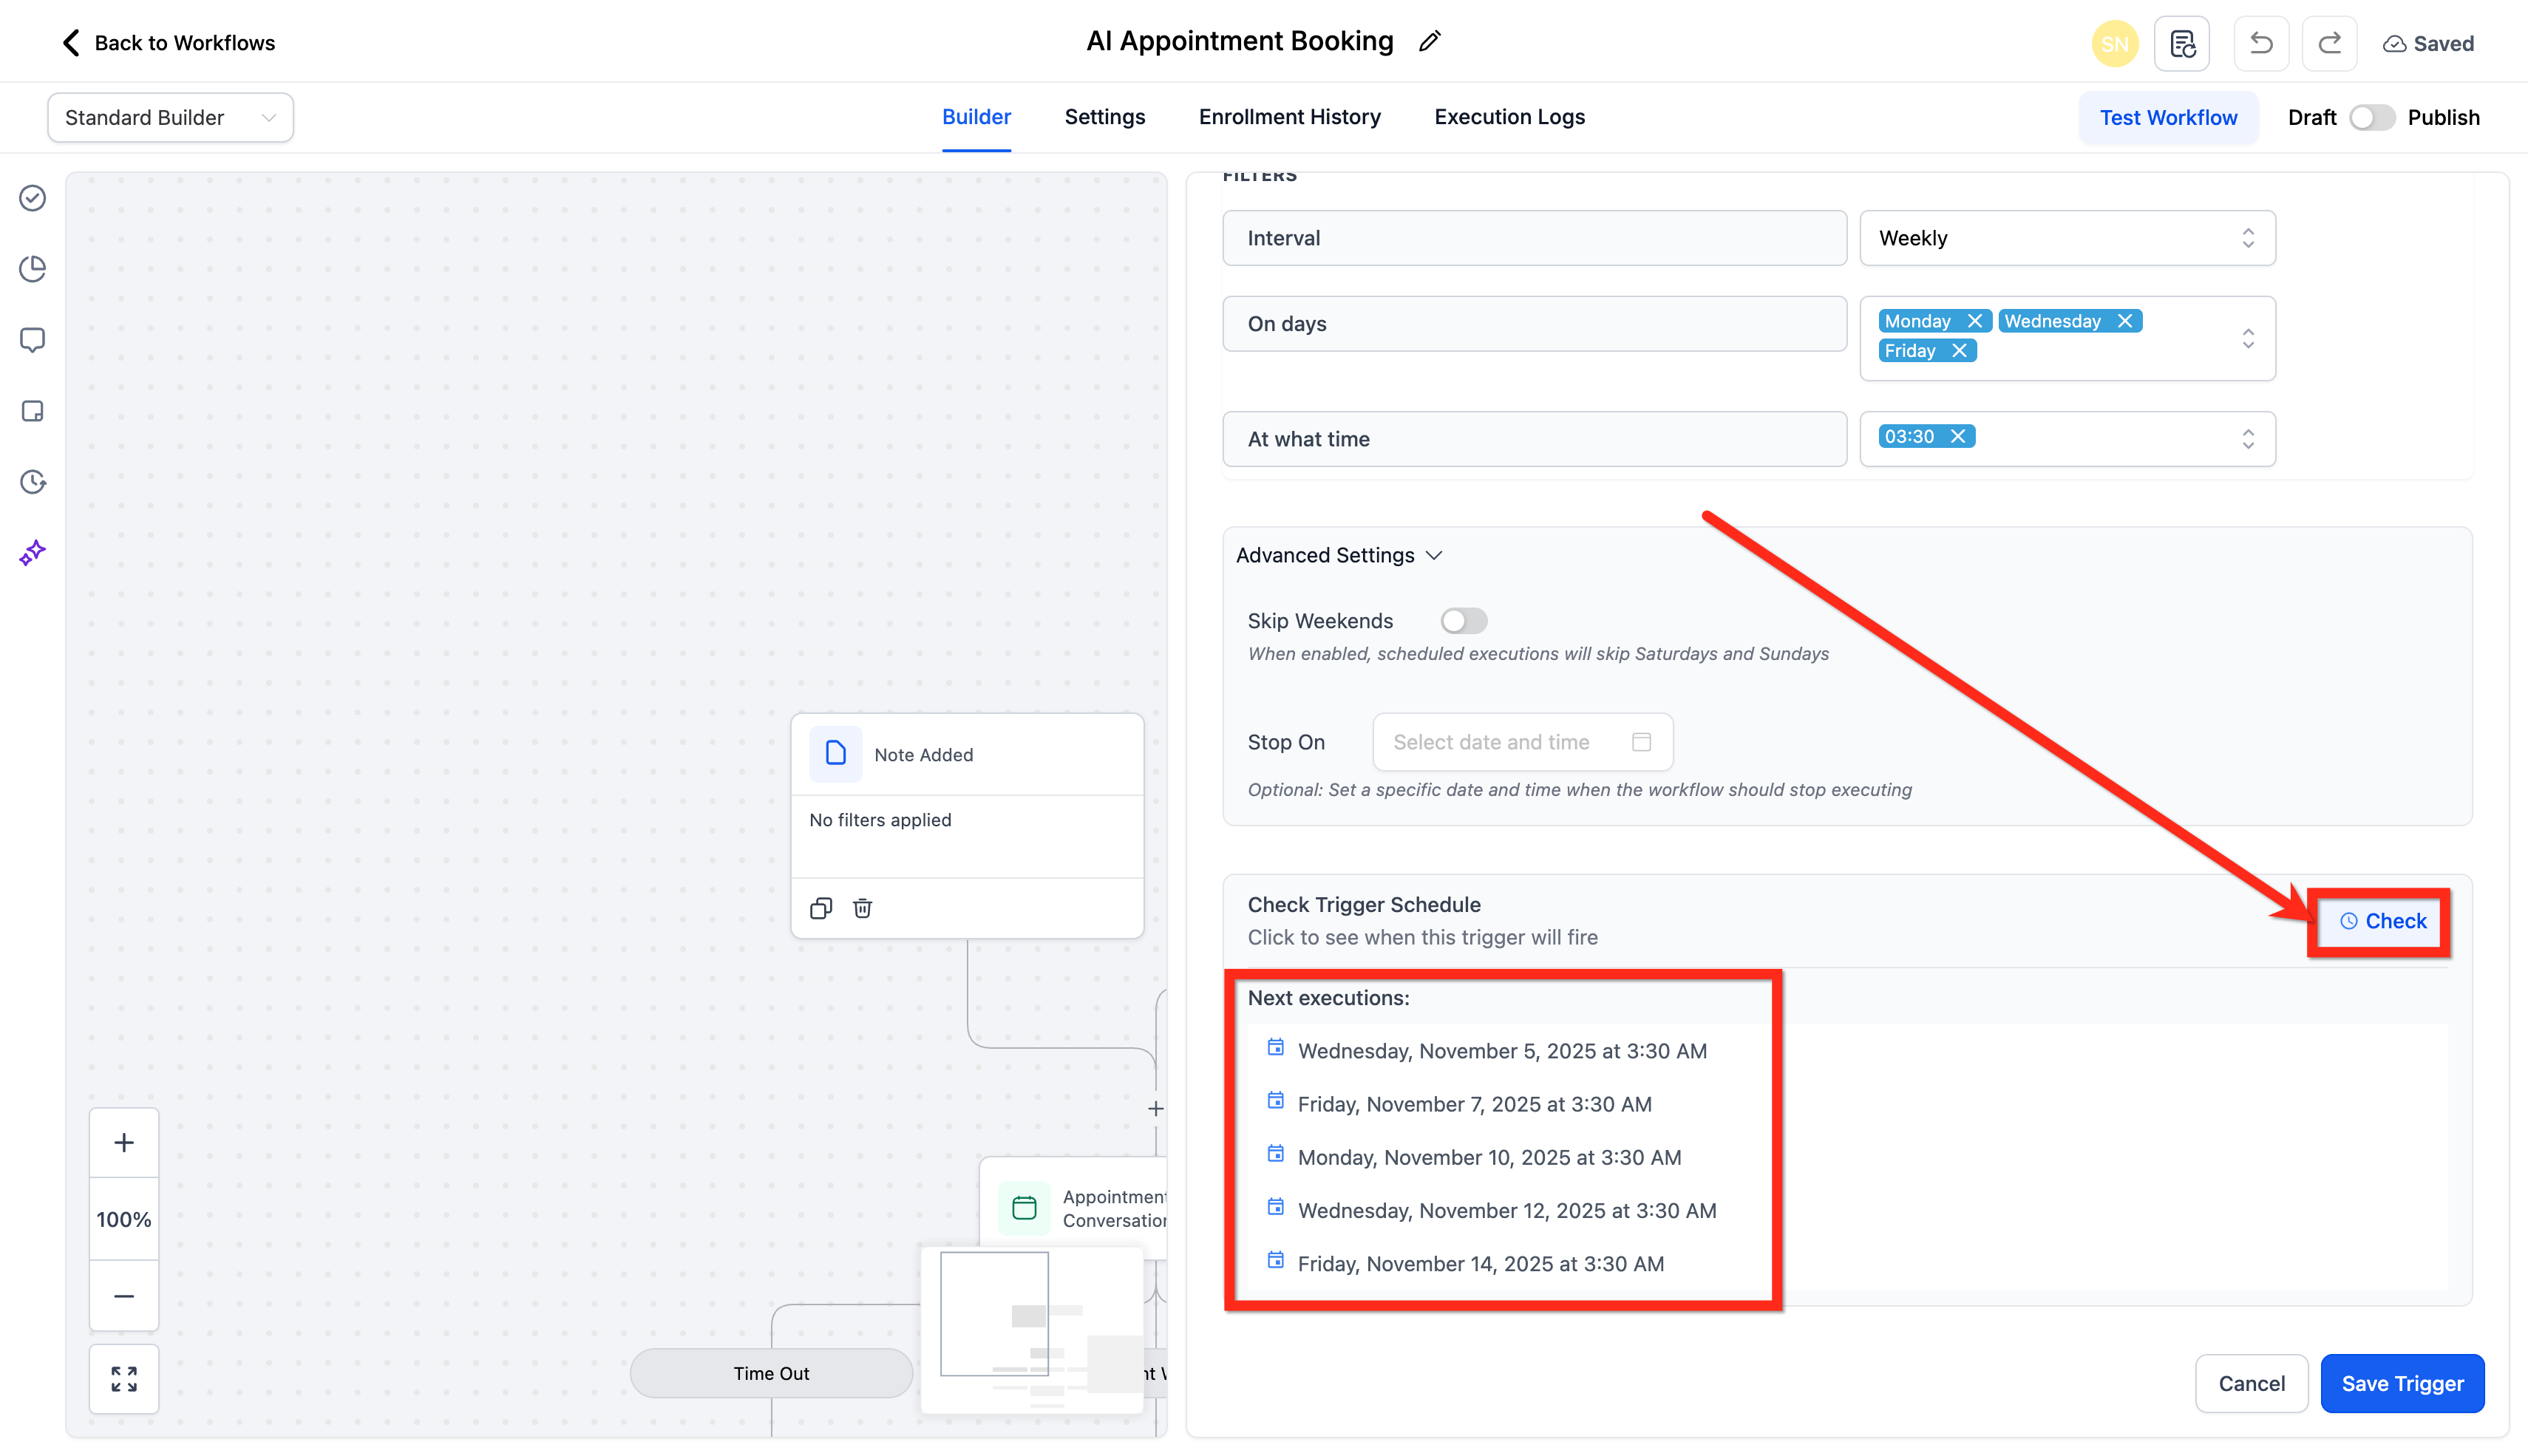
Click on Advanced Settings: toggle Skip Weekends and set Stop On if you need an end date. (Optional)
Preview the next run times using Check Trigger Schedule to confirm cadence (shows the next five executions).
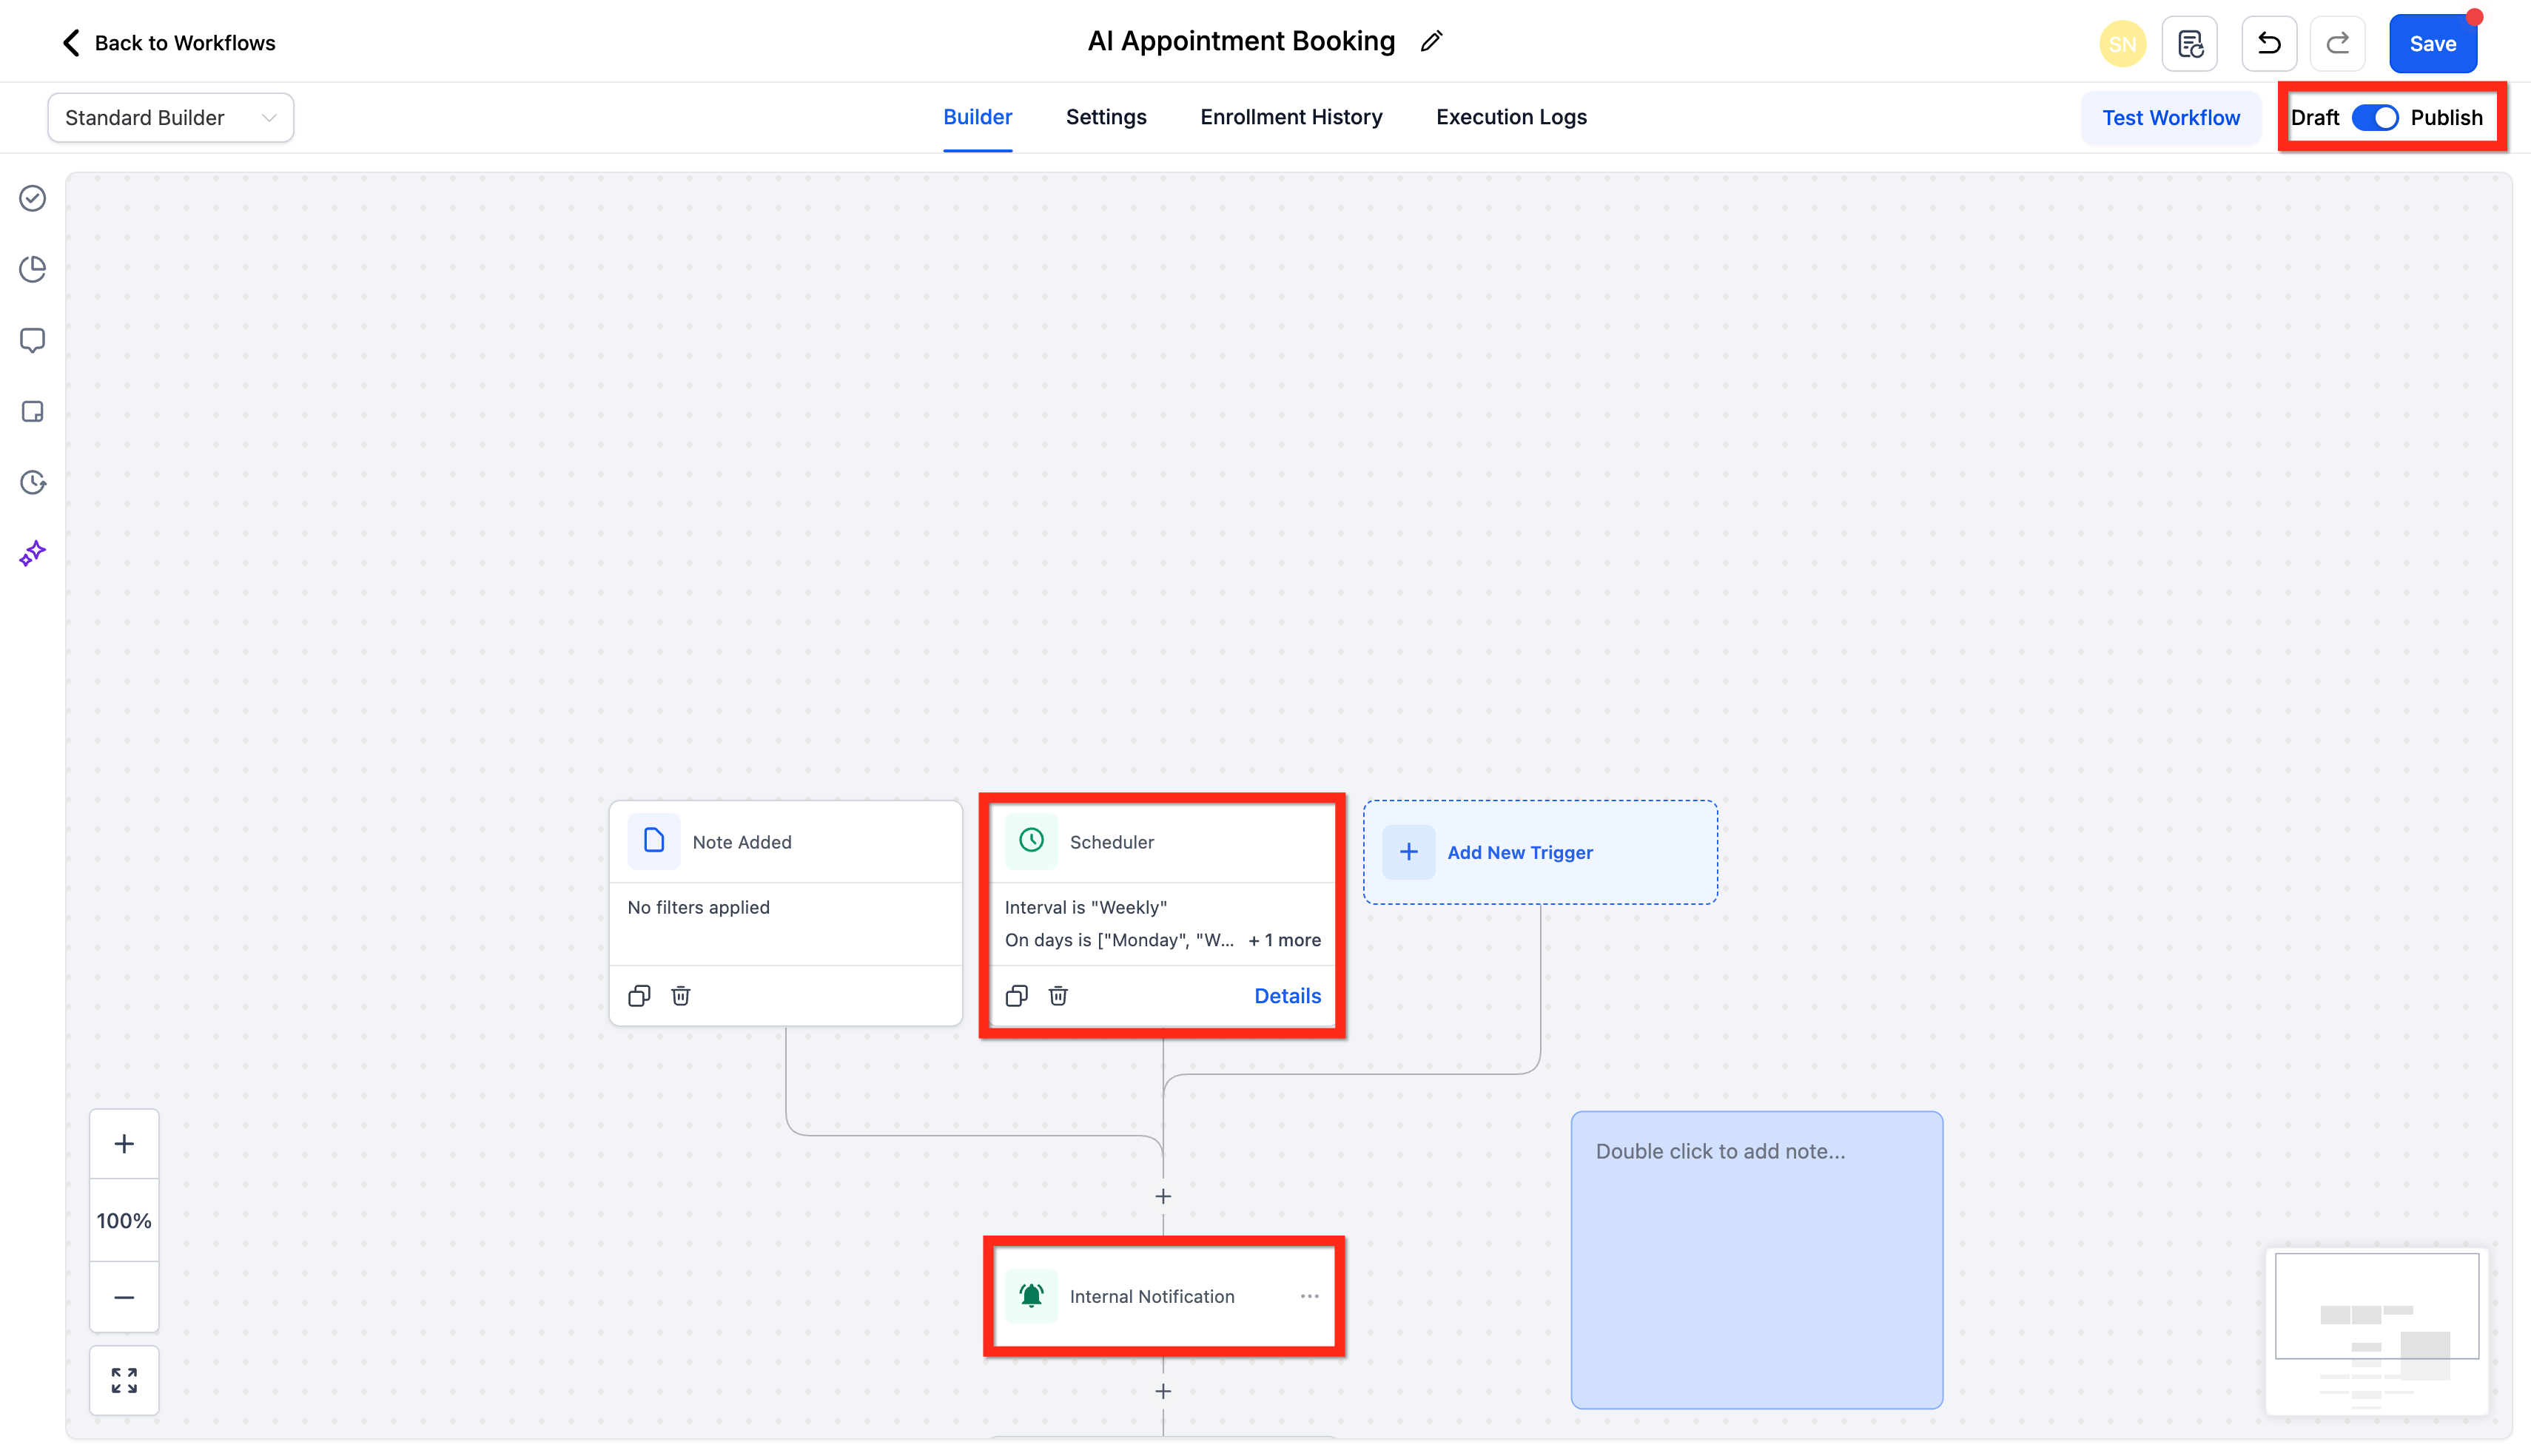
Add actions suited for contactless runs (e.g., Web-hook (Outbound), Slack, Google Sheets, Airtable, internal email/SMS to teammates, Custom Values, Create Task).
Publish the workflow. Scheduler will start running at the configured times from now on.
Example Use Cases
- Sheet Refresh: Update Airtable records every 4 hours via the Airtable integration.
- Routine Reports: Send daily summaries or weekly performance emails/Slack posts.
- Timed Reminders: Schedule follow-ups every morning at 8 AM.
- Ops Jobs: Nightly data hygiene, syncs to Google Sheets/Asana/Slack, webhook pings.
Frequently Asked Questions
Q. Is Scheduler contactless?
Yes. It does not enroll contacts. Steps that require a contact are skipped; the run continues to the next supported step.
Q. Does Scheduler backfill missed executions?
No. Scheduler triggers on upcoming times while the workflow is Published. Past occurrences are not executed retroactively.
Q. Can I schedule multiple times in a single day?
Yes. Daily and Custom options support multiple times.
Q. How does “Skip Weekends” work?
Saturday/Sunday occurrences are automatically removed from the schedule. Preview reflects this immediately.
Q. What does “Stop On” do?
It sets a final date/time after which future scheduled runs will stop.
Q. What actions work best with Scheduler?
Contactless actions such as Web-hook (Outbound), Google Sheets, Airtable, Slack, internal notifications, Custom Values, and task creation.