
Bulk Import for Companies lets you add or update Company records in SourCherry using a CSV file and a guided import wizard. This article explains how the import flow works, how to map fields safely, and where to review results in Bulk Actions.
TABLE OF CONTENTS
- What is Bulk Importing Companies?
- Key Benefits of Bulk Importing Companies
- Prerequisites for Bulk Importing Companies
- Common Mistakes to Avoid
- Import Modes Explained
- How to Bulk Import Companies
- Duplicate Handling & Unique Fields
- Update Empty Values Restrictions
- Monitor Import Status
- Frequently Asked Questions
- Related Articles
What is Bulk Importing Companies?
Bulk Importing Companies lets you create and update Company records in SourCherry by uploading a CSV file and following a guided, multi-step import flow. The wizard helps you choose how records should be created or updated, map CSV columns to Company fields with preview data, and verify everything before starting the import.
Important: Import supports only CSV (.csv) files. Excel (.xlsx) and Google Sheets links are not supported.
Key Benefits of Bulk Importing Companies
Faster CRM setup: Add hundreds or thousands of companies in minutes using a CSV.
Controlled updates: Choose whether to create new records, update existing ones, or do both.
Safer data changes: Prevent accidental data wipes by skipping updates that would overwrite fields with empty values.
Cleaner matching: Use Company ID-based duplicate detection to update the correct records.
Confidence before importing: Review mapped fields on a verification screen before the import begins.
Better auditability: Track imports in Bulk Actions and download a report when complete.
Prerequisites for Bulk Importing Companies
Before starting your import:
User Permissions
- You must have Admin access to perform imports.
File Requirements
File format must be .csv
Maximum file size: 30 MB
Only one sheet/tab
The first row must contain headers
Headers should match existing standard or custom fields
Field Preparation
Required fields must contain valid values
Custom fields must already exist in your account
If updating records, ensure you include the correct identifier (e.g., Record ID)
Common Mistakes to Avoid
- Missing required fields
- Blank primary field values
- Incorrect Record IDs when using Update mode
- Unique field conflicts
- CSV headers that don’t match CRM field names
Always test with a small file first.
Import Modes Explained
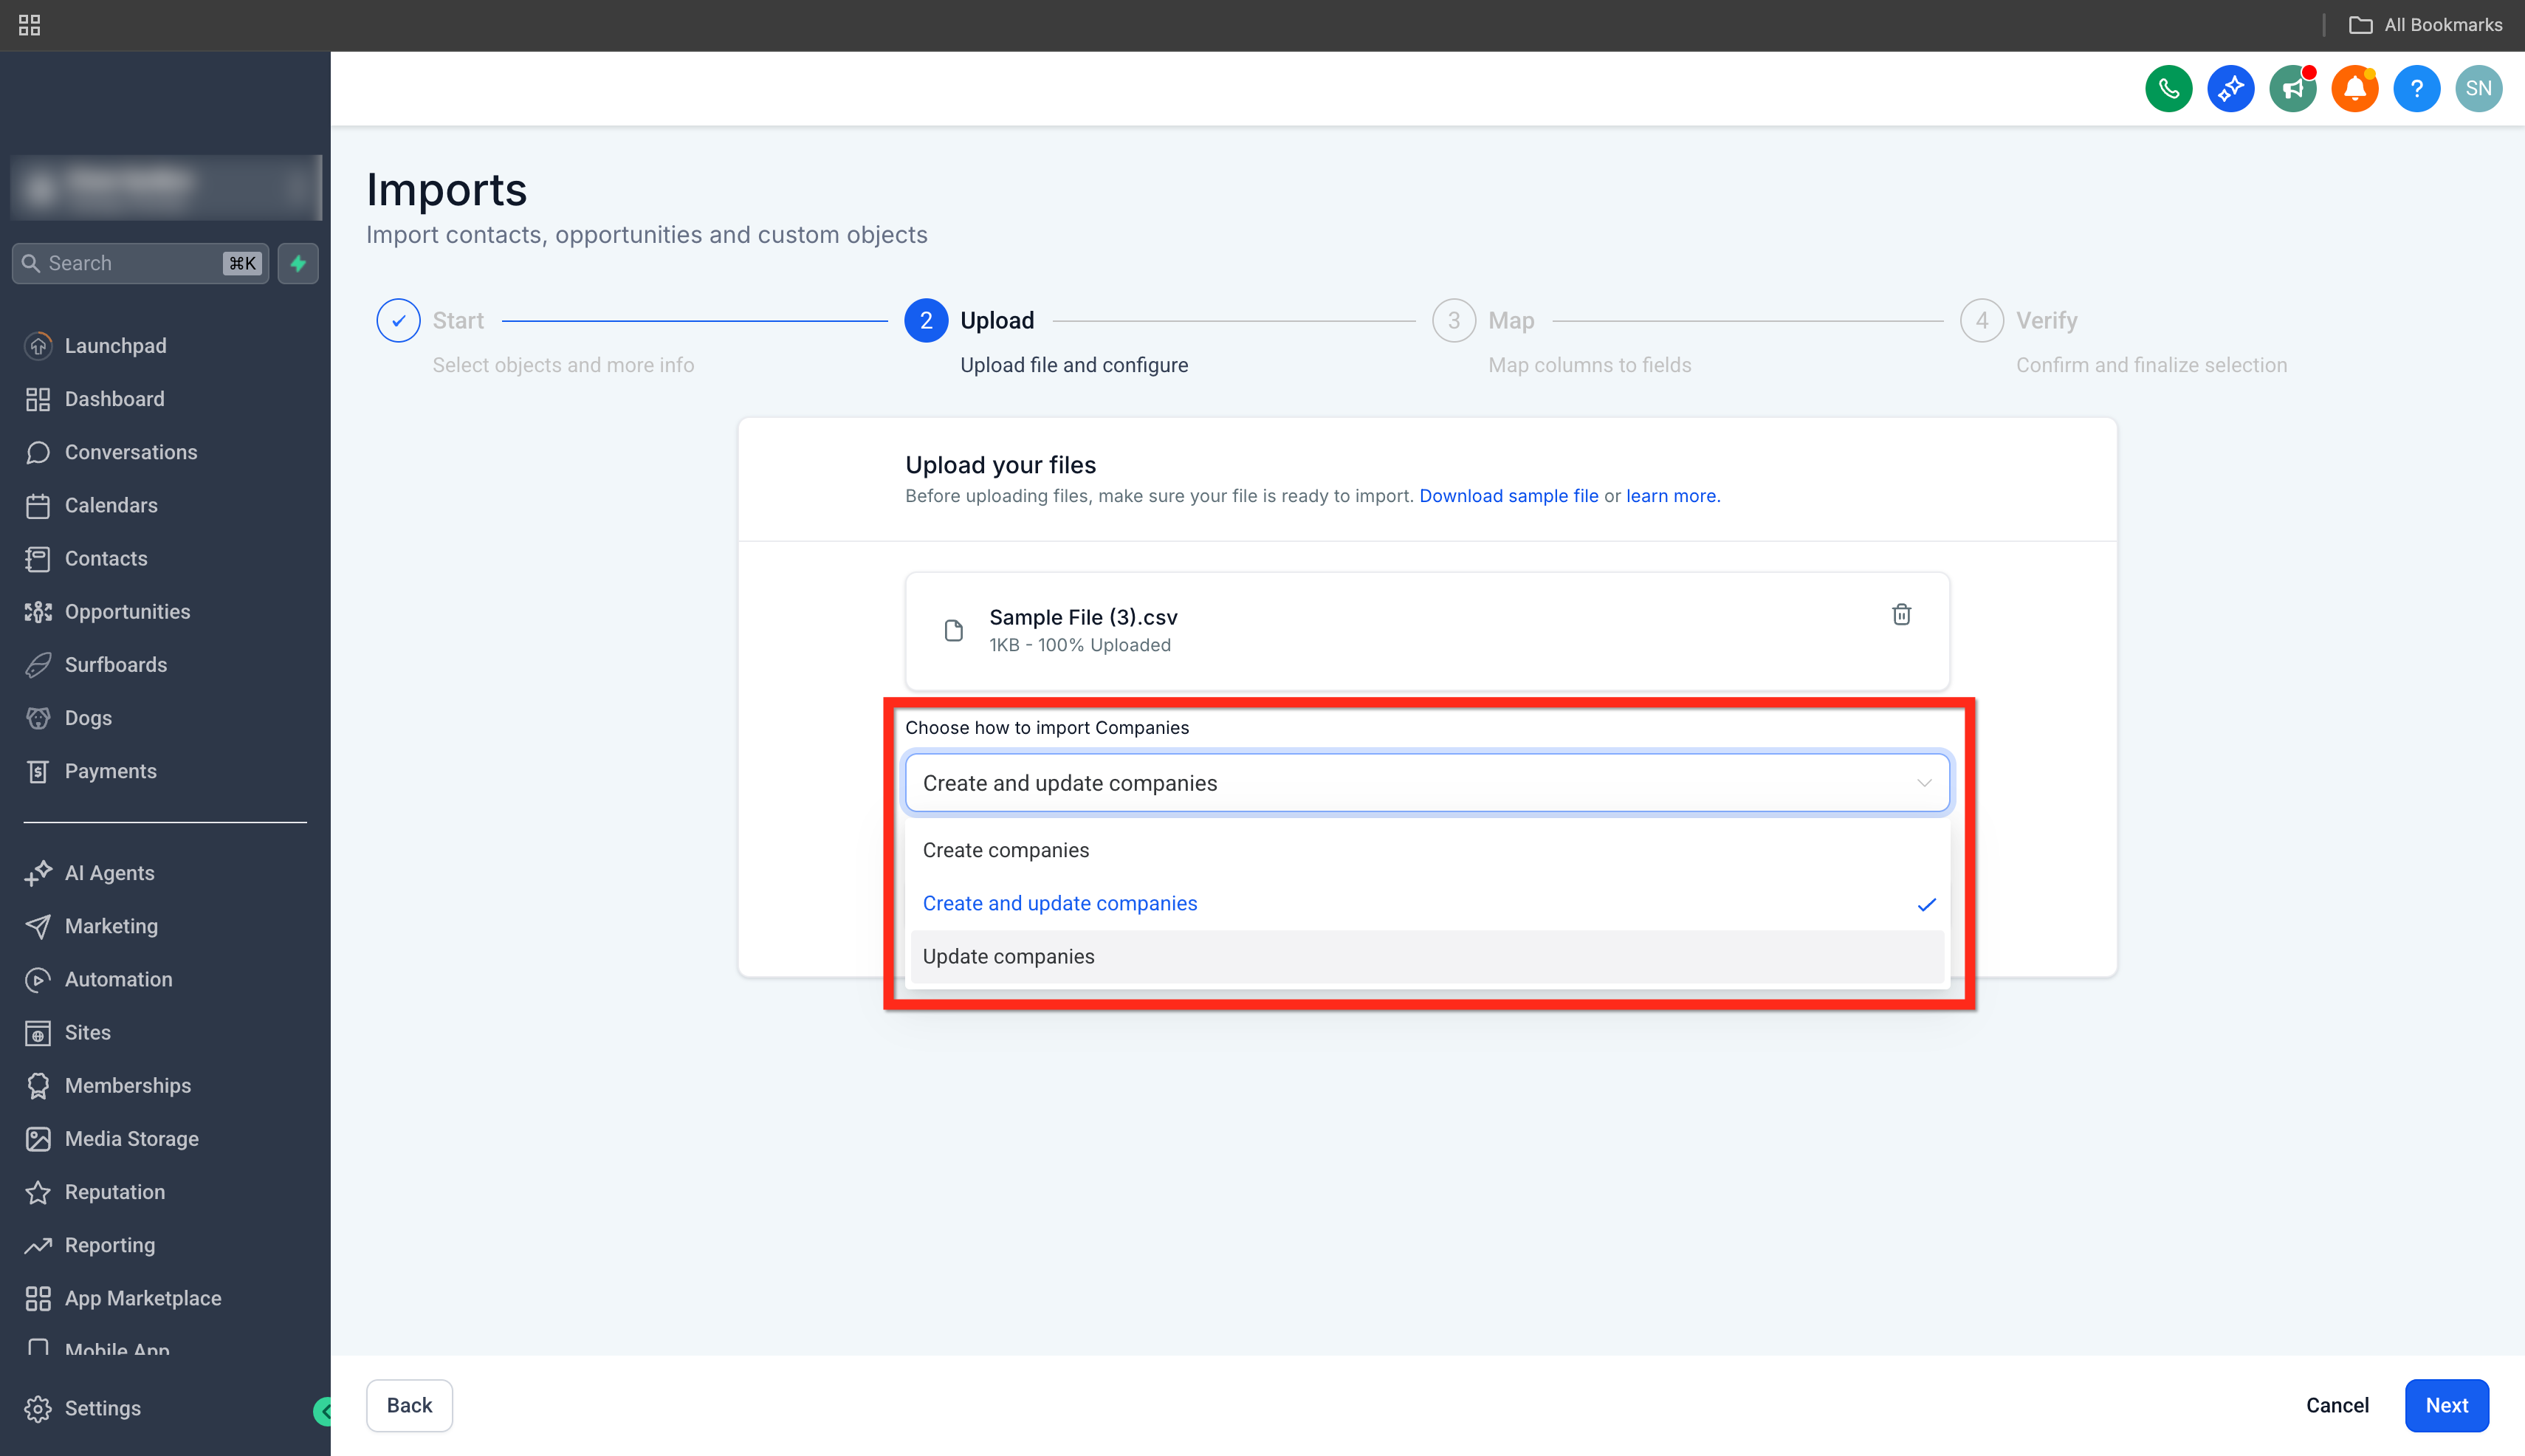
When uploading your CSV, you’ll choose one of three modes:
- Create
Creates new records only.- Requires the Primary field
- Existing records will not be updated
- Duplicate handling follows unique field rules (if applicable)
- Update
Updates existing records only.- Requires Record ID or unique fields in case of custom objects
- Rows without a matching Record ID/unique field will be skipped
- Create & Update
Creates new records and updates existing ones.- If Record ID or unique field matches → record updates
- If no match → record is created
- Unique field rules apply if configured
How to Bulk Import Companies
Step 1: Navigate to Import
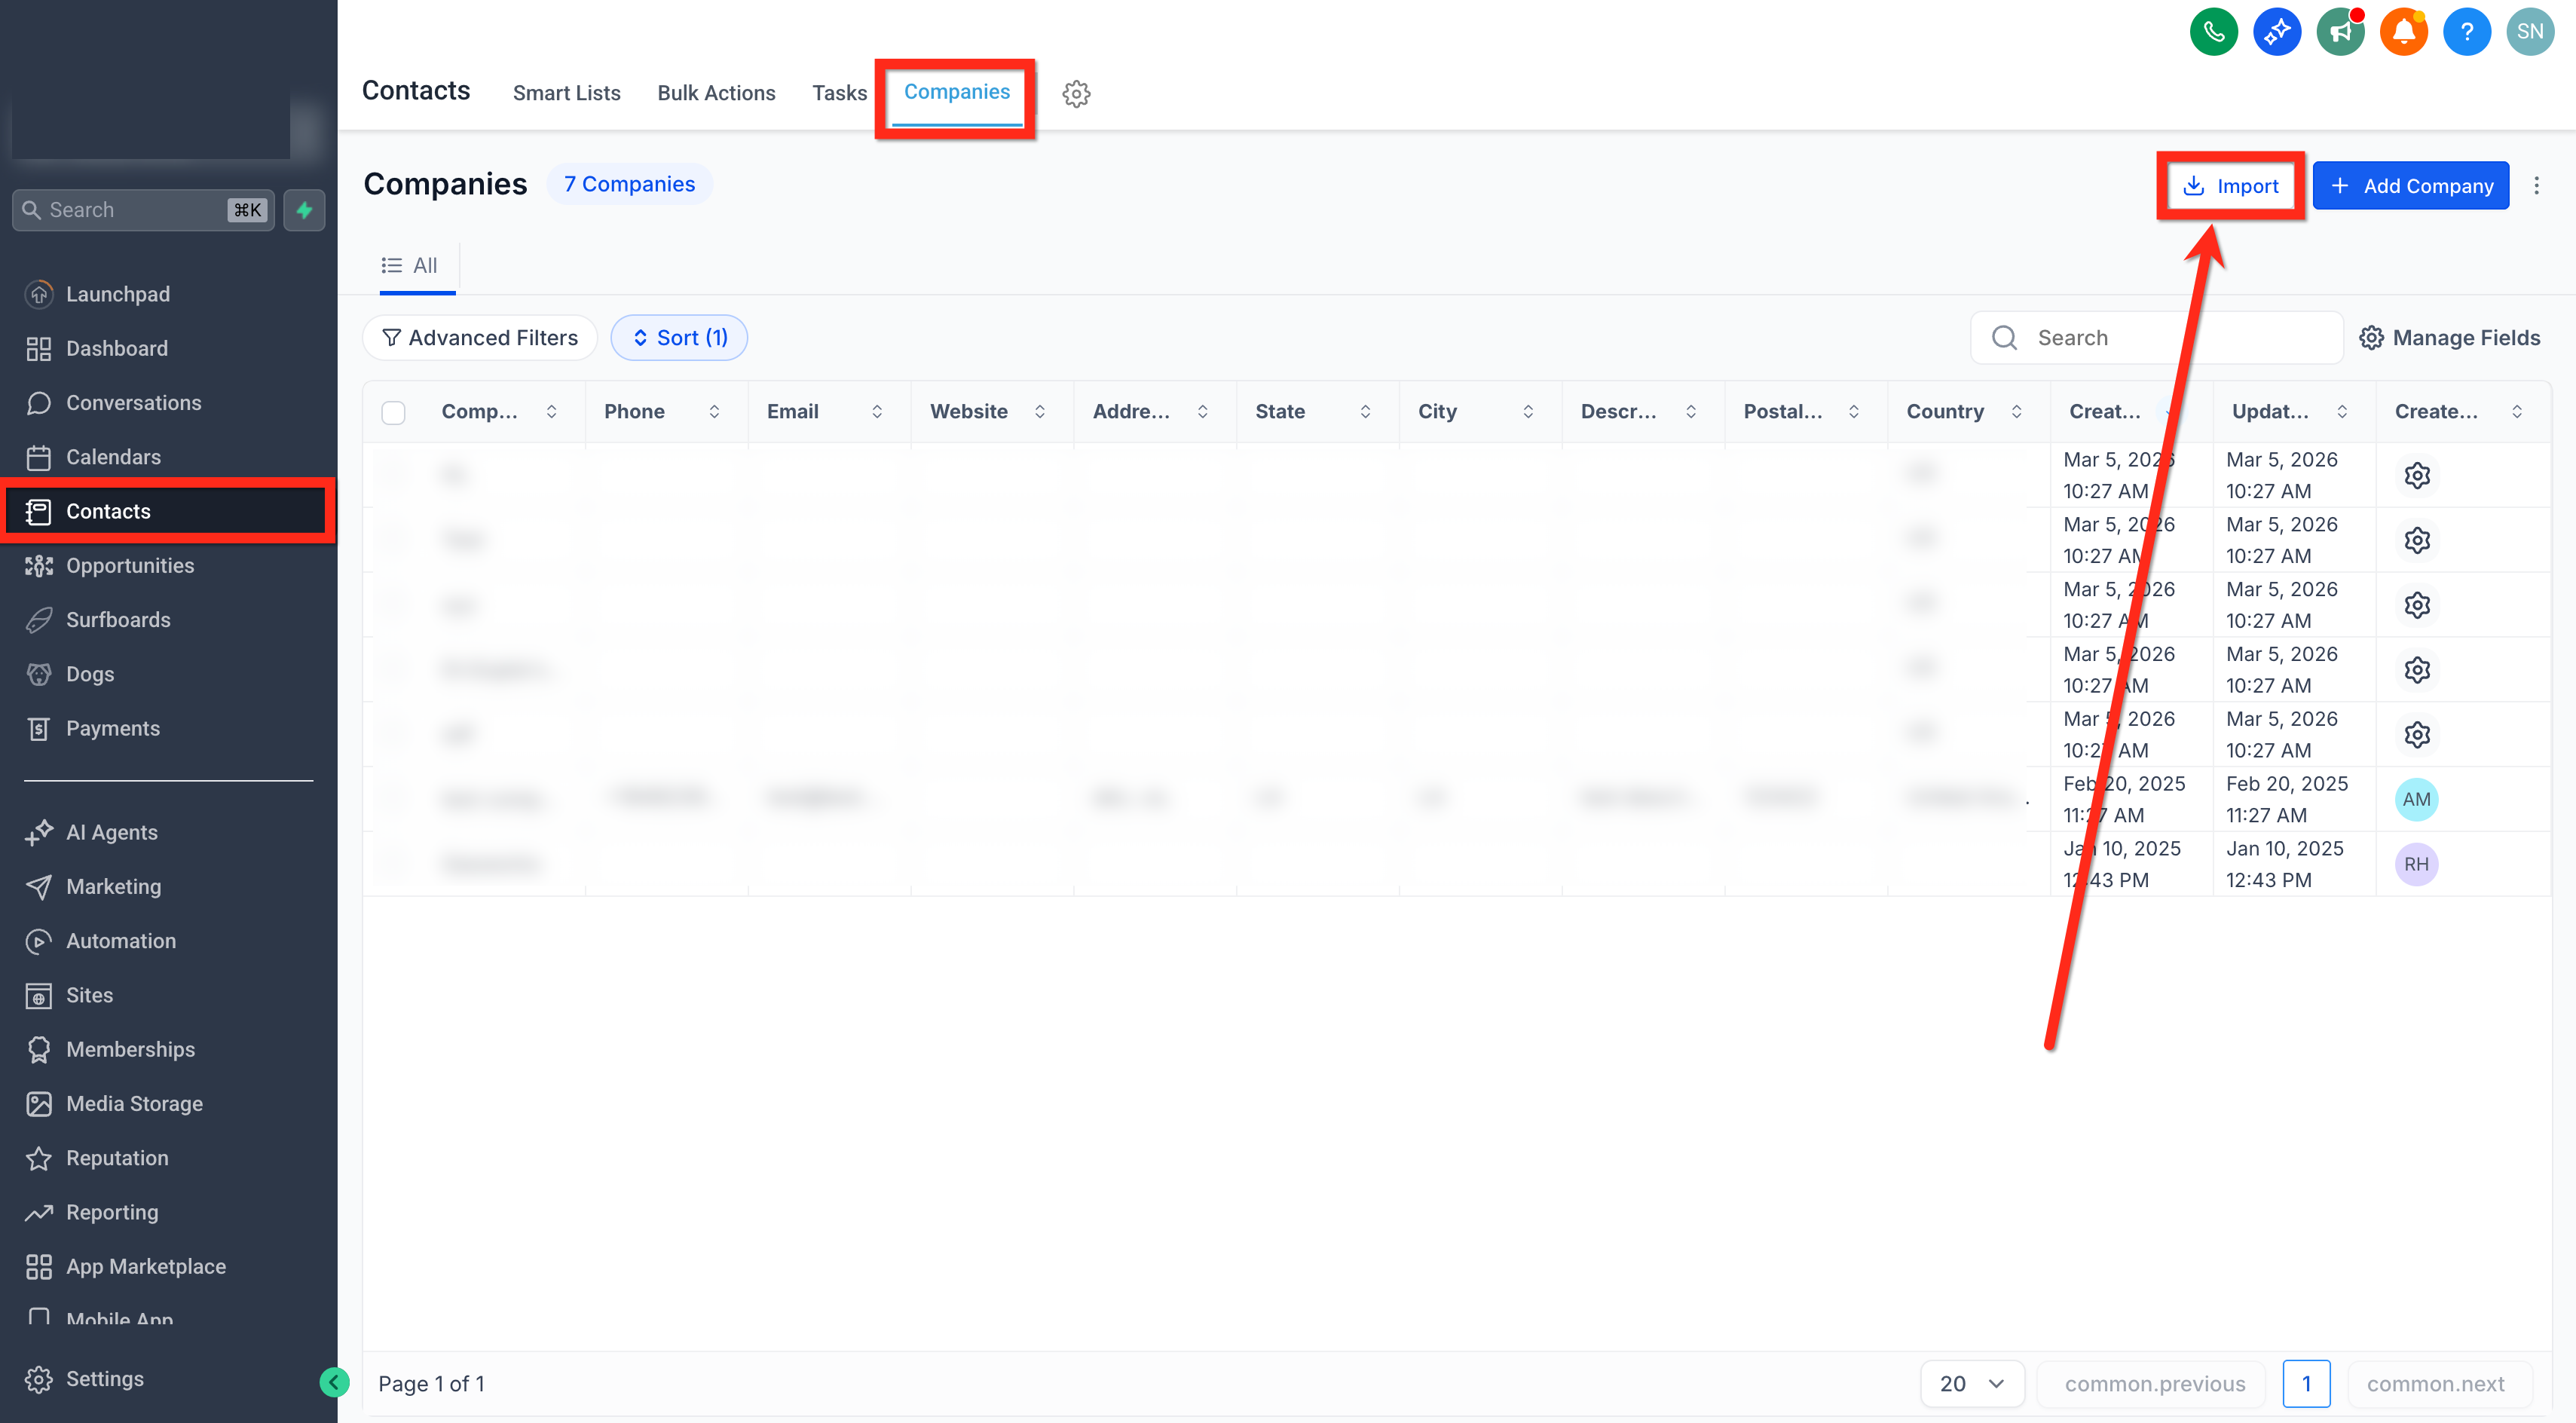
- Go to Contacts > Companies.
- Click on Import.
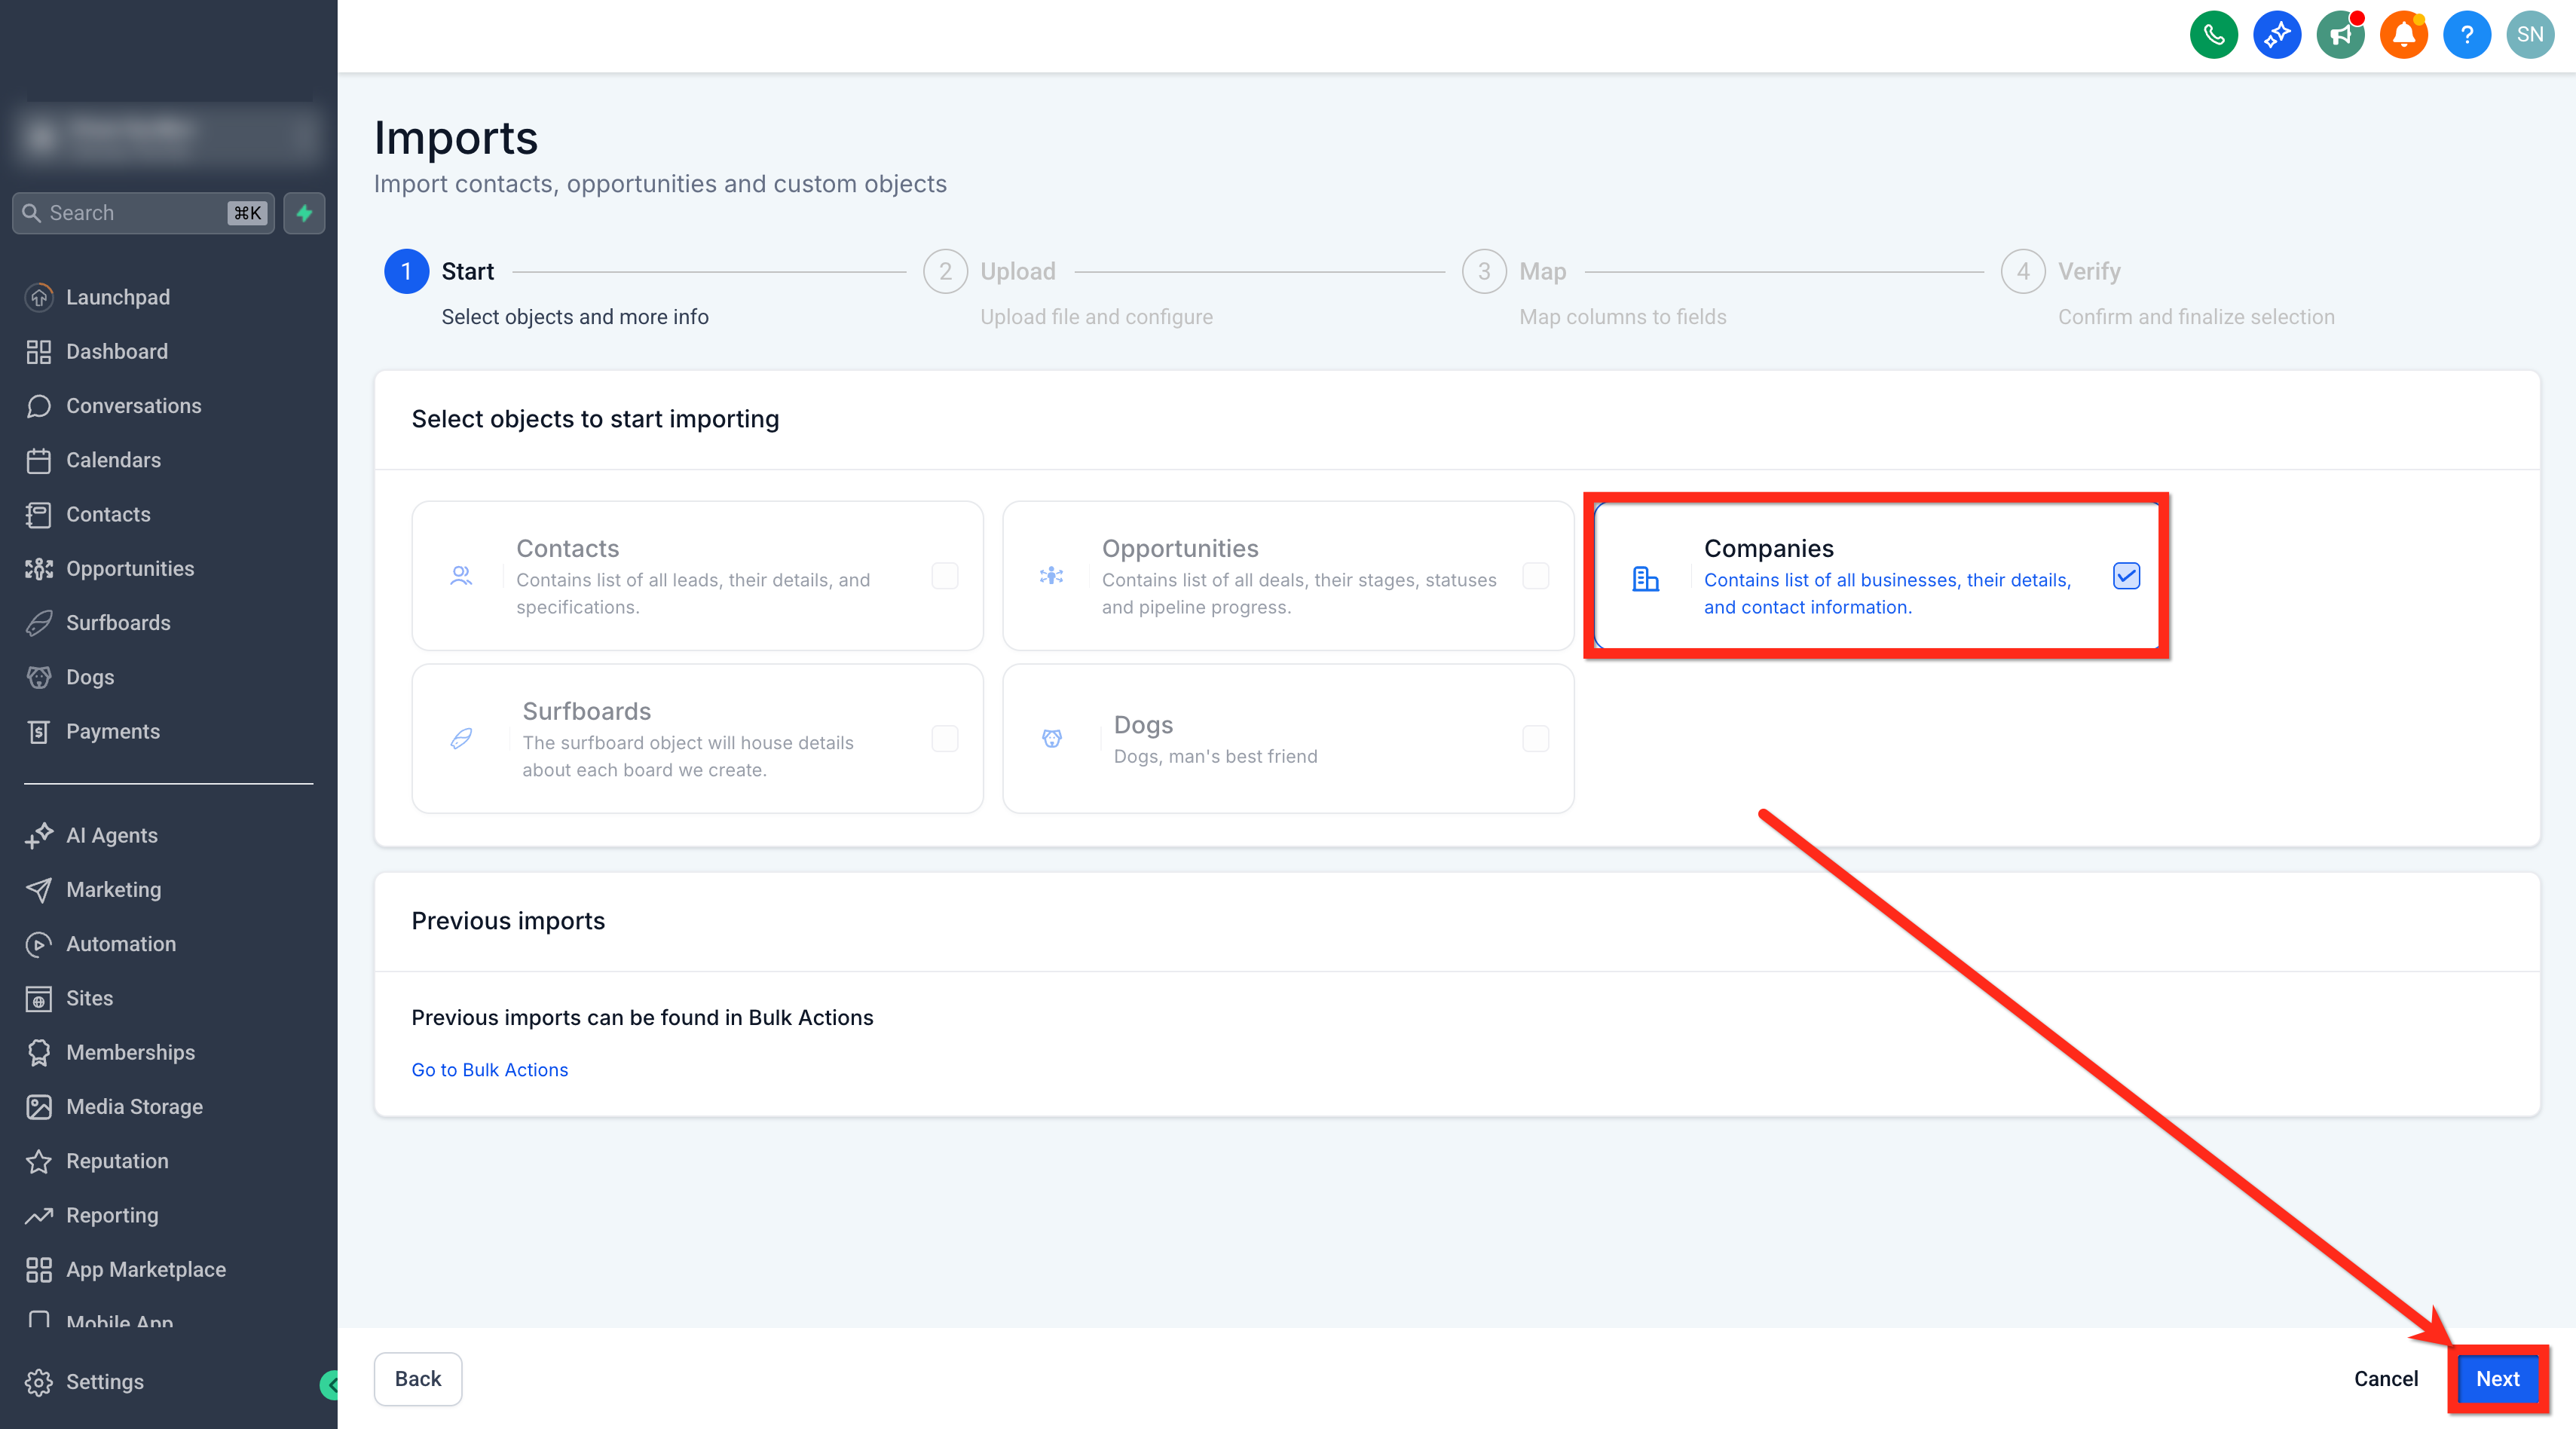
- Choose the Companies object.
- Click on Next.
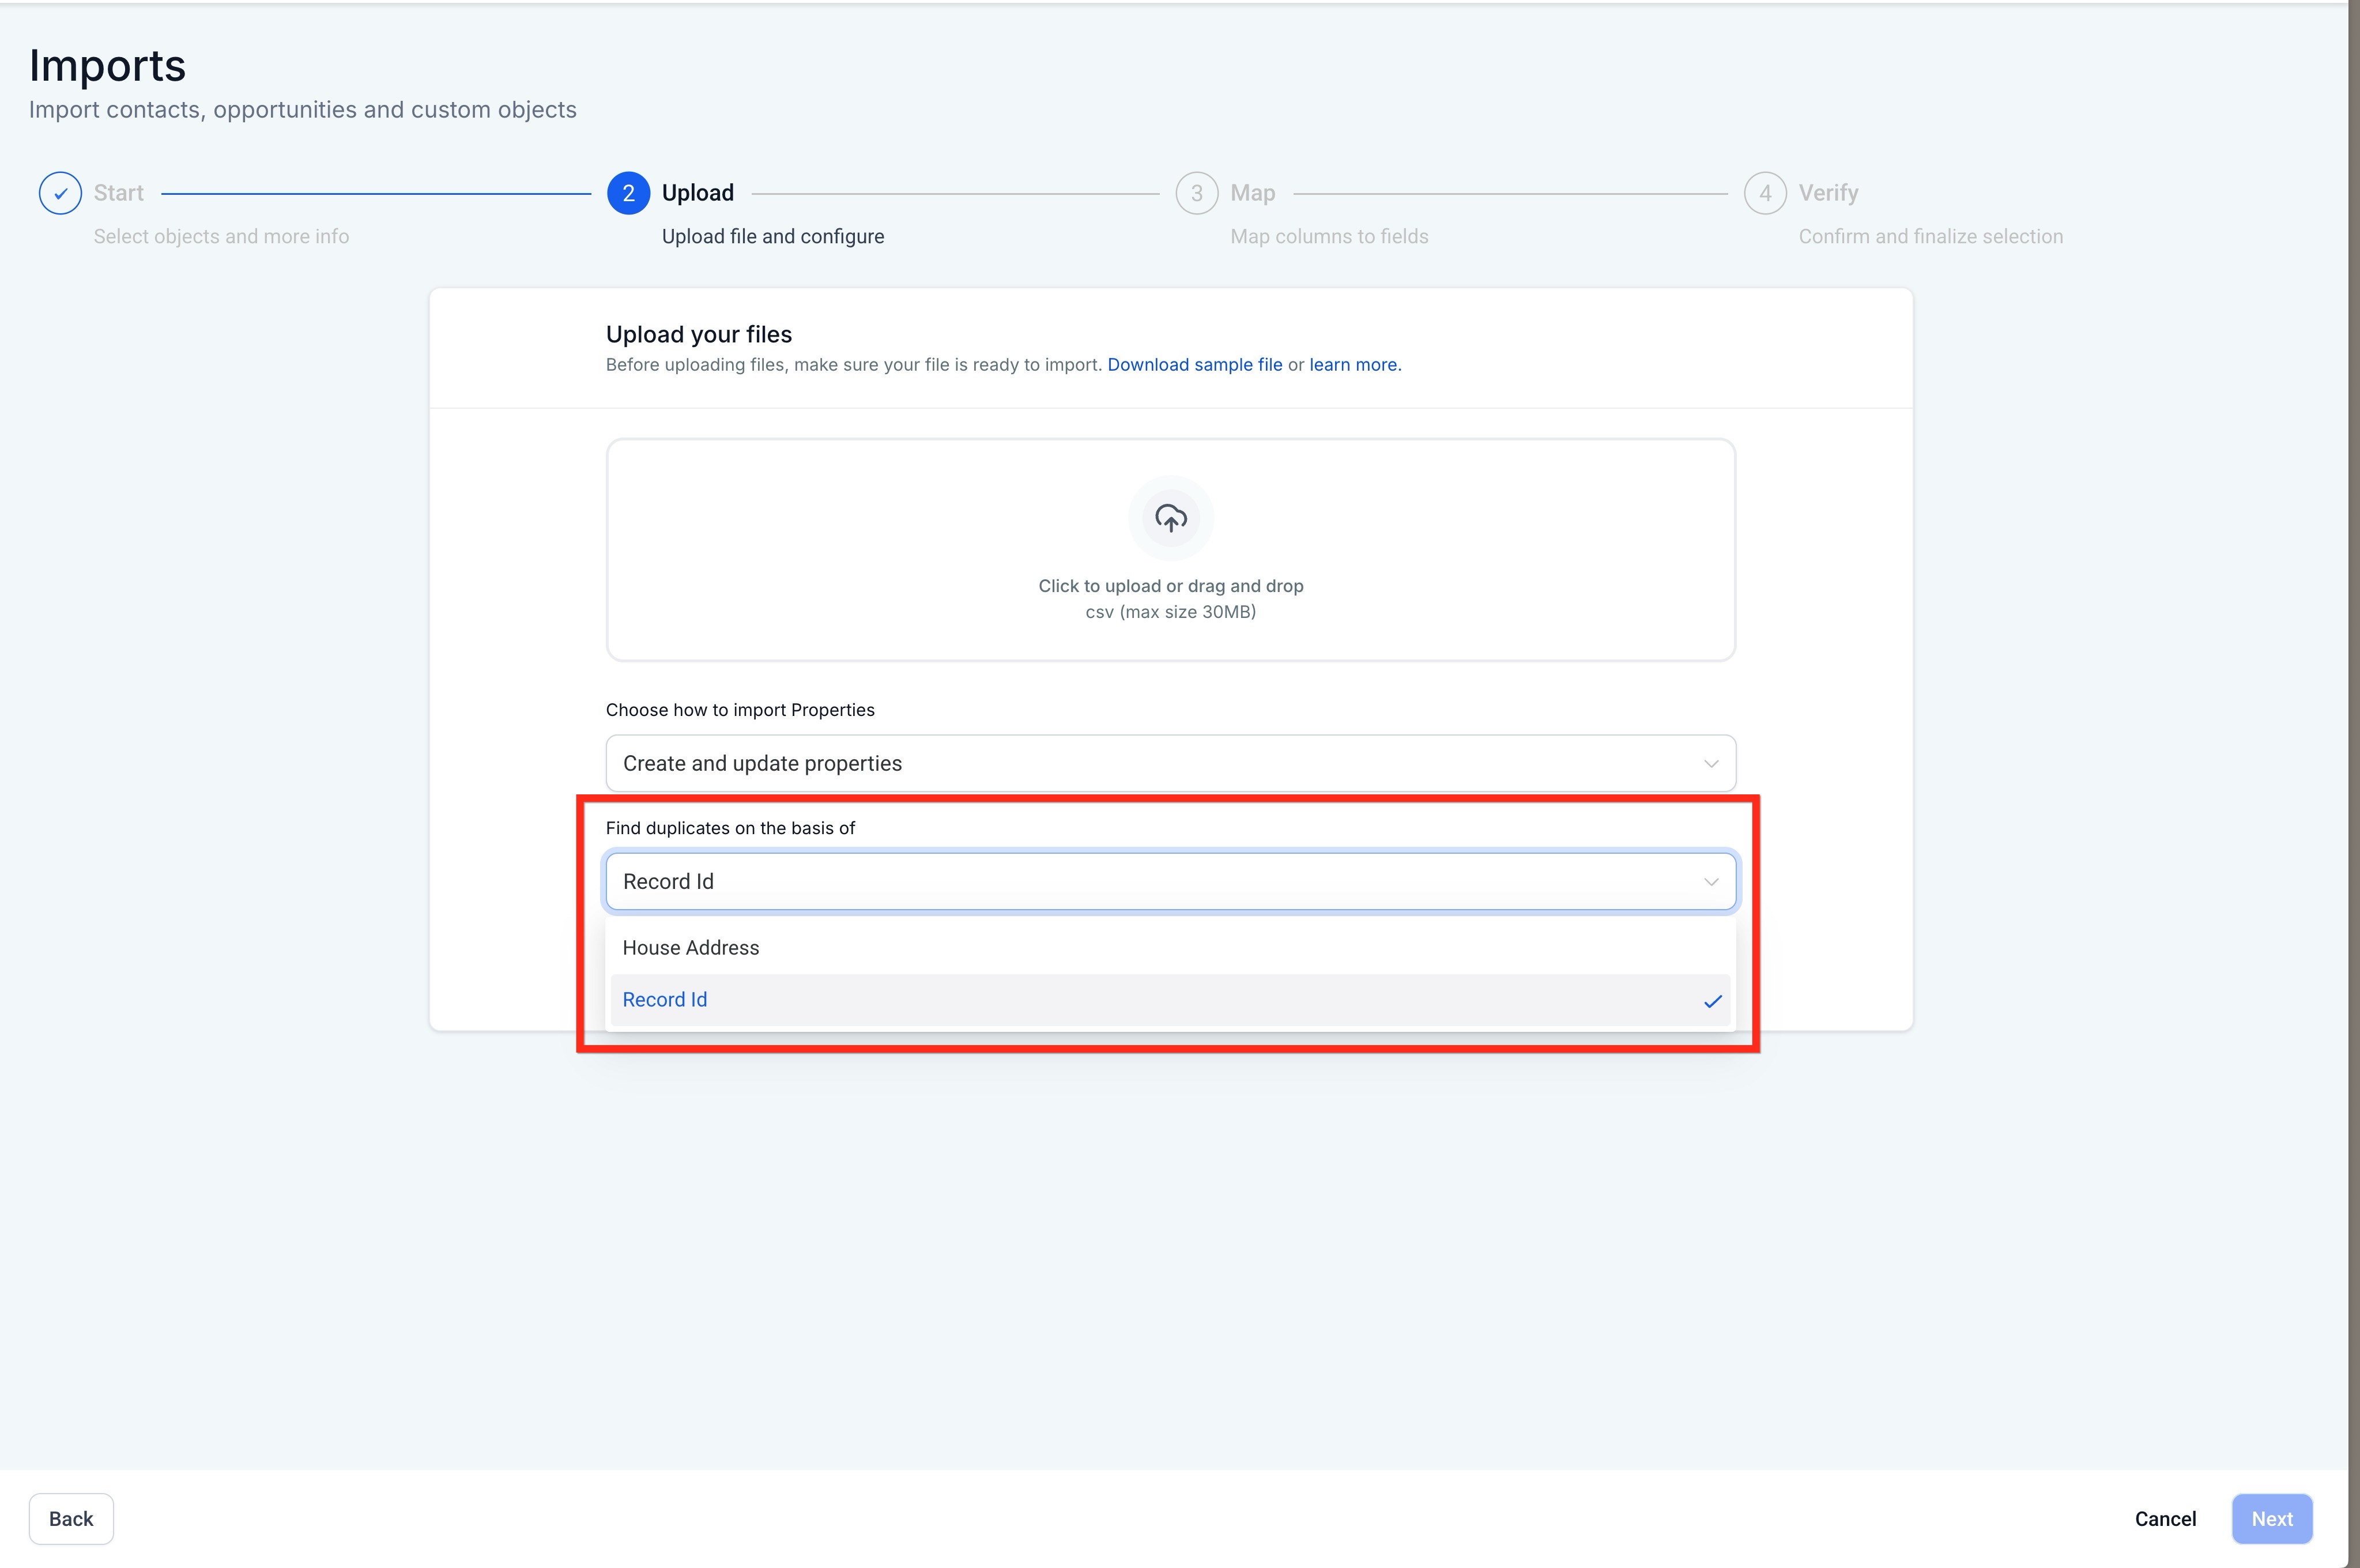
Step 2: Upload CSV File
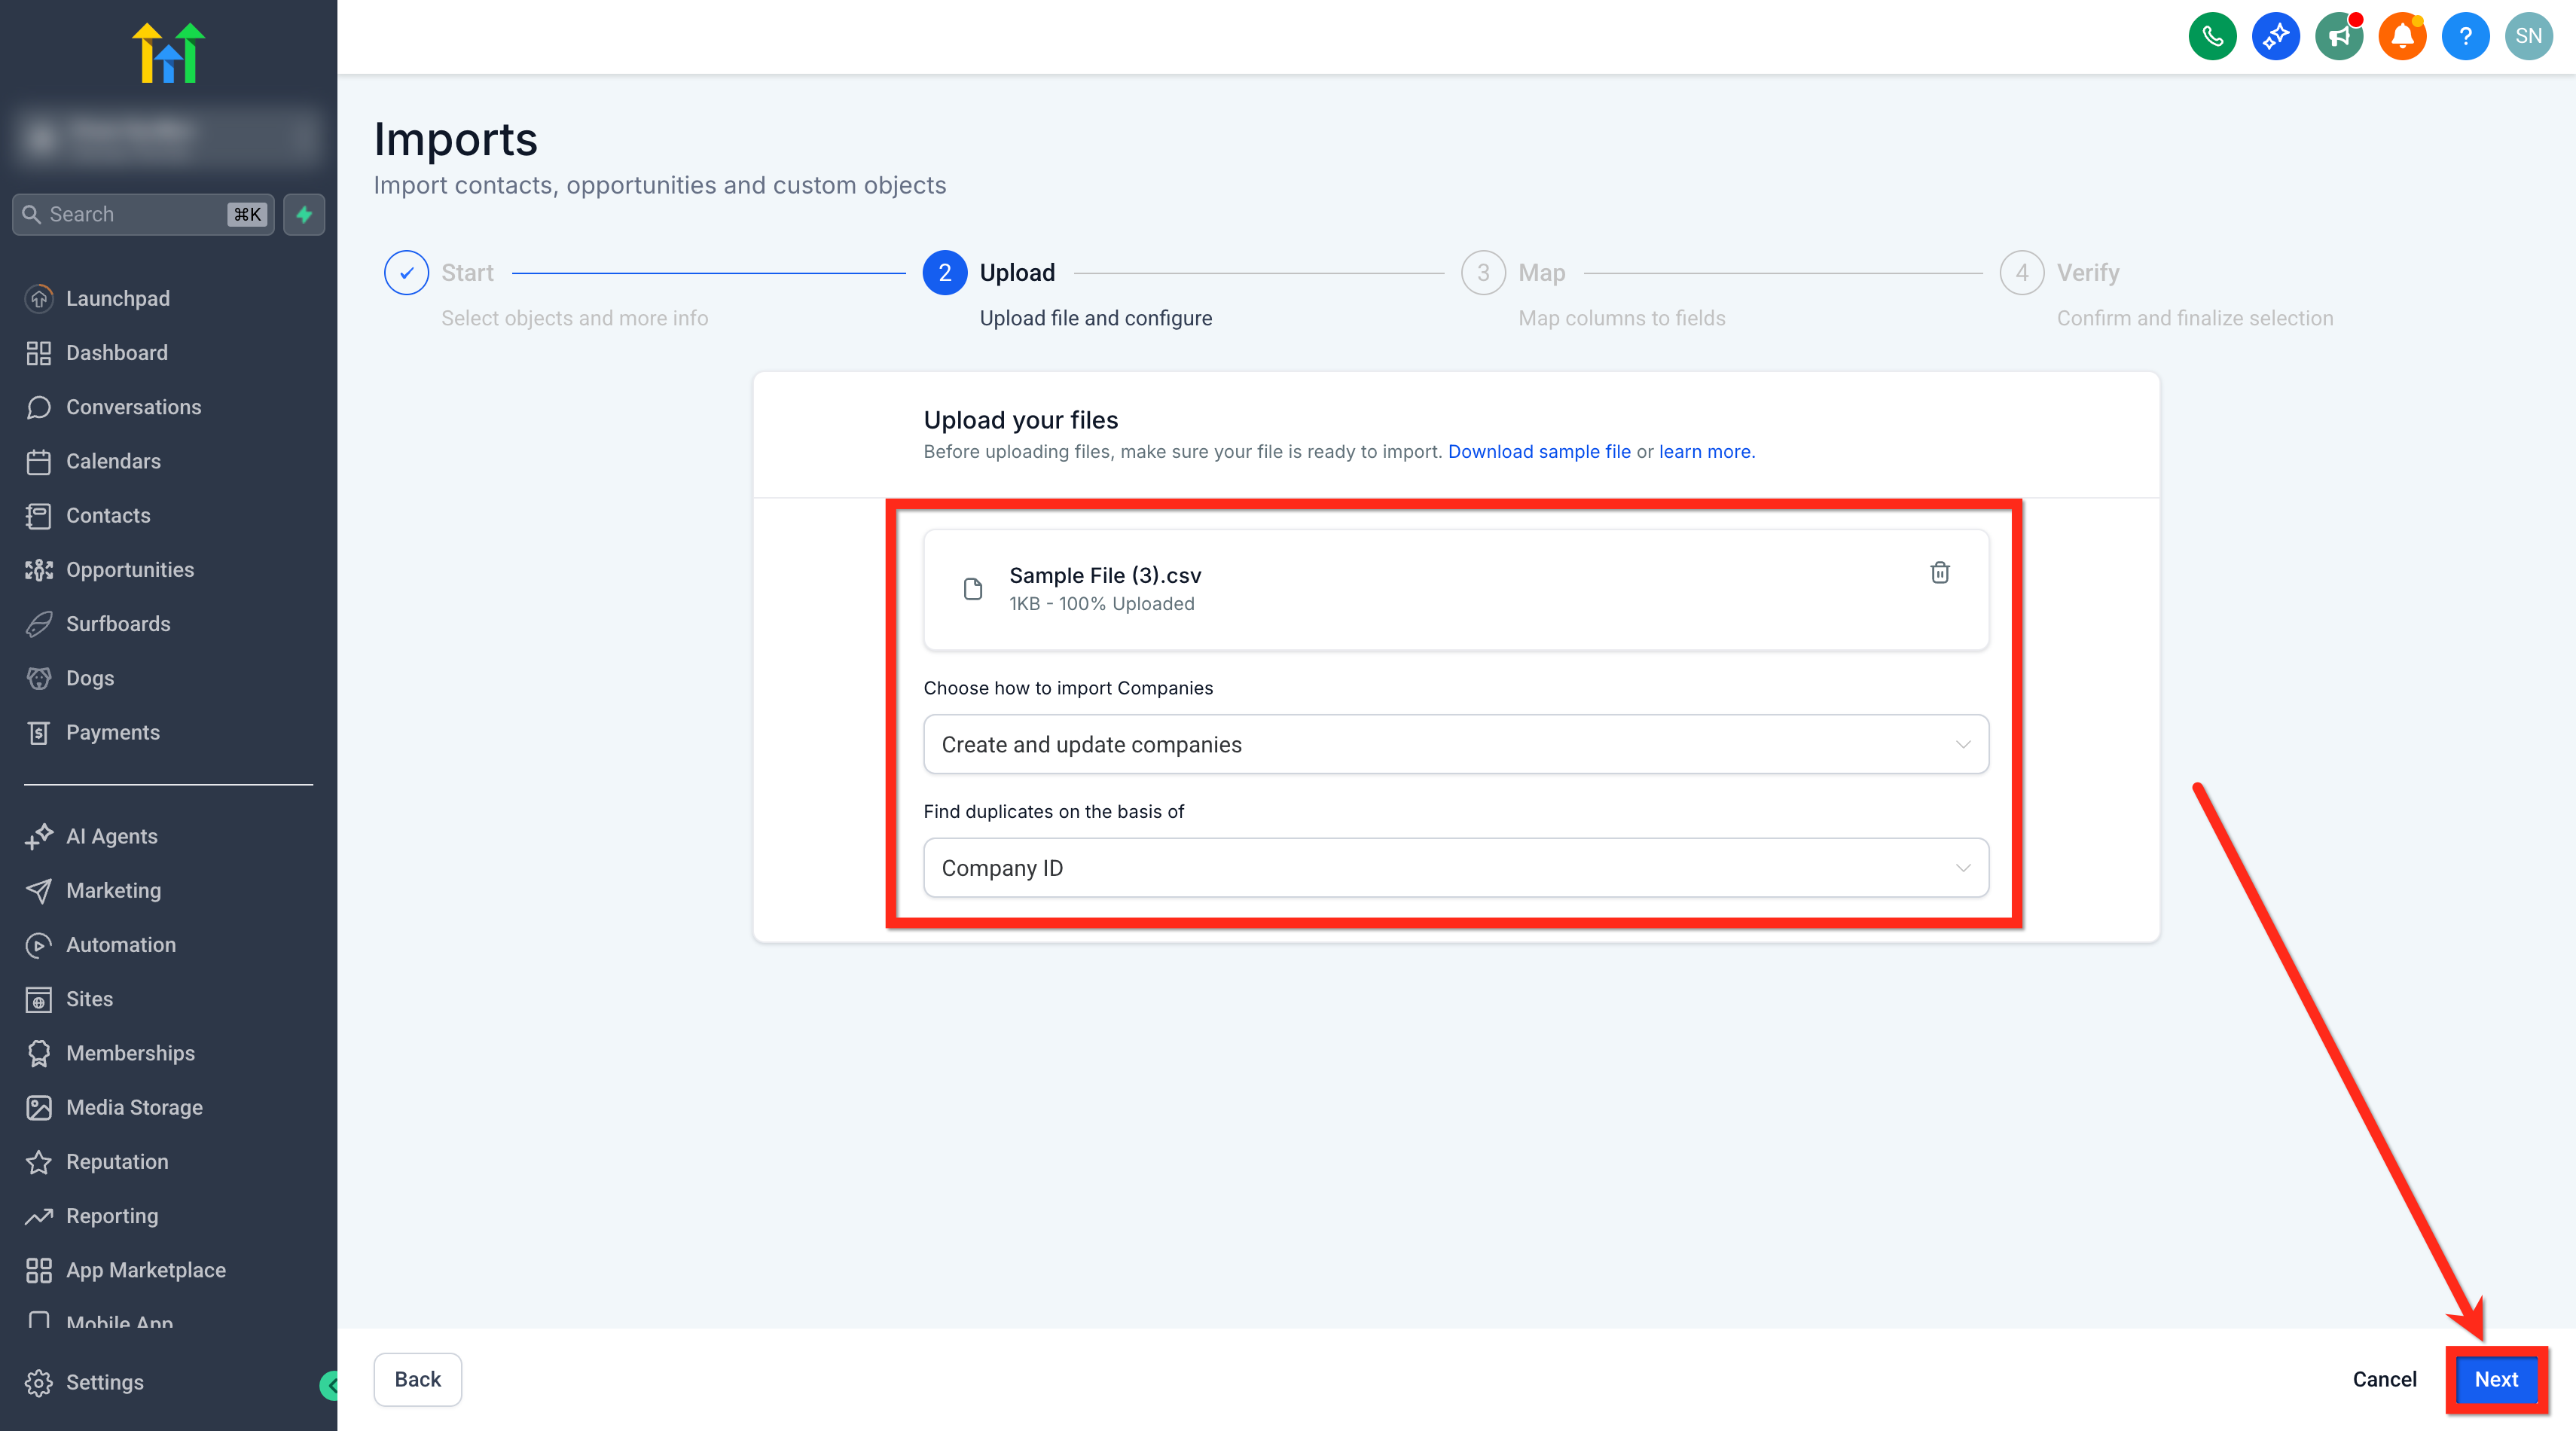
- Upload your CSV file.
- Choose your import mode.
If applicable, select the unique field to deduplicate on.
Click on Next.
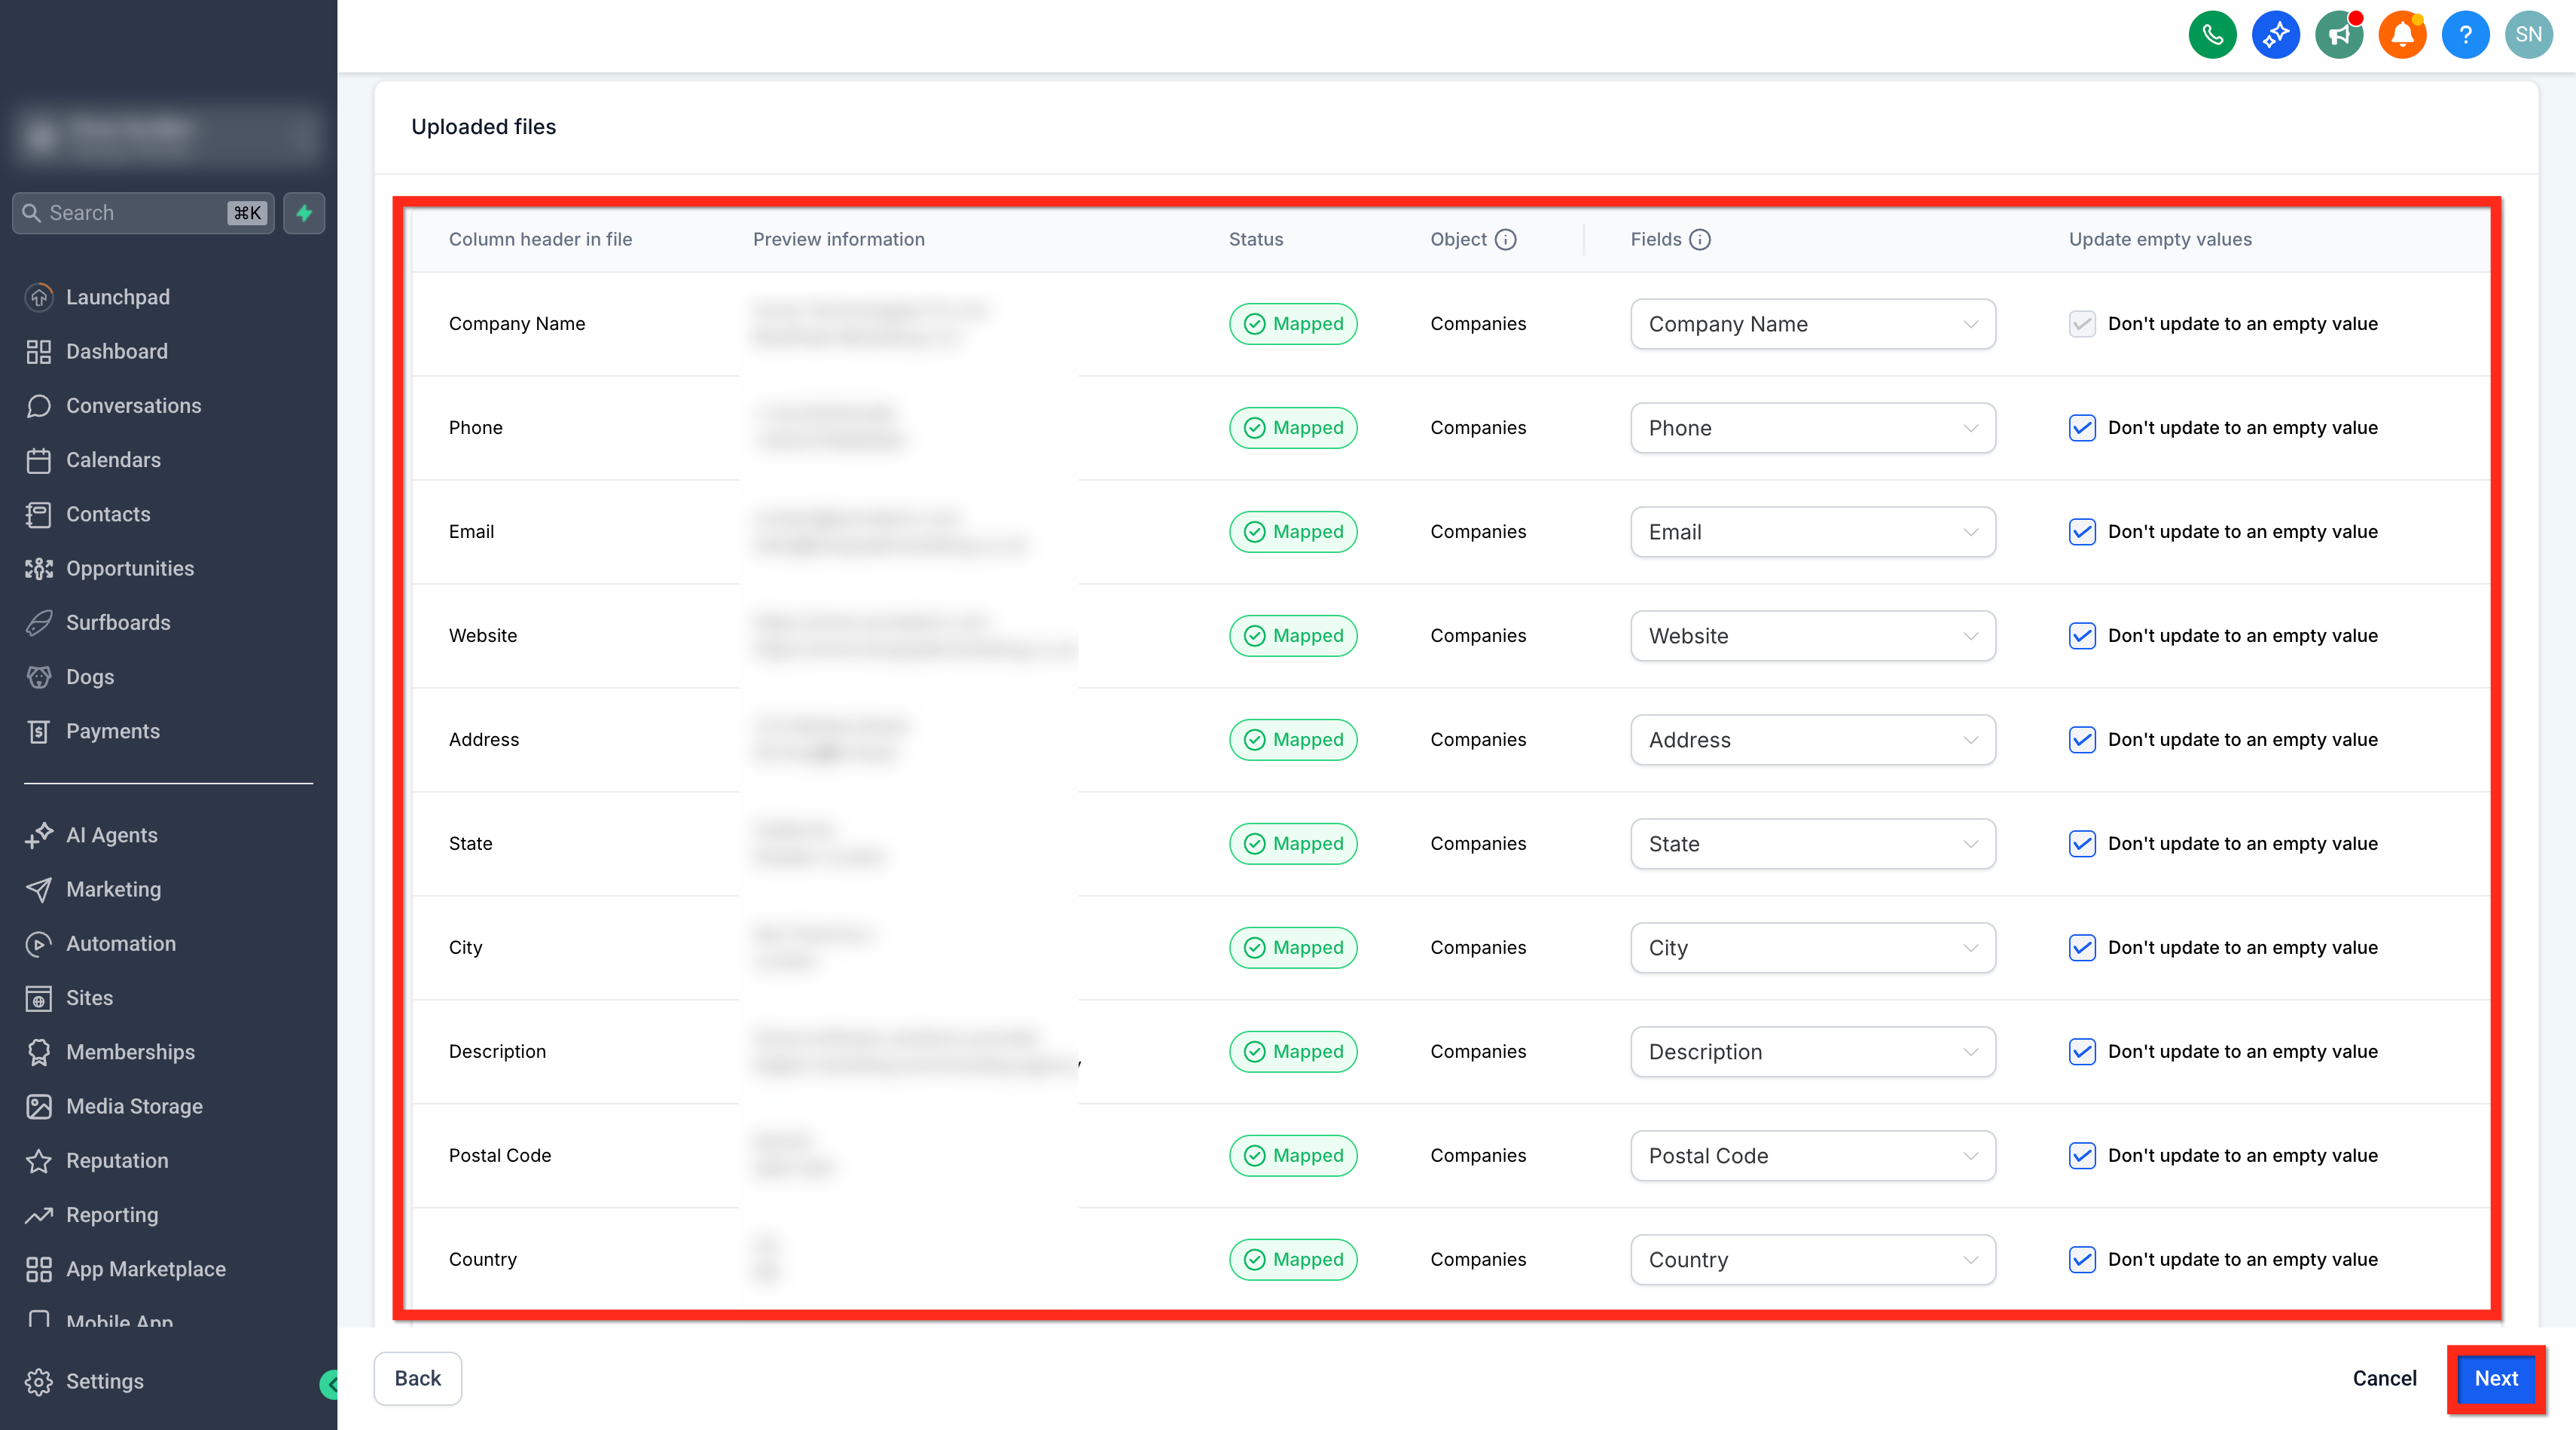
Step 3: Map Columns to Fields
Match each CSV column to the correct CRM field.
Required fields must be mapped.
Unmapped columns can be ignored.
Fields successfully mapped will show a green indicator.
Errors or warnings will be highlighted.
Don’t Update Empty Values
If enabled: Blank cells in your CSV will NOT overwrite existing values.
If disabled: Blank cells will clear existing values (except restricted fields).
Once done, click on Next.
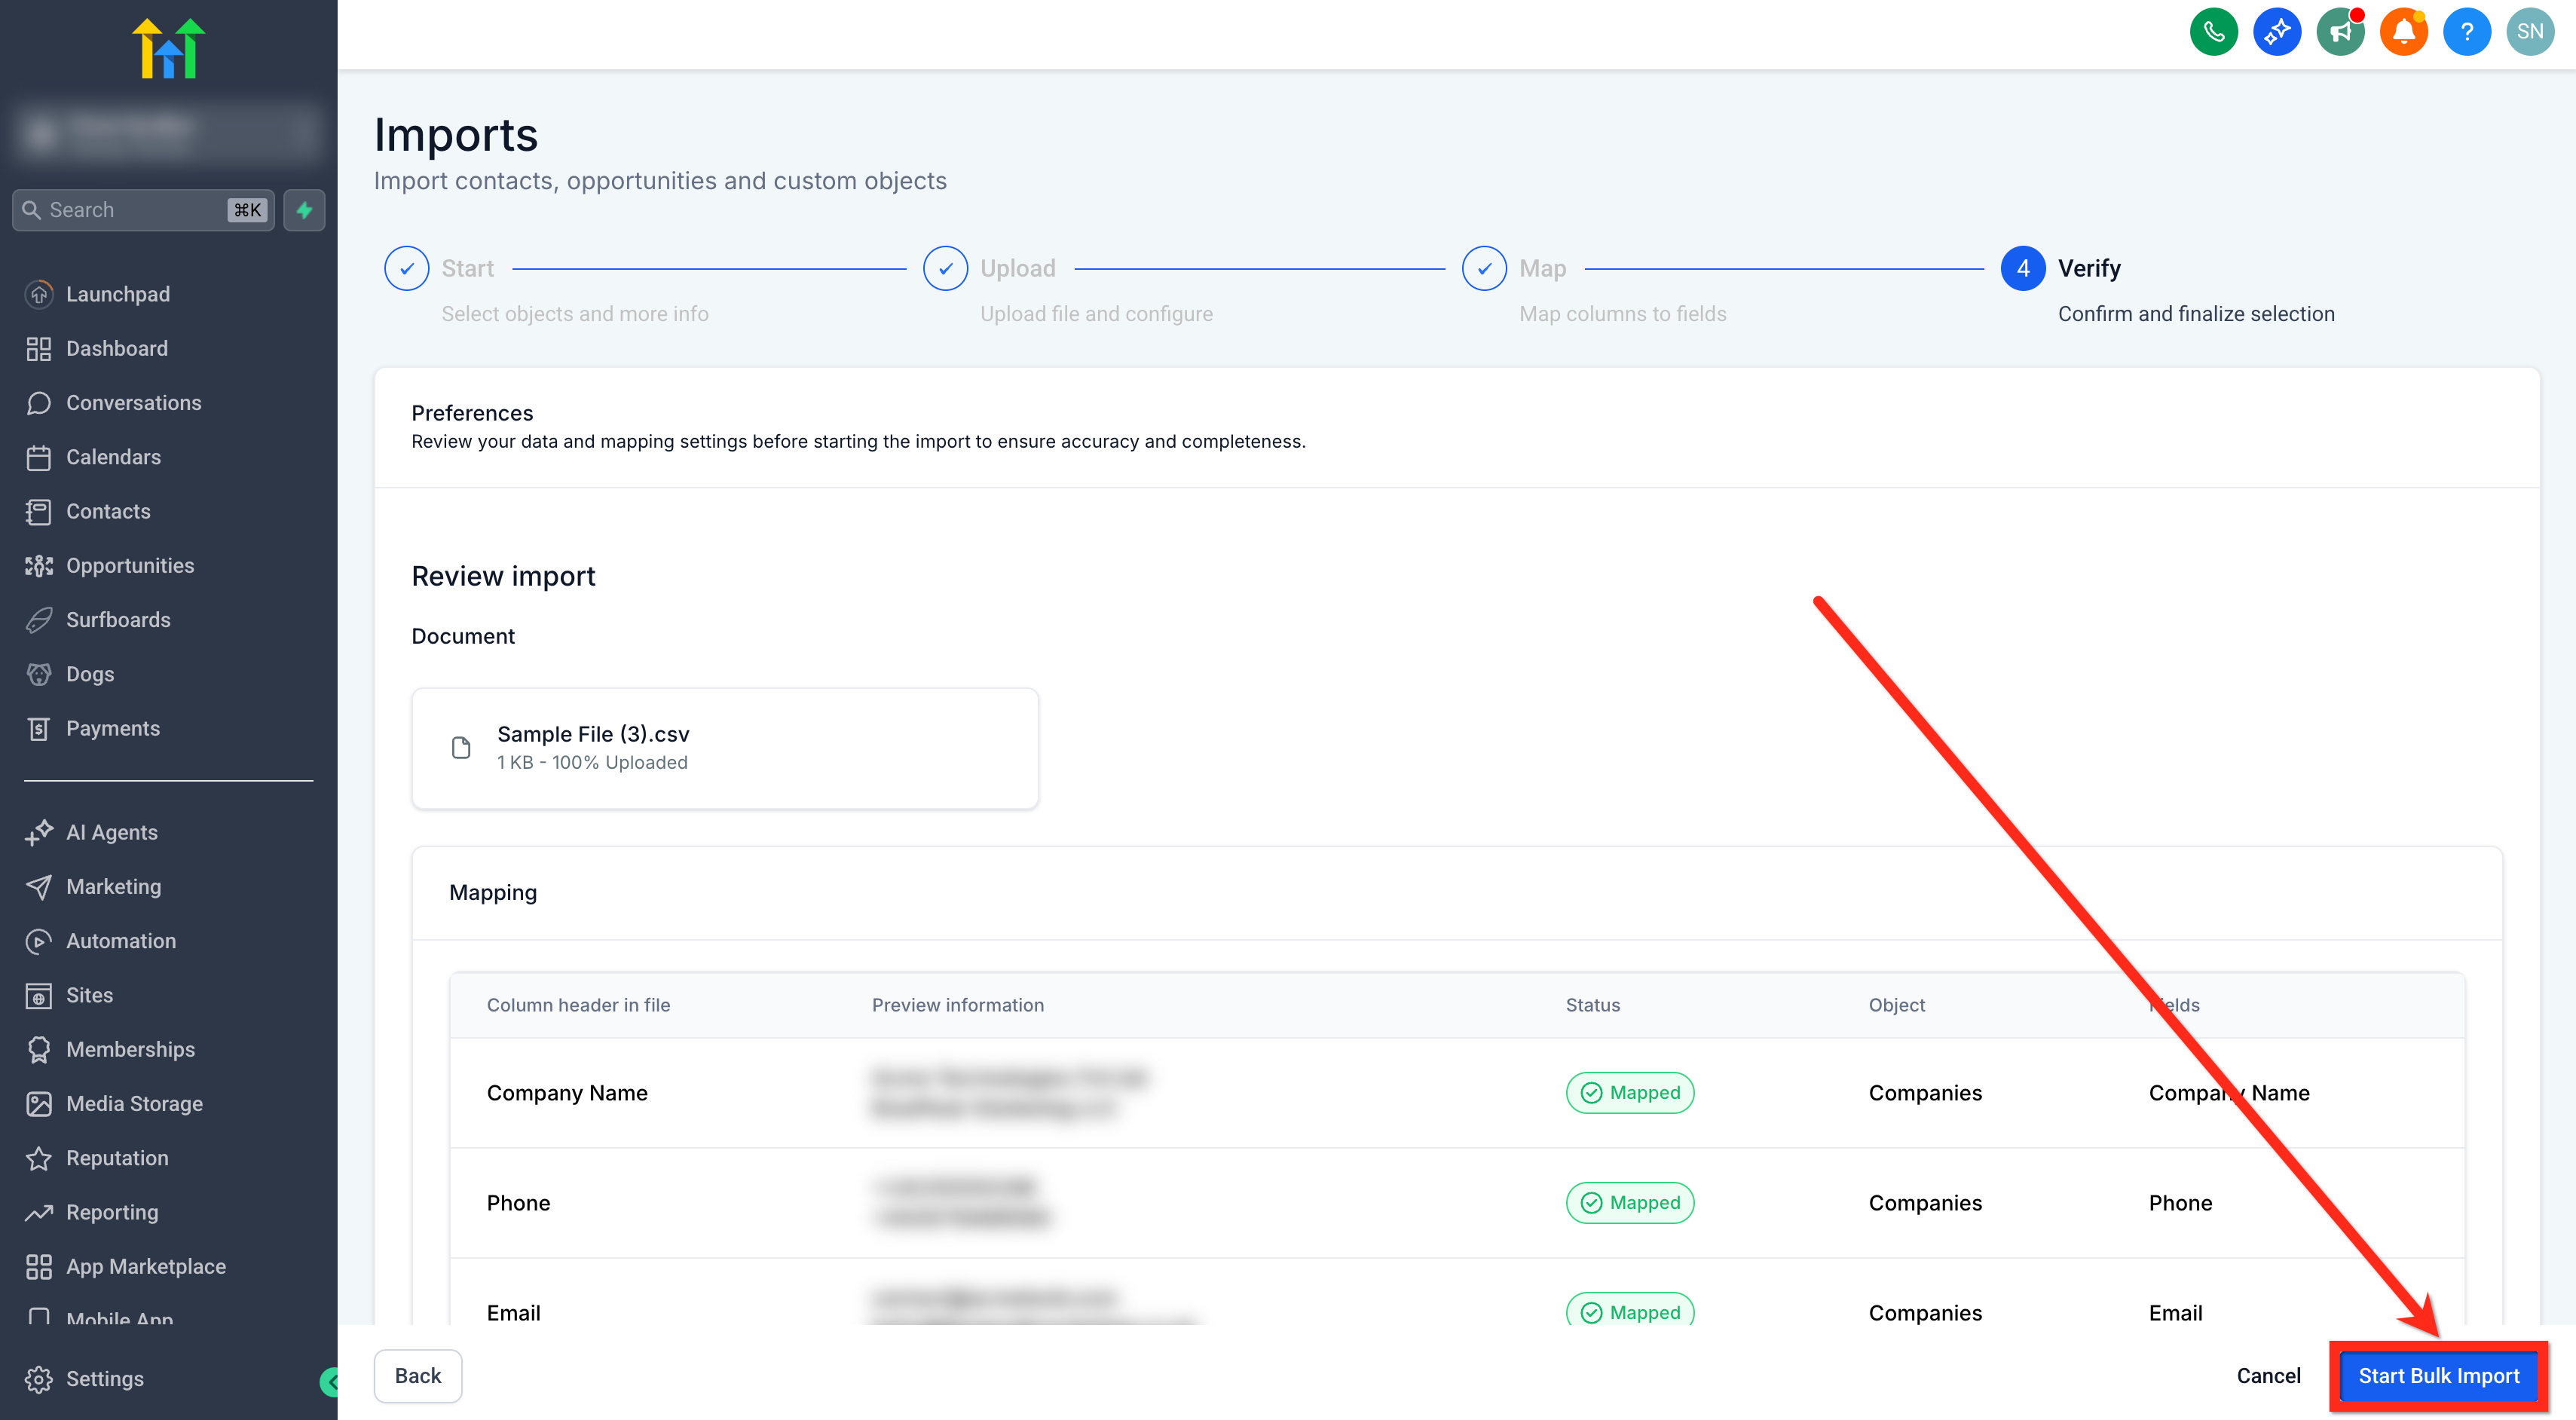
Step 4: Review and Import
- Review your data and mapping settings before starting the import to ensure accuracy and completeness.
Once done, click on the Start Bulk Import button.
Duplicate Handling & Unique Fields
If your Company or Custom Object contains unique fields:
You must select Record ID or one unique field as the deduplication field (if multiple are mapped).
The system checks other unique fields for conflicts.
If a non-selected unique field conflicts, that row will fail.
This ensures clean, conflict-free data.
Update Empty Values Restrictions
The following cannot be updated to empty:
Primary field
Required fields
These protections prevent accidental data loss.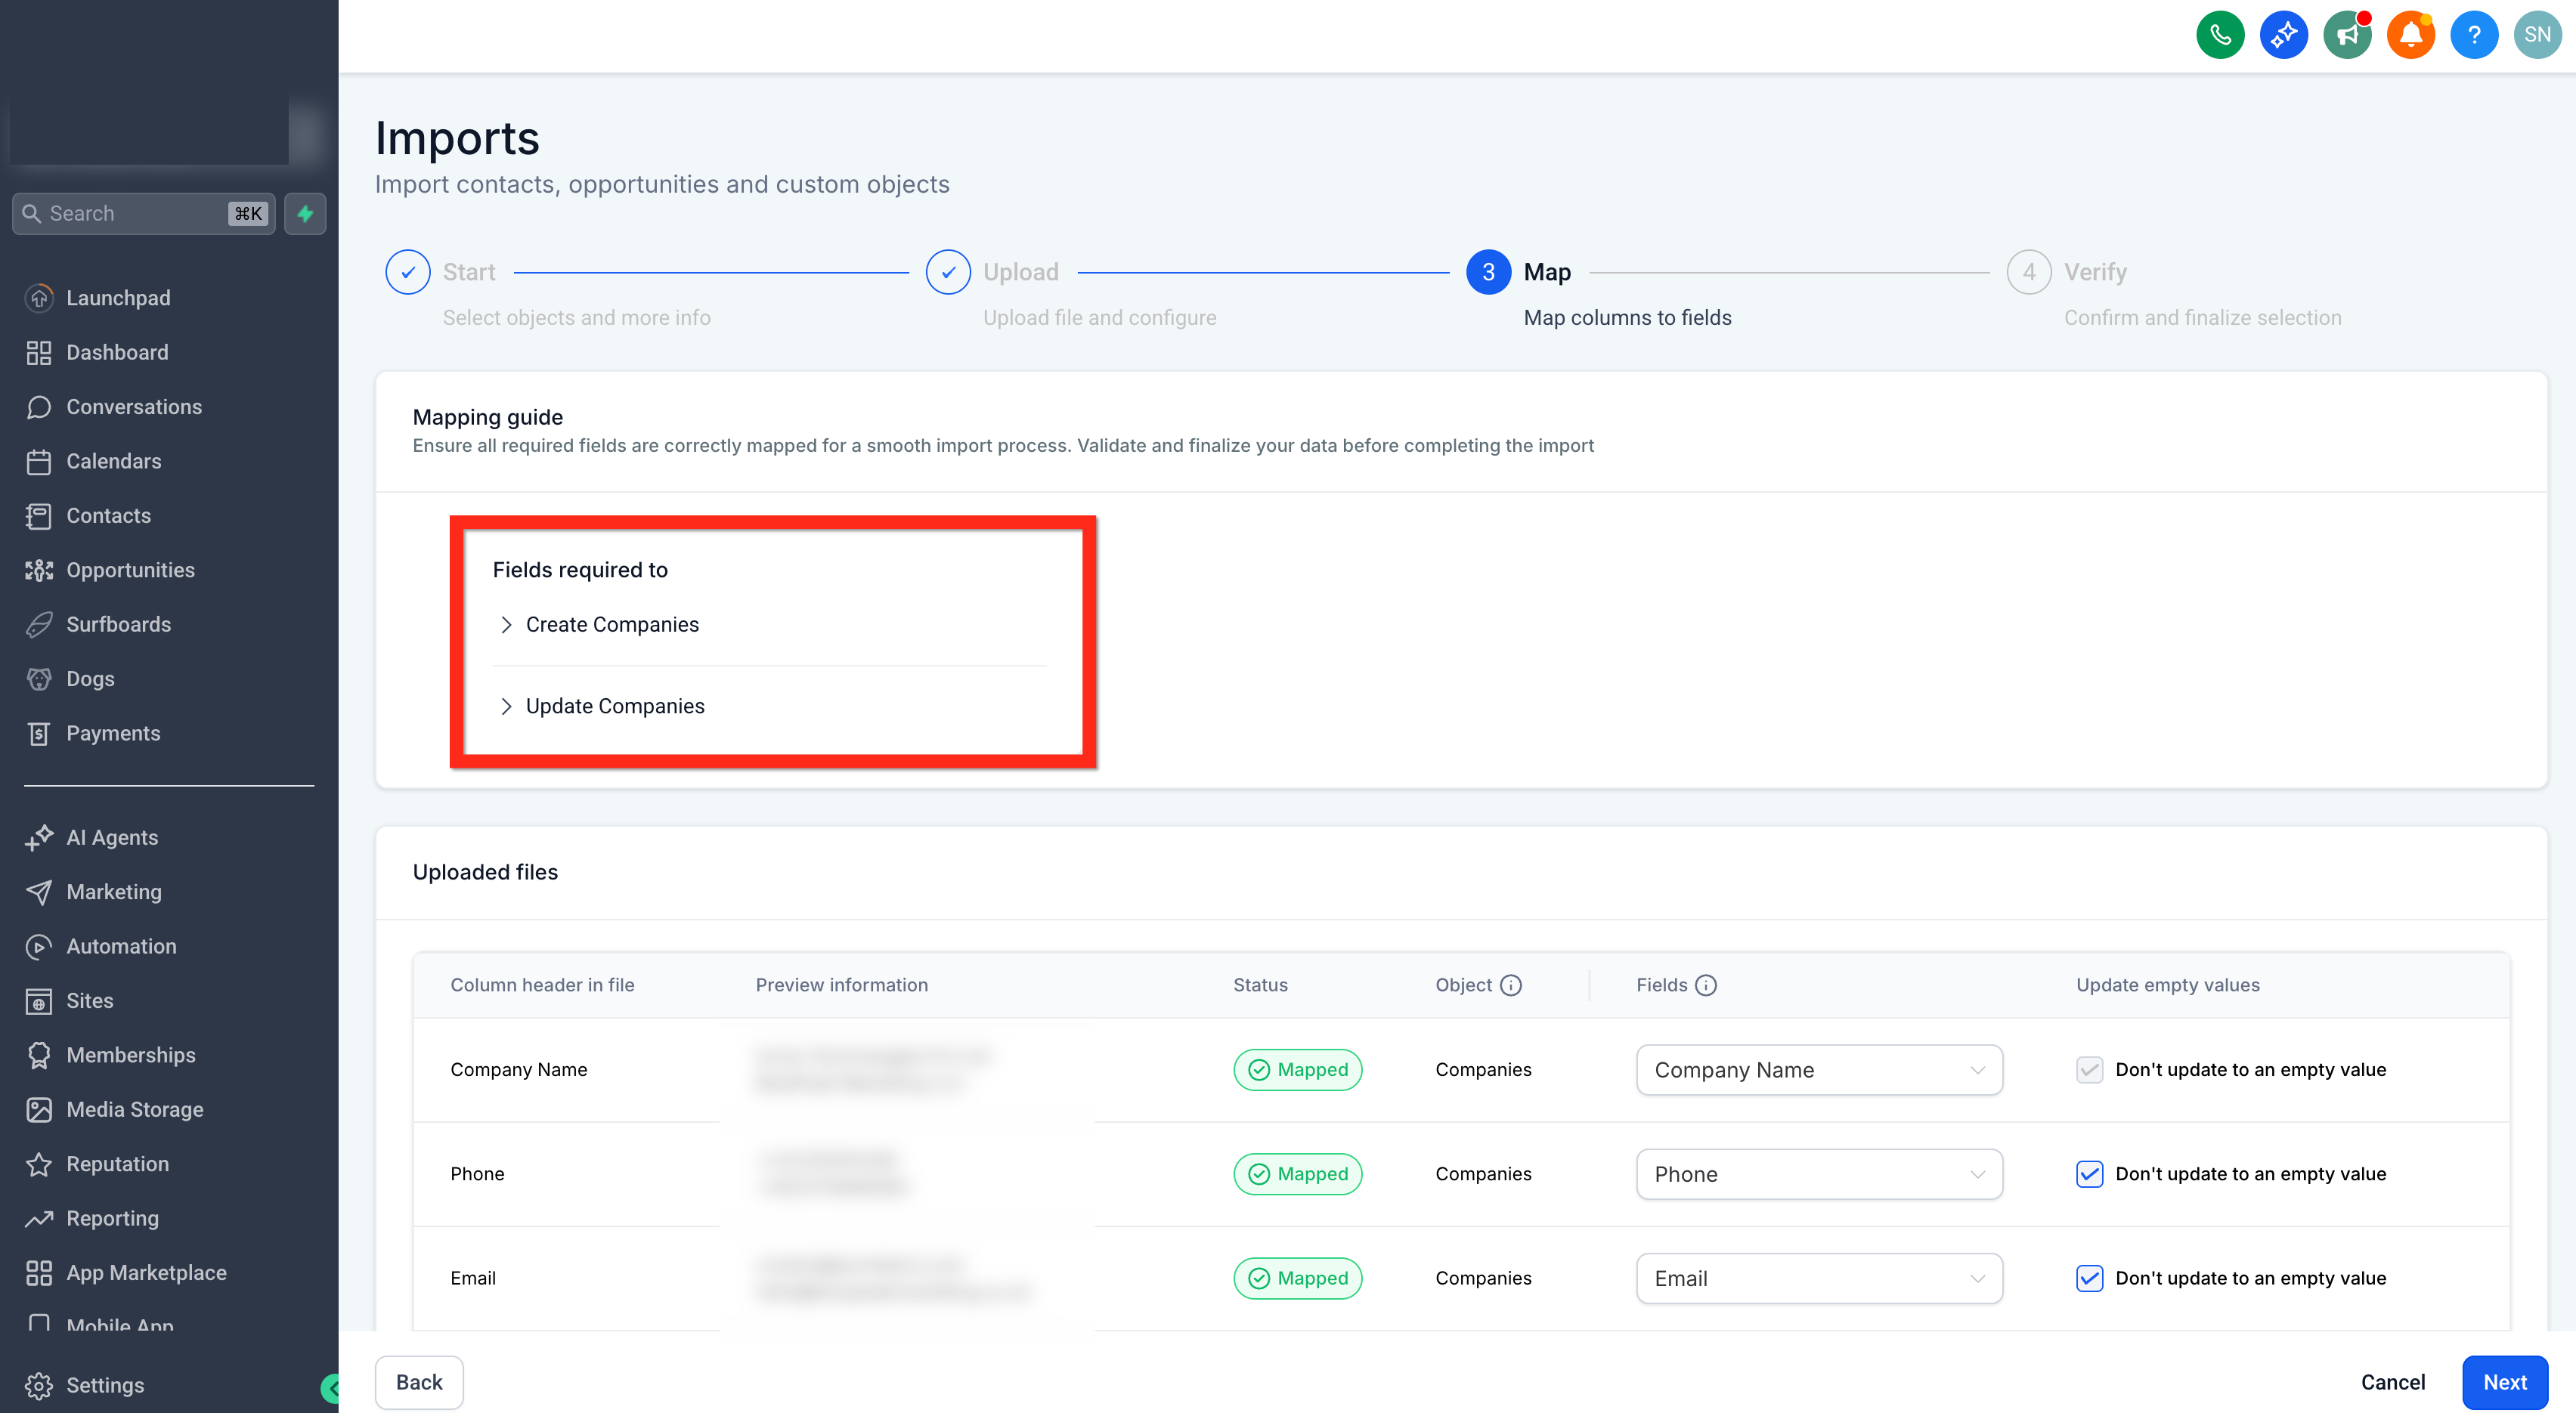
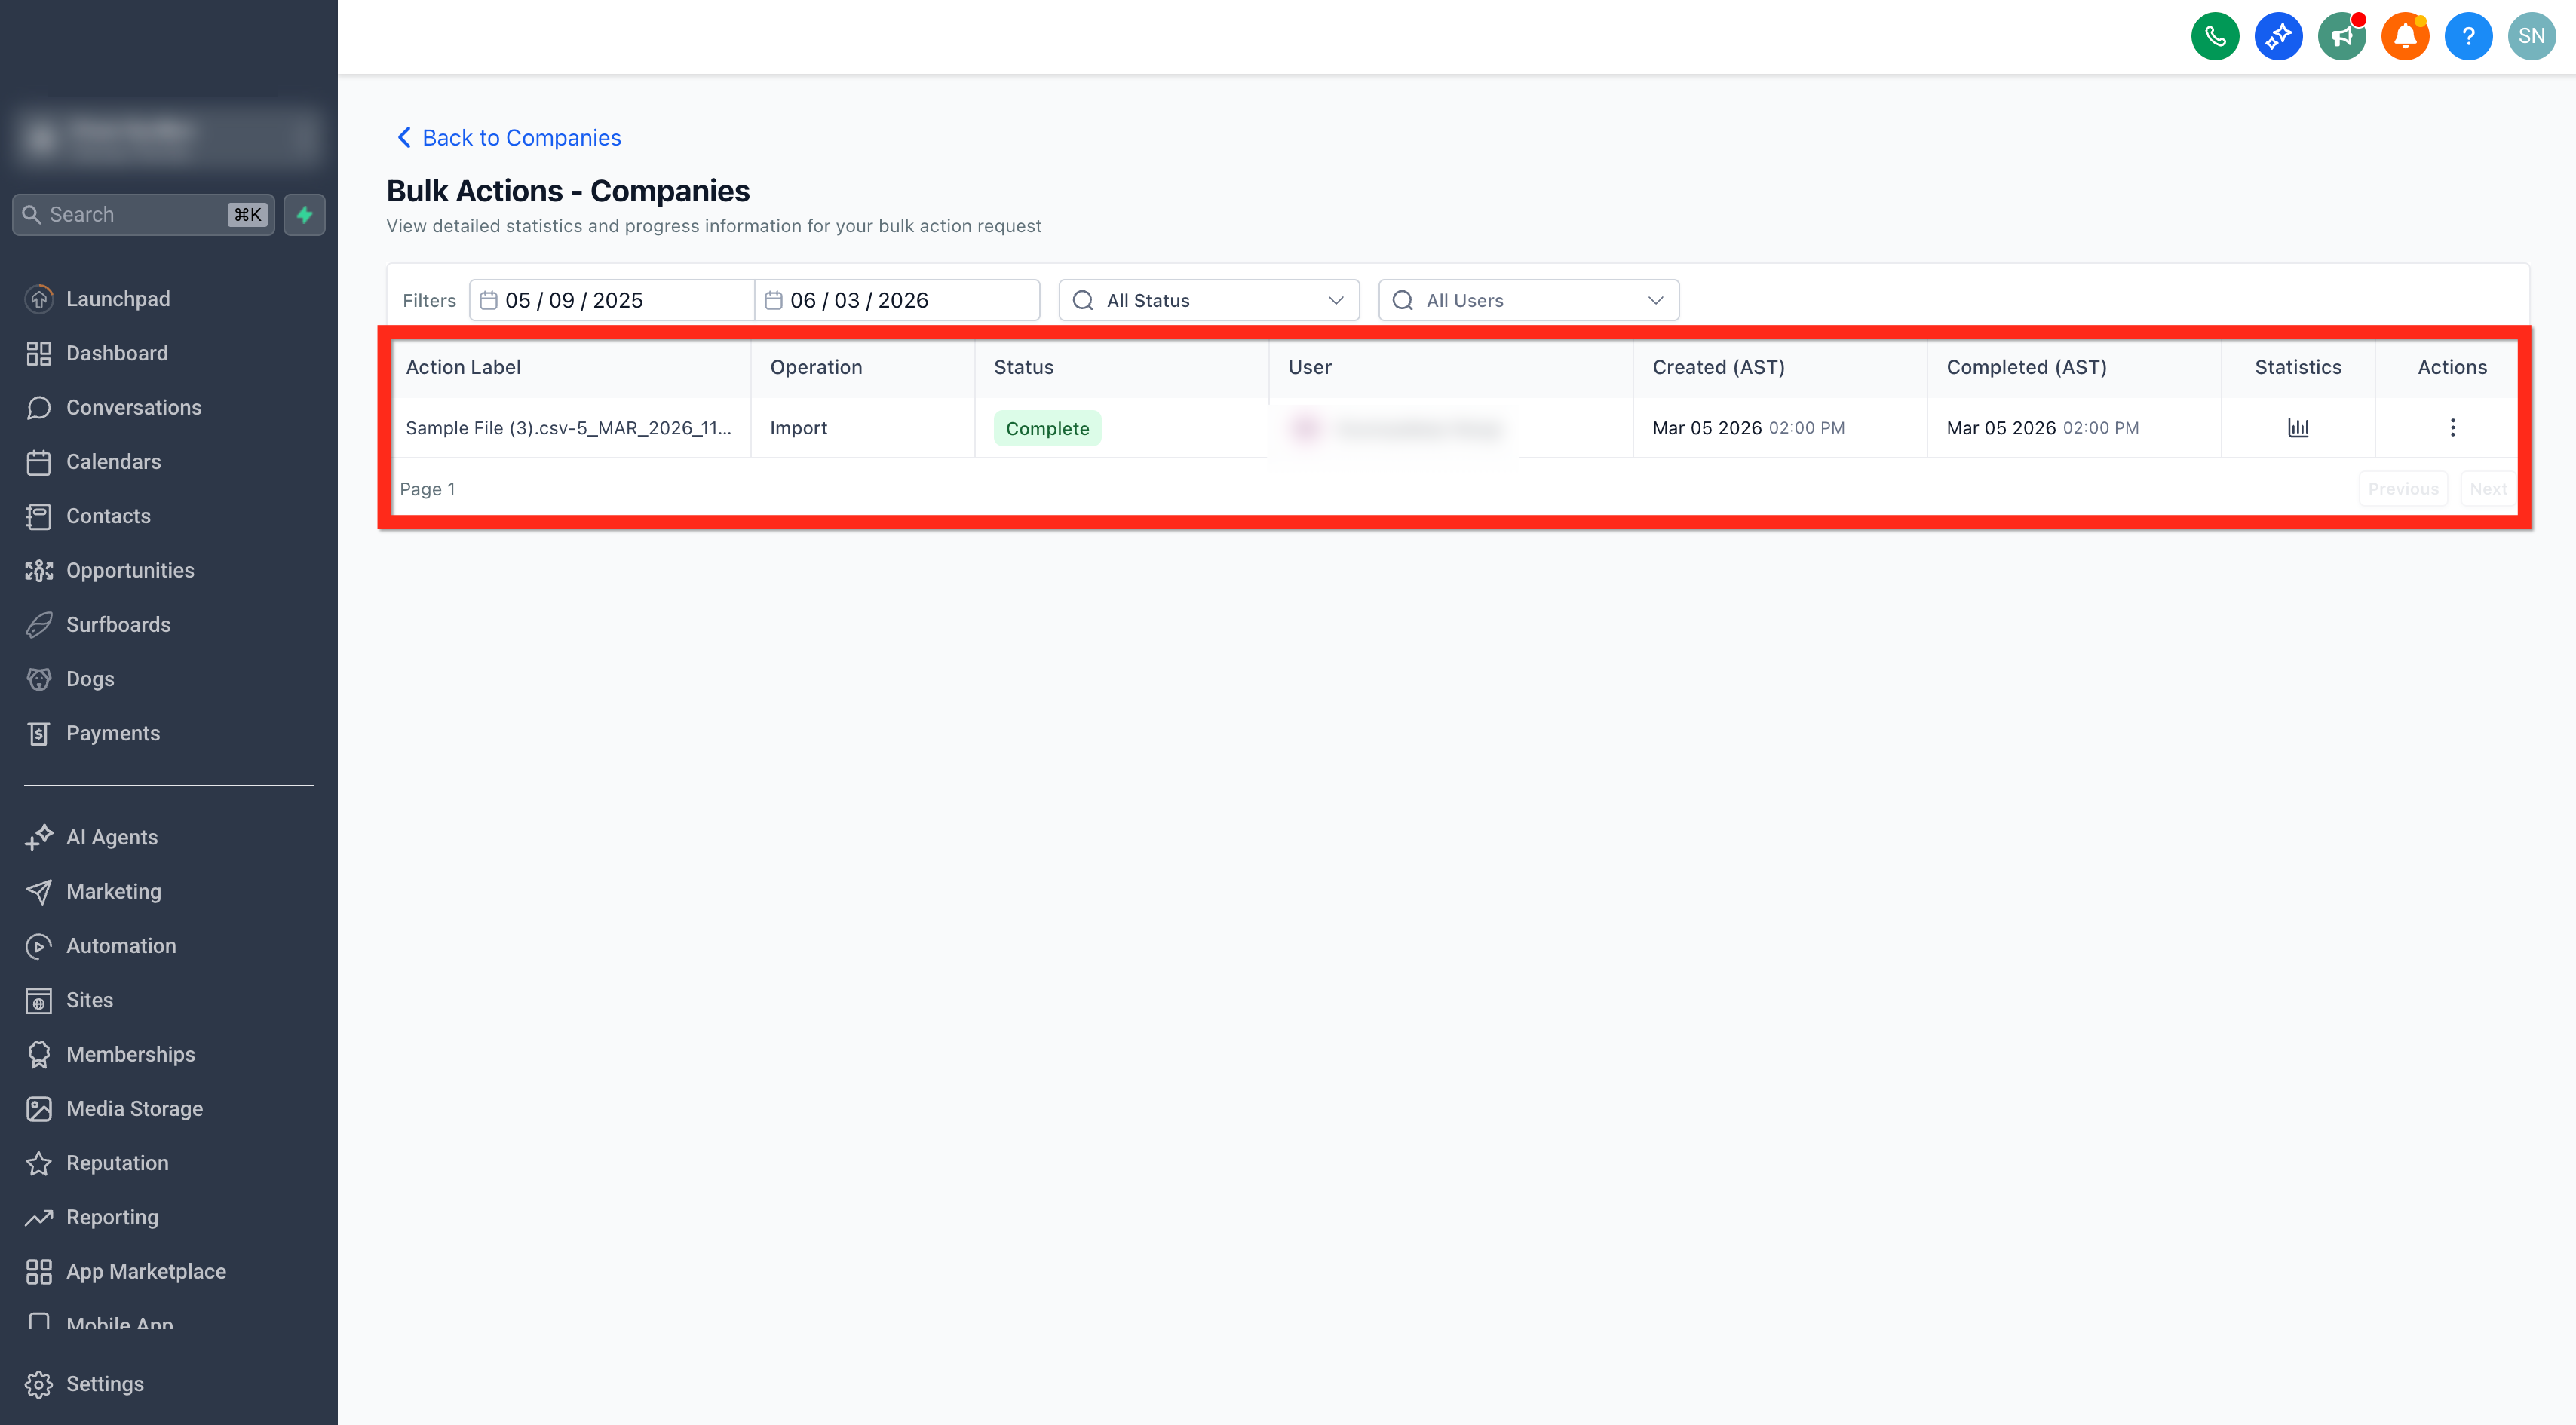
Monitor Import Status
All imports can be tracked in Bulk Actions.
From Bulk Actions you can:
View status (Processing, Completed, Failed)
Pause, Resume, or Cancel (while running)
View detailed statistics
Download error logs
Frequently Asked Questions
Q: Can I import multiple Custom Objects at once?
No. Only one Custom Object can be imported at a time.
Q: Can I import system fields like Created At?
No. System fields cannot be modified through imports.
Q: What happens if unique fields conflict?
That specific row will fail. The rest of the import continues.
Q: Can I undo an import?
No. Imports cannot be reversed. Always validate your CSV before starting.
Q: Where do I see past imports?
Go to Bulk Actions to view import history and statistics.