
This guide walks through signing up for Mailgun, adding your domain, and configuring the five DNS records Mailgun requires — two TXT records, two MX records, and one CNAME — inside SiteGround's DNS Zone Editor.
It also covers how to avoid breaking your existing Google Workspace/Gmail mail delivery while adding Mailgun's records.
Sign up for Mailgun & add your domain
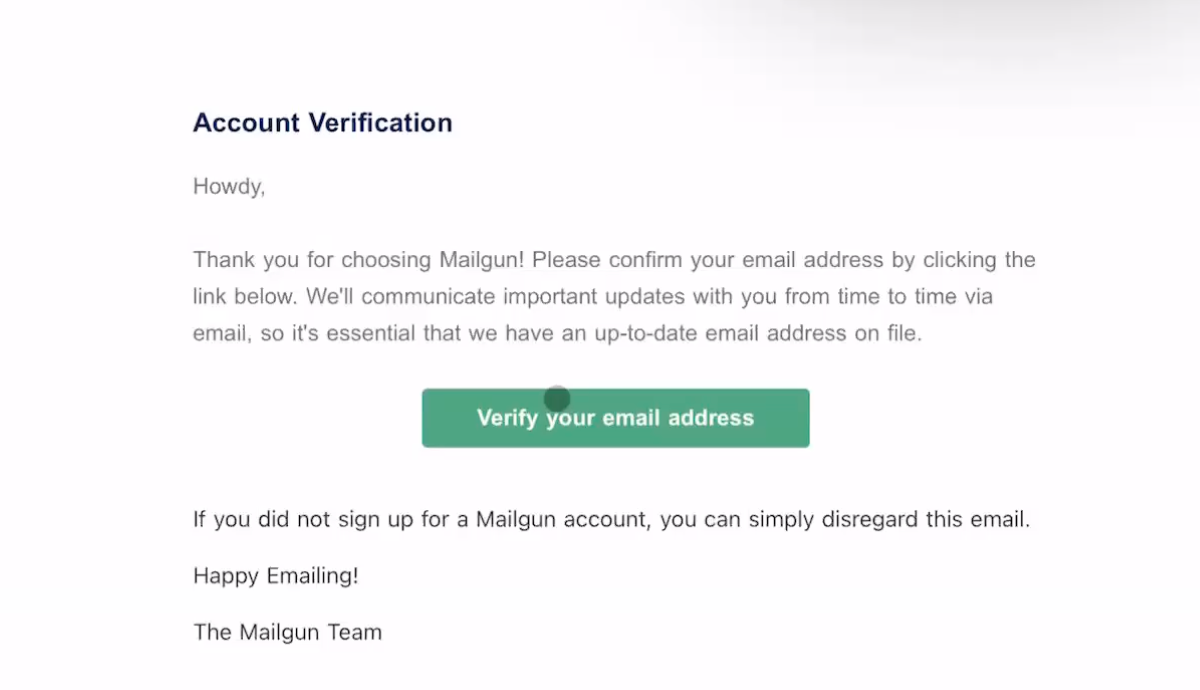
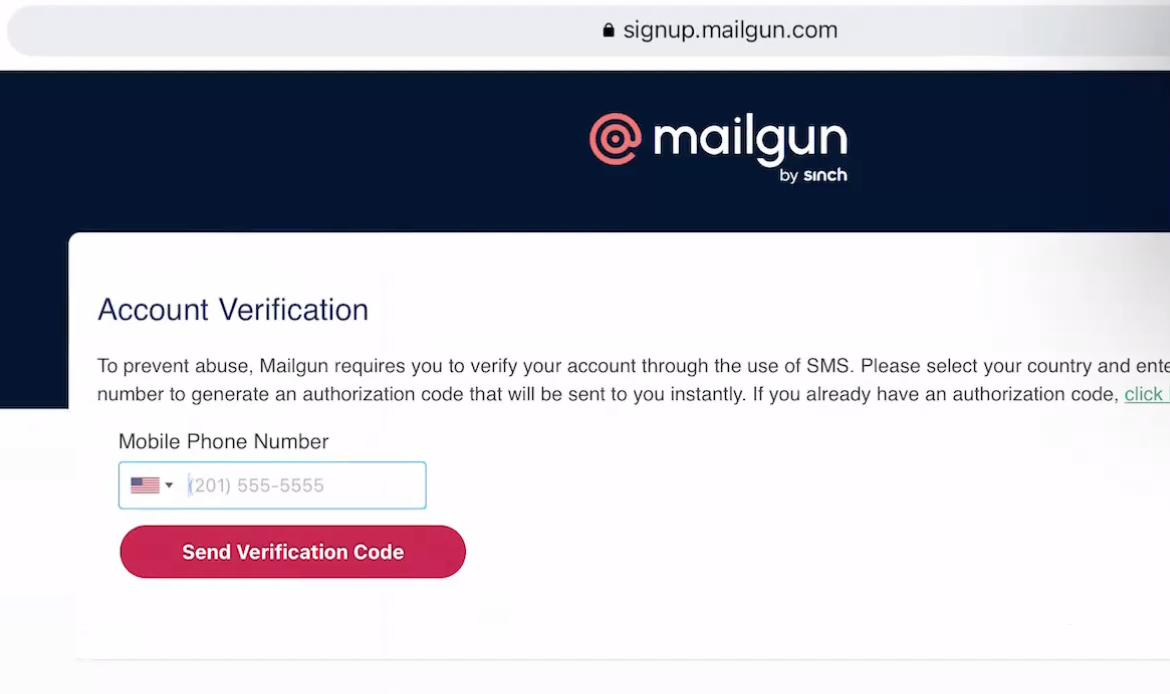
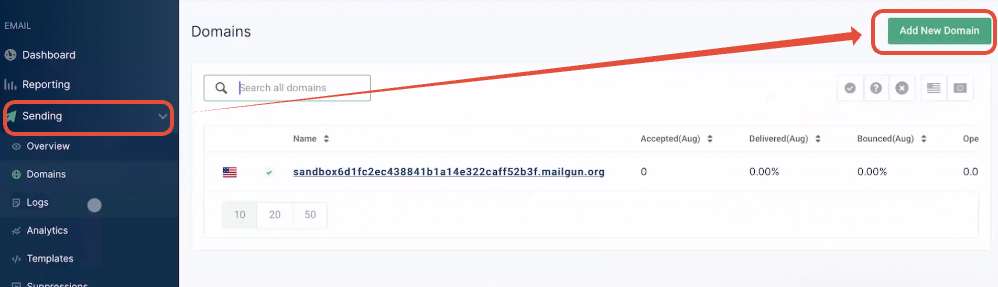
Log in to Mailgun, then click Sending → Add New Domain.
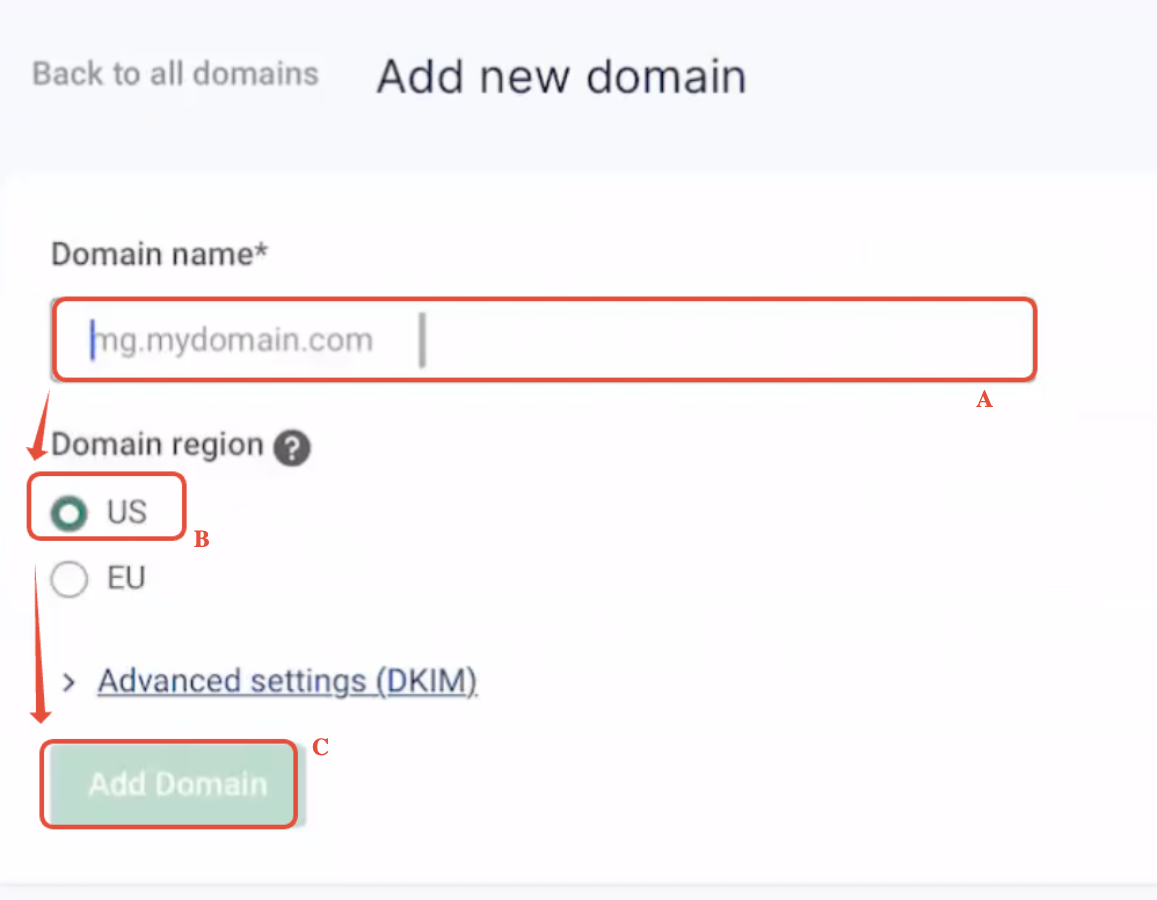
If your domain is companyname.com, decide whether to set up the main domain or a subdomain with Mailgun.
- Main domain: if you use the main domain, it should not also be used with Google Workspace or any other email provider — see Mailgun's guidance on sharing a domain with another email server.
- Subdomain: type ANYTHING_HERE.companyname.com — for example mg.companyname.com, replies.companyname.com, or support.companyname.com.
Set up the domain or subdomain under the US region — not EU.
Click Add domain.
The next screen asks you to add DNS records to your domain. Leave this screen open — you'll need it for the next step.
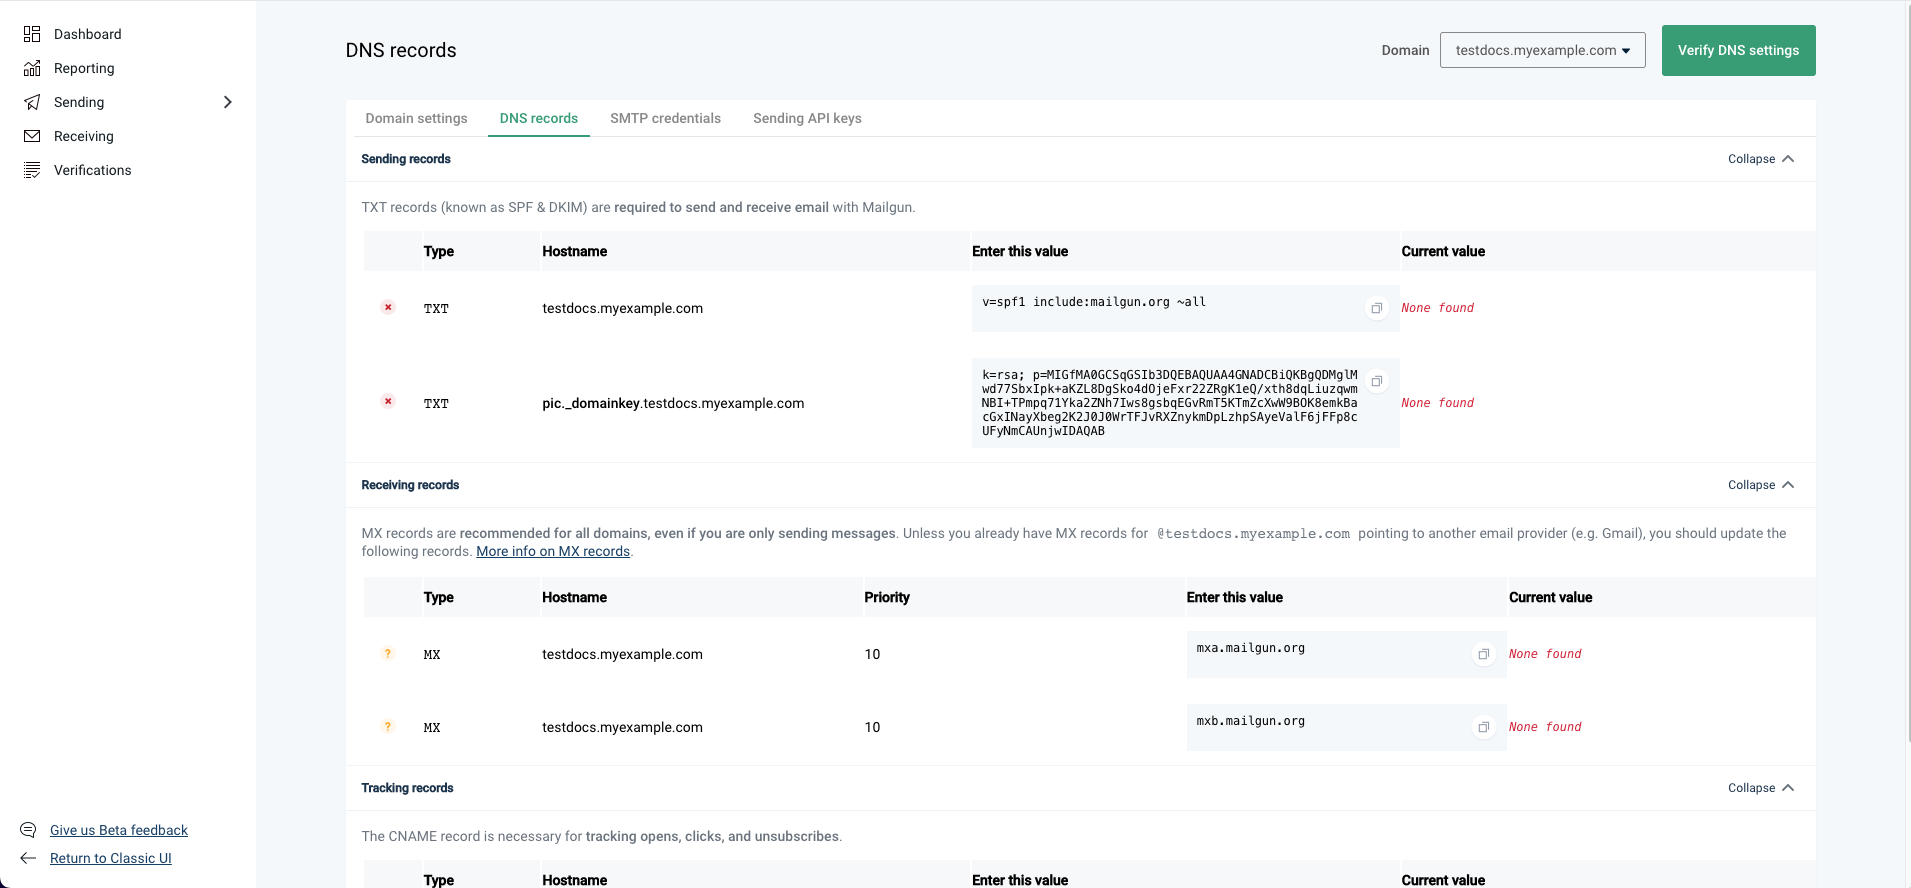
Access DNS records in SiteGround
Now log in to your DNS records and add the 5 DNS records Mailgun requires.
Log in to SiteGround. See SiteGround's own guide on managing DNS records if you'd like more detail.
Go to Site Tools → Domain → DNS Zone Editor.
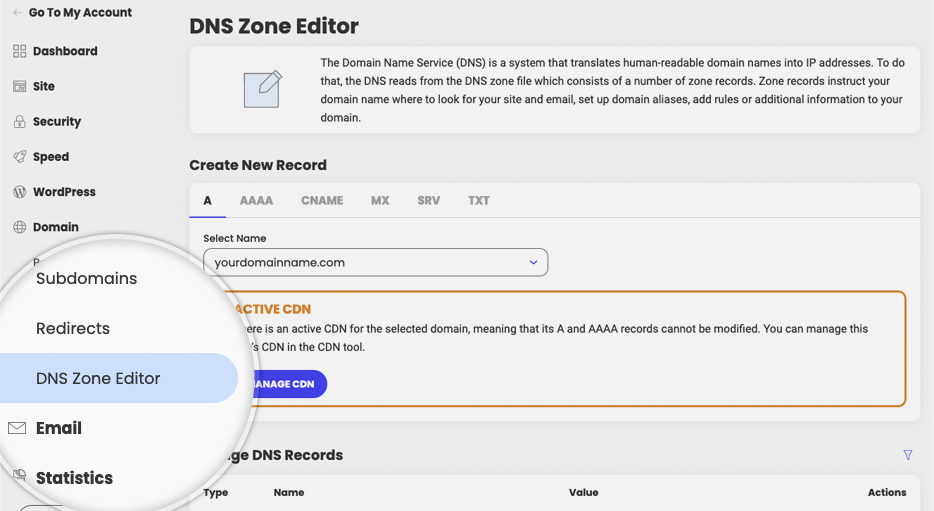
In the Create New Record section, you'll repeat the process below for each of the 5 records.
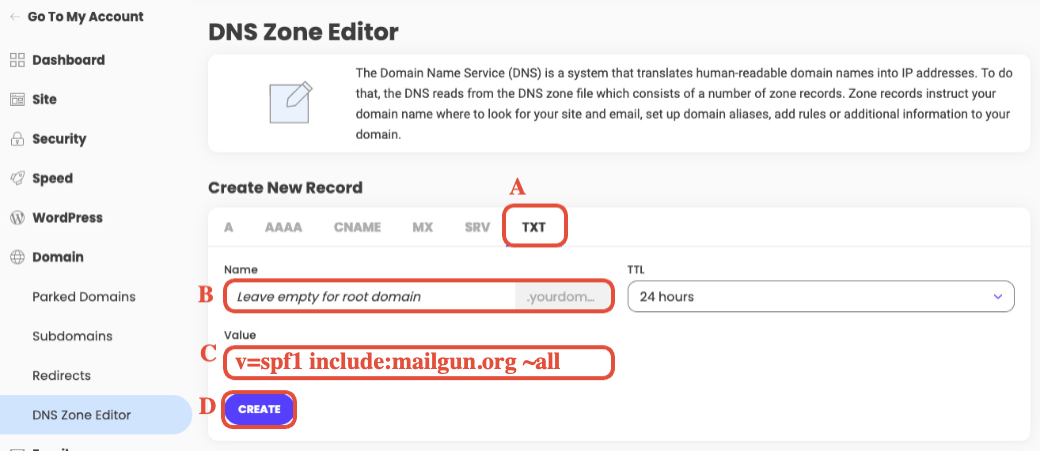
Add the 1st TXT record (SPF)
A. Click on the TXT tab.
B. Name: different for everyone — do not include the root domain.
- mg.companyname.com → host name is mg
- replies.companyname.com → host name is replies
- Main domain (companyname.com) → host name is @, or leave it empty
C. Value: the same for everyone — paste v=spf1 include:mailgun.org ~all.
D. Click Create.
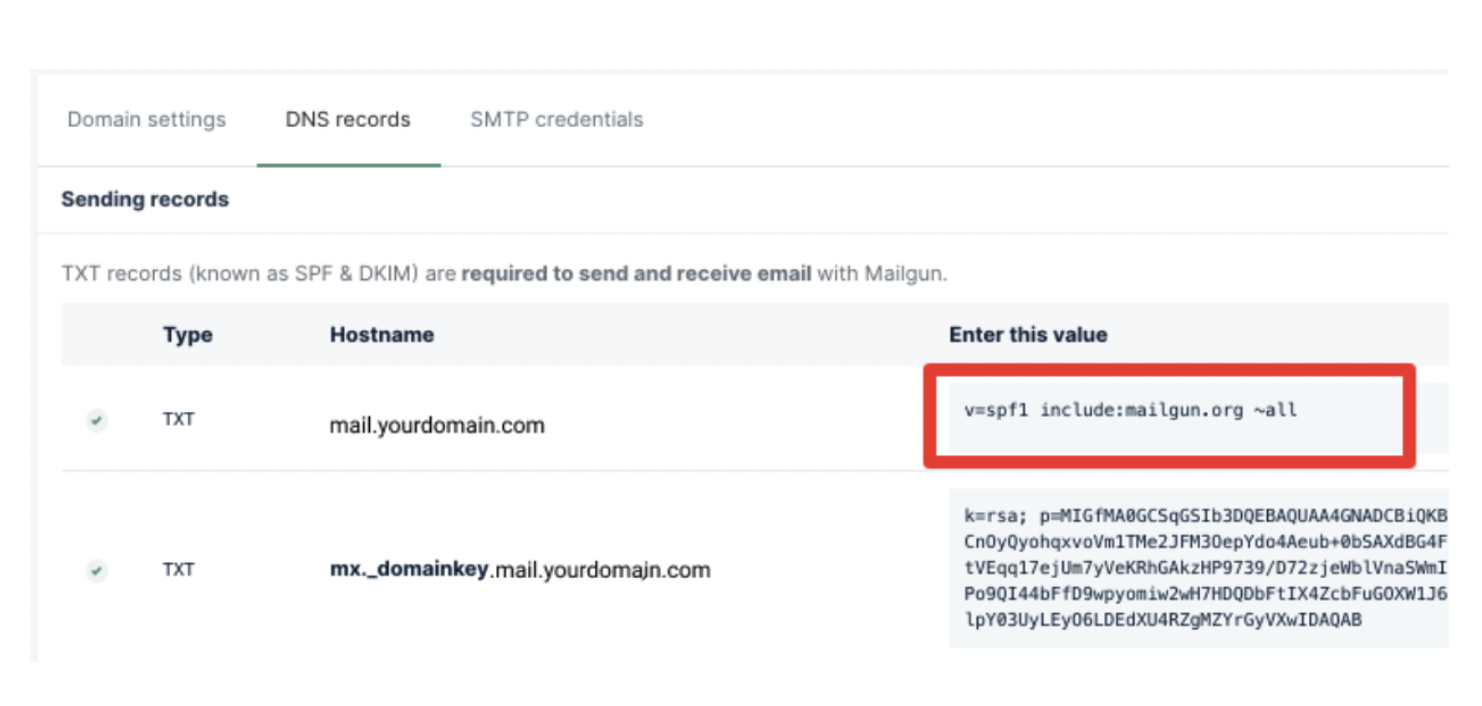
Add the 2nd TXT record (DKIM)
Click + Add Record again.
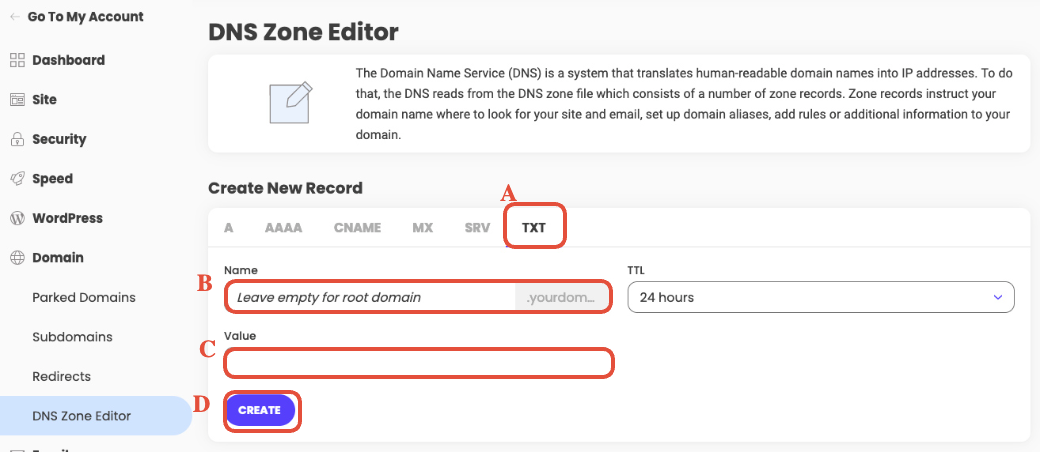
A. Click on the TXT tab.
B. Name: this part is a little tricky. Copy everything from the beginning of the value up until the subdomain part — do not include the root domain. Everyone's 2nd TXT record name and value are different.
| Example | Name to copy | Highlighted part |
|---|---|---|
| Using a subdomain | mx._domainkey.helpdesk | 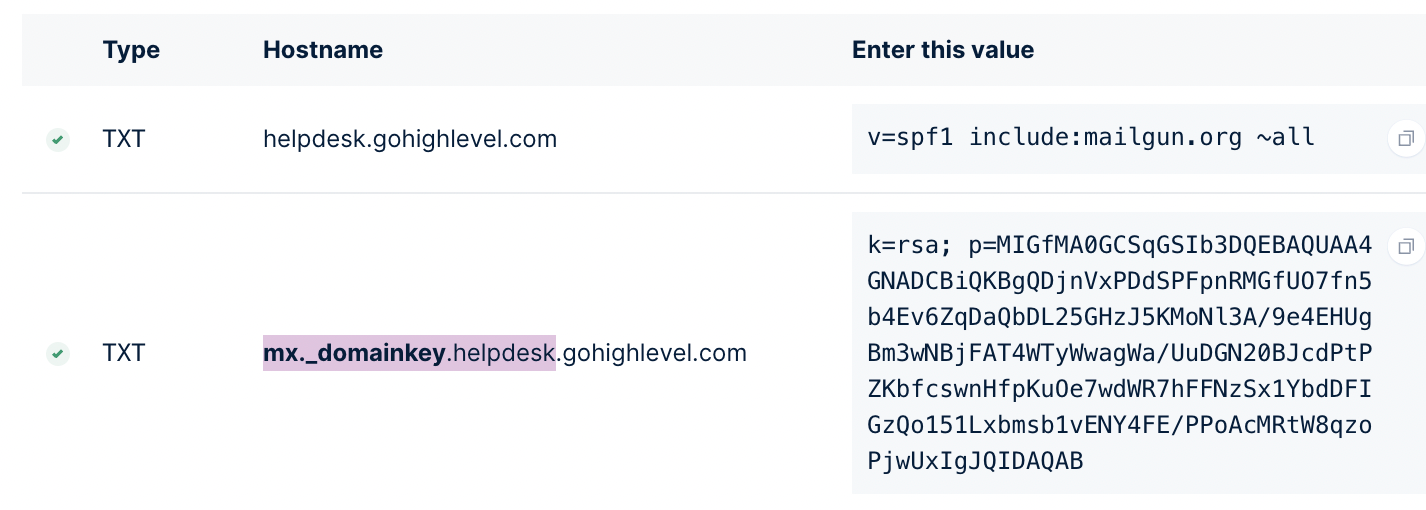 |
| Using the main domain | mailo._domainkey | 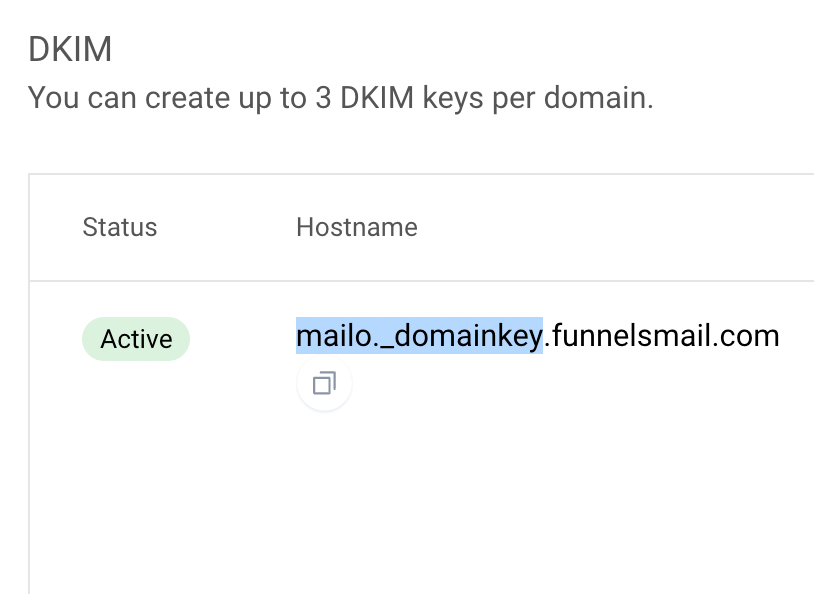 |
C. Value: head back to Mailgun and copy the 2nd, much longer TXT record — highlighted in the screenshot below — and paste it here.
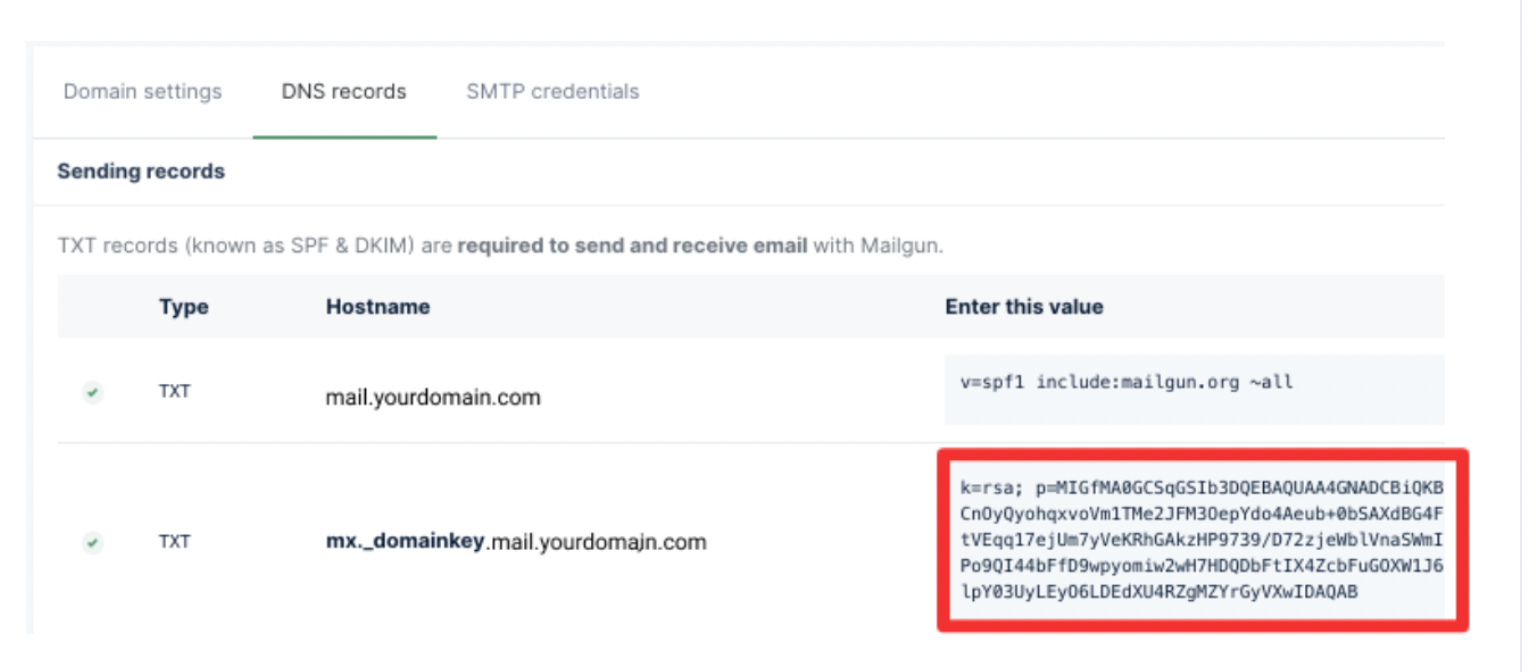
D. Click Create.
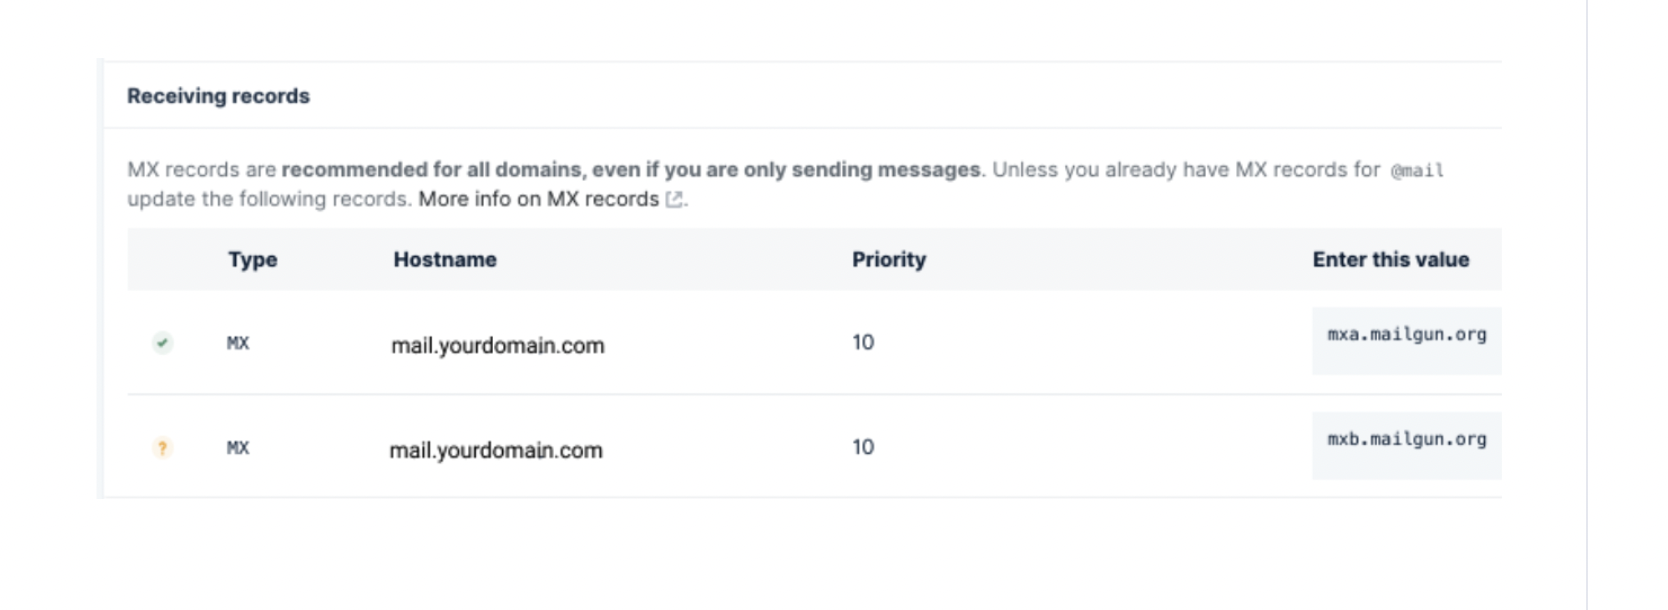
Add the 1st MX record
Click on the MX tab, then select Add your own MX records.
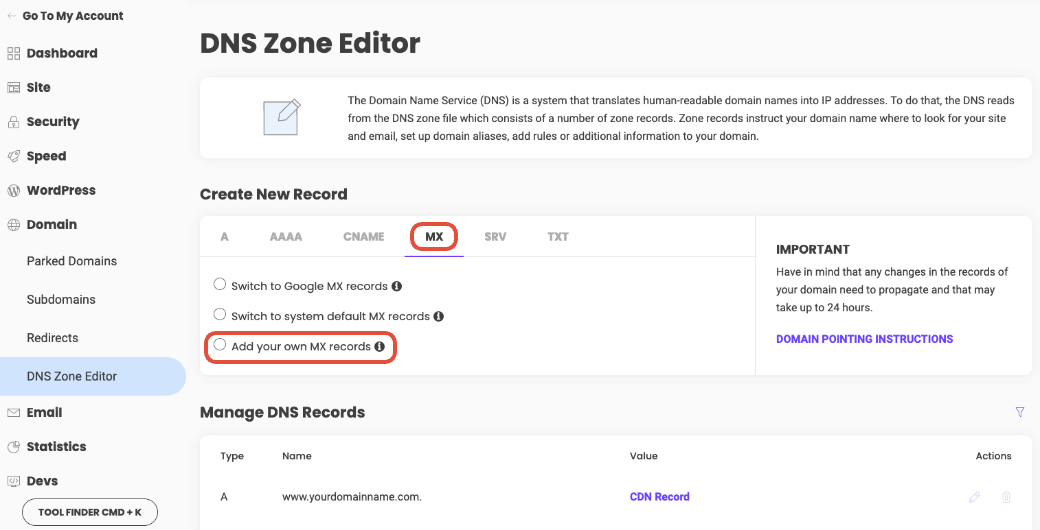
If you have a Google Workspace account capturing incoming email for your main domain, make sure you're using a subdomain for Mailgun instead. See Can I Use the Same Domain Name for Mailgun and for Google Apps (Or Another Email Server)?
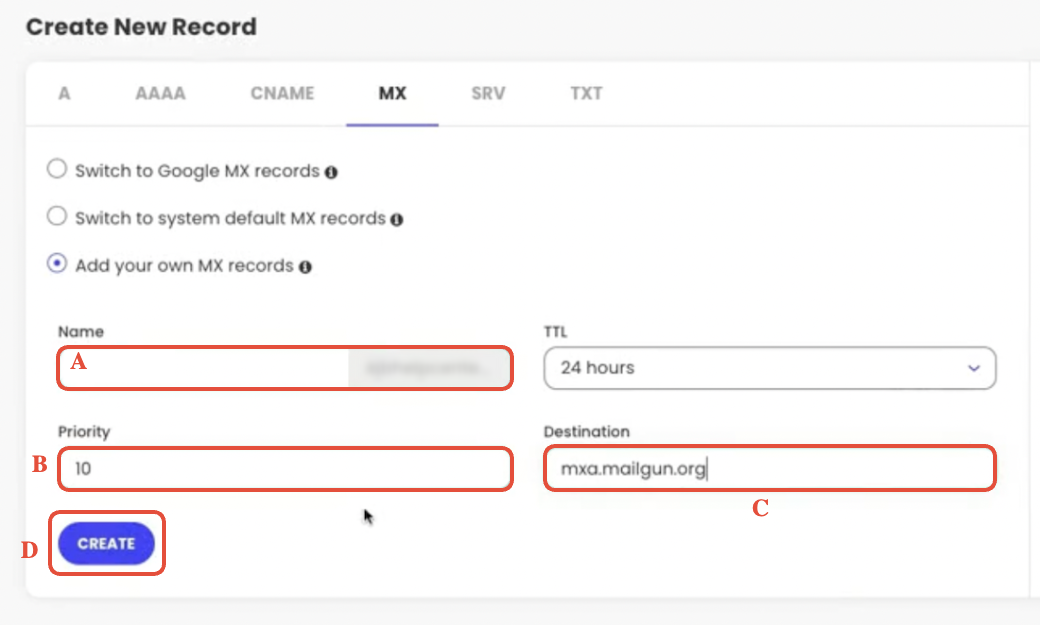
A. Name: different for everyone —
- mg.companyname.com → host name is mg
- replies.companyname.com → host name is replies
- Main domain → host name is @
B. Priority: 10 — the same for everyone, no matter what domain you're setting up.
C. Destination: the same for everyone — paste mxa.mailgun.org.
D. Click Create.
Add the 2nd MX record
Add another MX record. This time the destination will be mxb.mailgun.org.
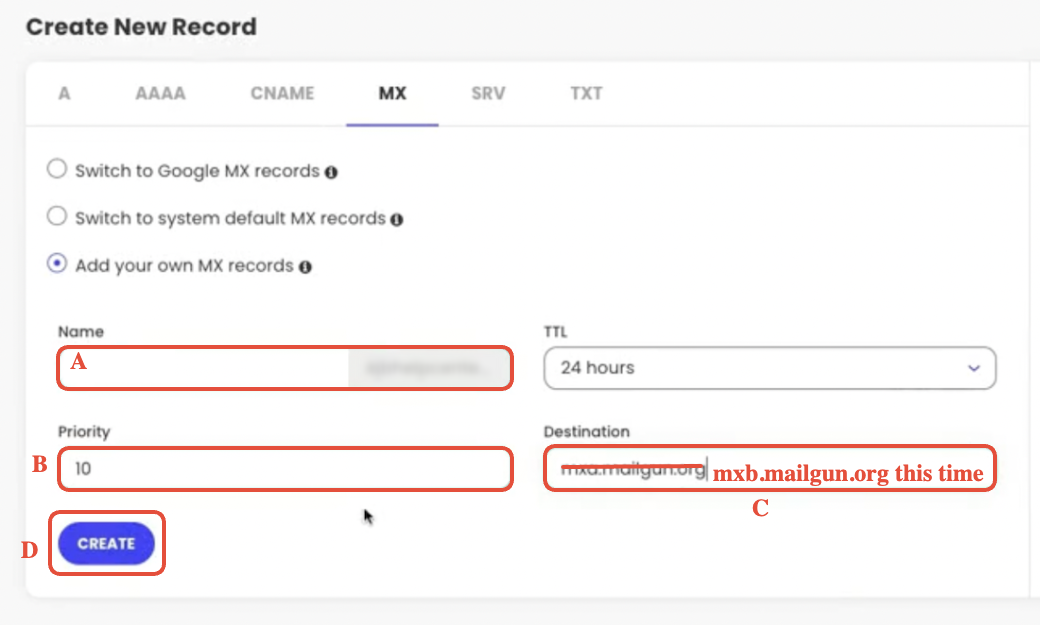
A. Name: different for everyone —
- mg.companyname.com → host name is mg
- replies.companyname.com → host name is replies
- Main domain → host name is @
B. Priority: 10 — the same for everyone.
C. Destination: the same for everyone — paste mxb.mailgun.org.
D. Click Create.
Add the CNAME record
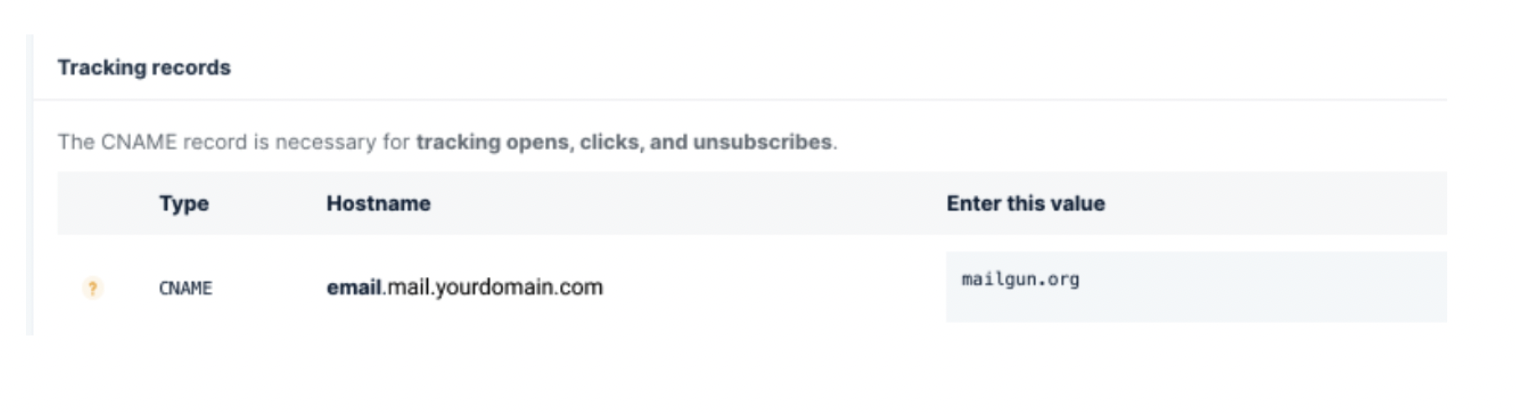
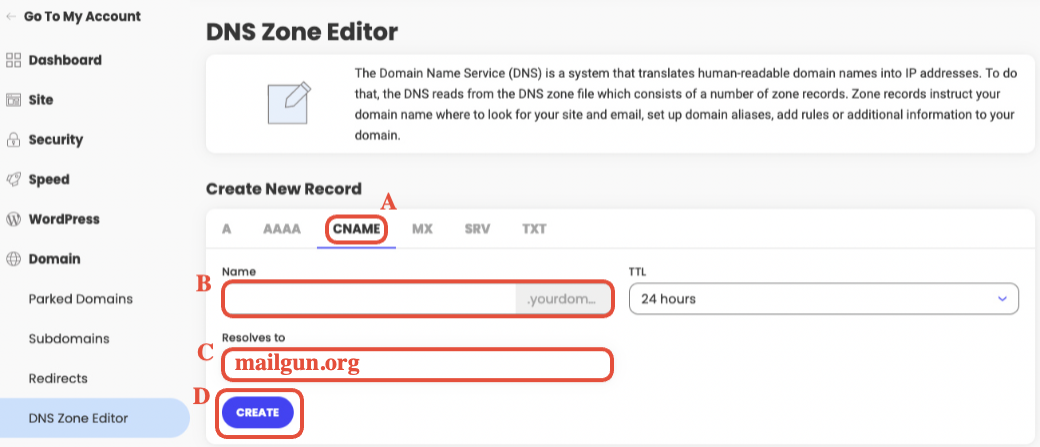
A. Click on the CNAME tab.
B. Name: different for everyone. Head back to Mailgun to copy the host name — copy everything from the beginning up until the subdomain part, do not copy the main domain.
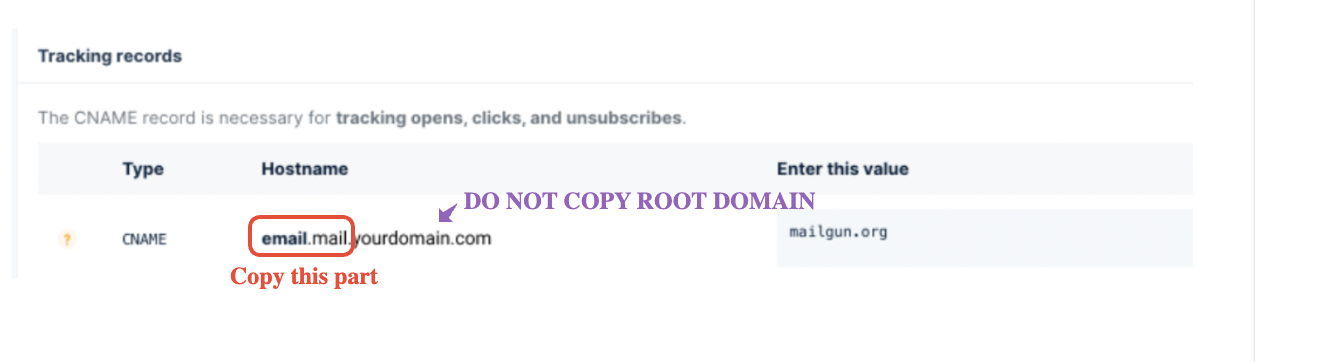
- mg.companyname.com → host name is email.mg
- replies.companyname.com → host name is email.replies
- Main domain (companyname.com) → host name is email
C. Resolves to: the same for everyone — paste mailgun.org.
D. Click Create.
Verify DNS & finish setup
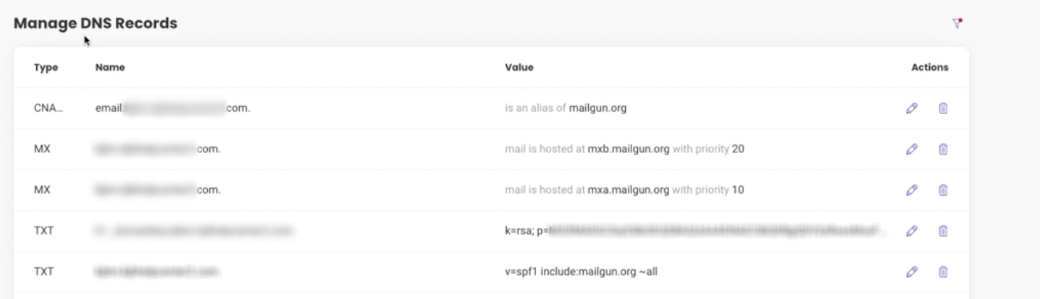
Now that you've added all 5 records, go back to Mailgun and click Verify DNS Settings. If some records still aren't showing a green checkmark, click the same button again — DNS propagation can take a little time.
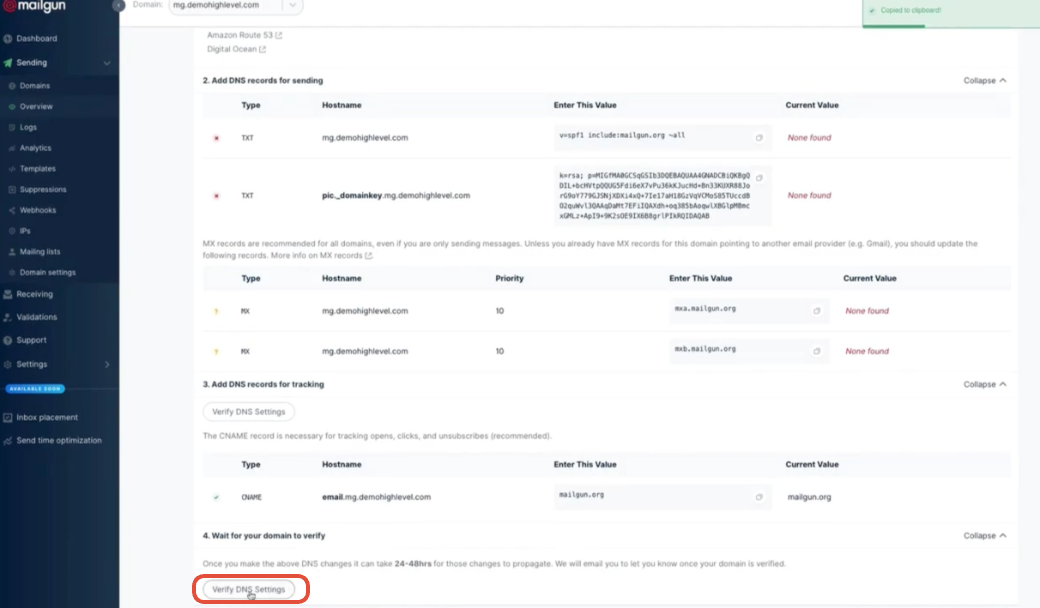
Once all records are verified, grab your Mailgun API key and add it to your email service settings.
Then send a test email to confirm everything works — see how to send a test email in the Conversation.