
Add Live Chat directly inside your website or funnel content instead of using only a floating chat bubble. The Embedded Live Chat Widget helps you place conversations where visitors are most likely to take action.
TABLE OF CONTENTS
What is the Embedded Live Chat Widget?
Embedded Live Chat Widget is a Live Chat placement option that renders the chat widget inline within your page content instead of floating on the corner of the screen. This makes chat feel like part of the page design, which can help businesses place support and conversion opportunities exactly where visitors are making decisions.
The widget still connects to the same Live Chat experience, so placement changes the presentation of the widget, not how conversations are routed or managed.
Key Benefits of the Embedded Live Chat Widget
- Higher Visibility: Place chat near hero sections, forms, pricing blocks, or CTAs where visitors are already engaged.
- Natural Page Experience: Present chat as part of the website layout instead of an overlay floating above the content.
- No Workflow Changes: Routing, lead capture, and Live Chat management continue to work through the existing chat system.
- Flexible Deployment: Use the widget across funnels, websites, landing pages, and other supported areas.
Where Embedded Live Chat Works Best
Embedded Live Chat can be used on:
Funnels
Websites
Landing pages
Custom HTML sites
Other supported pages where Chat Widgets can be installed
The embedded widget is also mobile responsive by default, so it adjusts automatically for smaller screens while remaining part of the page content.
How To Setup an Embedded Live Chat Widget
Proper setup ensures the widget appears exactly where you want it and behaves consistently across your website or funnel. The key difference in this setup is not the Live Chat feature itself, but where the widget is rendered on the page.
Step 1: Create a New Chat Widget
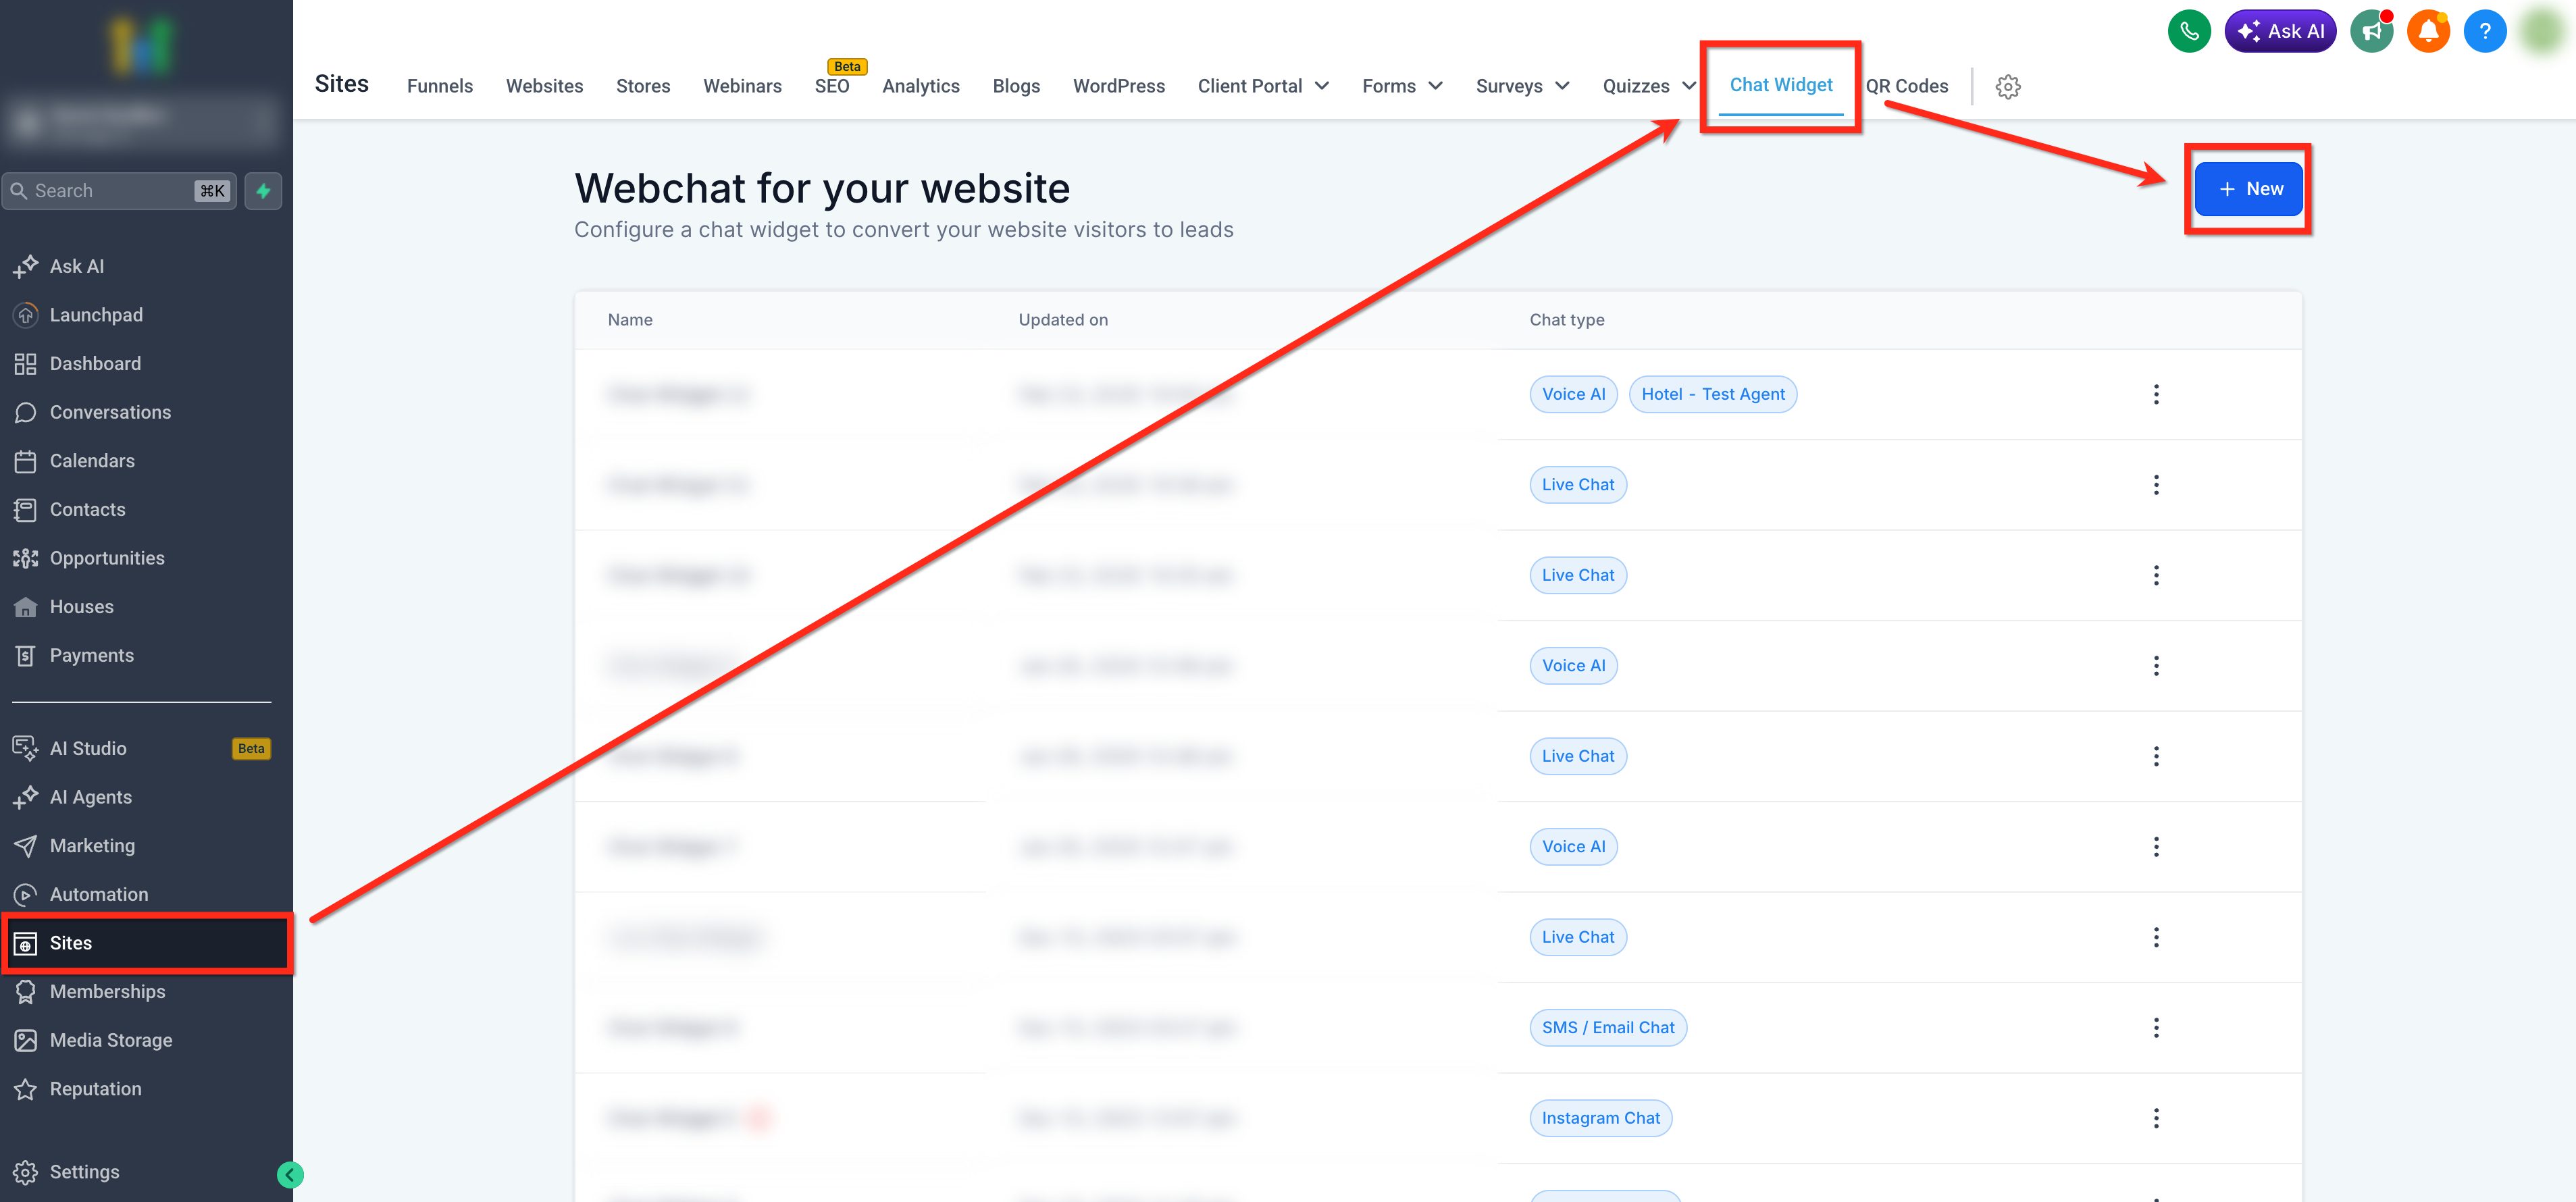
Go to Sites → Chat Widget then click + New or open an existing widget.
Step 2: Select Live Chat
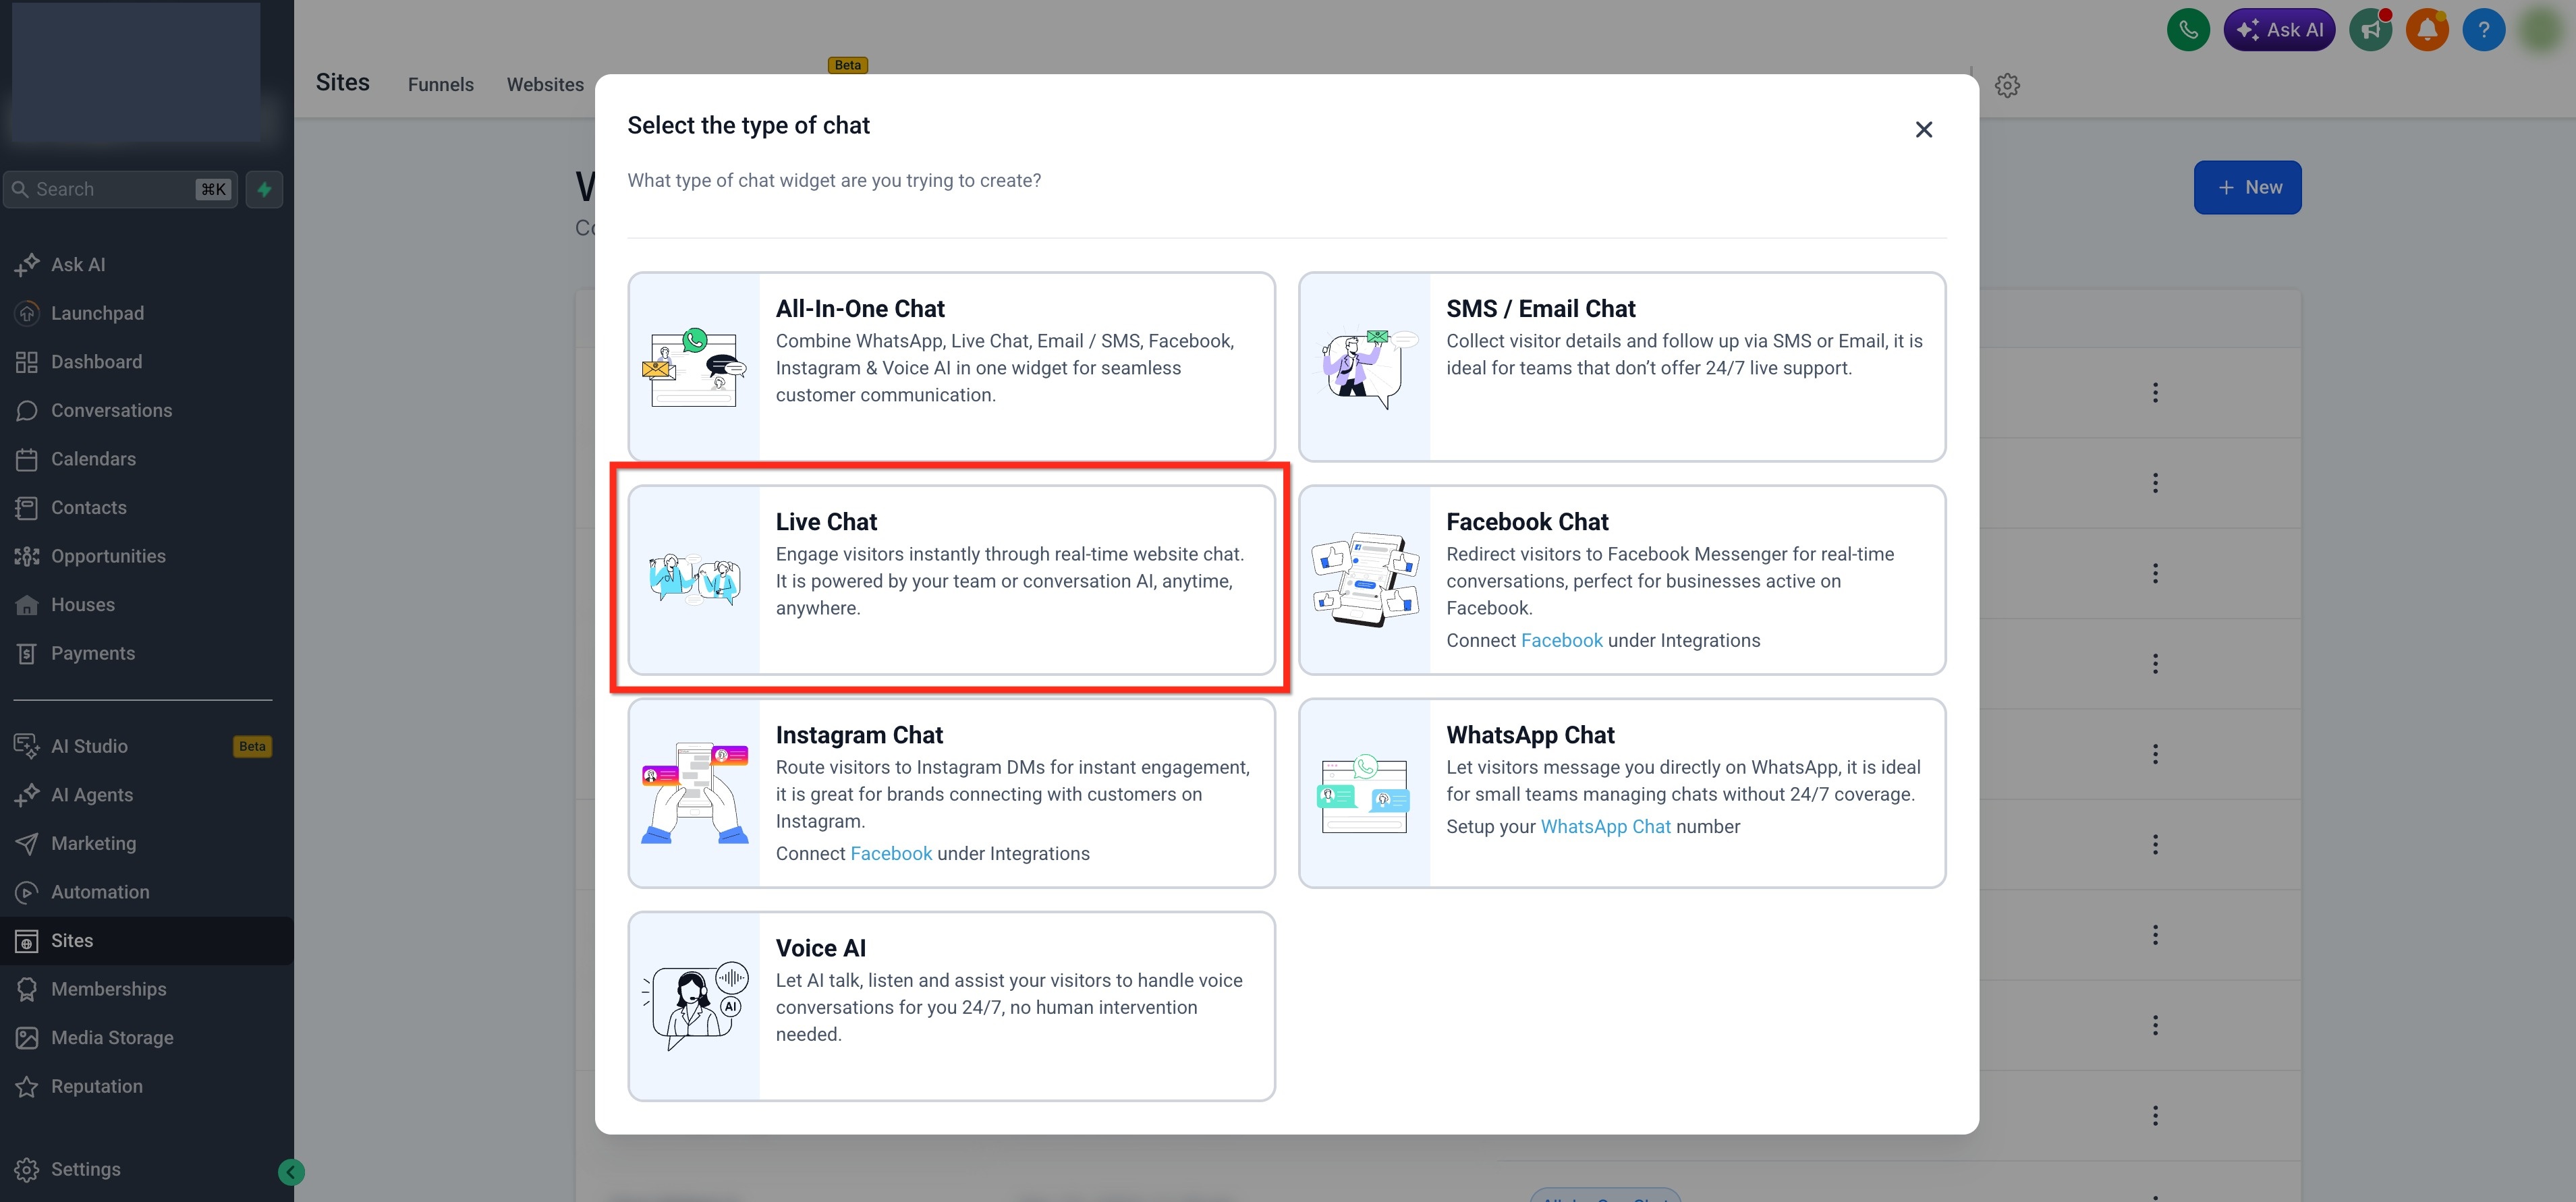
Choose the Live Chat option.
Step 3: Set Widget Placement to Embedded
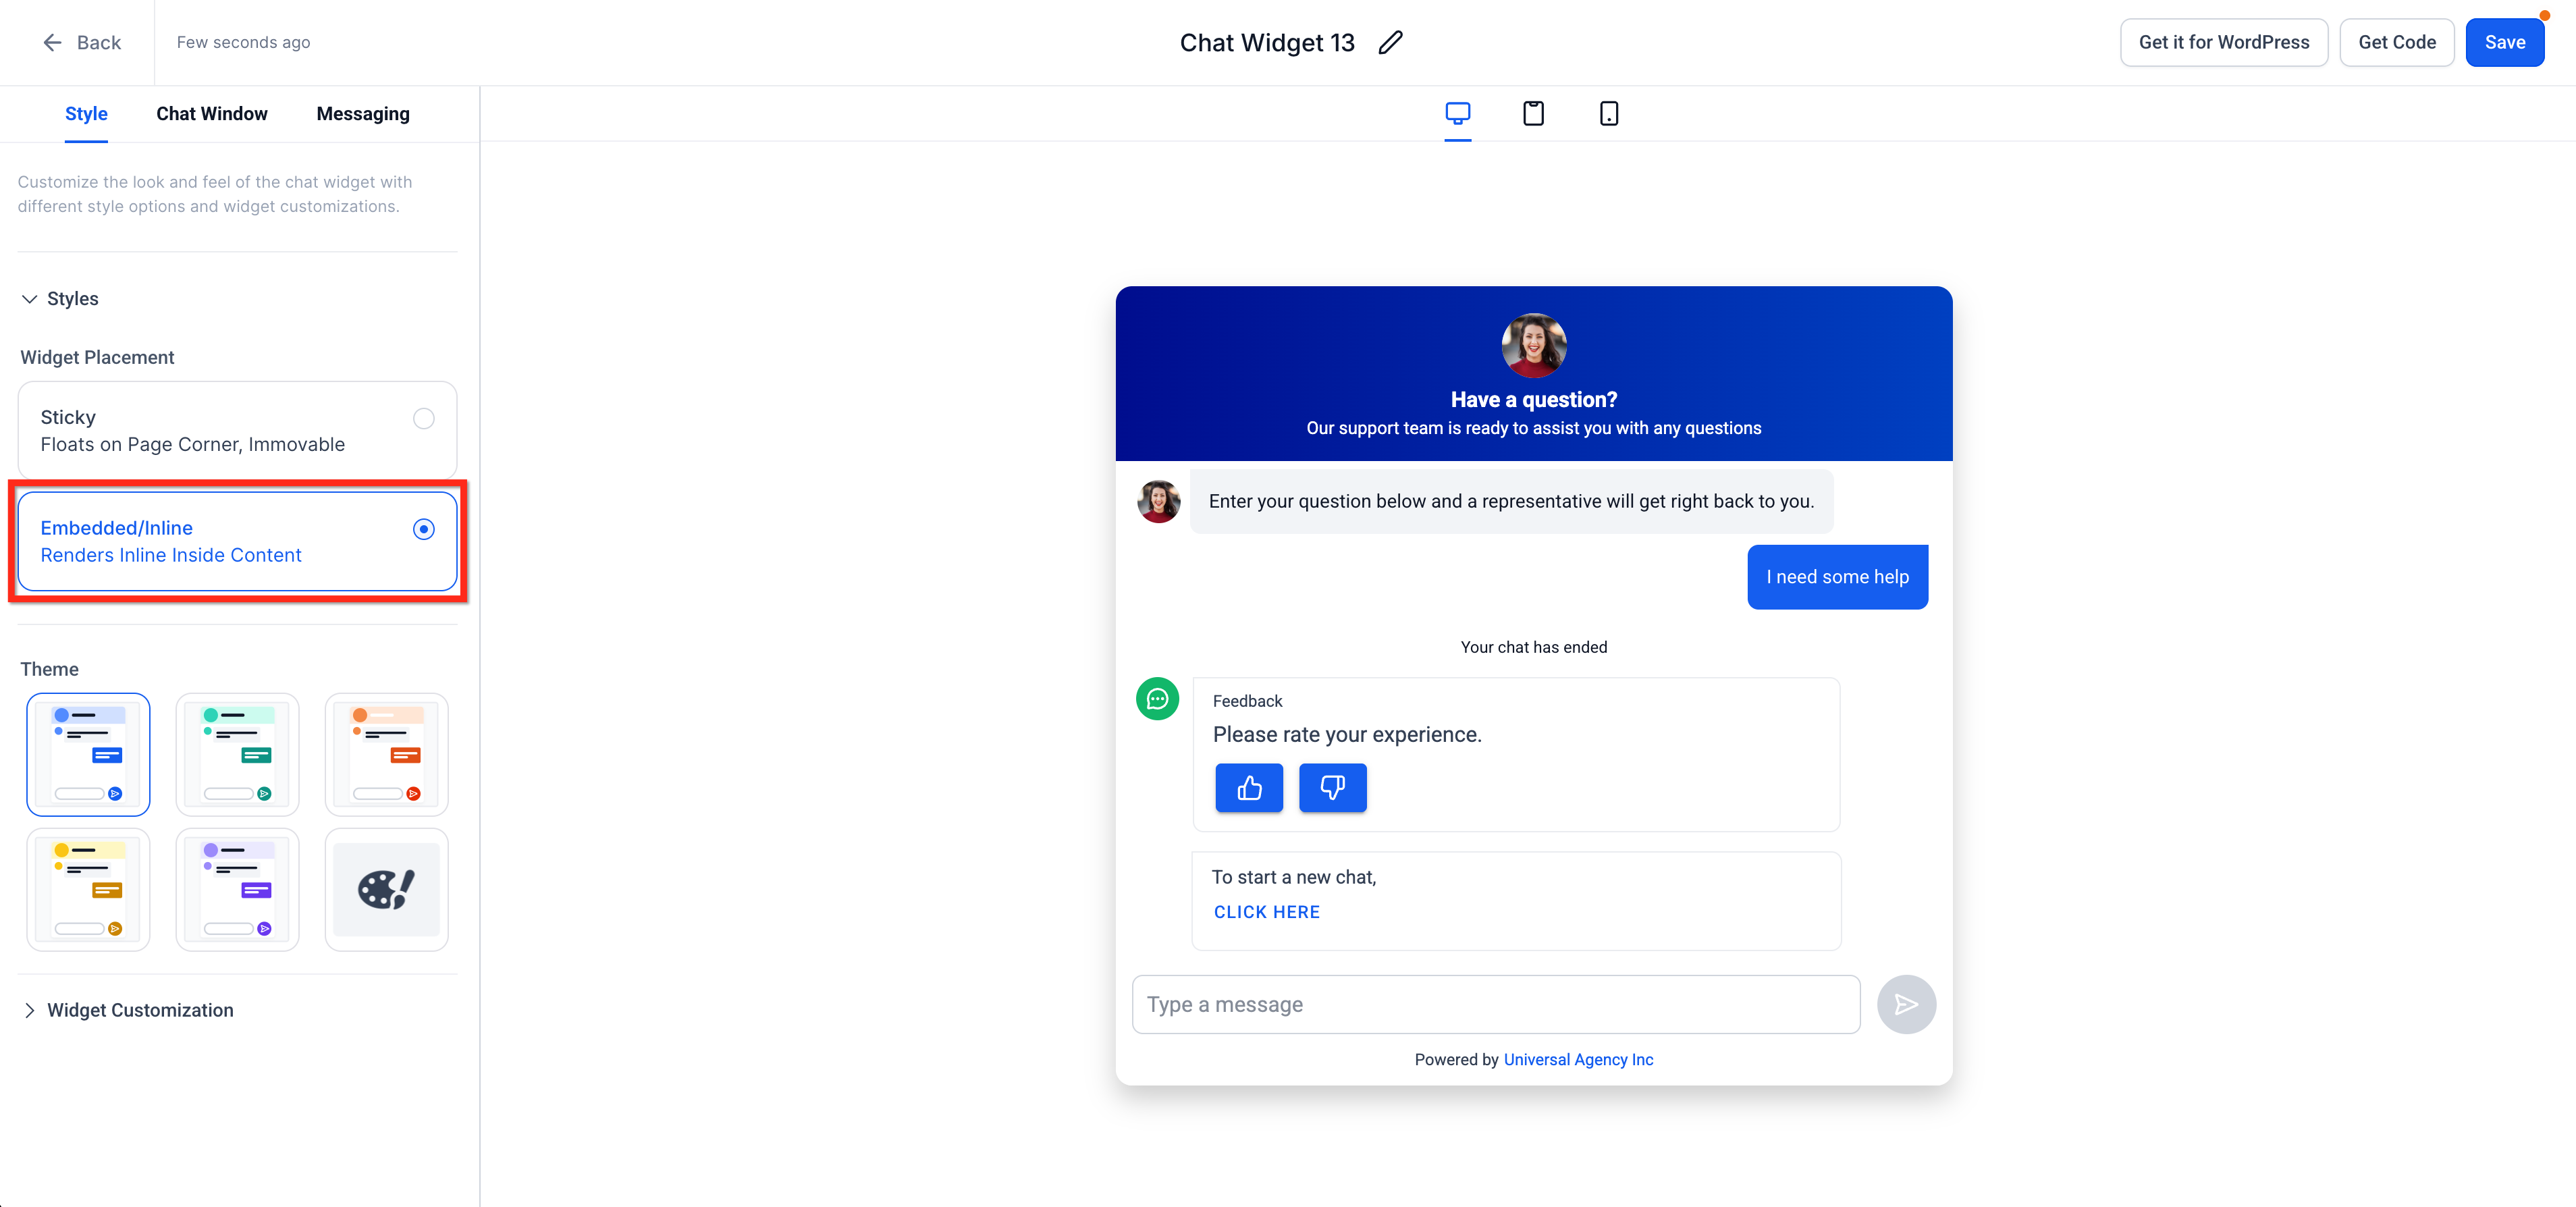
Navigate to the Style tab
Under Widget Placement, choose: Embedded / Inline (Renders inside content)
This ensures the widget will appear within your page layout instead of floating on the screen.
Step 4: Customize Your Widget
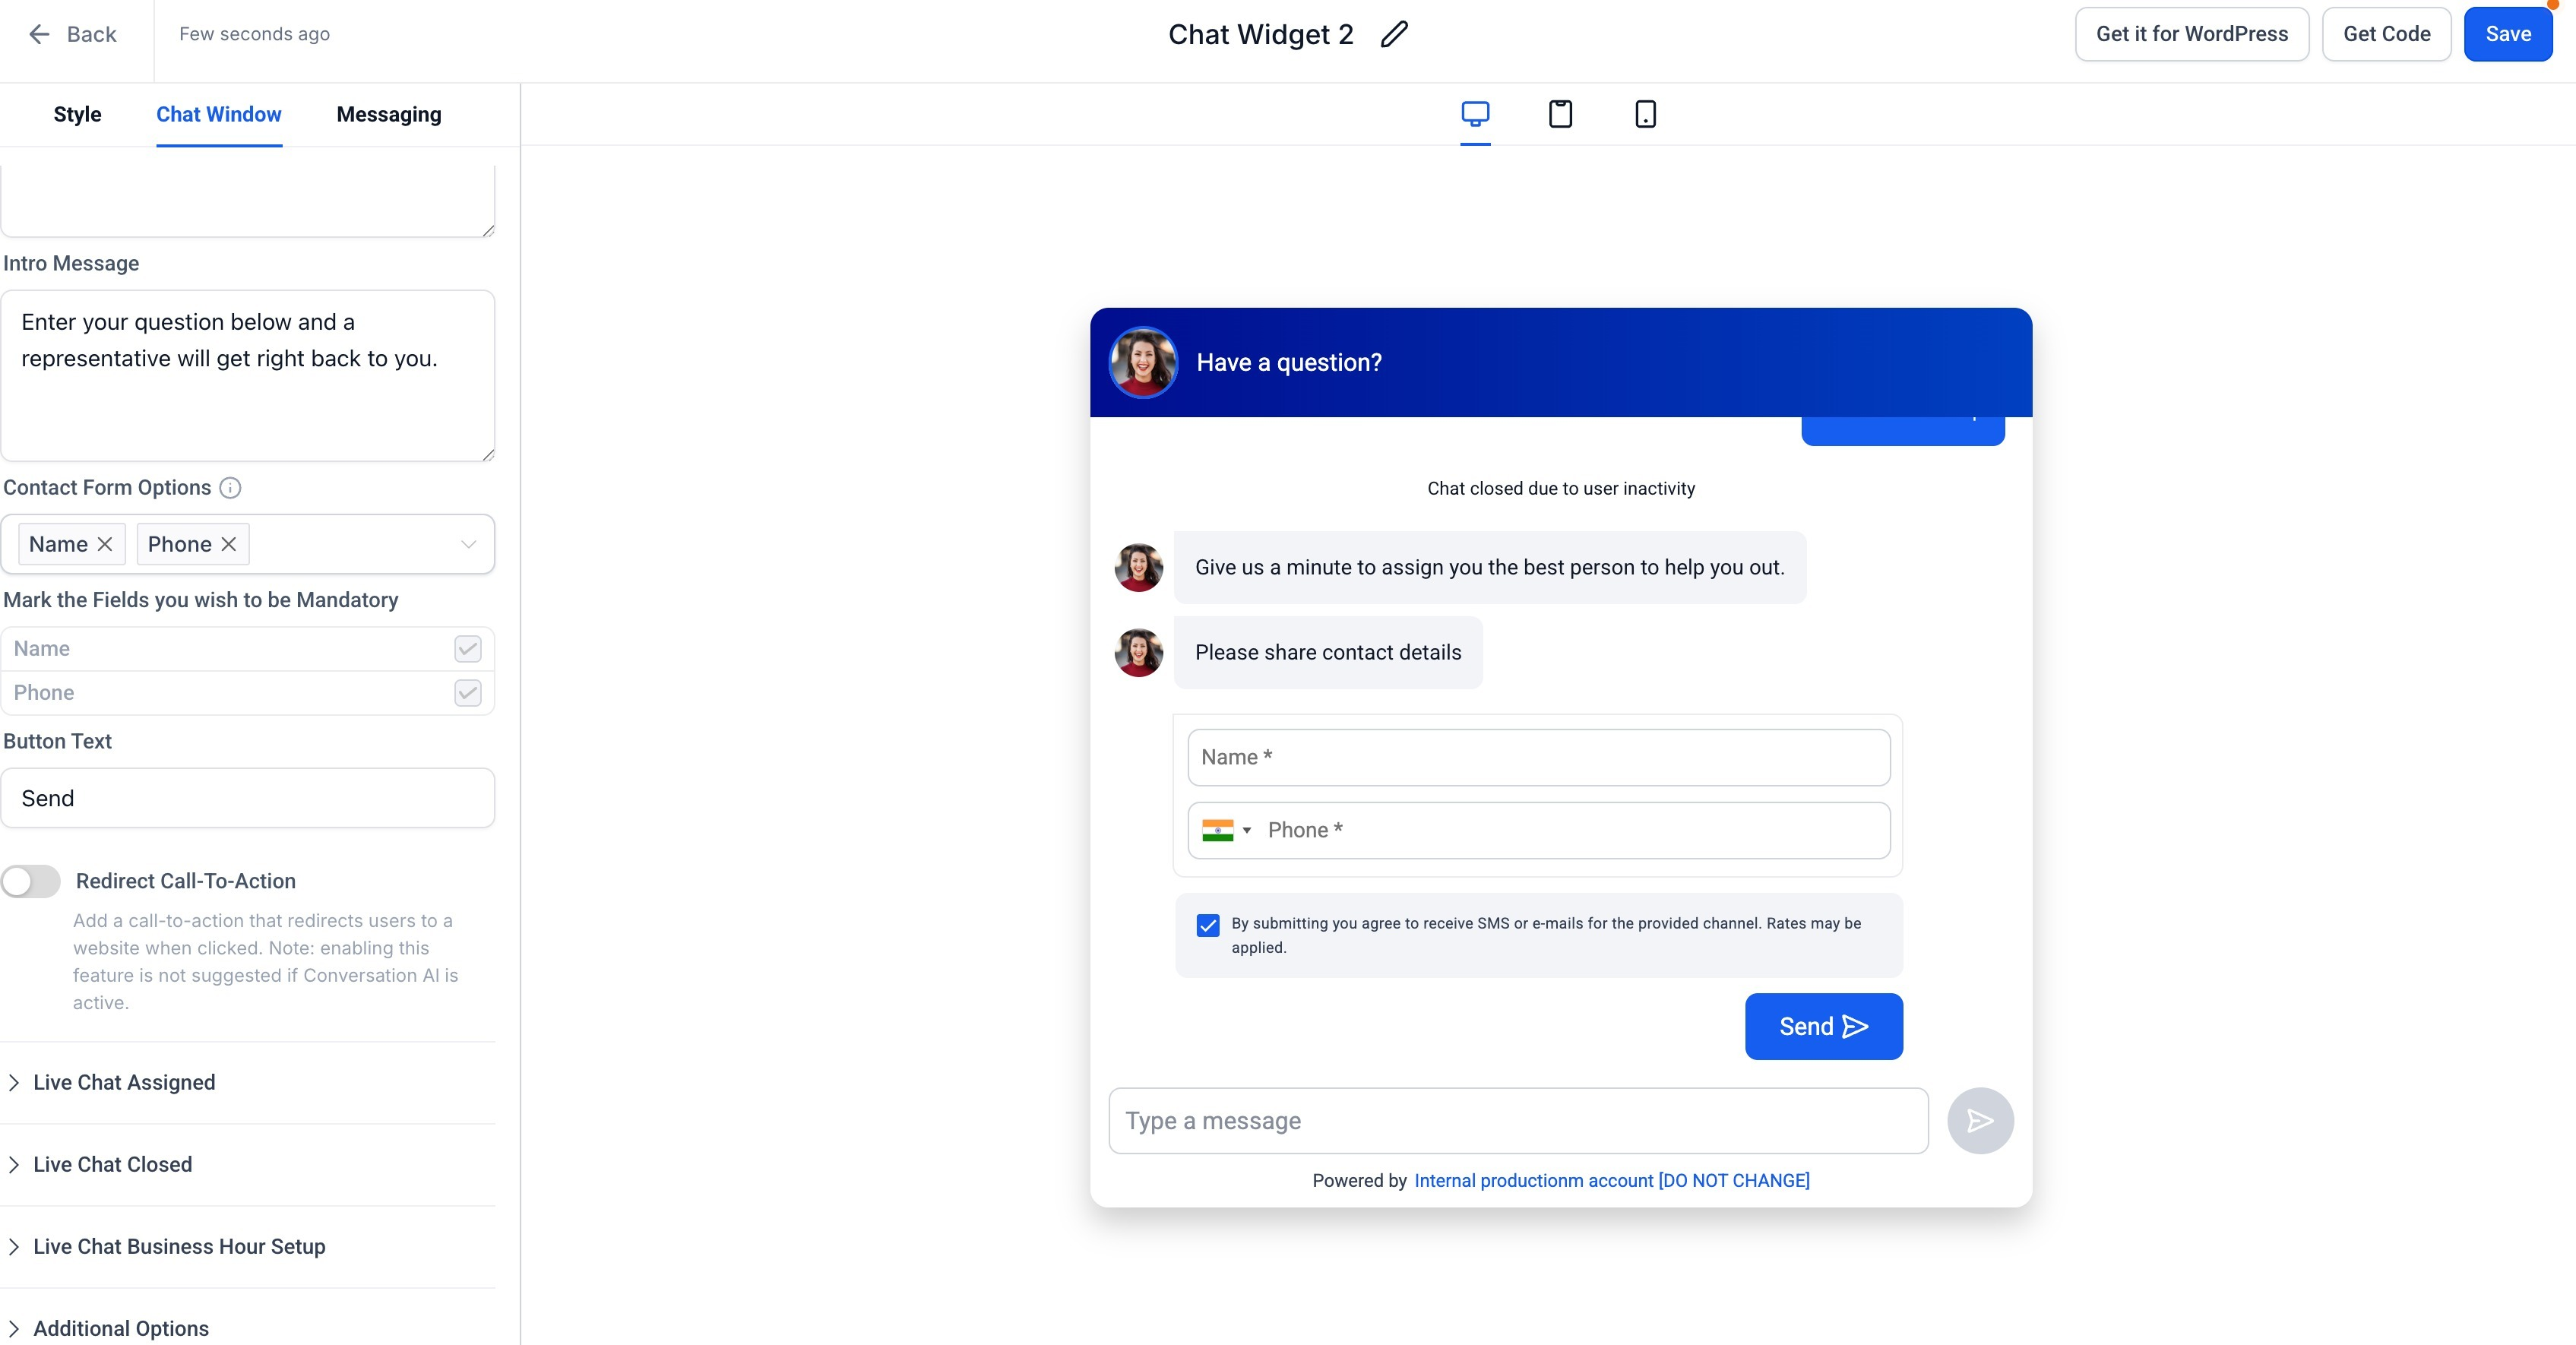
You can configure the widget as per your needs:
- Theme & Appearance
- Choose color themes
- Adjust branding (avatar, header, colors)
- Match widget styling with your website
- Choose color themes
- Chat Window Settings
- Edit intro message
- Configure contact form fields (Name, Phone, etc.)
- Set mandatory fields
- Customize button text
- Edit intro message
- Messaging & Behavior
- Set auto-responses
- Configure live chat assignment
- Define business hours
- Customize chat closed messages
- Set auto-responses
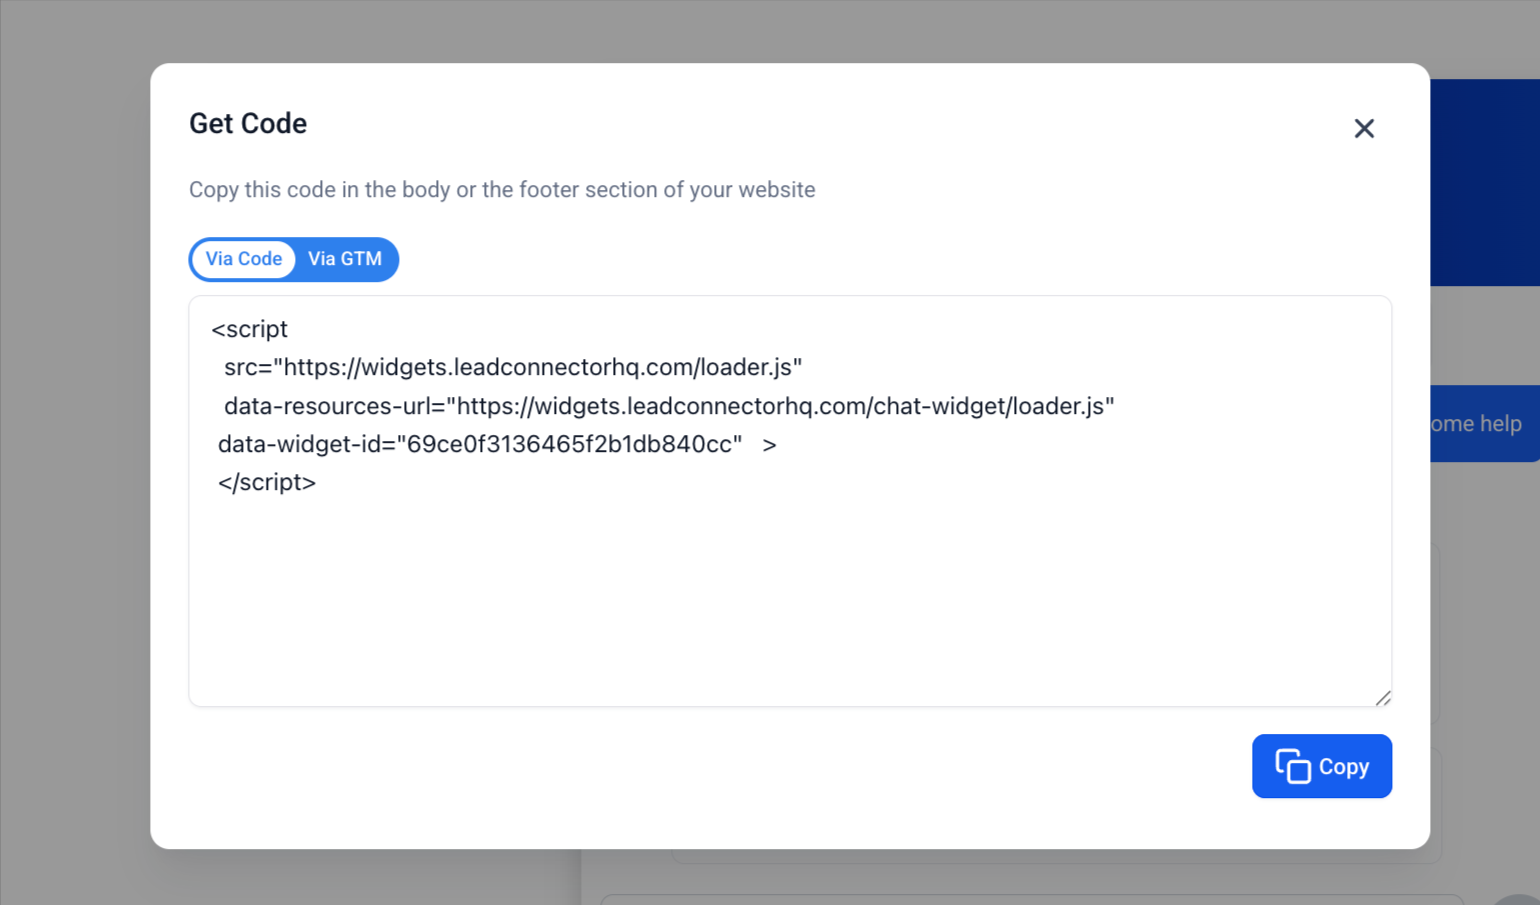
Step 5: Get the Embed Code
Click on Get Code (top right)
Copy the embed script
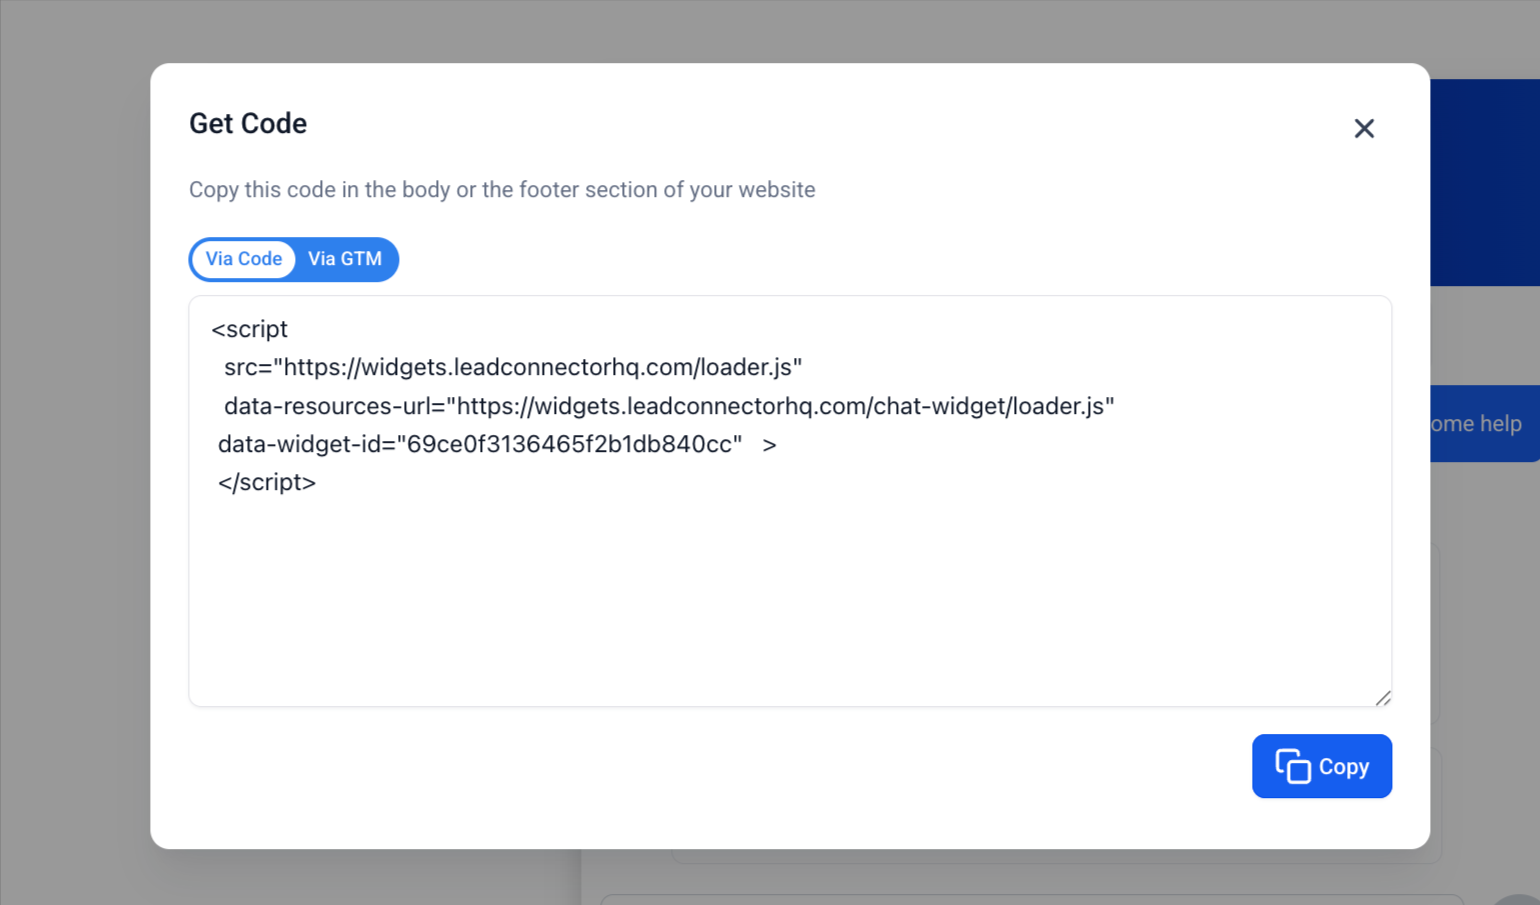
Step 6: Add the Widget to Your Funnel, Website or any other digital property
Option 1: Funnels
Open your Funnel Builder
Add a Custom Code element where you want the chat to appear
Paste the embed code
Save and publish
Option 2: Websites / External Pages
Open your website editor or HTML file
Paste the embed code in the desired section
Publish changes
The widget will render exactly where the code is placed
How It Works
The widget loads inline within the page content. Chat behaves the same as standard live chat (routing, automation, etc.)
Users can:
Start a conversation
Submit contact details
Continue chat in real-time
Common Use Cases for Embedded Live Chat
Embedded placement is especially effective when chat needs to support a specific action or reduce hesitation before a visitor moves forward. These use cases help frame the widget as part of the page strategy instead of just another design element.
Common use cases include:
Capturing questions before form submissions
Supporting visitors during pricing comparisons
Offering help on booking or consultation pages
Answering objections during funnel steps
Creating a more guided support experience on service pages
Adding a visible conversation option inside dedicated contact sections
Best Practices
A well-placed widget can support conversions without interrupting the page experience. The goal is to make chat feel helpful and timely, not distracting.
Place the widget near high-intent content such as forms, offers, booking areas, or support prompts.
Match the widget branding to the page for a more seamless appearance.
Test spacing and alignment so the widget does not look cramped inside narrow sections.
Review mobile layout after publishing to confirm readability and spacing.
Keep intro and acknowledgment messages clear and action-oriented.
Important Behavior Notes
Embedded widgets do not float on the page
You can still use sticky widgets on other pages
No changes to chat routing, automations or CRM data capture
Troubleshooting Embedded Live Chat
- Widget not showing: Ensure embed code is correctly placed and check if the page is published.
- Layout issues: Verify container width in your page builder and ensure no CSS conflicts
- Chat not responding: Check live chat assignment settings and verify business hours configuration
Frequently Asked Questions
Q: Can I use both embedded and sticky widgets?
Yes, you can use embedded widgets on some pages and sticky widgets on others.
Q: Does this affect chat performance?
No, chat functionality remains the same.
Q: Can I embed multiple widgets on one page?
Not recommended — may cause UX and tracking conflicts.